
Hopes were fading to get this dress finished on time for Christmas Day. But the sewing gods were looking down on me, somewhat favourably and I sewed them cuff poppers on quite literally at the stroke of midnight on Christmas Eve.
Oh how I love ‘the night before Christmas’ – When all the shops are shut and there’s nothing more to be got. The street outside is quiet; the Christmas tree lights twinkle at their brightest and that sweet little shot of sherry slips slowly down the hatch! Perfect time of year to have some hand sewing going on in front of a festive telly-box movie, too!

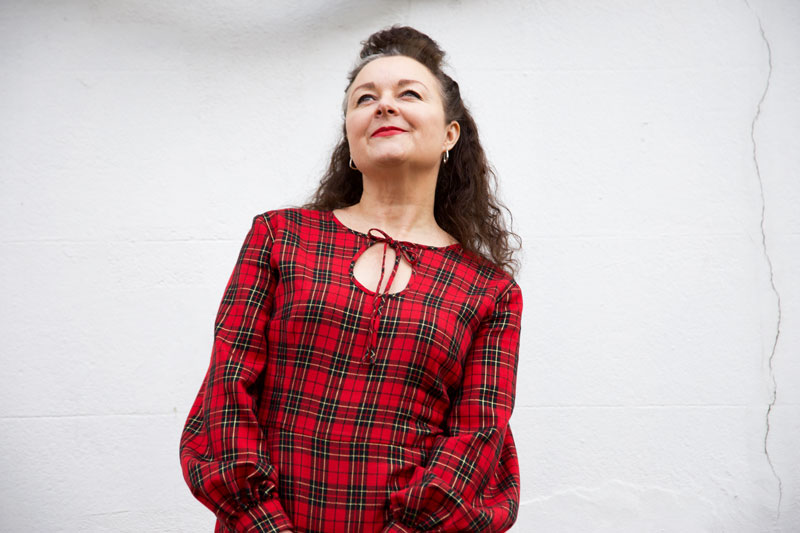
This dress is most definitely worthy of an ooobop original issue number 2. The turtle neck dress I recently made almost had a tear drop neckline but in an effort to walk before I could run, I saved it for this time.
The process was exactly the same:
- I dreamt the design
- I drew it in my Fashionary sketch book
- I self-drafted the pieces from my previously created blocks, using Adobe Illustrator
- Printed and tiled the pattern pieces
- And sewed up the finished article.
This is proving to be my favourite method of dressmaking to date! That said, I’ve got so much still to learn and I’m anticipating some frustrating times ahead so I’ll still be checking out Indi and vintage sewing patterns when I need some respite!
To edge the teardrop – thus avoid lining or facing – I dug out and dusted off the bias tape maker. To be fair I don’t think its much quicker than the manual ironing method but it’s a bit more fun… when it works!
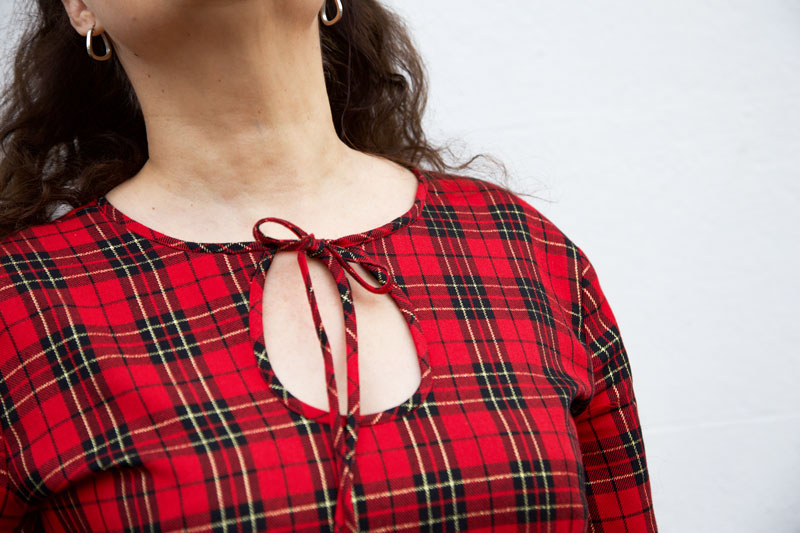
I’ve messed up many a time binding edges so this time I knew to start with sewing the right side of the binding to the wrong side of edge of the teardrop opening. I used my quarter inch foot for a consistent seam and took it real slow. Any unevenness is corrected when the binding is pressed in position to the front. (It doesn’t matter if it’s a bit wonky on the back because it won’t be seen. The entire reason for starting on the back!) I then clipped the seam in the curved areas before slowly and carefully top-stitching close to the edge on the right side to finish the binding, where it does matter! That final press is so satisfying.
I then used two more folded bias strips to bind the neckline from back to front, concealing the top edges of the teardrop, and continuing the topstitch to the ends to form the ties. I sewed across the ends of the ties to prevent too much fraying. I’m happy for it to fray a little.
Now lets talk bishop sleeves – Lovely big billowy bishop sleeves! They’re a bit trendy at the moment but to be fair they’ve never been out of favour in my fashion world!
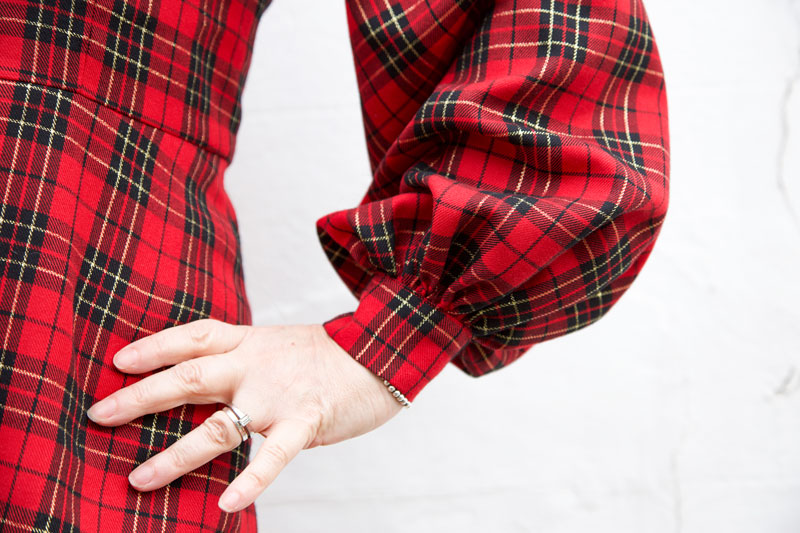
I took my sleeve block piece and similarly to how I flared it last time, created 4 slash points and spread the pieces till the width was a little more than thrice my cuff measurement. I didn’t deduct the length of the cuff from the sleeve as I wanted the fullness to overlap the cuff which it kind of does but the structure in the fabric doesn’t really make it perform as it did in my head!
The cuff is sewn akin to the binding to hide the seam and there’s a small overlap for the poppers.
I really want to rehearse another, even more fuller bishop sleeve on a blouse made with a lighter viscose. Just to see how differently it behaves. I really want to add some lovely button loops and buttons to the cuffs too which I didn’t do here mostly because of time restraints, hence the poppers!
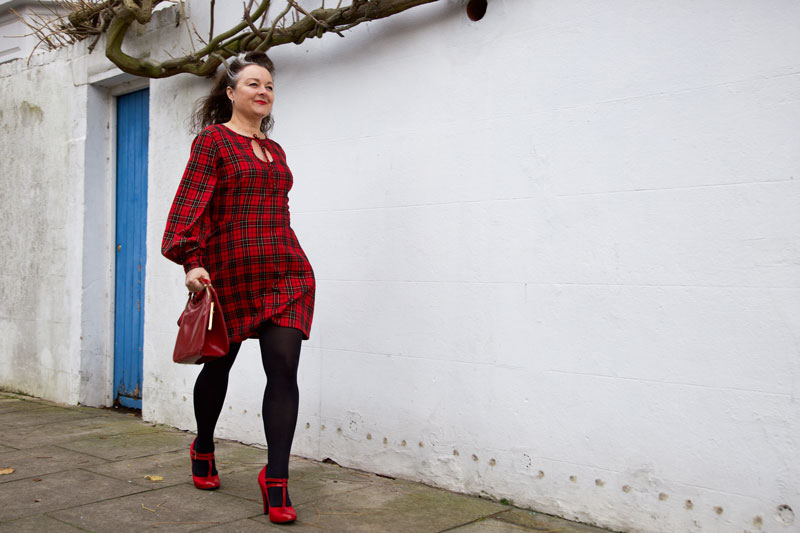
The rest of the dress is constructed the same as the turtle neck one: inserting an invisible zip in the back. And I must add how chuffed I was at just how invisible it turned out with all those checks matching up either side.

After all that work I didn’t wear it on Christmas Day. I decided to spare it from the cooking splashes and wine spillages and wore it out on Boxing Day instead. Despite it’s festive feel, I will be wearing this dress at every other time of the year and occasion for when tights and sleeves are necessary. The fabric is 100% cotton except for the metallic gold thread and is so comfy to wear. Not surprising that I debated using the fabric for PJs initially!

It carries a lovely little memory too as I purchased the fabric on a sewing blogger meet up organised by @ClaireSews for when @liblib came to visit all the way from Austraila. We chatted over coffee and shopped our little hearts out in the Goldhawk Road. I wasn’t supposed to be buying more but @ella_yvonne convinced me it had my name on it! Always such a treat to meet like-minded sewists IRL.
I’m not holding much hope for completing anything new before New Year so I’ll take this opportunity to wish you all a fabulous, creative and healthy 2020.
All the very best of wishes and lots of love from Janene xxx


