Working on the bias: My first Sicily slip dress

Janene is wearing her handmade Sicily slip dress and is posing with one hand on hip in front on a white door surrounded by brickwork and ivy overhead. She is wearing a self-drafted black turtleneck top, grey bobble hat, black rimmed glasses and Vivienne Westwood Bondage Boots.

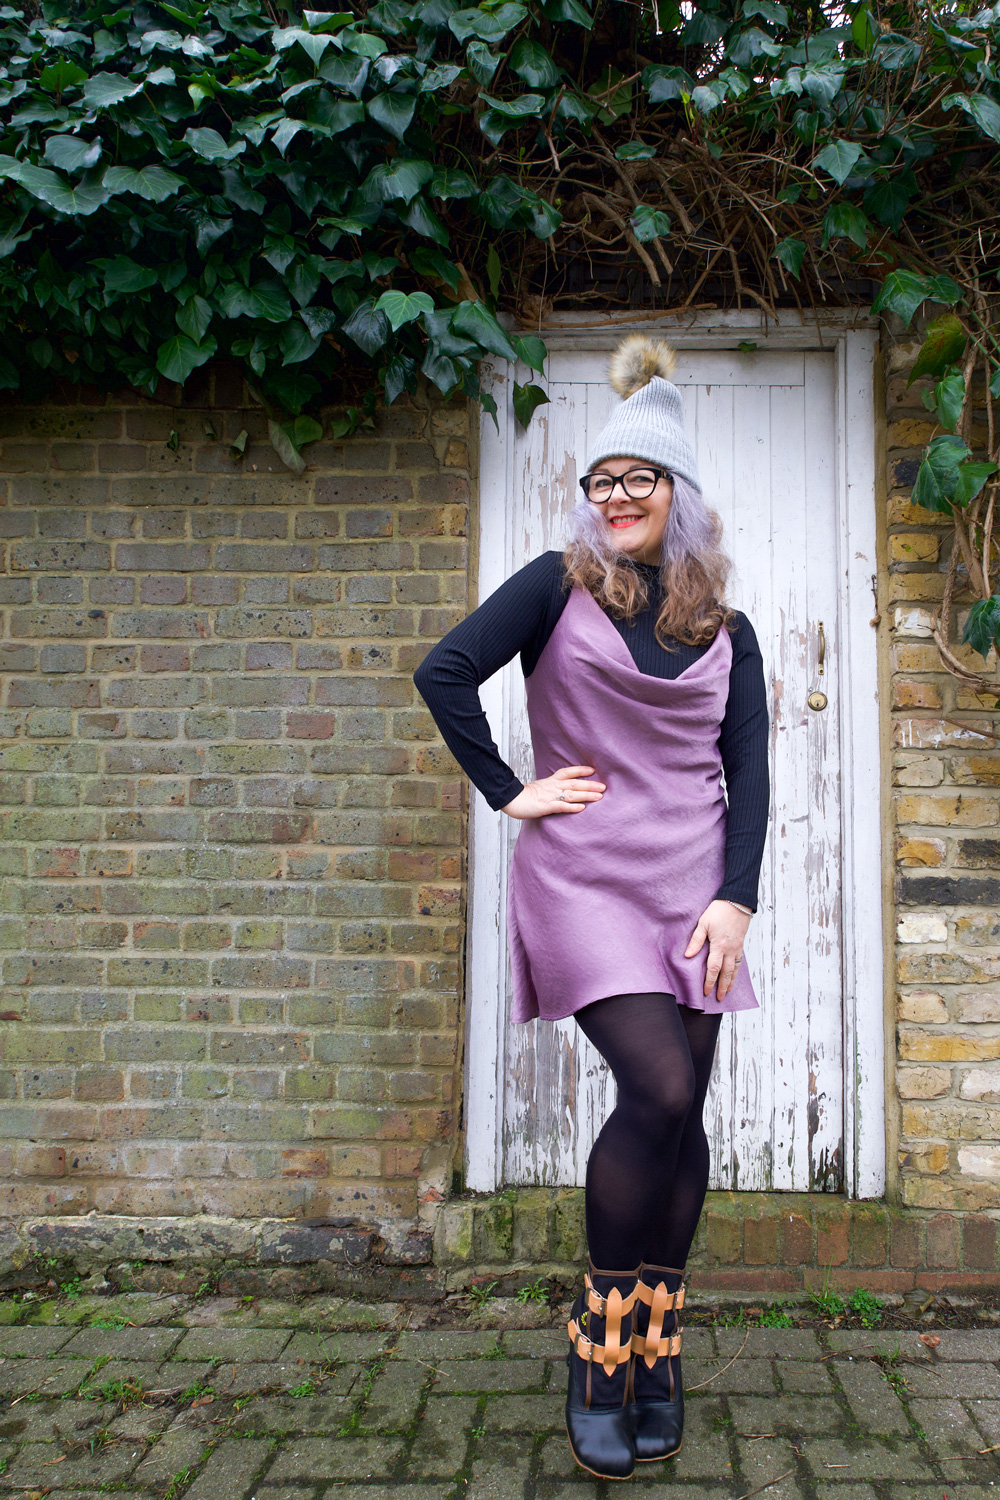
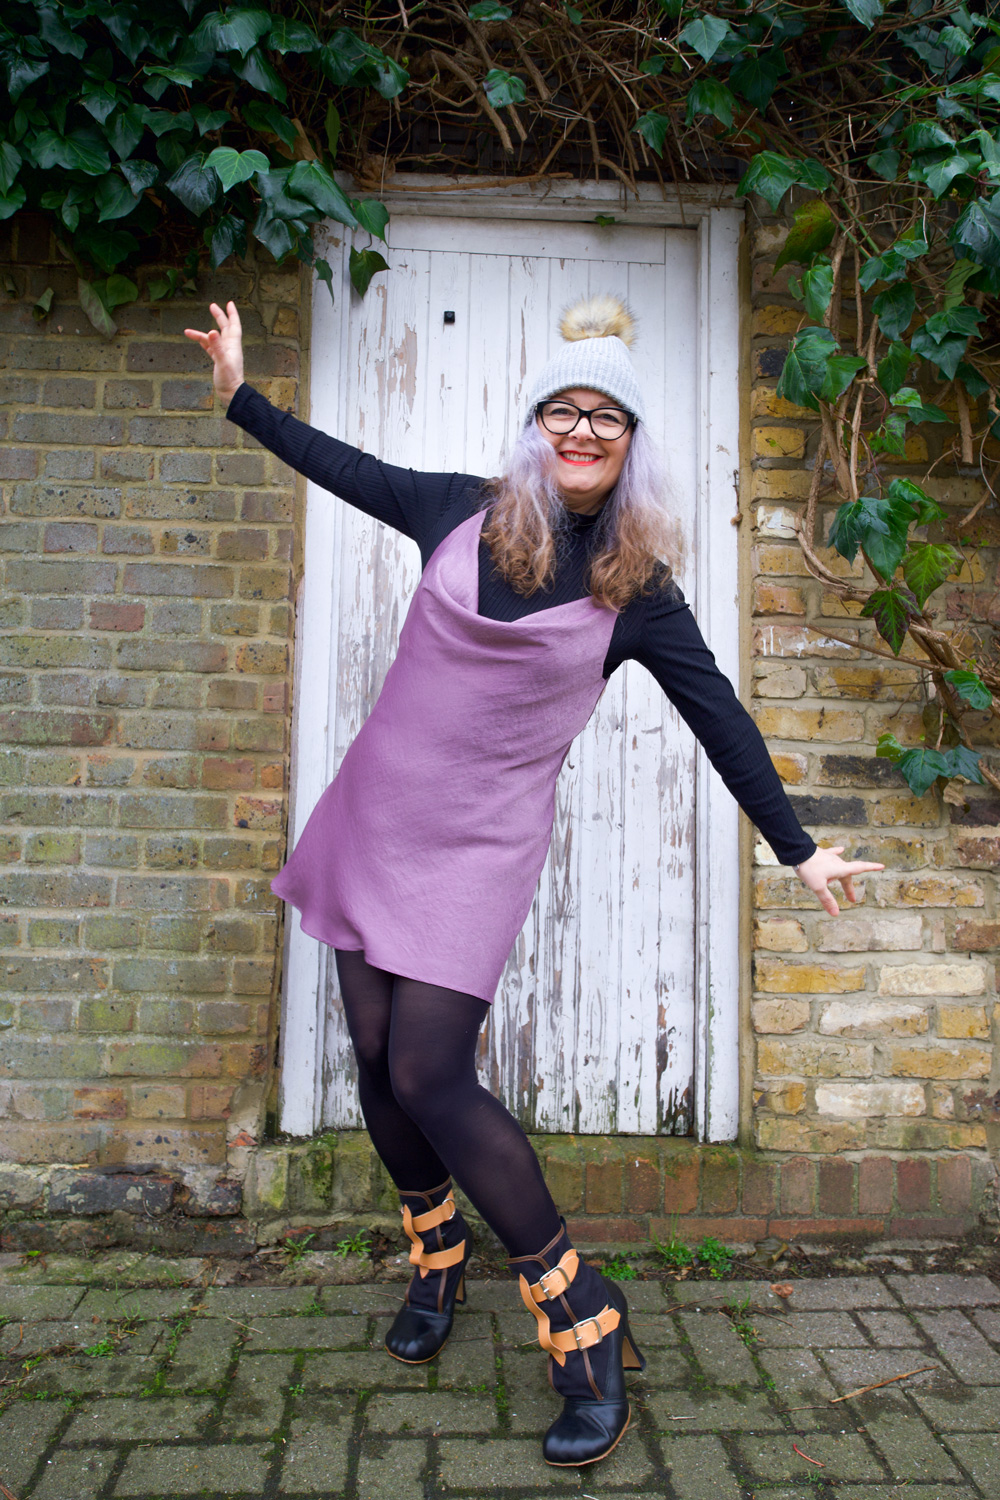
I’ve been admiring all the Masin Sicily slips since I saw the very first one, with the same thought in mind each time ~ could I pull it off?!

It’s a very clingy nowhere-to-hide kinda dress and I’ve never been ok with putting my belly out there but I figured I’d never know the level of exposure until I tried!

But why the lilac Janene? Haha, I thought I’d get in there before anyone else does! Because to be fair I don’t often break out of my red and black palette. (I’ll be running back to safety after this post, don’t you chicken curry about that!)

Janene is wearing her handmade Sicily slip dress and is posing with both hands on hips in front on a white door surrounded by brickwork and ivy overhead. She is wearing a self-drafted black turtleneck top, grey bobble hat, black rimmed glasses and Vivienne Westwood Bondage Boots.

Truth be told there was a lilac lovers party going on and fomo got the better of me! Hosted by Cut One Pair and Pigeon Wishes and to celebrate the collaborative button collection this is the second time in the space of a few weeks that an Instagram challenge has given me a push out of my comfy zone. My first being my now favourite jumper!

I have never sewn a bias cut dress. Save a bias cut skirt section of the BHL Jenna dress which I just realized I never blogged (doh!). And I can’t actually remember the last time I sewed a cowl neckline so I was really looking forward to (read, super apprehensive about) making this dress!

Back vew of Janene wearing her handmade Sicily slip dress. She is posing with both hands on hips in front on a white door surrounded by brickwork and ivy overhead. She is wearing a self-drafted black turtleneck top, grey bobble hat and Vivienne Westwood Bondage Boots.

Now for clarity (and first note to self) I have to say that putting together 50-odd sheets of A4 pattern pieces nearly drove me over the edge. And not for the first time. I don’t know why I put myself through this. Rewatching The Crown while I was doing it eased a bit of the pain but I so don’t want to do that again for a very long time!! Took me an age to get back up off the floor, if nothing else!

The next issue I had was cutting it out. I invested in an A0 cutting mat (Affiliate link) some time ago. It was quite pricey but equally worth every penny. I quickly learned that cutting slippery fabrics with scissors was not the best way forward the first time I tried! So I had both mat and rotary cutter lined up but still, working on the floor was a bit of a nightmare. I had to roll the rug back on the living room floor to pin the pattern to fabric and then roughly cut around each piece so they would fit on the mat to then be cut out more accurately.

Janene is wearing her handmade Sicily slip dress and is posing with arms outstretched in front of a white door surrounded by brickwork and ivy overhead. She is wearing a self-drafted black turtleneck top, grey bobble hat, black rimmed glasses and Vivienne Westwood Bondage Boots.

It was better than I expected but the pinning and shifting of pieces was a little detrimental, I’m sure, and I’d have much rather have used pattern weights and cut on a large sturdy eye-level purpose built cutting table. Excuse me while I dream the sewing studio dream… again!

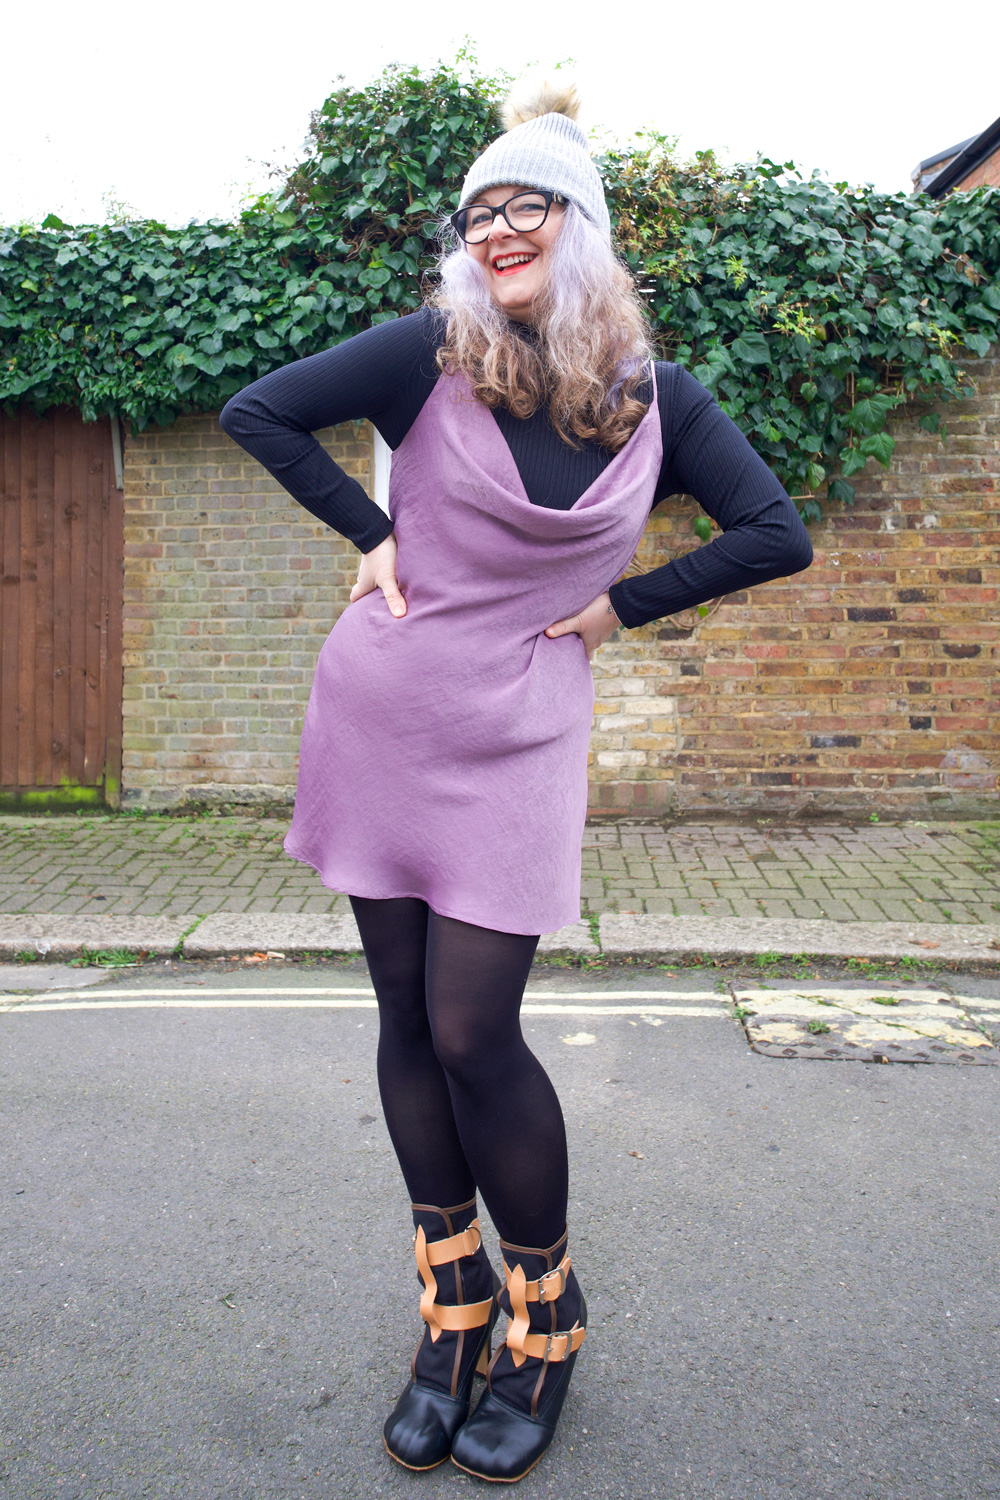
This is the first time I have used a sewing pattern by Masin and I have to say I found the instructions beautifully laid out, concise and super helpful. There’s a clear explanation of bias grain behaviour and how to pick the correct size. Having said that I still managed to pick a size too big because my hips are bigger proportionally than my bust (so I made the wrong choice instead of grading). And I think that is why my cowl neckline appears rather more dramatic than most. I’m still deciding if I’m comfortable with it. It’s perfectly fine layered with an undergarment but I’ve got a whole pack of tit tape at the ready for when I dare to wear it on its own!

waist up image of Janene, wearing Masin Sicily slip dress. She is holding 3 lilac colour carnations with both hands to the bottom of the frame. She is wearing black rimmed glasses and her head is back, laughing.

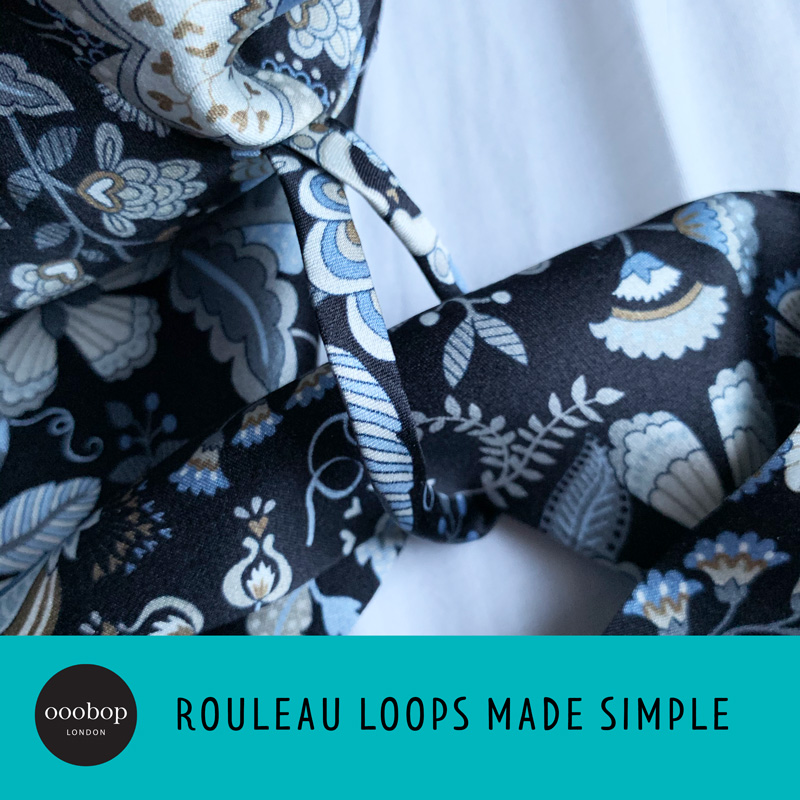
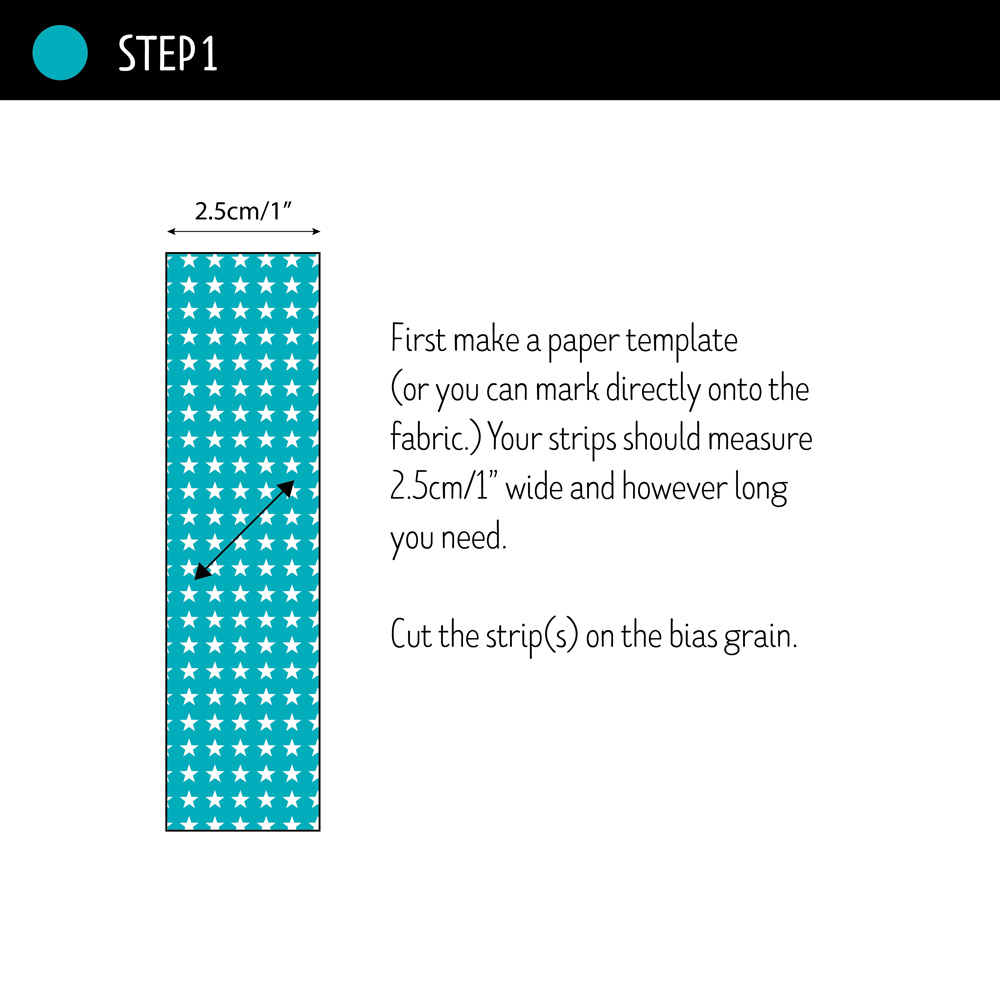
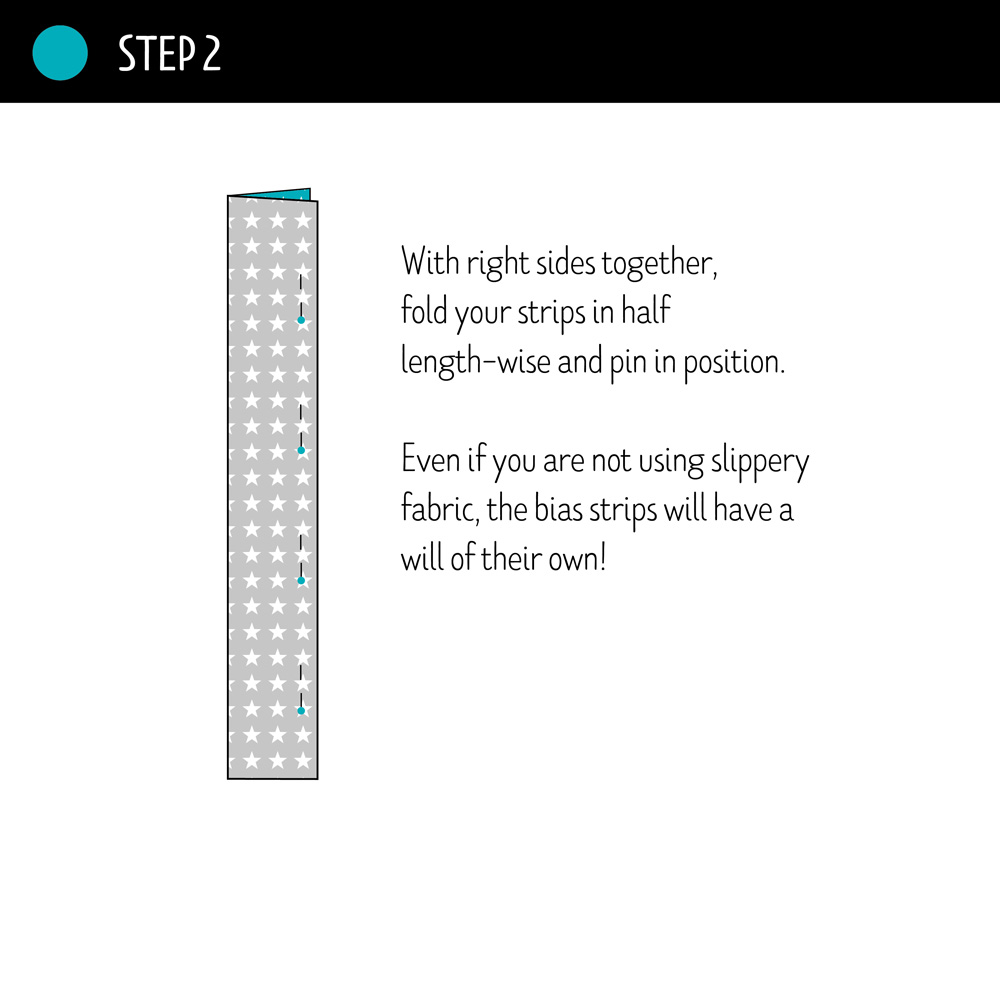
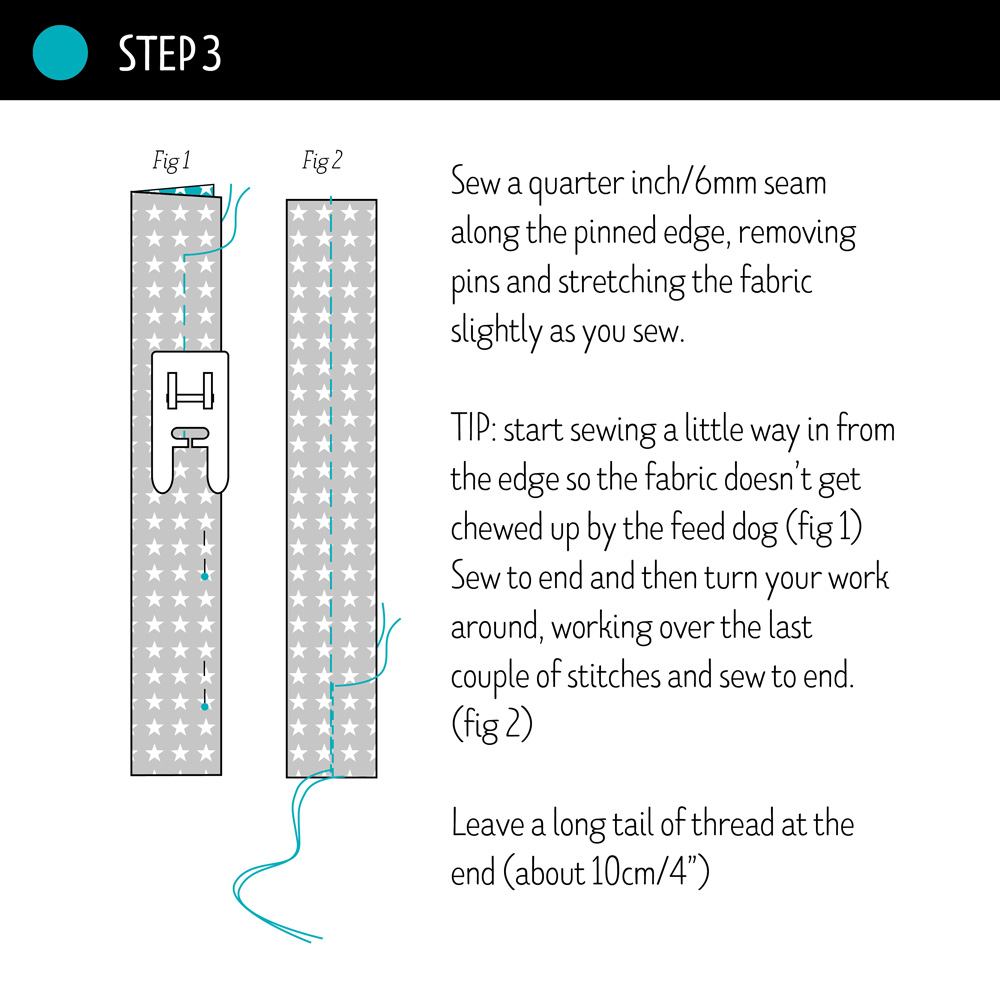
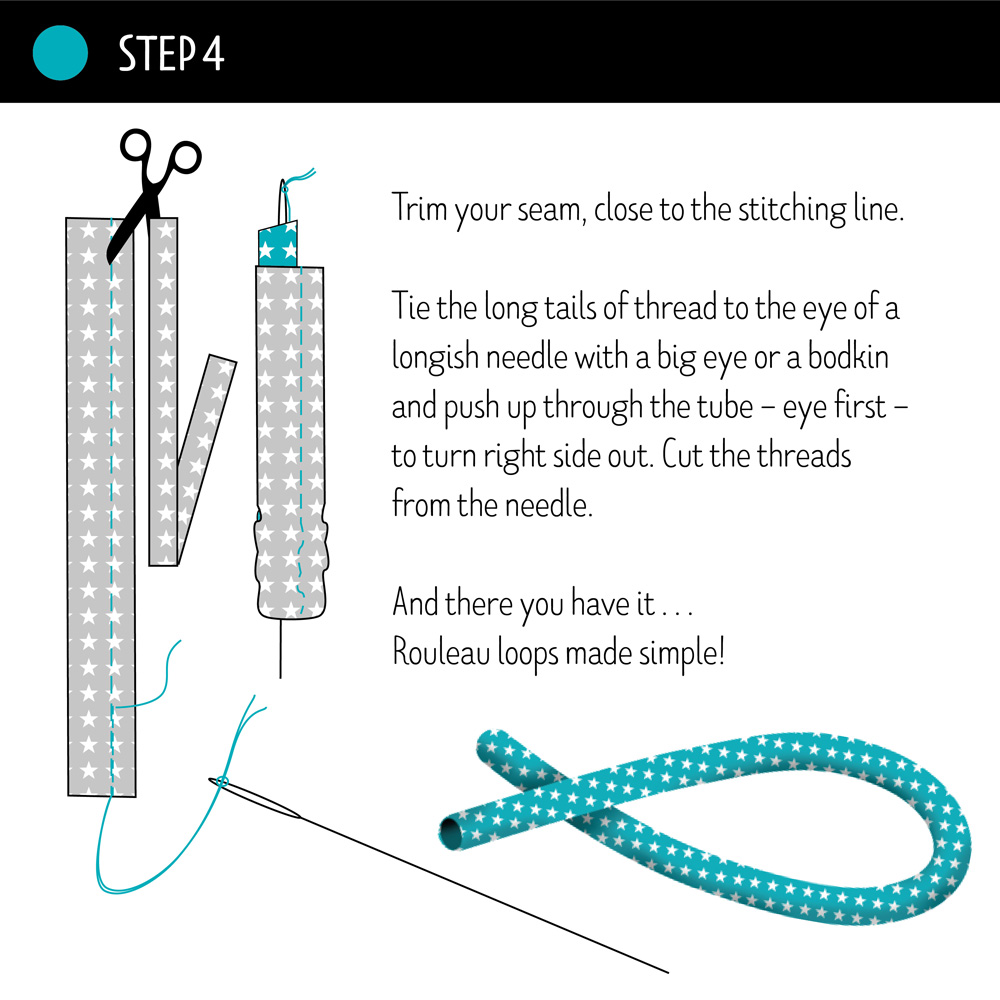
I was surprised that this view A with the skinny straps was suggested as the easiest version to sew. It’s taken me years to master those spaghetti rouleaus! But I have to say now that I’ve grasped it, I actually quite enjoy making them. I recently posted a little tutorial here if you are interested:  Rouleau Loops Made Simple

There are very few pattern pieces for view A – like front, front facing, back with facing, and strap – and no closures; so the rest of the instructions were super plain sailing BUT… and quite a big BUT…

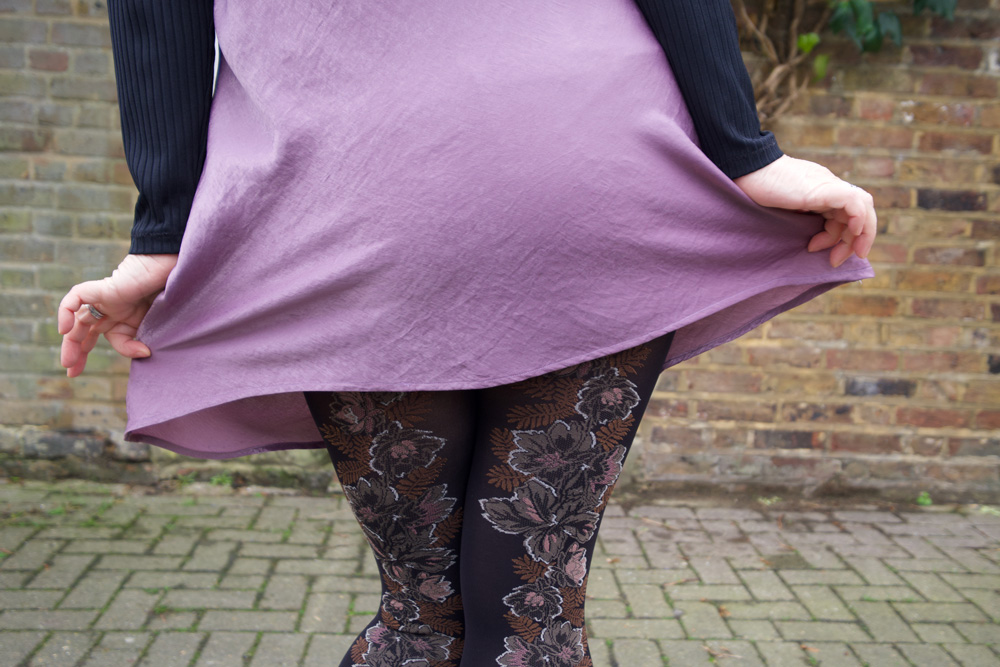
I think I made a boo boo by stay stitching the bias side edges with a straight stitch. I’m not entirely sure because I could have stretched out the seams when it hung over the edge of the table as I sewed, or perhaps as I was sewing the actual seams. I did use a small wide zigzag stitch to French seam the sides but of course that was like closing the stable door after the horse has bolted! While the dress is hanging, the bias cut fabric is going to stretch more but the stay-stitching is going to… well, STAY! (Second note to self: try zigzag stay-stitching too!)

Side view of Janene wearing her handmade Sicily slip dress and is posing with right index finger on lip in front on a white door surrounded by brickwork and ivy overhead. She is wearing a self-drafted black turtleneck top, grey bobble hat, black rimmed glasses and Vivienne Westwood Bondage Boots.

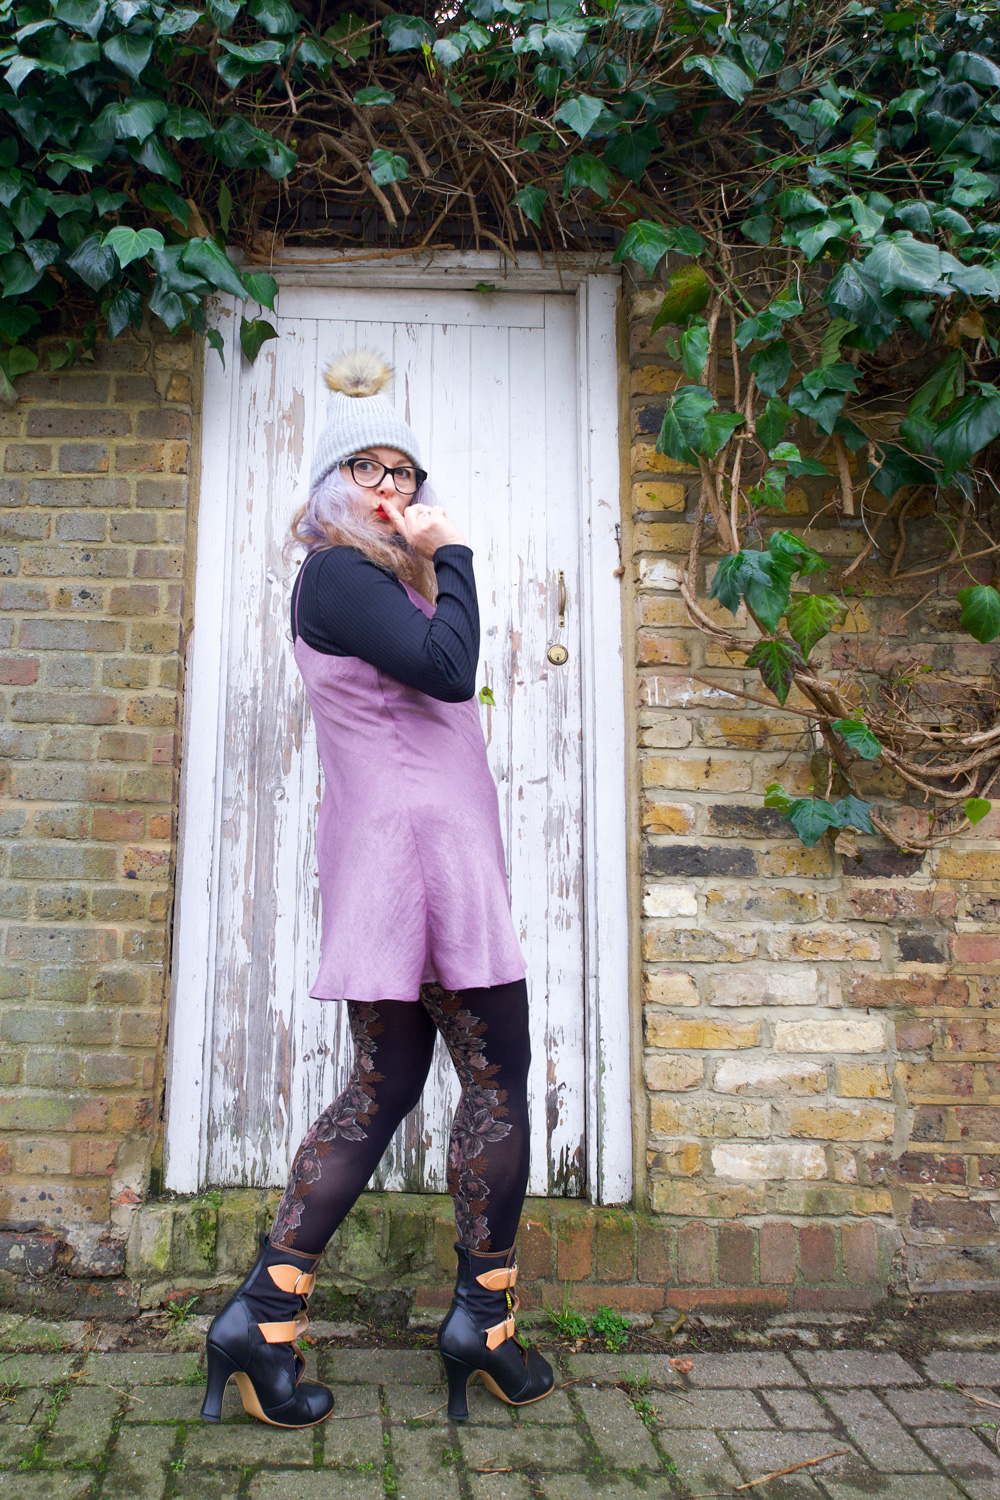
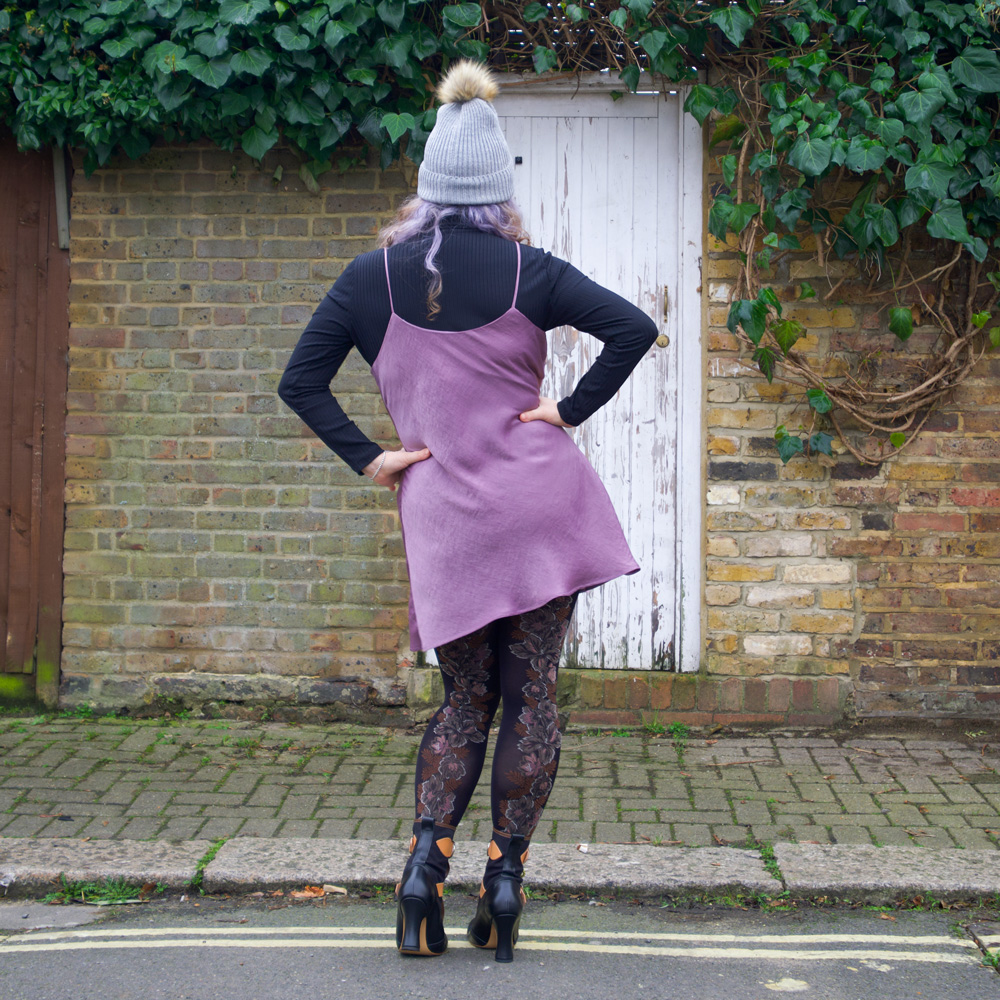
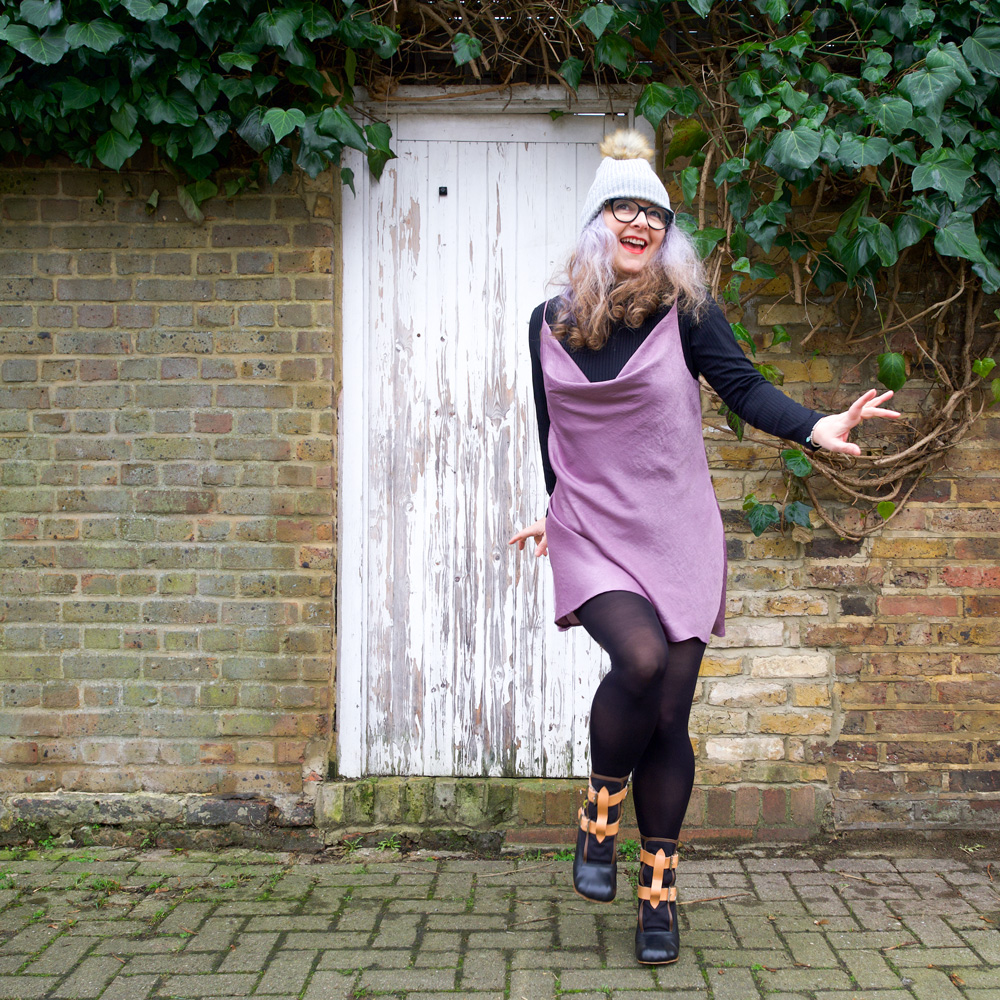
All was not lost though. The worst of the puckering was near to the hemline and I had been mulling over a choice of midi and mini length at the start. So decision was made when I realised I could crop off the worst areas by going for a mini length!

I’m pretty pleased with my hemming too. I sewed a quarter inch away from the cut line and pressed as instructed and then sewed close to the second fold. Even though this velvet touch poly is totally synthetic I was amazed that it pressed so beautifully.

Detail of small hem on dress. Cropped image of hands holding out skirt to sides

Once again I have learned new things. Testing things but valuable lessons all the same and nowhere near testing enough to put me off trying again – the absolute best thing about sewing adventures!

All in all I am delighted with the outcome and I will be revisiting this pattern again. Leopard print satin is already prewashed and sitting patiently atop the stash! So if anyone has any thoughts about stay-stitching bias dress side seams before I crack on, please let me know in the comments below. And I will love you forever!

Janene is wearing her handmade Sicily slip dress and is skipping towards the lens in front on a white door surrounded by brickwork and ivy overhead. She is wearing a self-drafted black turtleneck top, grey bobble hat, black rimmed glasses and Vivienne Westwood Bondage Boots.

Lovely photos by Daniel James Photographic

Rouleau loops made simple

Rouleau Loops made simple. Title image

I struggled to make a satisfactory rouleau loop for years and dodged any sewing patterns that involved spaghetti straps, button loops, ties and such decoration. Determined to get the technique nailed for my Vogue Liberty silk dressing gown, I rehearsed the following method with great results. I hope this works for you too!

STEP 1: First make a paper template (or you can mark directly onto the fabric.) Your strips should measure 2.5cm/1” wide and however long you need. 

Cut the strip(s) on the bias grain.
  • STEP 1: First make a paper template (or you can mark directly onto the fabric.) Your strips should measure 2.5cm/1” wide and however long you need. 

Cut the strip(s) on the bias grain.

STEP 2: With right sides together, fold your strips in half length-wise and pin in position. Even if you are not using slipery fabric, the bias strips will have a will of their own!
  • STEP 2: With right sides together, fold your strips in half length-wise and pin in position. Even if you are not using slippery fabric, the bias strips will have a will of their own!
STEP 3: Sew a quarter inch/6mm seam along the pinned edge, removing pins and stretching the fabric slightly as you sew.

TIP: start sewing a little way in from the edge so the fabric doesn’t get chewed up by the feed dog (fig 1) Sew to end and then turn your work around, working over the last couple of stitches and sew to end. (fig 2)

Leave a long tail of thread at the end (about 10cm/4”)
  • STEP 3: Sew a quarter inch/6mm seam along the pinned edge, removing pins and stretching the fabric slightly as you sew.

TIP: start sewing a little way in from the edge so the fabric doesn’t get chewed up by the feed dog (fig 1) Sew to end and then turn your work around, working over the last couple of stitches and sew to end. (fig 2)

Leave a long tail of thread at the end (about 10cm/4”)

STEP 4: Trim your seam, close to the stitching line.

Tie the long tails of thread to the eye of a longish needle with a big eye or a bodkin and push up through the tube – eye first – to turn right side out. Cut the threads from the needle.

And there you have it . . .
Rouleau loops made simple!
  • STEP 4: Trim your seam, close to the stitching line.

Tie the long tails of thread to the eye of a longish needle with a big eye or a bodkin and push up through the tube – eye first – to turn right side out. Cut the threads from the needle.

And there you have it . . . Rouleau loops made simple!

Do let me know if you found the layout of these instructions helpful. I sometimes struggle with photographed instructions and I find illustrated steps are easier to follow but that might just be me!

Camping it up in a Burda Maxi

Burdastyle Maxi DressThis is the Burdastyle Maxi dress from May 2014 issue and it literally took an evening to trace and make, plus a morning to finish seams and hem.

I love the gathered front loop detail created by some clever drafting and a drawstring. The straps are a lovely and incredibly practical feature too. Each strap is folded in half and the fold is attached in position to the front bodice. This creates a double strap which separates over the shoulder where the visual is 4 spaghetti straps at the back. No irritating slips off the shoulder. No embarassing wardrobe malfunctions!

And I have to mention the fabric. I went in asking for linen lawn. I knew it was a bit of an ask and I’d anticipated the screwed-up-face response that I got in each and every shop. I even predicted the suggestion of cotton lawn instead. No, no, no. Burdastyle definitely stated linen lawn. Kind of a contradiction of terms really, so I’m wondering if its a translation thing. Anyone know?

So with no linen lawn and an urgency to make this dress before I went away, I asked if they had anything soft and drapey. No not polyester. Eewww sweaty! Though to be fair it was very soft and drapey. No not cotton. It’s not nearly drapey enough. Too crispy and neat. Apart from the lawn, possibly. But oh the creasing. I was tempted by tangerine muslin. Really tempted. But I’d have to have lined it for modesty purposes and I really couldn’t be arsed. I was about to give up when the viscose was presented as an option. Only in black or white but also only £4.99, with all the softness and drapeyness I could ask for. Bargain! Done!

And what a joy to work with. I took my time to cut it out because it did move around a bit on the table. especially when I was cutting on the bias. It has got a little natural stretch to it. But to be fair. It is drapey, black and relatively casual so no glaring errors are going to cause a stir here.

I made it a couple of weeks ago when I last went camping so this was it’s second trip out into the wilds of West Sussex!

So there I was, minding my own business, floating around the campfire in my new maxi dress, relishing the soft swishes of viscose around my ankles with stars in the sky and Mr O at my feet. Doesn’t really get much better than this . . .

. . . then this happened . . .

Burda Maxi Dress photobombed

Right on cue!

It’s a small miracle I got the first picture sans bombing to be honest!

I was going to leave out the in-seam pockets to hurry the process. I never really got the excitement when other people go on about pockets. But I’m glad I did and boy do I understand now! Torch and lighter in one, cash and phone in the other. Look, no bag!

And who wants serious posy photos any hoos?!

Burdastyle Maxi dress photobombed

You get to see how the straps separate at the back in the picture above. Clever, no?

You can also get an idea of how the elastic at the waist cinches the bodice in to create a much more flattering silhouette than it would have done otherwise!

You must also be feeling my delight at the depth of my in-seam pockets!

The bombing barrage came from nowhere. Actually it came from all angles. Sabotaged good and proper by a gang of onesie-clad cheeky girls!

Photobombed by onesie girls

The absolute cheek of it!

photobombed by the girls

Hang on a minute. Remind me whose shoot this was?

There was only one thing for it . . .

Maxi dress bombs the children

Seriously ladies, this dress is great for camping. It’s great for slinking down the shops too. And methinks in a drapey sandwashed silk it would be super sexy and glamourous, no?!

If you don’t have May’s Burdastyle mag then here’s a link to where you can download a pdf pattern.

And for anyone who is keen to know more about the delights of viscose, here is a fine clarification of the making process and its properties.

Hope you all had fun sewing times this weekend. Or maybe you were out camping it up too?