ooobop! review: Burda Style July 2013

Just when you thought I’d forgotten all about you! So sorry for the really really late review. I’ve had this issue in my clutches for quite some time and I’m sure most of you have snapped one up and made up your entire summer wardrobe in the meantime. But for those faraway friends who always get the bum end of the deal when it comes to Burdas on shelves, this post is dedicated to you.

Celebrating Summer is the opening theme for July. So get your sunnies on because there is nothing shy or wallflower-like about these there garments.

Cotton, jersey and linen. Bold prints, floral and batiks… all a little bit hippy for me, to be honest, but for any beginners looking for some dramatic starter projects, a few of these could well be worth a punt.

Burda July 2013 summer designs
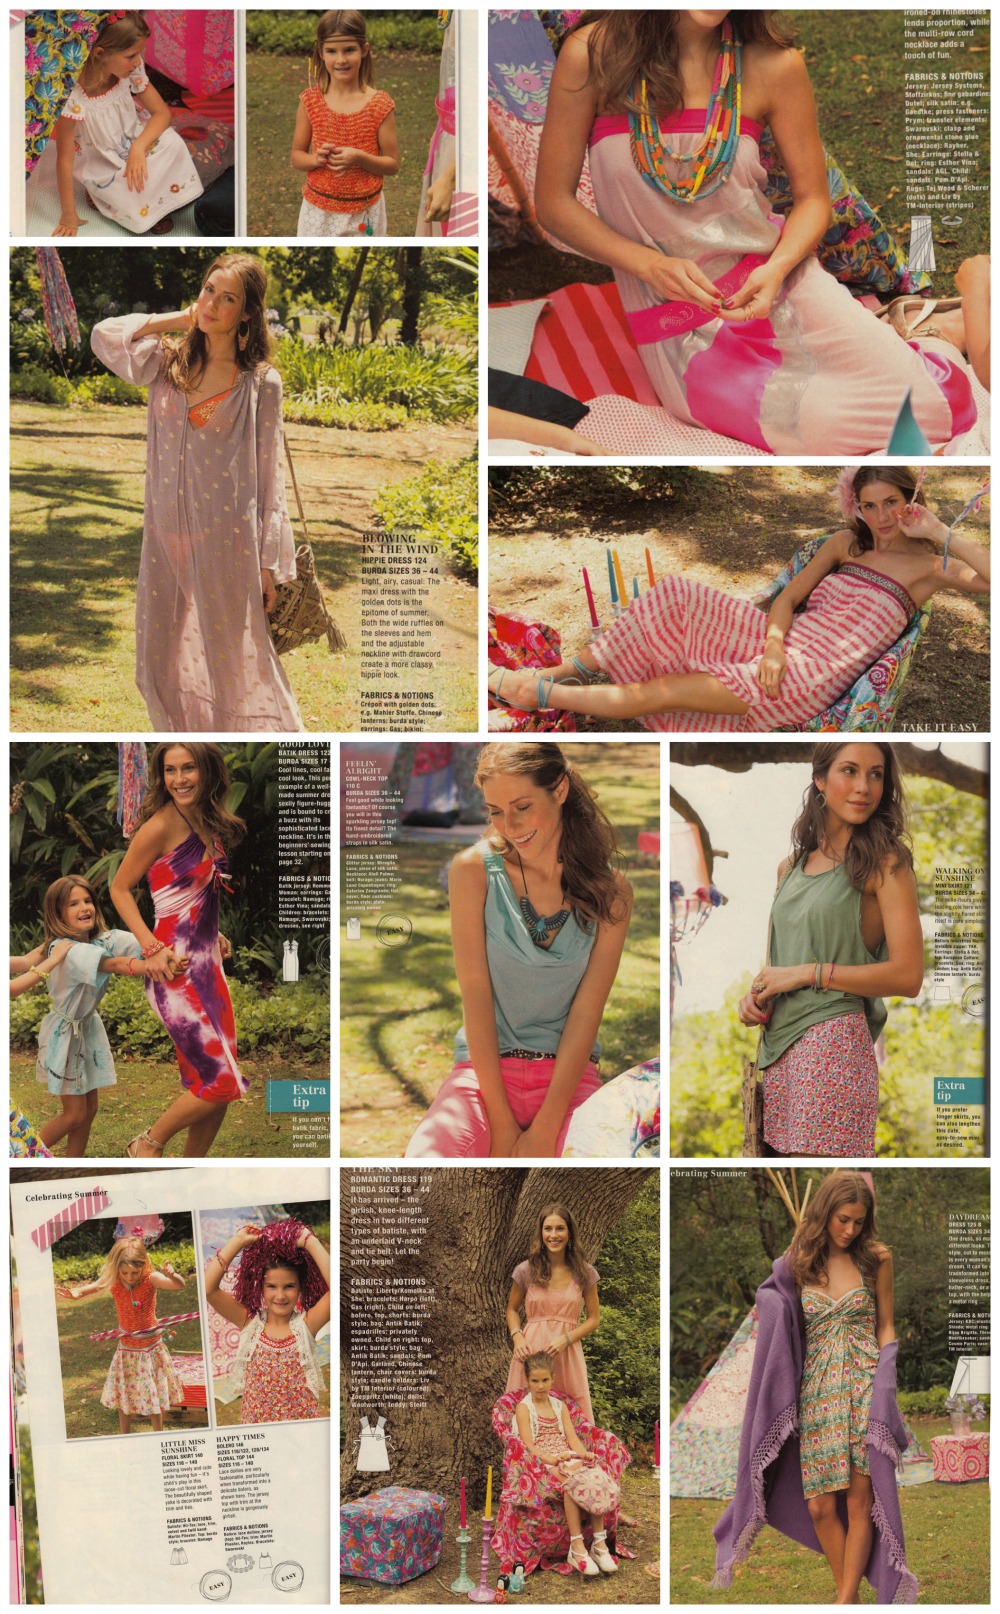
The dress, bottom right corner, for instance is fashioned from a rectangle of fabric with single slit. You can just about see the diagram to the right of the dress. There are some nifty instructions to wear this dress in three genius ways with the help of a circular bangle. But, easy as it states, I haven’t quite got my head around it enough to explain, I’m afraid!

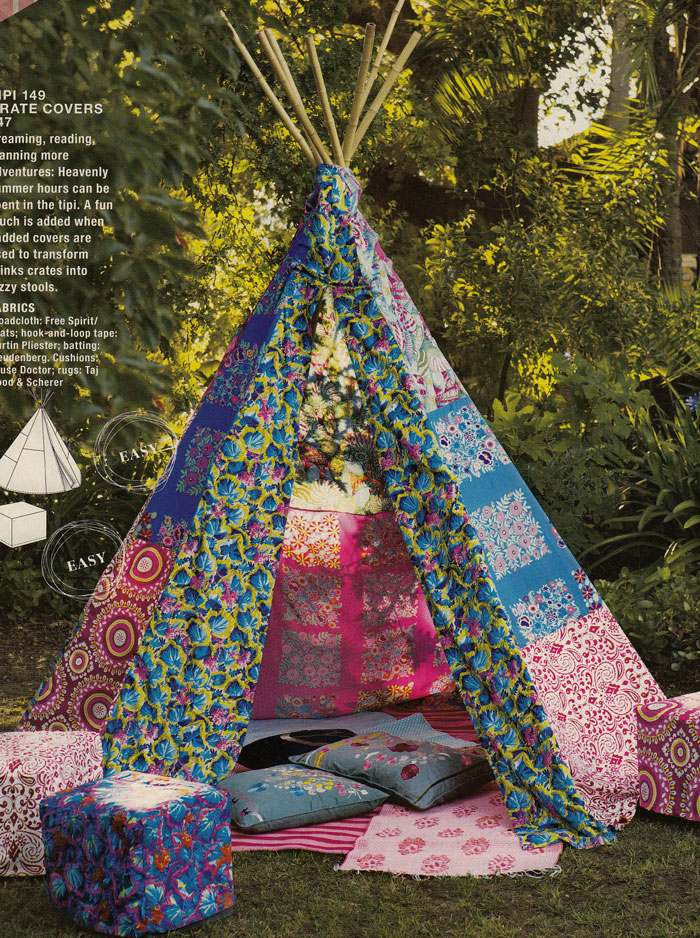
My hippy tendencies, however, do extend to love of tipi!

Burda July 2013 Tipi

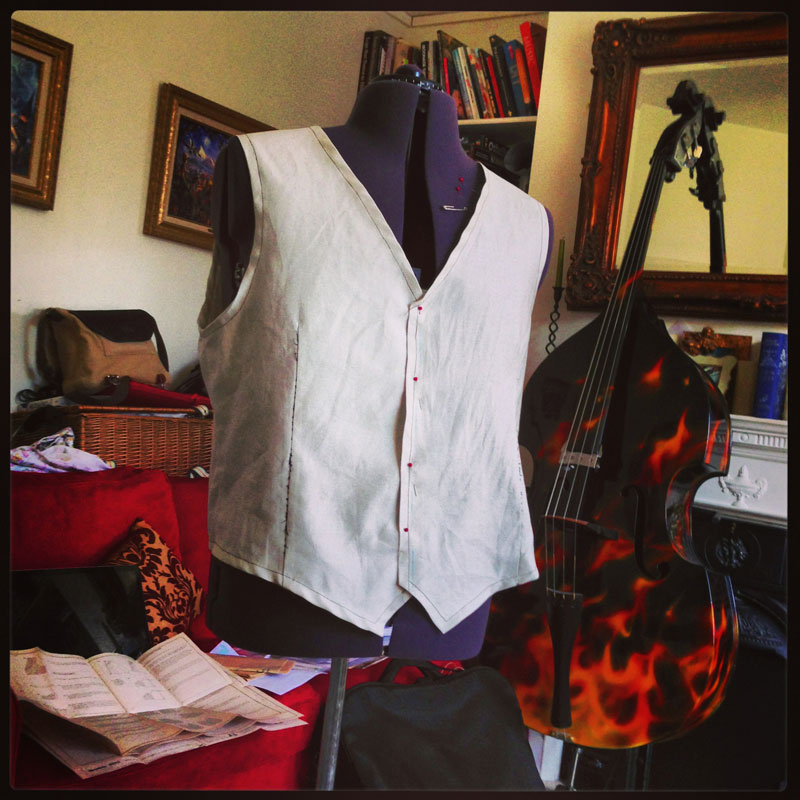
The next section gets a bit more versatile. The opening shorts and silk vest top with twisted straps brings a little sophistication to some interesting casual wear. Not sure what to make of the pink wool and leather-trimmed shirt dress (centre) with oversized bellow pockets. I already don’t like the puckering around the waist! But the cowl neck  on the jersey satin top (centre right) is so classy as is the soft wool jacket (bottom left corner) with its silk trim and pocket flaps. Really interesting asymmetric closure too.

Burda July 2013 summer fashions
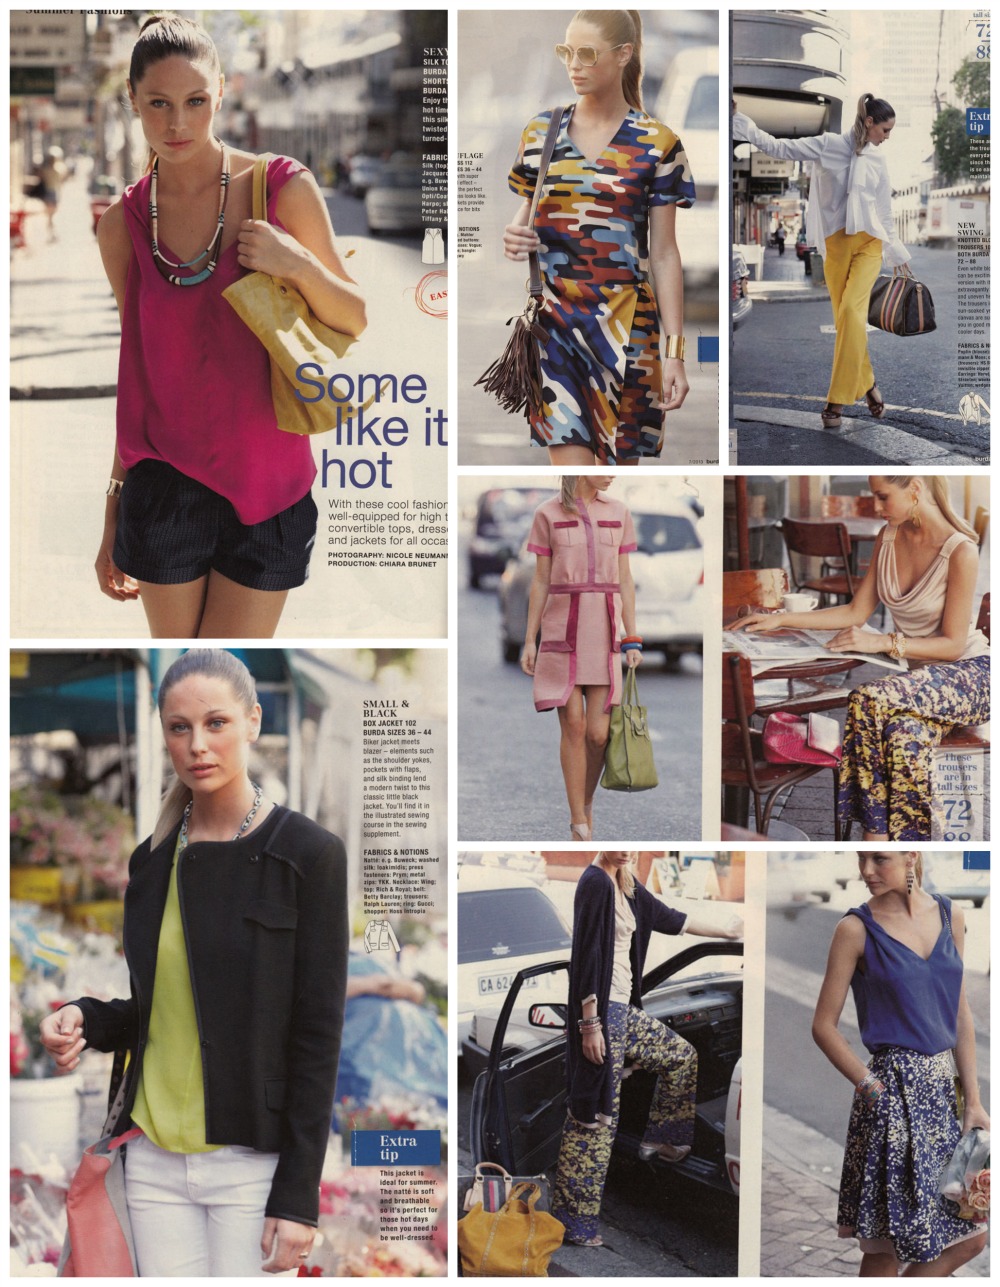
I wasn’t immediately bowled over by the retro pattern. But on closer inspection those shorts are really cute with their angled hip yoke pockets, waist pleats and turn-ups. I’d really like to give these a go before my holiday, if I get a chance. The T-shirt though a useful pattern to have, is a little boring really but far more intriguing is the use of fabric here. It’s made of striped raffia! Can’t imagine that’s a snuggly wear!

Burda July 2013 retro shorts and Tshirt

It lightens up somewhat with shimmering silks, floaty tulle and pearly sequins. My pick of the set is that silk batiste with ruffle appliqué jacket (bottom left corner). Short, boxy cut and properly unnecessary! Which is why I love it so much! I quite like the deep v-neck top (centre bottom) but I wouldn’t sew with that sequin fabric for all the silk in china!

Burda July 2013 Summer shimmering fashions
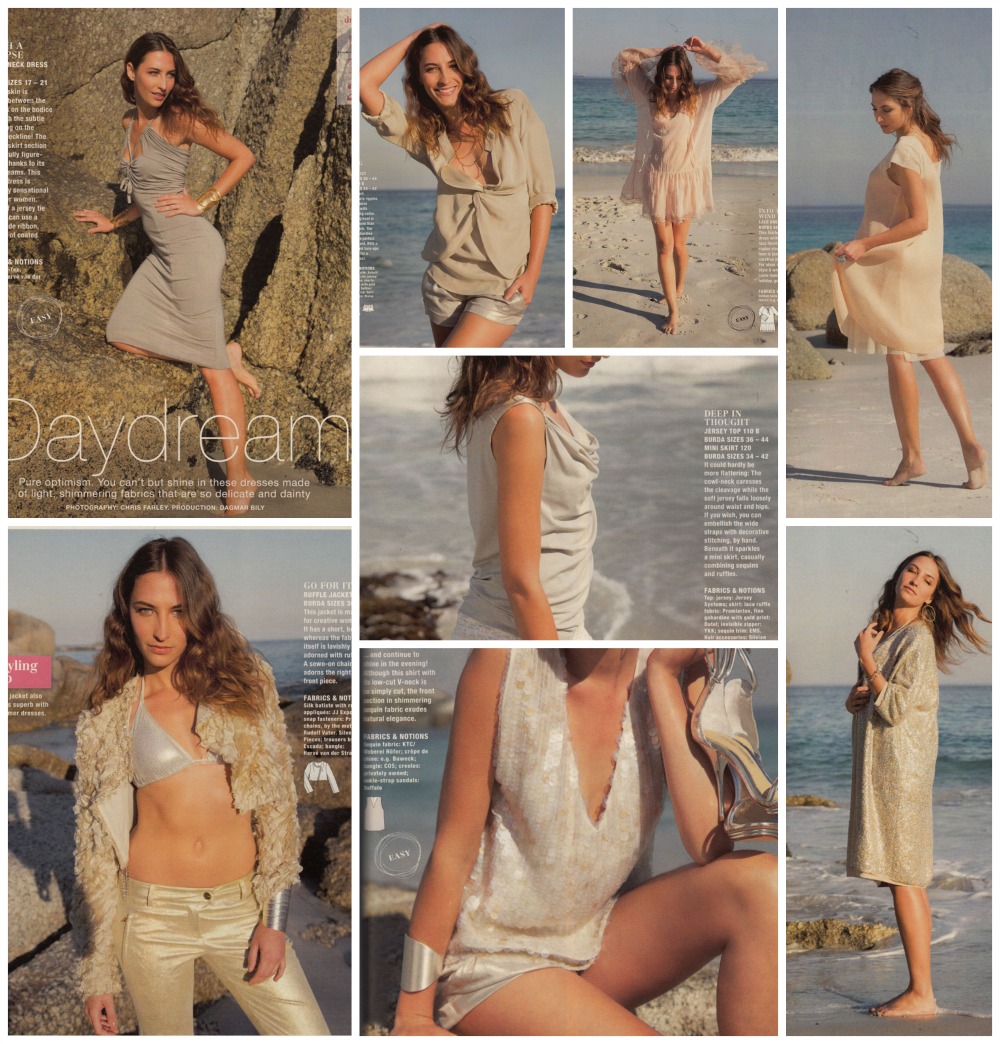
Included in this section are some more of those genius wrap dresses. The top one shows another two ways to wear the one shown previously. Beach dress becomes evening dress with clever usage of a bangle!

The one below has two side slits and makes such a great beach dress. No bangle involved here, the fabric piece is simply draped around the body.

Burda July 2013 wrap dresses

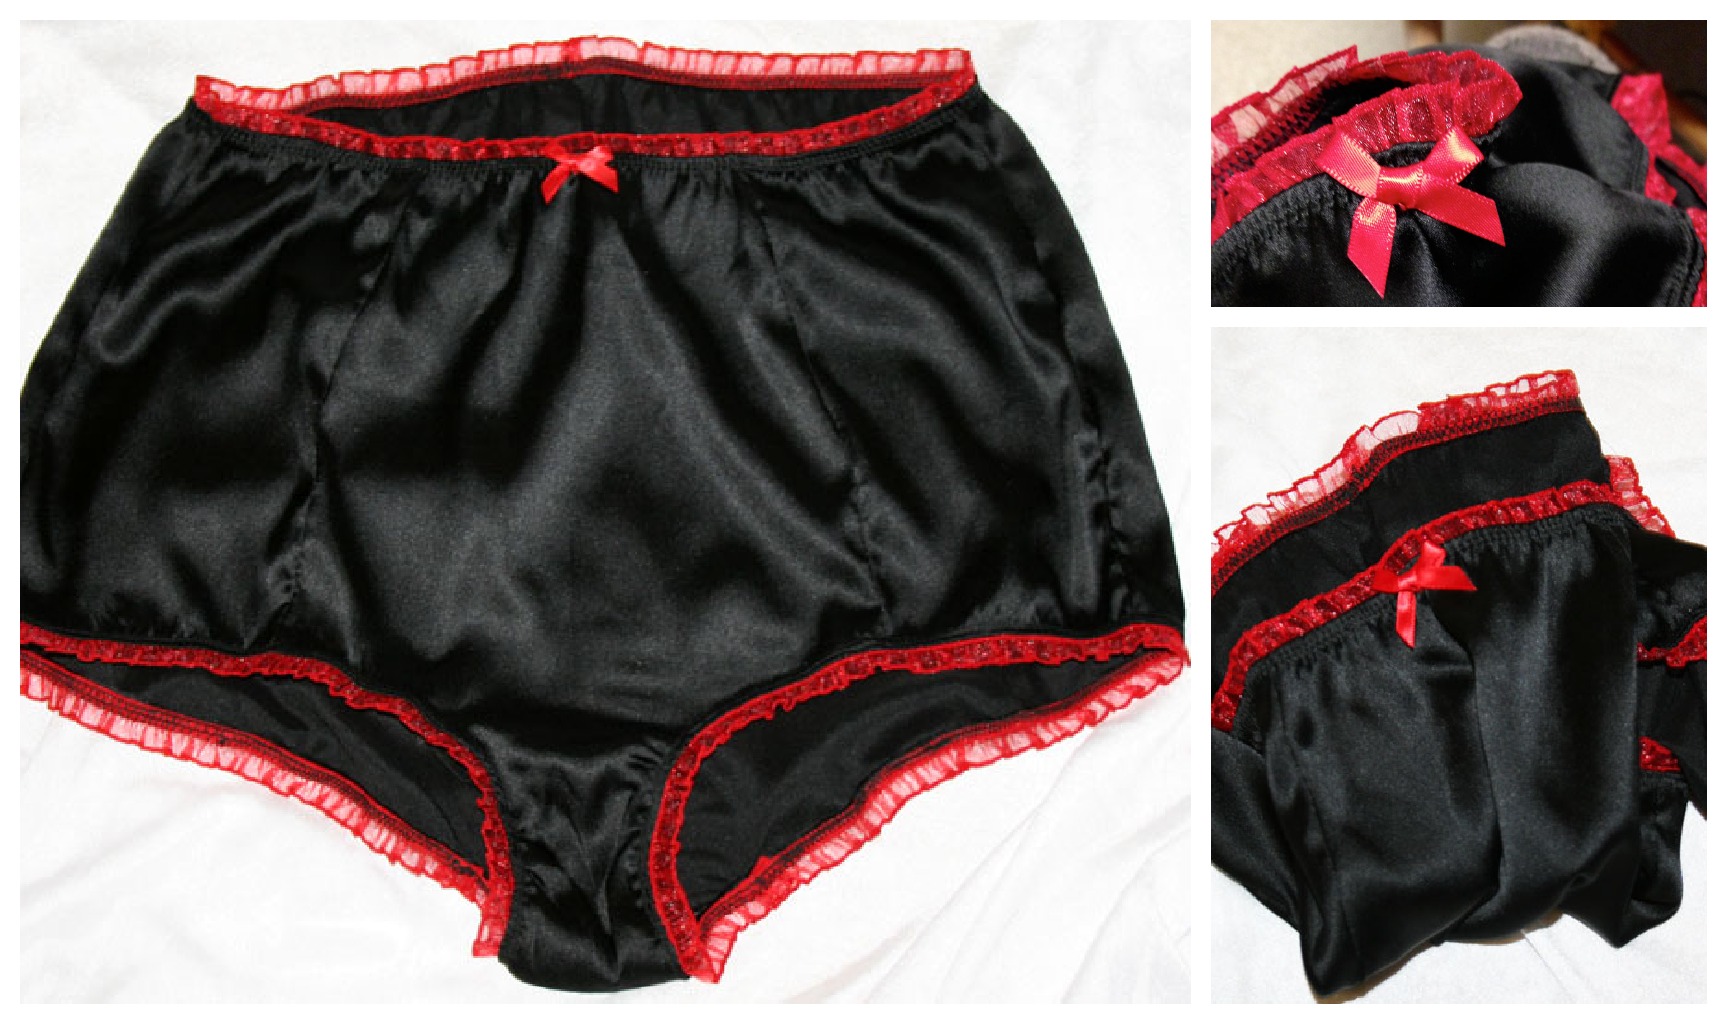
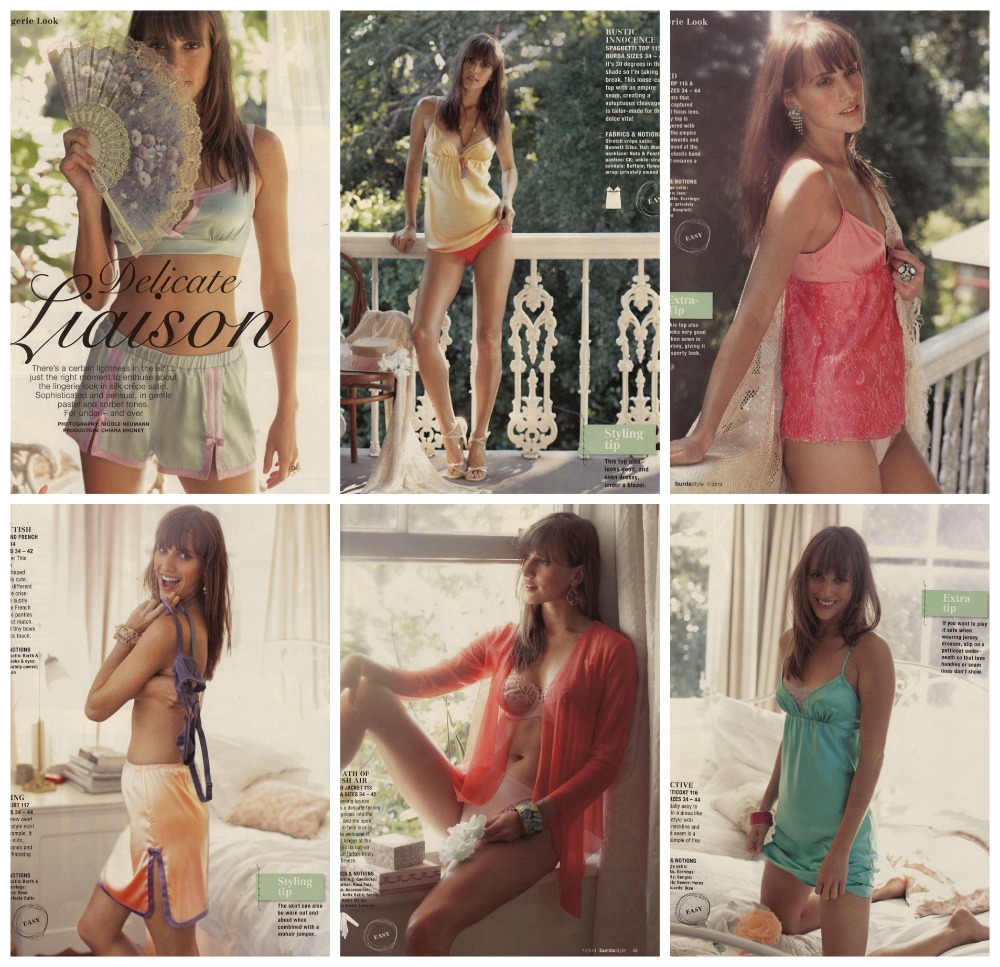
Some lovely lingerie patterns included in this issue. I’ve made a couple of pairs of pin-up pants but I really want to explore the world of undies in more detail. I’m tempted to rustle up a couple of slips too as a cheats way of avoiding a lining!

I love the French knickers and the camisole tops. And imagine how luxurious they would feel in silk crepe satin…

Burda July 2013 lingerie

But hey. Guess what section tops it all off, once again? You guessed it!

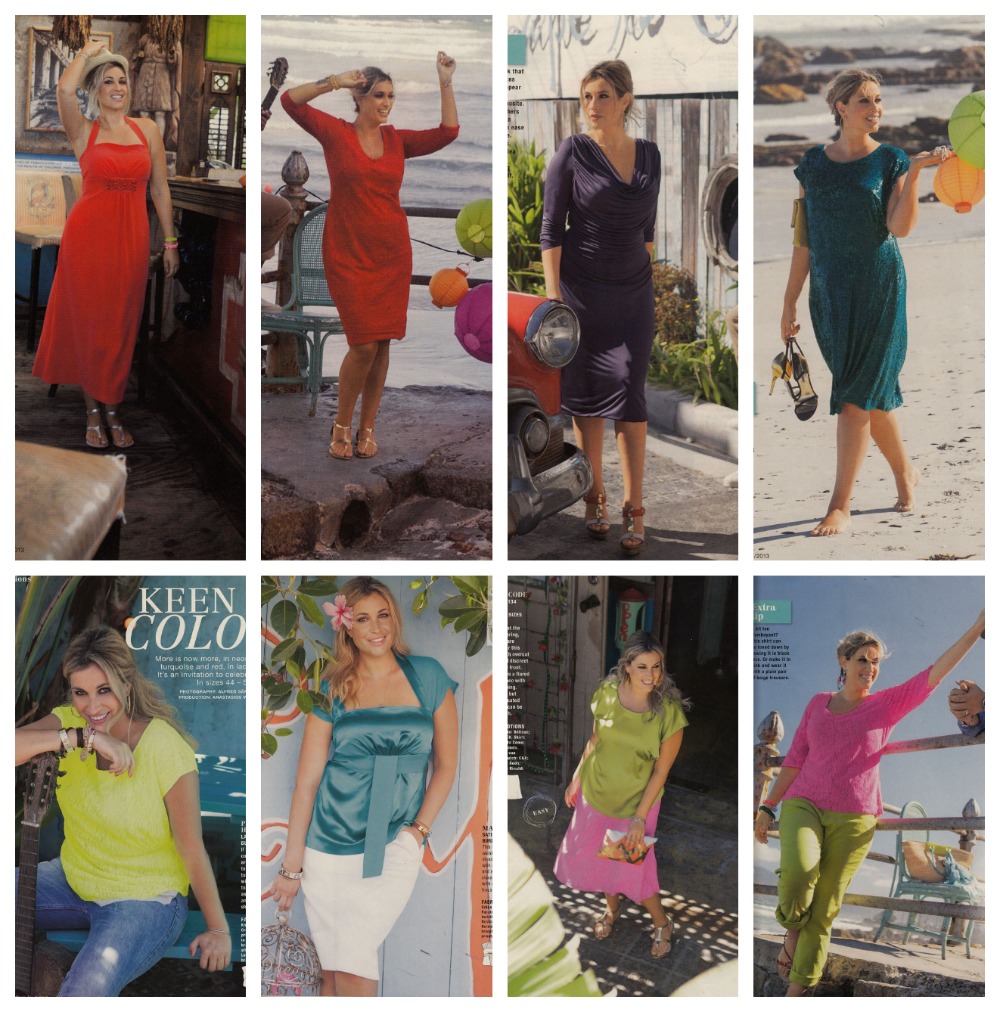
Bolder, shapelier, sexier and far more likely to appear in my holiday suitcase. Check out that all-red stretch satin halter neck dress (top left corner). Sparkly rhinestones cover a small gathered section under the bust. Soooo flattering. Loving the red lace dress (next to the halter dress) with three-quarter length sleeves too. (I do like a red dress!) I’m not entirely sold on the use of asymmetric darts though. Looks to me like a mistake.

And wow! That purple cowl-neck dress (3rd column first row) sports a cowl to behold. Its made of a double layer of silk jersey, here. I anticipate a nightmare sewing scenario but if anyone wants to make this for me, I’d be happy to receive!

Burda July 2013 plus fashions

From the lack of reviews on this issue along with the odd very negative ones, I gather this hasn’t been the most popular. I have to admit, it took a few going-back-to’s to get a fair impression but as always, if there’s only one pattern that hits the mark it’s still so worth the cover price. So stick with it lovely sewists!

Pin-up pants and procrastination

black pin-up pants with red lace

I made my first pair of pin-up pants last September 2012 and I knew I would have to make more. For one, that stretch silk doesn’t come cheap and I WILL use every last piece! But moreover they are divine to wear!

Even though they look as massive as the last pair, they are in fact a bit shorter. So they come just under the belly button now! I found some fabulous red lingerie lace at my local haberdashery stall and remembered that Mr. O had bought me a packet of little red bows some time ago. Perfect for some cheeky vintage-style knicks!

Not much more to say about these other than they are well worth a go. I love working with smaller projects especially as I don’t have a dedicated sewing room. It means I can have everything contained and to hand… and don’t have to clear the decks in order to lay everything out!

As you might have noticed, this is the 2nd little project I’ve posted today, after starting a toile for Mr. O’s waistcoat this morning. One might think I was seriously procrastinating and avoiding doing the welt pockets on some very expensive silk satin. One might be quite right!!

waistcoat toileGosh! Is that the time? Sorry must dash! Got a date with Mr Selfridge! 😉

50s pin up silk knickers

silk knickers

Well Bridget Jones, eat your heart out. Mine are big and all silk!

There has been a lot of knicker making activity going on in blogworld recently. For example these pretty French knickers by Kat at The Couture Academic, these ‘little pants‘ made by Rachel at the House of Pinheiro and just check out Gertie’s prolific pant production line! Plenty ’nuff inspiration to ease me gently into the beginnings of lingerie-making.

As with most things I do for the first time, I headed to my Burda Style magazine collection, remembering a Lovely Lingerie section in issue 01/2012, which of course included the perfect pattern.

Burda Style LingerieThe only thing that flummoxed me was that these ones had a side zipper! I can’t get my head around having to zip up your pants in the morning, call me old-fashioned! I guess the rationale was that the over layer of tulle wasn’t too stretchy and I for one would never be able to get non-stretchy nicks over  my hips!

So first mission was to find some stretchy lingerie fabric so I could omit the zip. I went in search of stretch cotton satin but on presentation of skirt-weight cotton sateen each time, I gave in to the more luscious lure of 100% stretch silk. At £15 metre, these are definitely the most expensive but certainly the most luxurious pants I own. My faithful haberdashers in Shepherds bush market stocks the elastic lace at 50p a metre which softens the blow!

silk knickers bow

These were such an easy and delightful make. Though I don’t want to give you a ‘bum steer’ (!) They are more time-consuming than you would think, to stretch-and-stitch the elastic lace, top-stitching it twice on each opening . . . especially on to slippery silk.

Oh, and by the way, I make no apology for the lack of modelled garment. How could I possibly compete with the way that Scruffy Badger so confidently models her frilly knickers?!

Ooobop! party dress

party dress back view

I have been designing this dress in my head for quite some time. I design a lot of things in my head –in the shower, on the bus, when I’m meant to be doing something else and when I’m nodding off to sleep – it’s a busy old head!

Anyhows, an invitation to the gorgeous Rhonda’s 30th bitthday party was a great prompt to put some of these ideas into action. I met Rhonda’s mum, Tina many moons ago when we moved next door to her and she soon became more than a neighbour. More confidante, great friend and the most wonderful childminder to my son. So this party was really a family affair and I needed a dress.

party dress full skirt

I’ve got real issues with buying clothes from high street shops nowadays. I haven’t bought anything new (save underwear and shoes, of course!) in over a year and get much more satisfaction in making something myself or striking lucky in charity shops. I did think about making it a conscious decision when I started this blog but I know how flaky I can be and I didn’t think I could stick to that rule. Turns out I didn’t have to make it a rule. It happened quite naturally. I much prefer dreaming of what I want and making it or ‘rescuing’ from charity shops rather than settling for what’s out there. And now I really feel like I’ve moved on.

party dress twirl

This is my first dreamt of, self-designed and handmade dress. And I am chuffed to bits. The bodice pattern is slightly modified from Burda Style’s Wedding Special, issue March 2011. It has a v-back, a high neckline and is perfectly fitted with waist and bust darts. Below is the bridesmaid dress as featured in the magazine.

burda bridesmaid dress

The skirt section is self-drafted. It is a circle skirt with the inner circumference double the waist. The fabric is either silk or cotton, a silky cotton… or maybe a cotton silk! I did a burn test and it burnt to dust so its definitely void of any synthetic fibres! I had enough of it to self-line the bodice and it feels lovely against my skin and was cool enough under the flashing lights on the dance floor!

party dress front

I made the sash from a 3 metre, double layer length of chiffon, tapered at the ends and top-stitched.

party dress sash detail

The rose print allowed for some interesting placement on the back. Quite happy about that!

party dress back

The dress is worn over an organza petticoat, again, self-drafted, which although not complicated, was more of a test of my patience than the dress. I will blog the petticoat separately given that I haven’t taken any photos of it yet.

Unsurprisingly I didn’t get chance to hem the skirt by hand. And in a way, I’m quite glad I didn’t spend the time – can’t imagine how long it would take – I went for a machined baby hem instead.  First I ran a line of stitching, a seam width, along the hemline. I used this as a pressing guide and it pressed up beautifully. I then tucked in the raw edge to the fold and machined again, using my quarter inch foot which made it really easy to keep a small and consistent hem. I was careful not to stretch the fabric as I went round so it didn’t pucker. I pressed it again… this fabric really is a pleasure to iron!

The most amazing thing about this dress is that it cost £3.50! £3 on the fabric – an incredibly lucky find in a charity shop – and 50p on the invisible zip. The sash cost much the same!

The fabric was a little slippery and needed lots of pins to hold in place. This is my first dress in a silky fabric and I anticipated it being troublesome. That said, I really worked fast on this dress. Mostly because I had a party to go to and I suppose because there was no expense at stake… apart from my time! It irons beautifully and hangs so effortlessly so I can forgive the grief it gave!

It took one evening to draft the skirt pattern, cut the fabric and assemble/line the bodice; a couple of hours to sew the skirt on to the bodice (I am really not a fan of gathering!!) and putting in the zip. I hand finished the inside lining, hemmed the skirt and made the sash the morning of the party.

I’m very pleased with how it turned out. I love the fabric and Im happy that a special stash piece got used for an appropriate project. It was just waiting for the right moment!

Thank you to Mr Ooobop! for the ‘action photos’ and lots of lovely birthday wishes to Rhonda x