The SOI Miriam dress and jacket I always knew I wanted

I’ve wanted to make a classic dress suit for as long as I can remember. And I own very, many original vintage patterns that would have been perfect, believe me. But an overriding anticipated disappointment in the result always held me back.
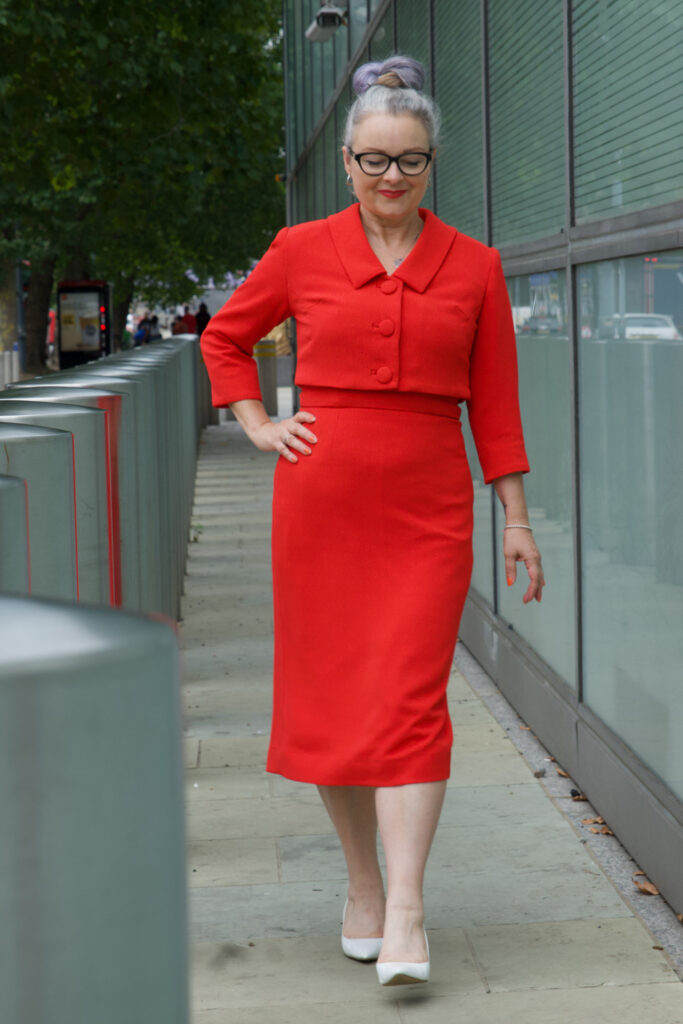
In fact its true to say I’ve altogether strayed away from vintage styles more recently, favouring an urge to be a bit more experimental instead. But I’ve never lost love for the classics. And when Lisa asked if I’d model for Sew Over It’s Vintage Dreaming collection I had to pinch myself. Every single garment of that Ebook is divine but the one look that took my breath away was Lisa in the pale blue polka dot Miriam set and Chantelle in the raspberry linen version. And I wanted it too!
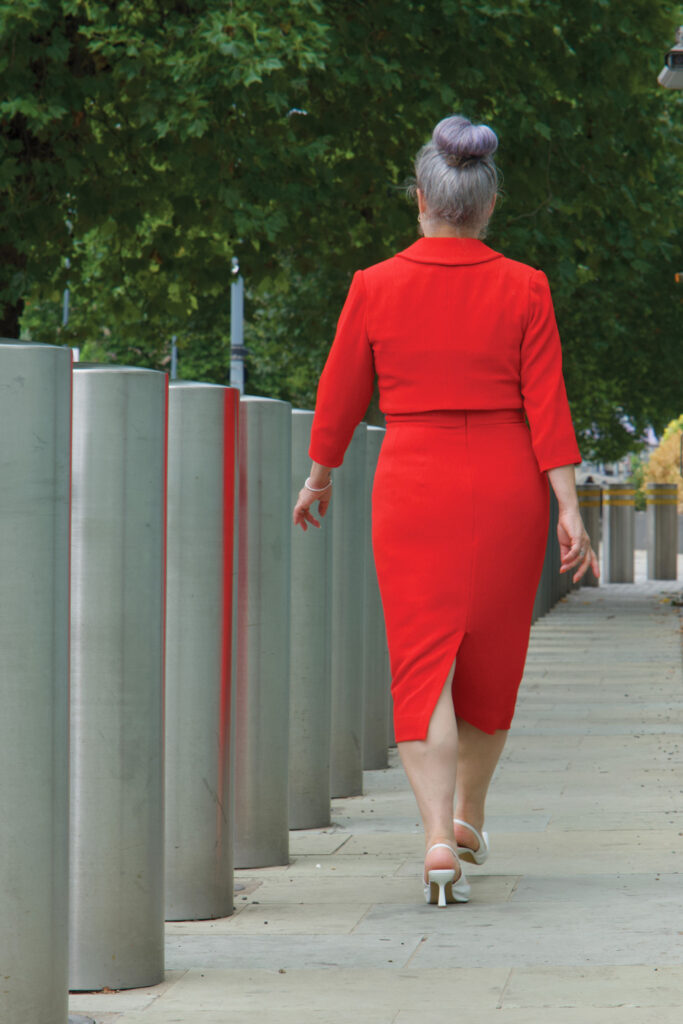
There was something massively nostalgic about Sew Over It making a return to vintage. Because that’s where they were at when I discovered them, when indie pattern companies were brand new and it felt so refreshing to have exciting options outside of ‘the Big 4’ pattern companies, and is exactly the point at which I was keen on sewing all things 50s and 60s. The main benefits of modern vintage-style patterns are the more realistic and modern proportions of the body measurements and also the inclusion of multiple size options so you can grade very easily between 2 or more lines to get a perfect fit. Most of my 1950s patterns are generally an unprinted tissue template for a singular size only. And generally speaking don’t fit straight out of the packet!
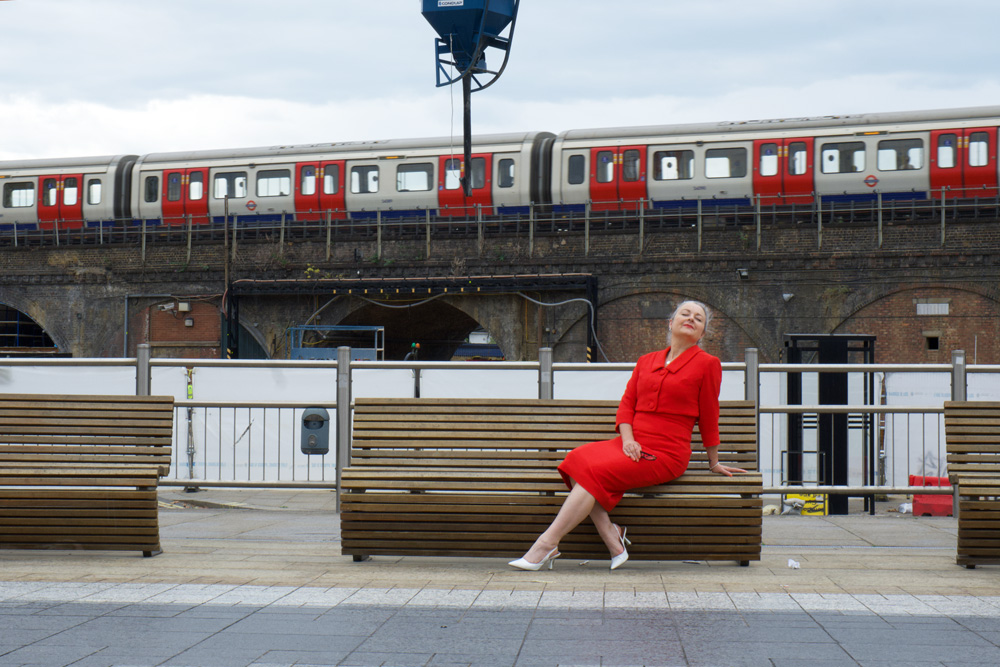
And so it was such a joy to cut a straight size 12 for the Miriam set with no fitting adjustments at all! 

The dress came together so easily and relatively quickly. This is largely due to the simplicity of the design, but also the instructions are very clear and concise. The only step I skipped was for the adjustable straps. I just made sure the straps were exactly in the right place and the right length by pinning and trying on and adjusting … about 15 times before finally sewing in place!
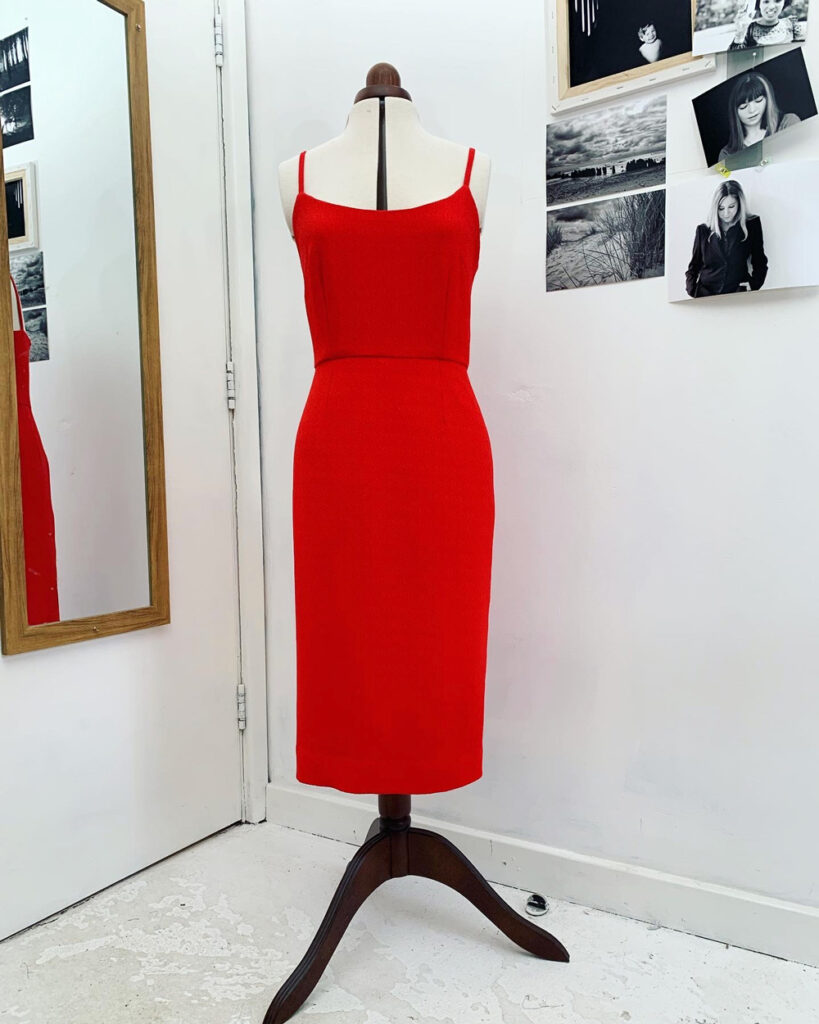
I used a medium weight, red textured crepe from New Crafthouse (always delighted to use deadstock) bought with a voucher I won back in April at the Spring Fling party. Also delighted that I’ve used it up relatively quickly and it’s not languished in stash! I’m trying so hard to create better habits recently regarding my fabric choices, sources and usage. More about that soon.
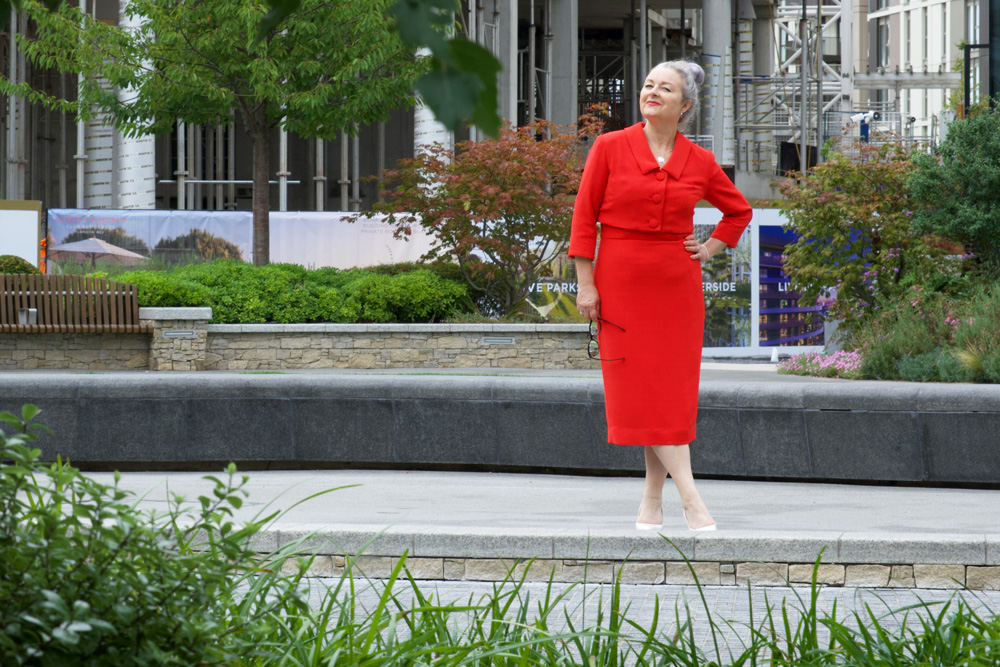
The jacket involved a bit more work. But that was mostly my fault! Although the fabric was great for the dress – it’s got great drape and is very huggy at the same time – I had  a feeling it wasn’t going to have quite enough structure for a jacket so I needed to employ some extra techniques. 

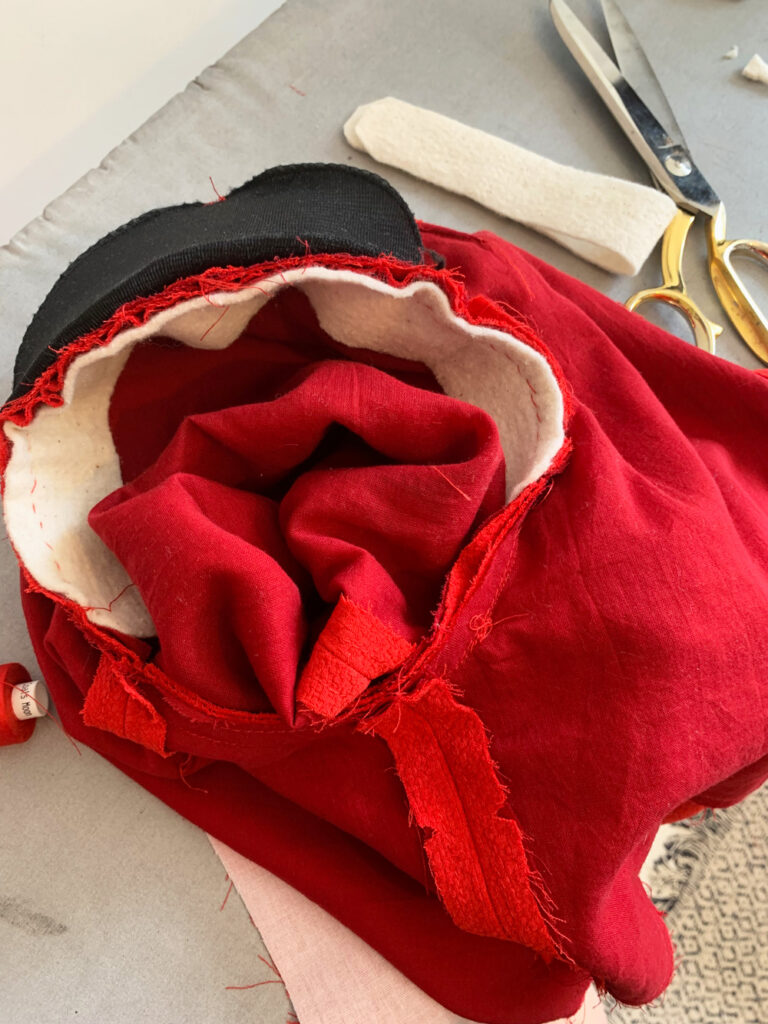
For starters, I underlined all the pieces with a red cotton voile – a great suggestion by SOI. I also padded the shoulders and added some strips of cotton fleece for the sleeve heads. I remembered to take a photo of the inner workings this time. Not quite so pretty though!
I had a horrible feeling that machine buttonholes were going to give me grief. I couldn’t bear to get to ‘almost finished’ stage only to ruin it all with raggedy buttonholes so I set about making old-school bound ones. And boy did I forget quite how faffy they are to do. I trialled some before I did the real ones. Worth it in the long run but I think I near fainted by holding my breath through the entire process. 
Its worth noting the importance of having those welt sections on grain. They will fold better and press straighter and give a much better finish.

And once I’d finished the button holes it made total sense to make covered buttons too. Luckily I had inherited a bag of the button bases and the rubber pressing tool a while back. The size was a little larger than suggested but it worked just fine.

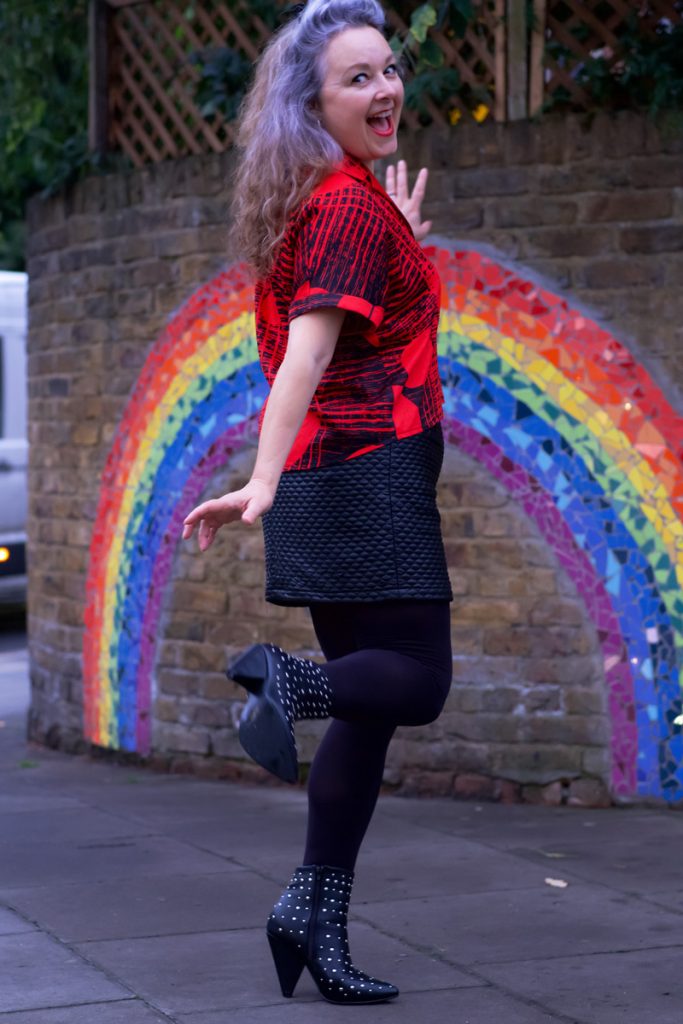
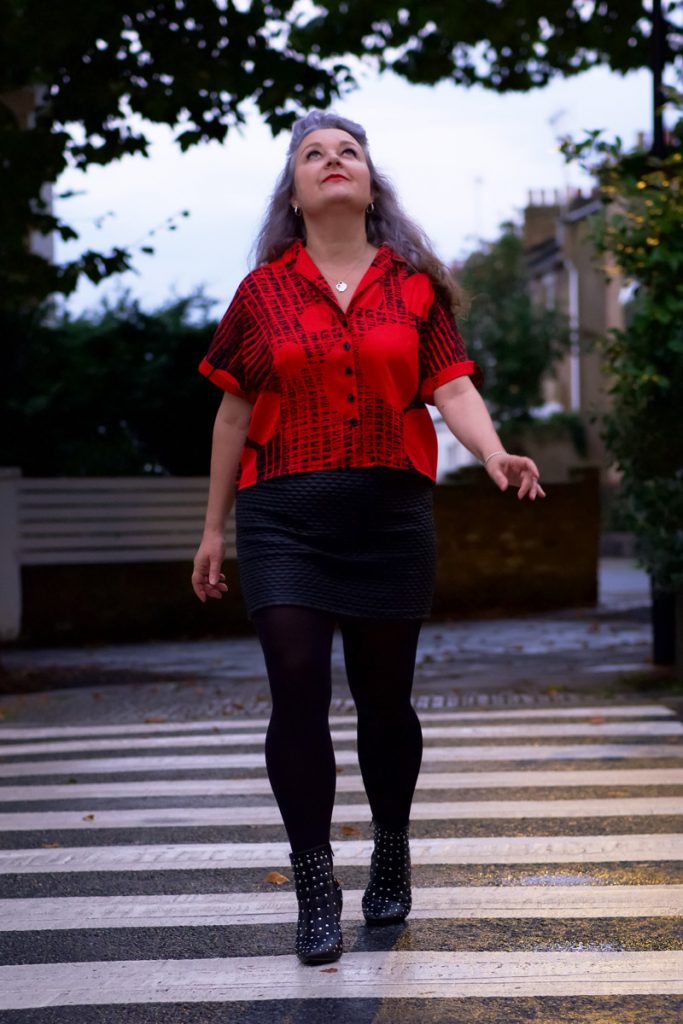
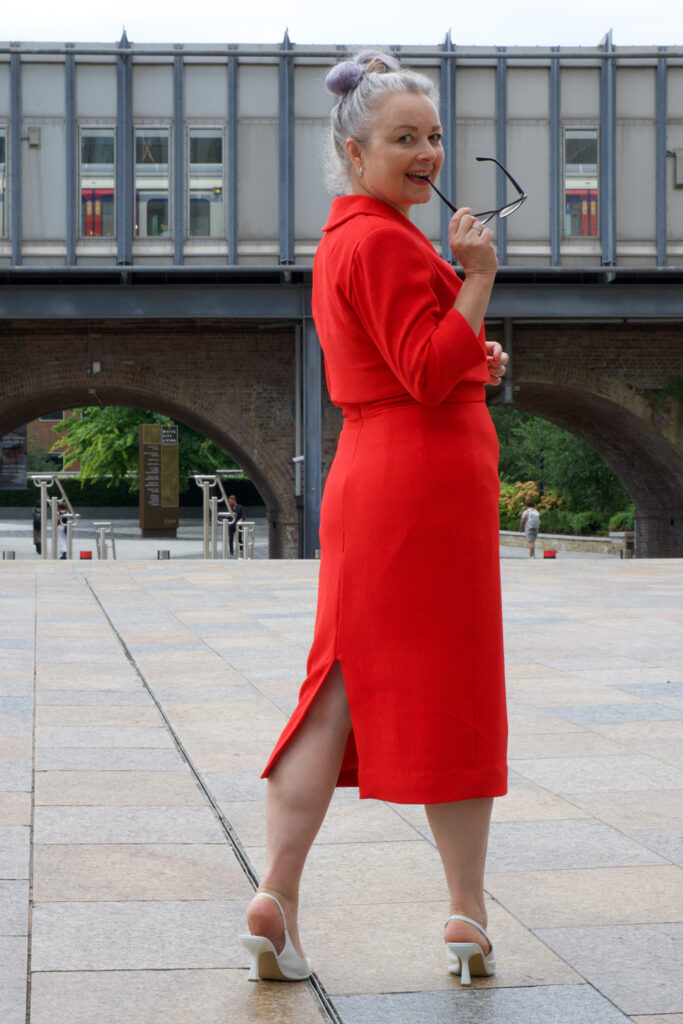
I completed the outfit in the nick of time to wear to my niece’s wedding and was so preoccupied I didn’t get any full length photos so all the thanks to Dan who took the time out to shoot these for me in and around where we work.

I just love how this suit makes me feel: mostly so grown up and properly dressed! It makes me walk tall and fills me with confidence. I got so many lovely comments from passing people, and that added to the feel good factor too! This is already a wardrobe bestie. And most probably will be for years to come.

How I hacked a Frida to make my daisy dress

Waaay back in April, I went to my very first New Crafthouse party. I’d heard of these legendary do’s but I was always too slow to the checkout page. This time round, howevs, I got a heads up and I snapped up a ticket the minute they went on sale.

The theme was Spring Fling… I do love a brief! Kind of narrows down the options of what to make, which is helpful because as you probably know its virtually impossible for a dressmaker not to make something new for a party!

Another good thing is, that because there’s usually a bank of ‘wanna makes’ swimming around in my head, I just have to pause the slideshow and pick a winner!

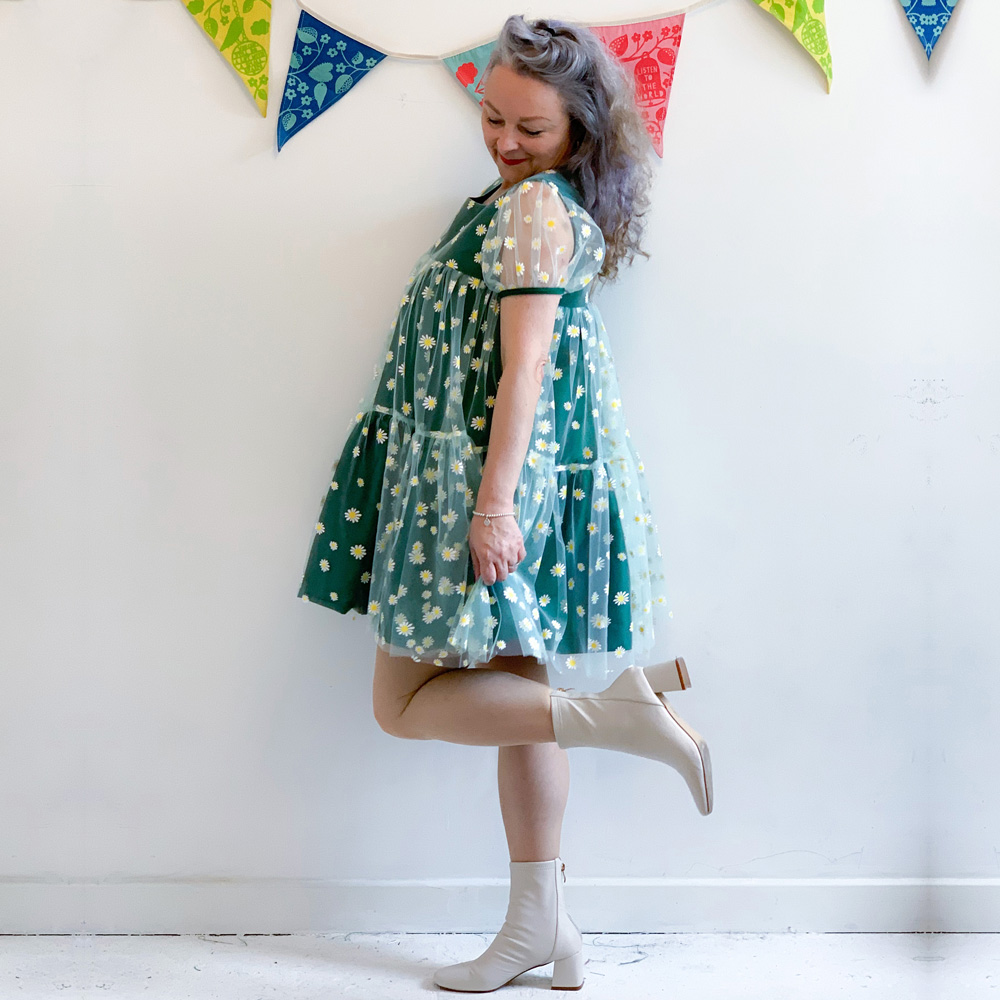
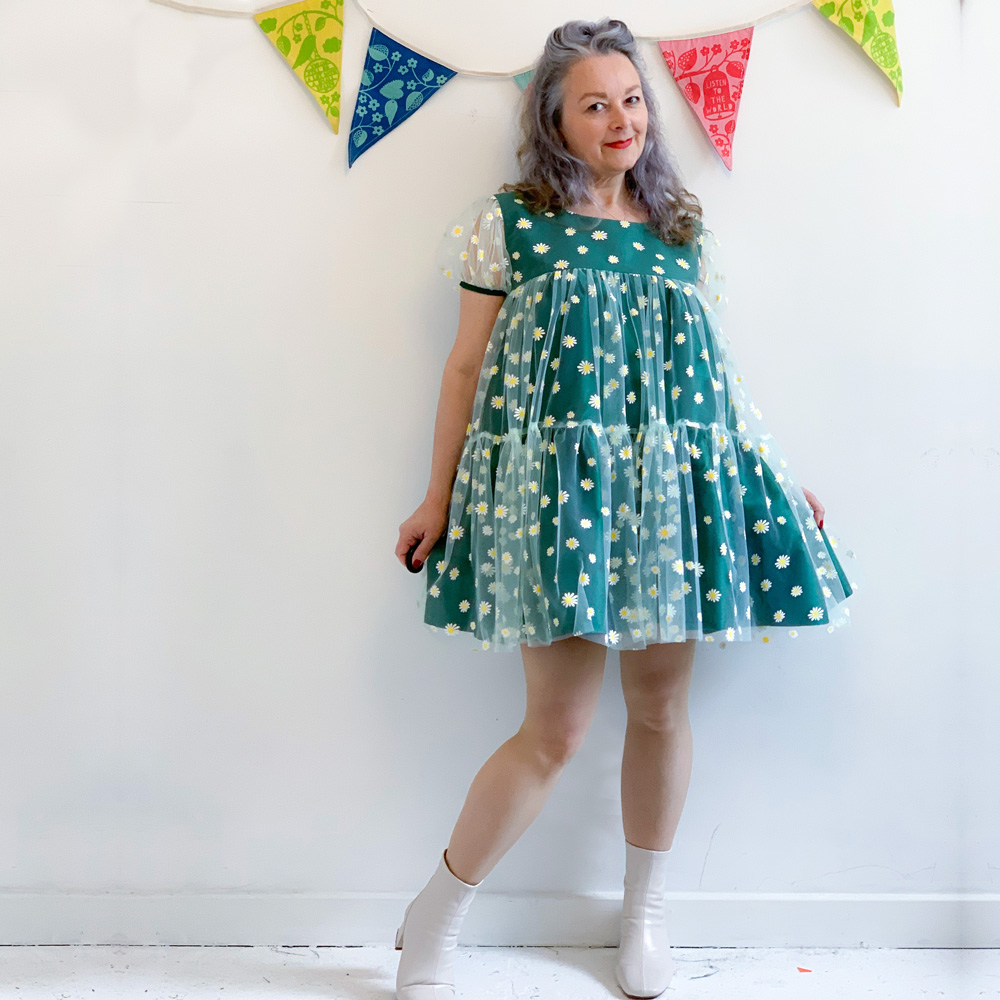
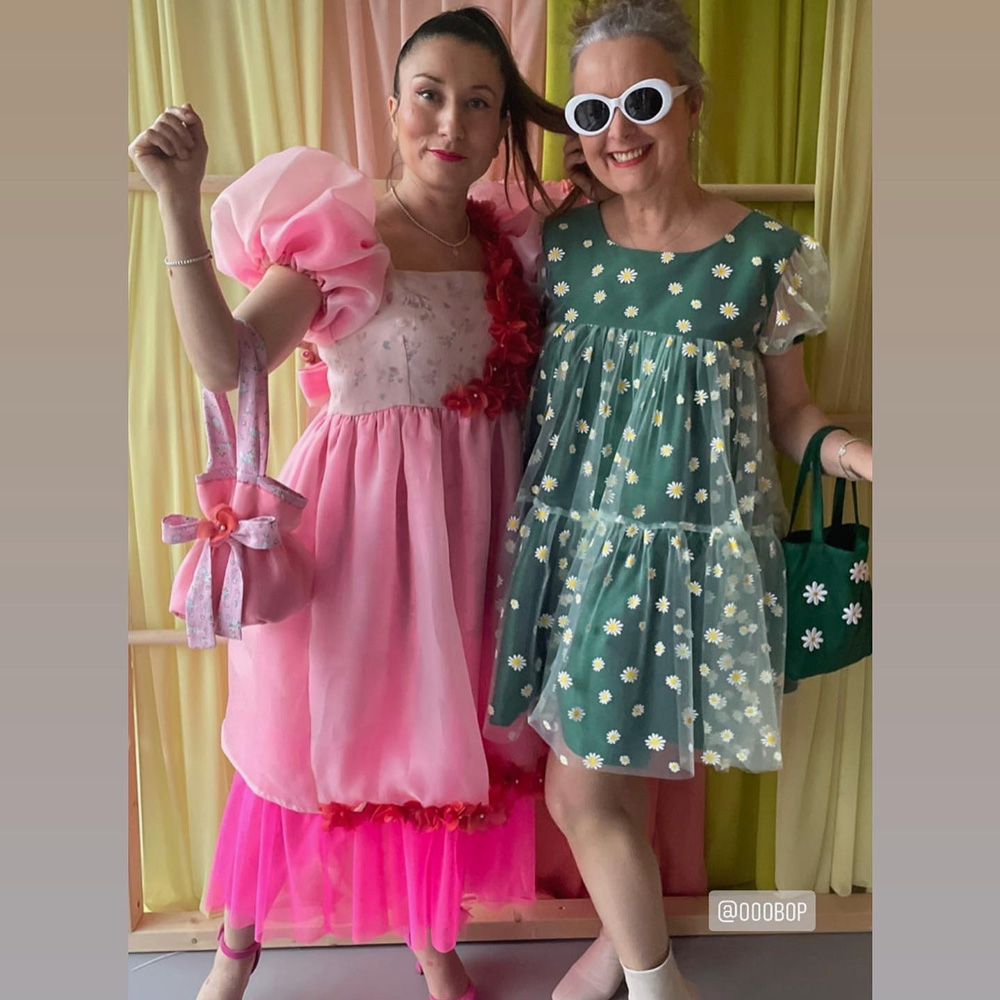
I’d been toying with a Molly Goddard style dress for a while. Not so over the top as that pink Killing Eve number – though, never say never! I guessed pink might be the popular choice for a spring theme and I wanted something a bit different, so I pictured what spring looked like in my local parks and daisies sprung to mind. 

But boy did I set a task for myself. I wanted daisy tulle. It had to be daisies, on tulle and nothing else. And I searched high and low until I finally found it some on Etsy. Its actually a pale green tulle which was a bonus too though it doesn’t really come across as such.

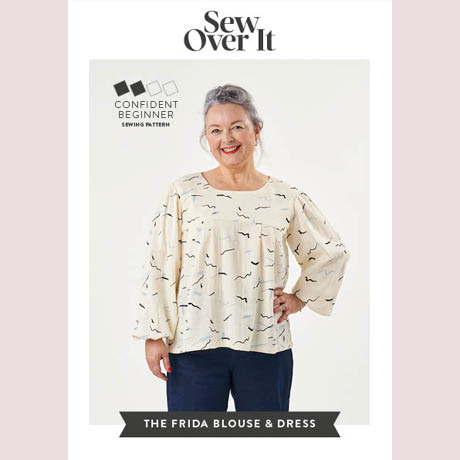
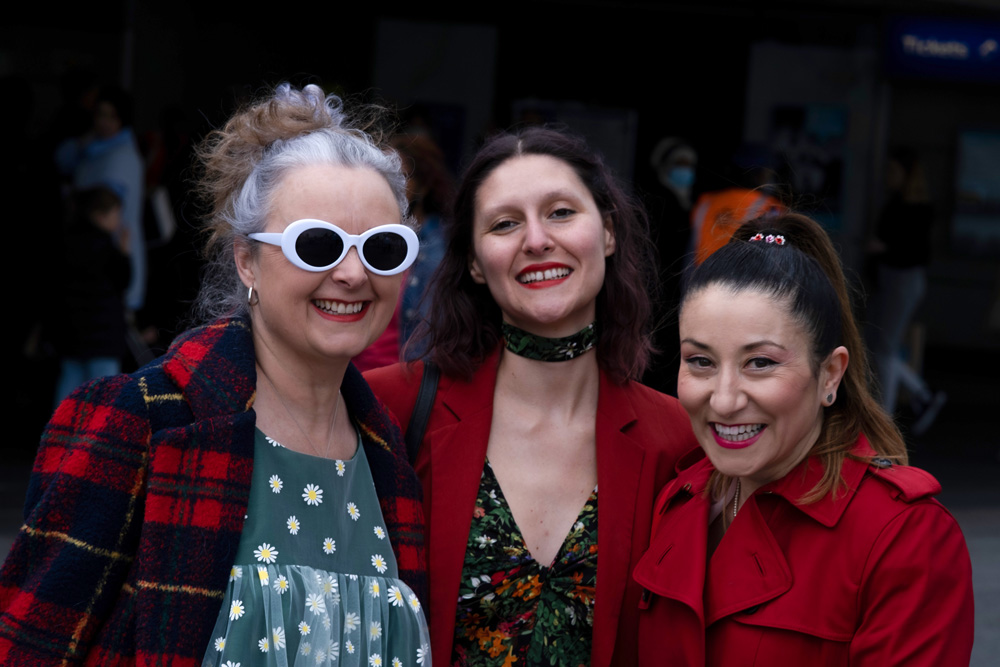
As for the pattern, I knew exactly what I was going to use. The SewOverIt Frida blouse and dress is such a great little pattern with no closures. Zippers and tulle aren’t generally friends so it was a perfect choice and a very simple hack would make my vision happen. And hey… see anyone familiar on the pattern cover?!

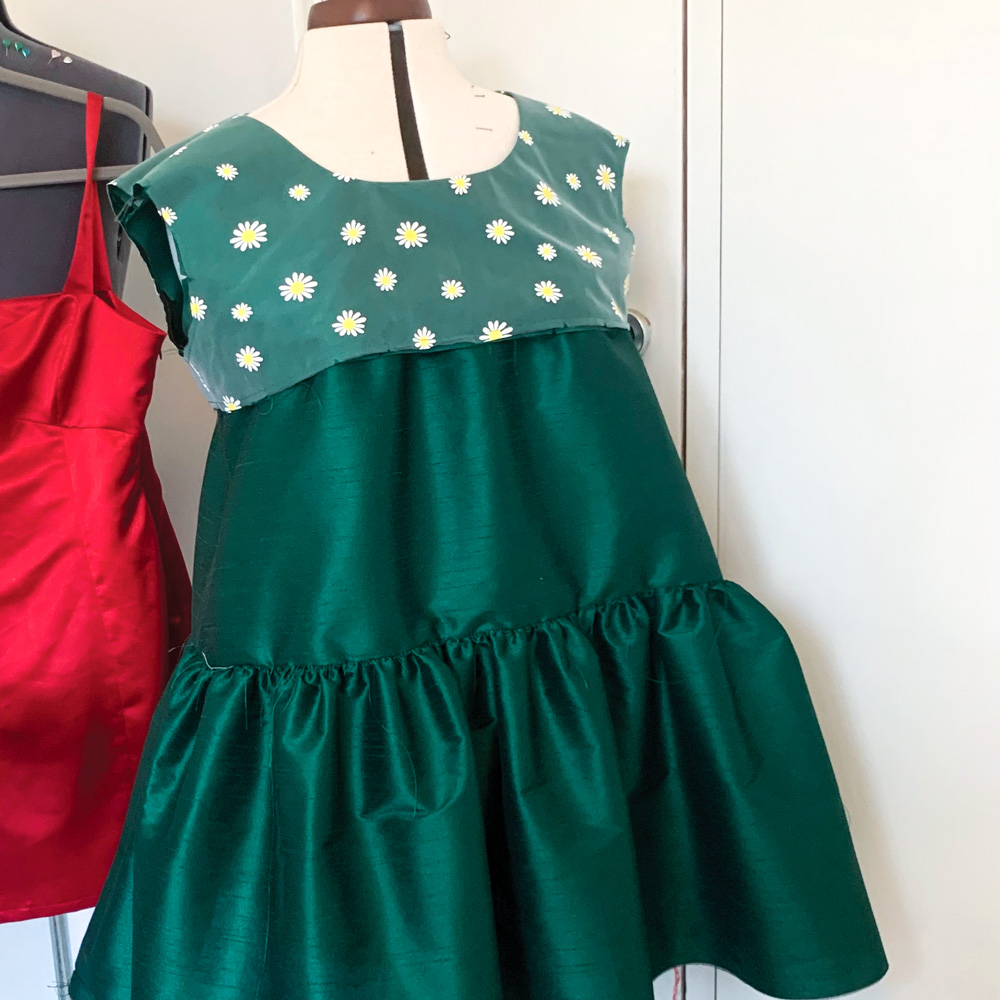
I kept the bodice section pretty much exactly as was, apart from shaving a little off the shoulder, because I  wanted the sleeve puffs to sit on the end of my shoulder point for maximum pooof! I used a green poly taffeta for the underdress because it had great structure and also was a great grassy base for the daisies to sit on. I overlaid the tulle on to the bodice piece to sew as one and I love how the sheen of the taffeta shone through.

I used the longer skirt section of the Frida Dress pattern as the foundation of the under-dress. The top part where it meets the bodice is pleated and I kept that but I split it about half way down and spread that bottom half to end up with a gathered bottom tier. This created much more of a dramatic A-Line silhouette and already the cheeky fun of this little party dress was beginning to make an appearance.

The tulle overlay is simply two gathered rectangles, each to the same depth as their corresponding under layers. The bottom layer was cut twice as long as the upper one and gathered onto the top tier.

For the sleeves,  I took the fuller sleeve pattern piece of the Frida, shortened it and then cut and slashed to spread it really wide. It was a bit trial and error but it worked just right with the first draft. I created some binding from the taffeta to edge the sleeves. I was so happy at this point as there were strong indications that it was evolving exactly as it had taken shape in my head!

Apart from gathering the tulle (one of my least favourite things to do) The process was pretty simple. And I finished it just in time to meet up with Alma and Ilaria and set off for the do!

We had such an amazing time – New Crafthouse is such a lovely space in East London and Hannah and Rosie were awesome hosts. We were greeted at the door with a gin fizz and had immense fun catching up with sewing friends old and new, everyone of them looking incredible in their handmade creations. It blows my mind how much talent there is in our wonderful sewing community.

And guess what! Not only did Ilaria win first prize for her amazing Botticelli meets Molly Goddard dress (we clearly have great minds)… but I won a runners up prize too!

We seriously had no expectations of coming away with prizes. It was so exciting. And we were buzzing all the way home.

Useful Links
Sew Over It Frida Blouse and Dress pattern
The New Crafthouse
Mod Retro Vintage Sunglasses (aff link)

Theres a lot to love about a Libby Shirt

I’ve already had people ask if the fabric I used for this shirt was leftover from my latest sheath dress. I’m clearly set in my colour palette ways!

It isn’t, but its a close contender I found it on a pile of Ankara bundles when I was looking for pyjama fabric. And was pleasantly surprised by the light-weightness of it and of the lovely sheen. The shop owner told me it was cotton satin – I didn’t realise that Ankara prints came in any other weight other than the usual medium/heavy structured cotton. Definitely keeping eyes peeled now for different kinds.

And I did have a plan for a lovely lightweight pair of pjs until I saw all the lovely Libby shirts on Insta and that instantly changed things up. I bought, downloaded the pdf pattern, printed and cracked on with tiling the pages together that same evening.

I’ve only ever made one Sew Over It pattern before – the Joan dress – which Im still in love with. If only I could squeeze myself back into it… It was a tough enough wiggle from the outset!

And because of that, I made sure I was being totally realistic about my choice of size this time. Yes I have been known to cheat myself! But to be fair, it does state on the instruction booklet that “Sew Over It patterns tend to have less ease than other patterns as most of the designs are intended to have a closer fit.”

This time ironically it appears I’ve erred on the bigger size! But it really doesn’t matter as it’s so lovely and cool to wear on a humid day. No touching underarm seams and a slight blouson back which really keeps it all nice and airy.

There was nothing complicated about the construction. Though I took time to make sure all the little circles and notches were clearly marked on my fabric pieces. Especially as far as the collar pieces were concerned. And they fitted together a real treat. The fabric pressed nice and sharp too as you’d expect from a quality cotton and a bit of hot steam. And I marvelled at the results. for some time before carrying on with the rest!

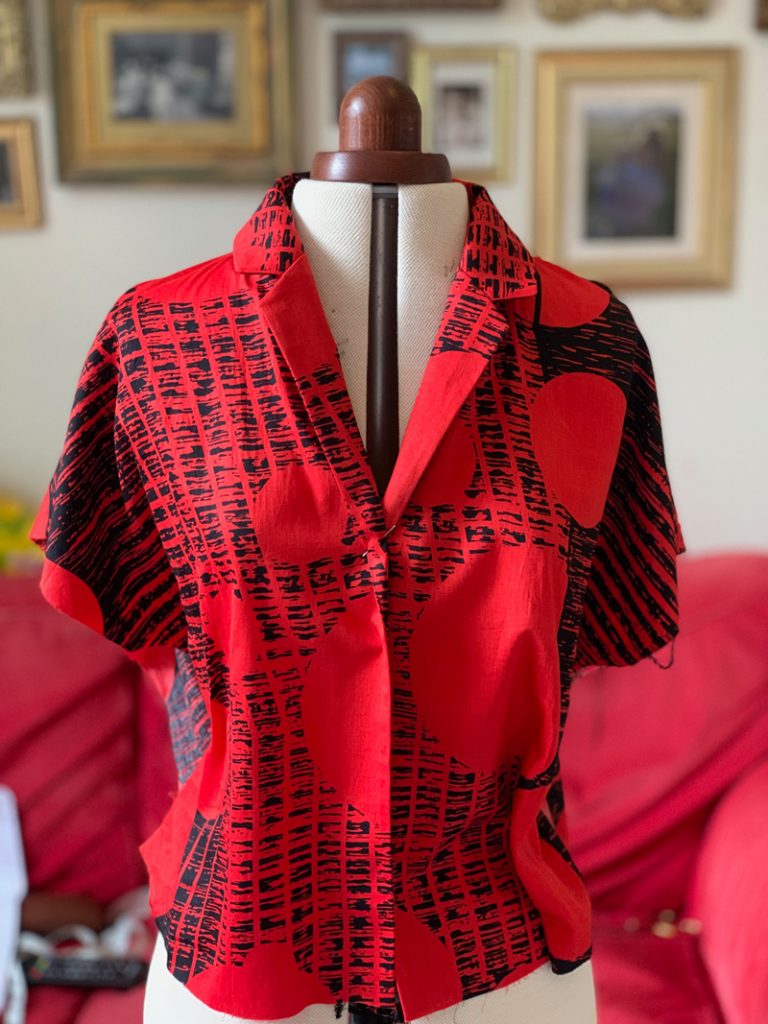
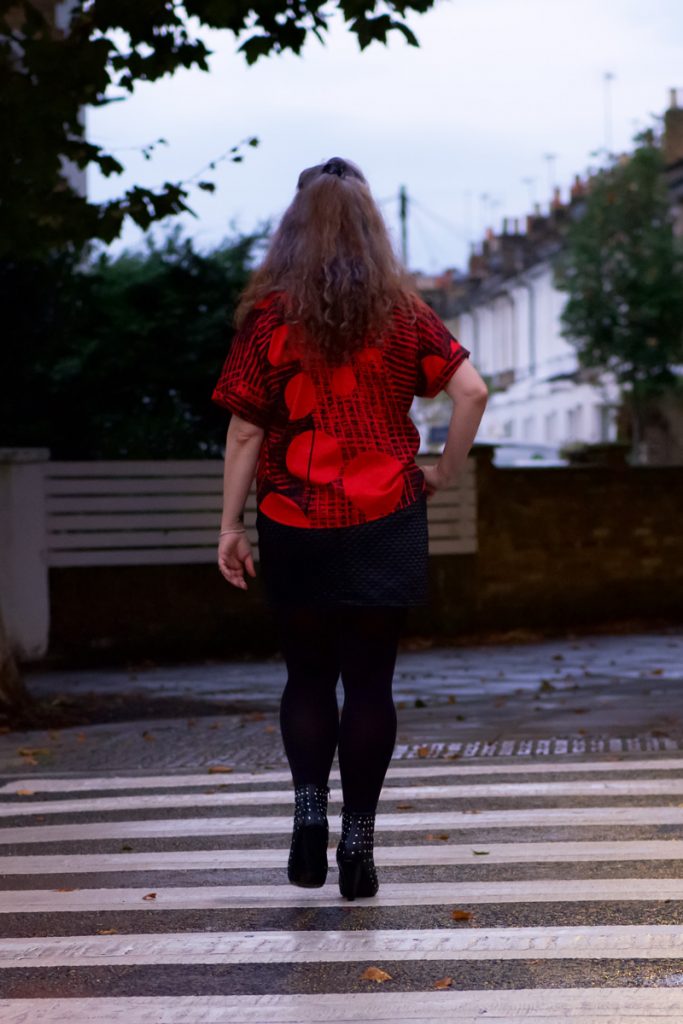
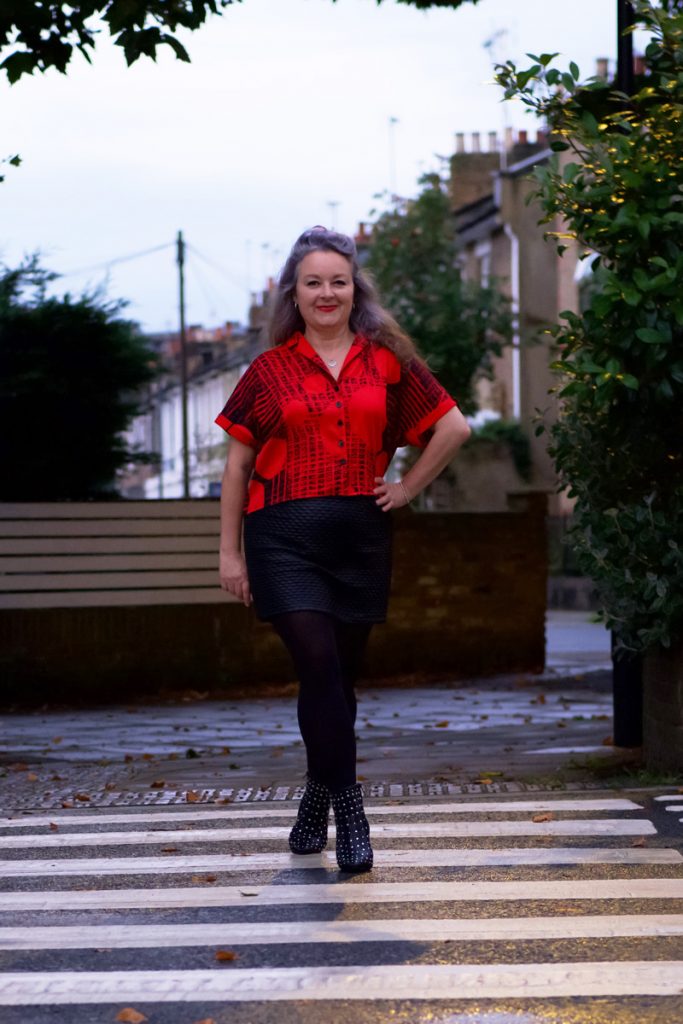
I had just about enough fabric to make this shirt and not an iota of thought was given to pattern matching. It would have been very difficult in any case with the design being so random and all. It was looking to be a nasty mismatch at the centre front with the half circle meeting the full circle but I think I’ve got round that by disturbing the design with some black button holes and buttons. I’ll just keep telling myself that!

This image has an empty alt attribute

I cut the longer length version so that I could make up my mind if the cropped length was going to suit me or not. Before I hemmed, I tried it on and cropped was definitely the way forward so I just overlaid the front pattern piece onto the shirt and trimmed to the line. I did however go back to check If there was one back piece for both versions as I wasn’t sure if it was quite right for the back to stay longer. There isn’t and it doesn’t matter. I’d just assumed the back would be cropped too.

I love how the finishes are considered in the instructions for each seam. It comes together so neatly that you are prompted to stand back and admire your progress at each stage. The cuffs in particular are a great way to bind the sleeve hems. And the facings do a great job of housing the overlocked hemline at the centre fronts too.

I would definitely make this shirt again, perhaps in a slightly more draping fabric next time. Maybe a viscose or liquid-like silk satin for a posher version!

I love the style of this shirt, the cropped length option and the cut-on sleeves. Such a timeless vintage vibe. And a very easy fit.

All I’ve got to do is make some bottoms to wear with them, haha. I’m forever in need of simple black skirts or shorts but I just can’t bear to make something that boring. Needs must though!

Photography by Daniel James Photographic

Thanks to Dan for taking these shots under really difficult circumstances. Nagging wife and failing light is never a winning combination. But I love them!

Joan dress: not so little, not so jumpy

Joan dress front view

When I first heard of the Joan Dress, by Sew Over It, the first thing that entered my head was a nursery rhyme I remembered as a child, from the Ladybird book of Nursery Rhymes. It went like this:

Here am I
Little jumping Joan
When nobody’s with me
I’m all alone

Not particular ground-breaking stuff but that poem coupled with this awesomely terrifying illustration has stayed with me ever since!

Little Jumping Joan

Clearly I wasn’t purely channelling Joan from Madmen !

I’ve been after a classic dress for some time and I do believe that this one totally fits the bill whilst still fuelling my lust for vintage.  I used a green wool crepe, underlined with a silk organza and fully lined with a gold lining, all from stash. I don’t usually happen to keep a supply of such luxurious fabrics, moreover it was reserved for another dress which I am still a bit too scared to attempt! But it has been hanging along for too long now and in any case saved me a trip to the shops!

The leaf-buckle belt I made is just the icing on the cake (whilst disguising the fractional misalignment of darts… shhh!):

close up of leaf buckle belt

Now I will let you into a little not-so-secret, secret. Fully underlining a dress (excepting the sleeves), especially if you’ve limited the ease, means you can’t jump, you can barely sit, nor eat, forget picking up anything you’ve just dropped or even attempting to zip up the last couple of inches… oh and sneezing is a no no for sure! Needless to say this is the first time and most probably the last time I will do this, unless of course I have no reason to attempt the latter.

Joan’s first outing was to the Foldline‘s launch party at Sew Over It, Islington where I met the lovely Lisa in person. Such a gorgeous shop and such a talented lady. I explained the issues I had created for myself and Lisa politely explained that silk organza is used in corsetry for just those holdy-in kind of reasons! So I had kind of corsetted my whole body! There were so many yummy snacks on the table and I just daren’t!

Joan Dress profile

There was, however, a method in my madness. I had made a dress in wool crepe once before – Vogue V8280 in fact – and I had only lined the skirt in a thin silk lining. Although the wool crepe fabric was good quality it creased like Billy-o every time I sat down. I also found it a bit too drapey on it’s own to hold any structure for a pencil skirt. And then I had a silk organza lightbulb moment.

I still stand by my reasonings for underlining the skirt. It worked and looks far better than the other one did but I would definitely need more ease in the top half if I were ever to underline a bodice again!

The whole process of underlining wasn’t as daunting as I’d previously thought. In fact I quite enjoyed it. I traced the pattern onto the silk organza pieces using an air erasable pen. The funny thing is, I did the tracing on one evening, forgetting the magic qualities of said pen and put the pieces to one side to be continued the following evening. Well you can guess the rest… doh!

air erasable pen

So after I’d retraced the pieces, I pinned and then basted the pieces to the wool crepe. Strangely satisfying! I also basted the darts which made for easy sewing of–!

underlining with silk organza

Basting done, I cut out the main fabric and sewed all the pieces as per instructions, which incidentally were very clear and concise.

I do so love the little neck-tie detail, making it all things Joanie. The little collar effect at the back of the neck too. I especially like how the wool crepe behaved for this. It was definitely the right fabric for the job. I am also in love with my zipper insertion! Nowadays I don’t even attempt an invisible zipper without my invisible zipper foot. Can you see my zipper? Can you? No? Oh jolly good! Boy does that please my tiny mind!!

Joan Dress back view

You may also notice that I made a pleat at the back rather than a slit. I’m not very ladylike when it comes to an open vent and nine times out of ten I will rip it. Nothing to do with me not being arsed to fathom the instructions at all… honest, guv!! 😉

Well, I’m guessing there may be a couple of comments regarding the shoes. Bought by Mr O of course. Another of his amazing, jealousy-fuelling qualities is that he adores shoe-shopping… for me! And he gets it right all the time. They are from Iron Fist and are the Sugar Hiccup, teal and black with glitter skull. I can’t actually walk in them very far, it may not surprise you to know. But they look darned good and they are a very lucky match for Joan!

Iron Fist shoes

And no, of course I didn’t manage to reach that leaf!

Leaf buckle fabric belt and how I made it

leaf buckle belt

One of the many selling points of a vintage-style dress is the addition of a matching or co-ordinated fabric belt with a cute buckle. But as much as I love the look, I’ve always gone for the belt-free view just to avoid the extra work. What a shirker!

Until now that is. Until I made the Sew Over It Joan Dress. Apologies up front for the lack of said Joan shots but Mr O has done a bunk again and left me void of quality photography services. She’s all class is Joan, and no selfie is going to cut it, I’m afraid. Hoping to nab some shots in the next few days, though.

I found this cute little buckle, at my first visit to the Hammersmith Vintage Fair a few years ago. I’m not entirely sure how old it is or what it’s made of but it’s a weighty metal, inlayed with tiny turquoise and teal mosaic pieces. Shamefully I don’t even know what kind of leaf it is. Sycamore, grape vine? Any Girl Guides out there? It’s not cannabis thank goodness. That would be far too tacky!

The eureka moment to use it came in tandem with another when I remembered the lovely jade green wool crepe I’d squirrelled away for a vintage Hardy Amies number that I (ahem) put into Karen’s (DidYouMakeThat) Sewlution Jar just as many moons ago. So what a result. A pattern gifted by the lovely Alex at Sew Over It, perfect fabric in stash plus the prize jewel of a perfectly coordinated buckle!

So here’s how I made it. . .

Materials:

Fabric (waist measurement plus 4 inches x width to fit in buckle, plus seam allowance)

A length of Petersham waistband stiffener, 1 inch shy of fabric length and width to match

Velcro

matching thread.


Instructions:

With right sides together, pin fabric along the length, marking a gap either side of the centre point for turning. Sew along length with a regular stitch and then change to a longer length stitch or basting stitch for the gap:

pin fabric along length

Trim seam but leave the full allowance along the basted section:

trim seam allowance

Roll the seam from the edge to the centre of the tube and press the seams open:

press seam open

Unpick the central basting stitches to open the gap:

unpick stitching at gap

Turn the tube right side out, pulling each end through the central gap. You can do this by attaching a safety pin at one end and pulling through or if you don’t have one already, I wholly advise you to get one of these loop-turners! You just clip one open end and push the fabric over itself, like so:

loop turner

Give a good press, making sure that seam stays open and pressing the gap closed too.


give a good press

Insert the Petersham belt stiffener by attaching a large safety pin to one end and feeding through the central opening to one end. Repeat for the other end.

insert petersham belt stiffener

Ladder stitch the central and end openings closed and give another press:

ladder stitch

Top stitch on the right side. I find the stitch-in-the-ditch foot works a treat for this:

stitch in the ditch foot

Take a moment to admire said top-stitching. It’s the little things, you know! 😉

topstitching

Fold over and hand sew one end to the buckle. All buckles differ but same in principle:

attach one end to buckle

The next step is totally unsympathetic to any vintage techniques but I make no apologies because it works for me. I hand-sewed velcro to the other end to make it adjustable:

attach velcro

It’s foresight you see. There’ll be a few Christmas dinners before the year is out and I’m erring on the side of caution. Should have been a Girl Guide!

Hope you found this tutorial of some use I’ll be back soon to show how it in situ, on Joan!

TTFN x