Handmade Secret Santa pressies

gold bag on the railingsWhen I saw this bag in December’s Burda Style magazine, I just knew it was the one I’d been storing in my head for over a year! I’d seen a very similar 1940s Vogue pattern floating around on the web, time and again but never for sale, at least not with a reasonable sale ticket!

vogue bag hat pattern v9837
Source: http://vintagepatterns.wikia.com/wiki/Vogue_9837

I’d almost resigned to self-draft my own but couldn’t quite get my head around the order of sewing. Didn’t really try hard enough tbh! But Burda saved the day yet again with another simple well-drafted design.

burda pouch bag
Source: Burda Style magazine December 2014

And so when I found out I was to make a Secret Santa pressie for the adorable vintage-wearing Emmie Ink Fairy, it was a given!

The instructions suggested leather, which I did originally go looking for. And believe it or not there is such a great colour choice as well in the Goldhawk Rd! But even after a good rummage, I couldn’t find a gold piece big enough to fit the pieces. I thought two pieces of gold lamb was a bit excessive and then gave up on leather altogether when I couldn’t remember if Emmie was a veggie/vegan. That might have gone down like a lead flipper!

As always it was A1 Fabrics that presented me with a better fabric solution: some lovely soft, gold ‘pleather’. Perfect!
It was an education to work with. A leather needle made light work but boy did we have a fight to press the stuff! Didn’t really think that through properly.

Gold pouch bag

Pleather is plastic, fundamentally, and will melt if it comes into direct contact with a hot iron. I’m not that daft. I did use some parchment paper as a pressing cloth. But it just boinged back the minute I stopped pressing. The heat was being retained and making it too pliable. So I grabbed the nearest ‘clapper’ I could find, in the shape of a heavy book, to slap down on the fabric once I lifted the iron off. It did the job in cooling down the fabric quicker and so holding the press a bit better. Not nearly as well as a woven fabric would have pressed but better than a poke in the eye for sure!

gold pouch bag

Burda’s instructions stopped at a facing but I wanted neater than that, so I made a lining to attach to the bottom of the facing, and of course included an ooobop label! Not such a secret now but I liked it as a finishing touch!

inside gold pouch bag

I stupidly didn’t get a picture of Emmie with it adorning her wrist but it didn’t look out of place with her beautiful pink sparkly dress.

We were at a lovely Christmassy do hosted by the BHL girls. So honoured to be part of the evening with so many wonderfully familiar faces.

We dined and beered at a local-to-me Polish restaurant called Patio. I seriously don’t know how those girls catered so brilliantly for over 30 of us with so many different menu choices. They were amazing.

And look what some gorgeous and not-so-secret Santa made for me!

quilted cup and saucer

I seriously couldn’t believe that someone could have made this quilted cup and saucer but when I realised it was the uber talented Rachel Pinheiro, it all made blinding sense!!

What’s not to love about the colours, the french men in their Breton tops, the moustaches and the candy stripes? Perfect to keep all my sewing notions from rolling around the table while I’m sewing and also for sticking pins and needles in as I go.

Earlier in the day I had been to a work Christmas lunch. Yes I know, 2 Christmas do’s in one day. And I was still standing! One of my secret-santa friends bought me this gorgeous sewing pattern. She is so bloody clever and so thoughtful! I can totally see myself in this dress already!

Vogue V2410 vintage dress pattern

I consider myself truly spoilt. Not just with do’s and gifts but with the plethora of amazing friends that bring me so much joy and make me laugh so much. That’s got to be the best part of any time of the year.

Have you made any gifts this year or is it all just too much?


ooobop! review: Burda Style December 2014

Burda Style Magazine December 2014 issue
Over the last few months I’ve been having a spot of bother getting a copy of my favourite mag from my local WHSmiths. Well from any Smiths actually. They are getting slack in their orders of big quantities or sometimes any orders at all!

But last month and this month, I decided to order it from an online newsagent and I think this is the way forward for me. It costs an extra £1.60 for post but I get notification of it’s arrival date and it is delivered within 2 days. I love the sound of the thud of the post landing on the mat and I certainly don’t miss the queues to the awful automated cash desks at Smiths!!

So here we are. Although not overly festive. But that’s ok.

The opening section, although very monochrome displays some lovely structure with a touch of shimmer.

Burdastyle December 2014 art deco section

A: Described as a long blazer but I think more a classy occasional coat. I love the asymmetry and I’ve seen some gorgeous silk-like viscose fabric that would work amazingly well. Could really do with one of these. I don’t have any party outer-layers! Burda suggests it could be a mini dress too.

B: I didn’t join the ‘peplum gang’ when they first got fashionable. But I might be persuaded by this one. I really line the clean lines of this top. It’s got a midriff that has sold me and I like the slit at the neckline.

C: A classic sparkly sequin jacket. But not for me I’m afraid. Too shapeless. Too scratchy. And I can just imagine all the cat fluff that would get stuck around the sequins!

D: Quite like this dress. Very classic and very flattering. It’s actually an extension of top B. But I would question that choice of fabric. Impossible to pattern match and so the optical illusion draws attention to a pokey out belly even when the model doubtfully has one!

E: Probably not that clear from this little pic but this is a sparkly turtle neck top with blouson sleeves and a lovely wide cuff. Love the silhouette and for me it’s a perfect work to night out top. There’s a tute to help the process. This one’s on the list!

F: There’s that peplum again! I’m not that enamoured with it but I like the idea of mashing some interesting fabrics together: Pinstripe suiting, lace and embroidered something!

G: This is a great skirt. The fabric choice is stunning. Graphic and structured. You can’t really see the detail but involves a hip yoke and a deep pleat at the centre front.

H: This outfit isn’t my thing. I don’t like the silhouette. I don’t do culottes or drawstring waists. Not on the list!

I: This lacy top looks so pretty in the picture. You’d never be sold by the line drawing. It looks really wide and strange but the draping effect is a winner.

The next section gets some red in with some festive flair!

There’s some cute little girls garments here but only up to age 10. LMO is 10 but wearing age 14 clothes so as much as I’d like to make her coat B, I’ll have to sort my grading skills out or just admire them on the page.

Burda december 2014 festive flair

A: Lovely simple dress with a structured skirt and a petticoat underneath. None too girly but still with a pretty fitted silhouette.

B: Double breasted child’s coat with cute peter pan collar. Sewn up in top notch wool it is truly a classic forever coat. Well at least the child grows out of it! I think I like the grown up dress too. Love the simplicity, the red, the deep pleat and the neckline. But the sleeves are worrying me. They look kind of too big at the top.

C: A raglan blouse (or peasant top in my book!) and an extended version as a dress. Like both. And they would be very simple to make for presents. Don’t have to be too precise with the sizing either.

D: Scarf blouse and skirt with ties says it all. Too much flounce for me. They are both made in crepe too. Maybe that’s what is putting me off asides from the dipped pink and coral combo all clingy like that. Proper girly Christmas wrapping!

E: But just in case that scarf business appeals, here’s another variation on a dress with longer ties to tie in two places. Genius. But not on the list!

F: I think this is the same little girls dress as A but without sleeves. I don’t mind mums semi fitted brocade number but it does look a tad mumsy at that length to be honest.

G: They lost me at ‘loose cut’! And drawstring!

H: Boxy jackets always look good on children! The simplicity of the style can make way for some statement fabric.

A departure from girly to freestyle. Some very interesting fabric combos. And I like that.

Burdastyle December 2014 Free Style

 A: Hopefully you can just about make out the giant underbust fringe! It’s a maxi top sewn in a crushed jersey knit with an asymmetrical draped collar. I don’t wear strides but if ever I did I may have to pair up with one of these. Just because!

B: This is indeed a master piece! Military made beautiful. Slightly fitted wool coat with trumpet sleeves, asymmetric collar and buttoning. And that gorgeous design you can see up one side is appliquéd lace no less. I’m still revelling in my coat from February but I can totes see myself in this. Maybe next year!

C: Described as a bell skirt. Nothing much to see here but some lovely overlaid fabric and trim has planted some seeds for sure.

D: Gotta love a cape. Proper sturdy one too. I do want a cape but not this one with its belts and panels and epaulettes. It looks a bit overly involved for me. Don’t dislike it though.

E: There’s that top again. Same as E in the first section but in a totally different fabric. Making it more jumper than blouse for a more casual approach. You wont be able to see from the little pic but the seams are ‘outwardly open’! Why? Imagine how irritating when everyone and their aunt asks if your top is inside out!

F: In interesting patched shirt using patched stretch jersey, stretch faux leather and wool. You could use any kind of combo but I’m finding this all a bit too much. I do very much like the leathery sleeves though. The skirt looks more interesting than the pencil skirt it is but even though it is relatively straight I think that top needs to be worn with a much less interfering bottom half!

G: Pretty sure this is repeated from the festive section but I love how much more retro it appears with a shorter hemline.

H: Tube dress with rolled collar in a stretch knit lace. Great on the right bod. But not on mine!

I: I like this dress. Lovely defined bodice and flouncy skirt in an overlaid lace tulle. Sold on the colour too. Eliminates girly girly and makes it more day time. I can’t decide whether I like the sporty grosgrain straps or not. Actually I do!

J: I’ve been thinking of a poncho. Not like the one my mum made me wear in the 70s but something understated like this one. In truth I’m being lazy so as not to have to get involved in a cape! Its just a rectangle with minimal sewing, yay!

Burda’s designer pattern this month comes with a nod to Jean-Charles de Castelbajac. I love these little insights into the lives of designers. JC professes to be inspired by love andcuriosity. I like that! Just as much as I like this straight cut mini-dress with its massive pocket details and topstitched standing collar. burda december 2014 JC de castelbajac dress

I’ve made pj bottoms for 3 other members of my family but never for myself. It’s just occurred to me that I’ve got the most raggedy selection of nightwear and that things must change. Here’s some pretty things and one seriously crazy pair of pj bottoms!

Burda december 2014 nightwear

 A: Cutesy bustier and French knicker set. Piping, ruffles the lot!

B: Isn’t the idea of a boyfriend shirt that you just nick one off your boyfriend? I’m not sure I can afford to invest that much time into making a proper nightshirt. Piped collar, inverted back pleat, button placket, breast pocket with embroidered monogram and inseam pockets too!

C: Lovely little ballerina slippers. Could be a lovely little Christmas present perhaps.

D&E: A traditional set of pjs. What’s not to like? Love the cool crisp blue.

F: This is a knitted coat and I want it! I don’t want to knit it though. I’d be bored of it before I finished it, I’m that slow. But I’m sure someone out there would love to whip this up.

G: And theres those crazy palazzo trouser pjs! Can’t do those. I’d get myself in a pickle for sure.

H: Camisole and French knickers. Now you’re talking. Maybe this is my Christmas present to me!

I: This nightdress is pretty too. Ruffles top and bottom are a bit cake-like for me but I like the elasticated empire line.

As is traditional, it’s the plus fashions that bring the party to the fore.

Burda December 2014 plus fashion

A: Long jacket and pencil skirt. A classy pairing. The jacket comes with an optional belt but I’d leave that out unless you want the dressing gown look!

B: Low cut V-neck tunic top. I love the contrasting black band around the neckline. Very feminine and perfect with pencils and skinnies.

C: Bit odd this ‘volant’ tunic. Burda’s word not mine! Longer at the back than the front with ruffly bits. Not really my cup of tea.

D: Described as a peplum dress but someone more sophisticated than that I feel by the way that the centre point extends. Very jewel-like indeed. I’m not keen on the colours but greens and blues would do it for me. Or blacks and reds! A lot of precision sewing though. Only for the more patient among us!

E: Ah! There’s that long jacket with the belt. See.

F: Can’t make my mind up about this skirt. Its fundamentally a pencil with satin bands that run down the back. Apparently they make the bottom look slimmer. Are big butts out now then?

G: In the right drapey material this tunic dress would be gorgeous. I’d prefer not to look like a galaxy but I do like the contrast of the black bands and a busy print.

H: This colour-blocked peplum blouse is a no from me. Too much like hard work. Too much going on in such a small space. But I bet somewhere out there, there is a quilter who is itching to get going on it!!

Well that just about wraps things up. I hope you enjoyed the sneak peek. I failed in every way to make this a shorter exercise but no regrets. I thoroughly enjoyed spending the time to look closer at each garment. And of course it always makes for a great record to come back to.

Enjoy the rest of your weekend x


Burda Brigitte Blouse

First I must apologise for those who have had issues trying to comment on my blog over the last week or so. I won’t bore you with the tecchie issues but suffice to say all is now good at Ooobop HQ! (touch wood!) Thanks for bearing with.

It feels so good to be able to write a post. I knew how much this blog meant to me but didn’t realise quite how much. I found out quick enough when I thought I’d lost nearly 2.5 years of work! I’ve been such a bloomin’ grumpy pants all week, Mr O will tell you for nothing!

I feel like I should be making a bit more of a dramatic re-entrance, but I’m afraid we’ll just have to make do with a humble gingham peasant blouse.

burda gingham boatneck blouse

It’s a very nice gingham peasant blouse though. Care of Burda’s June 2011 edition Mag. It’s also available for download here where it’s featured in a sheer fabric.

I’ve made three sleeveless ones before but this one has long sleeves and no elastic. And it presented a fine oopportunity to create some bias gingham binding around the neckline and cuffs which is always lovely!

burda gingham peasant blouseThe fabric was sold to me as Egyptian cotton, which I had no reason to dispute. It is smooth and cool to the touch and feels like fine quality. But the pyromaniac in me is compelled to do a burn test, always. And the little black crumbly ash that resulted, confirmed the fibres as a poly blend, doh! Win some lose some. Should’ve sniffed a rat at £5.99 really!

But not a worry as it still feels nice against my skin and it’s not snug on the pits so remains a good choice for a warm summer’s day or an office with failed air-con.

The instructions suggested a gathered hem into another bias band but I was nervous about too much poof around my middle and given that I almost always tuck in my tops I just did a standard hem. But, note to self, I didn’t increase the length enough to compensate, and with one wave across the street, it comes untucked, whether I’ve tucked it in my pants or not!

burda gingham peasant blouse

It’s very quick to make if you can even up your gathers quickly. I faffed a bit too much with my gathers as usual, but it still got completed in an evening.

I love the raglan sleeves and the boatneck. So easy to wear. Great with a pencil and equally a circle skirt. And the plan is to make some capri pants one day, just like Burda’s styling, to come somewhere close to that retro Brigitte look.

burda gingham peasant blouse

Peasant blouse: Burda pattern, handmade by ooobop
Skirt: self-drafted & handmade by ooobop
Belt: H&M
Shoes: Rocket Originals
Photography: © Daniel James Photographic


1939 Vintage Simplicity Dress

vintage 1939 dress

It’s been a while since I sewed a proper vintage dress and when I spied 5 gorgeous yards of pretty blue and white print fabric in a charity shop for a fiver, it was a sure sign to unwrap one of my favourite patterns. I bought the fabric thinking that if I screwed up, a fiver was worth the risk. But actually I loved the fabric so much I used some other polycotton, from stash mountain, to rehearse a toile for the bodice first.

Very few alterations were needed. I did a slight FBA to add a bit of shape and added an extra inch to the waistline. I think it fair to say that I manage to pack away a few more calories than those svelte 30s women!

simplicity 3302 pattern pieces

The pattern is a vintage original from 1939: Simplicity 3302. And the condition of the pieces was impeccable. Factory folded and clean. Such an honour to be working with such precious pieces that are 75 years old!

The most surprising thing about this dress is that it takes 5 yards of fabric. At 35 inches wide that is. But it really doesn’t look that extravagant. I’m used to 50s style dresses taking up miles of fabric but the skirt section of this one isn’t even a full circle!

vintage dress simplicity 3302

I kept to the instructions, like the good GTS I am, and I created a neck facing instead of lining. I also decided against overlocking the seams. It somehow seemed wrong! The fabric behaved beautifully and frayed very little so I opted for a spot of pinking! Feels far more authentic and it pressed beautifully flat.

I’m not totally sure what the fabric content is. But on doing a burn test, I was left with a very silky white dust. So the consensus is that it is 100% natural fibre and top notch quality I reckon! It has quite a good drape going on and doesn’t crease too much either which makes me wonder if it is cotton or not. I made a decision not to line it. Mostly because of the gorgeously warm weather we’ve been experiencing but also because it always seems a bit mad to line a natural fabric with a synthetic lining. And I wasn’t about to splash out on silk!

sitting pretty in vintage dress

Having said that. I did use a silk organza for the sleeve stiffeners. You didn’t think those puffs stick out like that, unaided did you?! Quite a clever little trick that involves a circular piece of fabric like tafetta or flannel or organza, folded in half and sewn to the sleeve head before the gathering is done.

silk organza sleeve stiffener

vintage_1939_dress_sleeve_headIt looks a bit comical until you press the seam onto the sleeve and not onto the bodice which I did at first. Didn’t get a shot of that but the look on Dan’s face was priceless!

There is also an inverted pleat that is topstitched at the hem of the sleeve. So neat.

pleat on sleeve

I’d like to say it all went swimmingly but I made quite a big boo boo when I inadvertently cut the back as two pieces and not on the fold. Very easily done when patterns of that era are unprinted, but, regardless, I needed a quick solution as it would have come up too small once I’d seamed it and also, I didn’t have a large enough leftover piece to cut another back piece. Quite a big issue when you get your hands on a unique piece of fabric from a charity shop. It’s not like you can go back and bag another metre!

So… This is a bit bodgie… I made an inch wide length of bias tape from a 2 inch strip that I’d rescued from the selvedge, using my trusty Simplicity Bias Tape Maker Machine. And with half inch seam allowance I sewed it on each centre seam of the back. That effectively joined the back pieces together where they would have sat had there had been a fold!

Luckily the seams are disguised by the busy print so I think I got away with it!

back of vintage 1939 dress

I know my hair do isn’t strictly 1930s and the shoes are far from authentic but it needed a little bit of vintage styling to pull it off. Especially as youngest dort decided it was ‘lovely but very 80s!!’

vintage simplicity 3302 dress

I love the sweetheart neckline. So discreet and so pretty. It doesn’t have any added interfacing so I’m surprised it holds so well. I did clip into those curves good and proper though!

vintage sweetheart necklineI wrestled a bit with the zip. I knew I didn’t want an invisible zip. That seemed a bit wrong too so I opted for a lapped style zip insert. But could I get my head around it… No I bloomin’ couldn’t! I can do it with my eyes closed in the back of a pencil skirt but for some reason I just couldn’t pull it off. So I went for a straightforward zip insertion whereby I basted the seam shut, centred the zip and sewed to seam allowance. I did however prick stitch close to the teeth on the right side.

side zipper

I reluctantly wore my new dress a to a party on Sunday. I didn’t know any of the guests and was a bit worried I’d stick out like a sore thumb (in my 80s dress…. thanks dort!). But my assumptions were way off. Such wonderful food and great music and the most amazing people. My ‘wallflower status’ was upheld!

candy from Black Dwarf Designs
With Candy from Black Dwarf Designs

Oh and hats off to my wonderful fella, Daniel Selway who took the photos and who now finally has a site to host his pictures. Right here, in fact!


Nikita’s Prom Dress

Nikita prom dress title pic

I’m grinning like a Cheshire cat and welling up with pride as I sit poised to write this post. Meet Nikita, the sister of Jessica who was the lovely recipient of my first ever hand-made prom dress.

I knew there was another one on order, a year ago. After all you can’t make for one without the other can you?!

But what joy. What an absolutely pleasure to have another opportunity to make such a special dress. I’ve learned one hellofalot in this last year. Fitting mostly. This little beauty only took two fittings. I quite forget how many Jessica’s one took! I’ve learned not to be scared of cutting into the fabric. Learned how to be honest with measurements, how to be brave with fabric choices and mostly that I CAN make a dress befitting of a princess!

Nik modelling dress by the wooden door

Up until a few weeks ago, all Nikita’s dreams of her school leavers prom were wiped out when her school declared no funds for such frivolities, after all, this year. Everyone was gutted for her. Especially knowing how hard Nik has worked throughout her last school years… despite being asleep for most of them! Normal teenage behaviour you might assume but no, unfortunately for Nikita she suffers with narcolepsy. An awful condition which means she has to take very strong medication to keep awake. Lots of things trigger a collapse. Not least of all a fit of the giggles.

I reprimanded her dad recently, for his insistence on telling jokes one after the other but Nikita assured me it was fine because his jokes were so rubbish! She has the best S.O.H. ever!

It was such a relief when her school confirmed the prom would actually go ahead. But then a little panic set in when I realised I had a couple of weeks to pull off the dress.

Nikita wearing prom dress at Fulham PalaceI think by now you have the right to safely assume that Mr Ooobop, AKA the lovely Daniel Selway has been behind the creation of these blinding photos!

Helped by a scorching summer’s day and the beautiful setting of Fulham Palace, he has blown me away once again with his amazing self-taught skills.

Nikita wears ooobop prom dress at Fulham PalaceThe dress itself is fashioned from the same materials as Jessica’s, only in stronger colours. Red Duchesse Satin and Black polka dot tulle.

The halterneck bodice section is Simplicity 3825. Inspired by Nikita’s leaning towards a Marilyn-esque dress.

simplicity 3823 sewing pattern

I’ve had this pattern in my collection for some time and I’m so glad it came into good use.

I basted a layer of the dotted tulle over the bodice pieces and treated them as one for the outer pieces. Inside the bodice is self lined with the red satin. Its a good medium weight and gave the dress some necessary structure whilst not losing out to optimum swishy drape for the skirt.

Oh just look how divine her smile is!

By the fountain at Fulham Palace

The skirt is a full circle, of course. One can’t pose over street vents if the skirt doesn’t rise above one’s head! But actually a more demure pose was to be found next to a water fountain in the grounds of Fulham Palace!

Nikita sitting by the fountain in her prom dress

And lest I forget! There are the now signatory and obligatory 10 metres of soft-as-you-like dotted tulle that adorn said circle skirt. And no tears this time. I knew what to expect. I knew to pin section by section and I knew to baste… and to breathe!

walking barefoot in Fulham Palace gardens

walking away, barefoot

The back of the dress is genius in design. It has a wonderful elasticated panel which keeps the bodice fitted nice and snug with no gapes. I just love the effect that is created with the gathered netting over the liquid shiny satin.

back of prom dress bodice


ooobop prom dress in the parkI can honestly say that this dress is testament to everything I love about sewing. Not only about what I get out of the whole deal but what everyone else gets too. Nikita loved her dress and I feel so honoured to have made an original number for her. Mummy Tina was delighted to see her daughter have the best time in her new dress, Daddy Tim was very happy that I’d fulfilled the brief of a ‘modest’ dress and we are all so happy with Daniel’s outstanding photos.

Nikita will do well with whatever she choses to do. Of that I am sure. Nothing is going to hold this little lady back!

prom dress front

In the apple orchardAnd the talents didn’t stop there, oh no. Nikita’s lovely sister Jessica did such an amazing job of her make up for the prom and also today before the shoot. I’m so miffed I missed out on todays events. Slogging away in an icy office when I could have been out on location with the dream team in Fulham Palace!

Jessica doing Niks make up

So thank you girlies, for making a crazy sewing lady so happy and thank you Daniel for making my blog so pretty and thank you lovely readers for making it all worth it.

Portrait of Nikita

A skirt most fitting for my friend

Fitted pencil skirt

Meet Ms Moneypenny. AKA my lovely friend, Katy. Modelling the skirt she won in the school auction, made by yours truly.

And prepare for a whole host of lovely shots taken by Mr Ooobop, AKA Daniel who I am nagging like mad to get his portfolio up and live so I can share more of his lovely photography with you.

fitted pencil skirt modelled in the garden

Getting the fit right on ones own self is one thing but the pressure to get it right for someone else is far more terrifying! I suppose it’s a good kind of terrifying because it does make you learn very fast and not settle for anything less than a good fit.

I got a bit lucky with Katy. One measuring session, one draft of the pieces, one test skirt for a fitting, and one final fitting for the actual skirt. Probably by the power of flook but selling it in as skill!

Katy happy in her new skirt

This lovely little impromptu shoot revealed Katy’s hidden modelling talents. Took to it like a duck to water, she did. And check out those pins… we don’t get to see them very often!

sitting pretty with flowers

Such a pretty garden too. Could easily be confused for one in the Med! I wish I’d have taken a shot of Mr O as he was clicking away. He was revelling in the whole session. Lying on the floor, up in a tree, peeping round Grecian columns…! I was blissed out with G&T in one hand and hot dog in the other!

Katy modelling pencil skirt

And of course there were props…

back view with Frankie the puppy

Meet Frankie Knuckles, Katy’s 11-week old border terrier puppy. She has stolen everyone’s heart, obvs!

Holding Frankie the puppy

And there was photobombing, of course!

photobombed by children

Oh how I love this shot…

Katy modelling with her daughter

It’s such a great feeling to make something for someone who means so much to you. Especially when it fits them so well. It’s also the only time you can really get away with unashamedly staring at your mate’s bum.

You can just about see where I hand-picked the lapped zipper, and of course where I – ahem – matched the checks across the back seam (*polishes nails*)

See now, you’re all looking at her bum!

back view of skirt

The waistband pattern runs through centre front but waist darts rather mess up the plan. When I next make a skirt with this kind of fabric (it’s 100% gorgeous wool by the way) I might be inclined to create side seams on the waistband, as on properly tailored skirts, so that I can match the checks on the back too. This would also allow for expansion if ever needed.

front detail of skirt

I leave you all with a parting shot of the adorable Frankie. A fine model herself and because I just know she stole your heart too!

puppy border terrier

Here’s to more sunshiny days, fabulous photos, cute puppy dogs, fantastic friends and great opportunities for wonderful sewing projects. Cheers all x

Mono dress & faux film noir!

self drafted dress film noir
10.30pm.
The air is heavy.
Rain spatters relentlessly against the rattling windows.
Daniel and Janene each propped horizontally on opposite sofas. Mood is low. The bank holiday weekend is nearing it’s end…

Daniel: Got anything you need to shoot?

Me: Actually yes. But nothing fancy. Just need some pics of that trial dress I self-drafted.

Daniel: Ok. Go to it. Heavy on the make up. Big on the heels. And find a hat.

Me: But . . .


And that’s how these crazy shots came about! Quite literally out of not wanting to end our soggy bank holiday with the grumps!

So this is the dress:

mono dress full length

It’s my next leap on from my first ‘proper’ foray into pattern drafting. I’d tweaked the bodice and I’ve drafted a few pencil skirts to know the drill, and so I thought I’d pair the two together and make me a dress!

There were a few toiles along the way I can tell you! And this one still isn’t perfect. Goodness knows how but I think I need to take at least 2 inches out of the back bodice. My thoughts on this were confirmed at the time of drafting the back skirt section when I noticed there was precious little difference from the hip line to the waist line! I measured the bodice and double checked all measurements and just assumed it was meant to be.

However. I did have to do some trimming just under the waist line after I’d tacked it all together. And I thought I could live with it until I realised the side seams were a little bit too forward.

This really is no big shakes. In fact this is such a giant leap forward for me, the knowledge I’m gaining all the way is so totally rewarding. And luckily I have a heap load more of this fabric that was so kindly given to me by my fabulously talented milliner friend, Jayne Hepsibah. She wasn’t sure what it was but I’ve given it a burn test and it burns to a very fine pale dust. I wasn’t expecting that at all as it’s quite a weighty, almost upholstery style fabric with a bit of stretch! So I’ll make another soon to confirm my findings and rectify the problems.

The other niggling thing is that the armholes on the front could do with widening a bit. I wore this dress to a party a couple of weeks ago and all that dancing and waving of arms resulted in a little chafing round the sleeve edges.

I have some very similar fabric, but in crazy tropical colour, waiting in the wings once I’ve sorted out the issues. Can’t be neglecting the crazy inside when it’s raining outside!

self-drafted dress film noir style

There’s a fair few influences going on with this dress. The neckline I poached from a 40s pattern in my stash. The bold crazy fabric has echos of Kazz the Spazz who still continues to be one of my heroes despite her blog being no more *sniff*, though I’m sure she’d do it more justice with colour! And the overall design came about whilst doodling in my Fashionary book and watching Madmen!

Even though it’s far from perfect and hardly a ground-breaking design, there’s a huge amount of satisfaction that it didn’t come out of a commercial pattern envelope and that I had to make it up to my own instruction!

I self-lined the bodice. And considering the weight of the fabric, it behaved beautifully. With a bit of understitching round the armholes and neckline of course. A good test for the next run when I intend to make that neckline a little bit deeper, but still keep those nice angles.

self-drafted monochrome dress

And the hat! Let me tell you about the hat. Well I don’t happen to have any vintage hats just lying around. I’m sure Mr. Ooobop is convinced I have an actual ‘wardrobe department’ upstairs. I don’t sadly. But what I did have was this cheapie fascinator that I got from the pound shop, onto which I gathered some glittery tulle. Genius, non?! I’m sure some Russian veiling would have been classier but I’ll happily settle for this one… for a quid!

customised fascinatorWe had such a hoot doing these photos. Mr O was able to practice with his new birthday flash attachment and I couldn’t resist the addition little faux film noir-ness with my magic Photoshop wand!

This dress totally called for black and white pics and I wasn’t about to protest. I find black and white photography considerably kinder, compared to full on colour, especially at the end of a knackering weekend!

I’m so glad I’ve got such a pushy boyf, really! I’d never have got the get up and go let alone the camera skills to do this by myself! We really did have a lot of fun with this.

Shame neither of us smoke anymore, otherwise we could have got some proper authenticity going. However we did manage to fashion some obligatory venetian blind shadows!

head shot blind shadows

And it’s a fine way to capture the drama after the last glass of Prosecco got spilled!

vintage scream film noir

I do hope you all had a restful weekend with some making going on, of course!

Brigitte (over)exposed!

brigitte scarf at the brackenbury

I may have missed the party (sorry Tilly) but that doesn’t mean I was going to miss out all of the Brigitte action, oh no!

This is my animal-print chiffon version of the Brigitte Scarf from Tilly and the Buttons‘ gorgeous book: Love At First Stitch. I was so honoured to be invited to the book launch and get me a signed copy. (Managed to make that bash, obvs!) Seriously, if you haven’t invested in this book yet then I whole-heartedly advise you to do so, tout de suite. The photography is amazing, its got real patterns at the back and it goes without saying that the designs are to-Tilly-beautiful! (soz)

brigitte_exposed_3

I’m trying desperately to grow my hair out a bit. It’s taking an age. So while it’s at that God-awful in-between stage, it makes perfect sense to adorn said mop with a beautiful distraction. Cue Brigitte!

brigitte scarf

If it’s good enough for Bardot it’s most certainly good enough for me!

It truly, only took a jiffy! I cut it out and whipped it up while I was waiting for dinner to cook. The suspicious among you, on Twitter… yes I’m looking at you, O Doubting Thomasina – Ms Seams Odd Louise…. suspected dinner was being cooked for me. A girl can only wish but must also remember to be grateful for small mercies when your boyf already has the compulsory skills of music, dance, shoe-shopping and of course… photography!

Brigitte over exposed image

I adore these shots Dan took today. He was practicing an over-exposed technique and I personally think he hit that nail right on the head. No pesky wrinkles or blemishes and lovely bright colours to boot. More o’ these please Mr O!


Self-drafted retro top

retro check top

A couple of months ago, I signed up for a local adult education course to learn how to draft a bodice. The need for a go-to-template is great now. My need to save hours in a day is bigger than ever and so the idea is, that if I have a master block, I won’t have to keep reinventing the wheel, each and every time by having to make alterations to a preprinted bodice pattern. I would also very much like to realise some of these gazillion designs floating around my head and create them for other people too.

The course was cheap. Just £85 for four Saturdays, 10-3. And the teacher was lovely. There were 5 other students at first class and 3 at the last. So we pretty much had one to one teaching for the last session. pattern-drafting tools

To begin, we were instructed to pick a set of body measurements from a table of standardised sizes, that matched closest to our own body measurements. My first furrowing of brow. The whole point of me wanting a custom fit is that I don’t fit standard. Even my shoulders dropped an inch with that first instruction! As is usual for me I just kept shtum. But someone else in the class just couldn’t, and with gusto unabashed, questioned the task out loud! Hoorah for the confident ones!

The teacher assured us it was easier and quicker to go from a standard set of measurements whereby most of the calculations were done already and then make alterations to fit, afterwards.

And so I did as was asked. But the confident one did not! She used her own measurements and although, indeed I finished drafting first, she had a better fitting first toile. Funny, that!

But, with fear of the wind changing, I relaxed my jealous scowl and approached the teacher with questions on how to fit this bodice… that really didn’t fit at all!

She drew on me with red pen. The neckline needed to be made deeper. The side seams taken in; the bust point needed to be moved; the fullness taken out of the bust; the back bodice needed shortening; and the shoulders were too long. Mmmmm…..!

first bodice muslin

OK. Not a problem. In fact quite a few extra lessons in alterations were absorbed in the process so I didn’t feel too robbed.

I made the above adustments and sewed another toile. A better fit but it still needed changes. A third toile and although I knew it still wasn’t perfect. I was determined to draft my actual top and make it before the end of the course. I thought it would be useful to have the teacher hold my way throughout the process. And it was.

I ended up with a completely wearable top. She helped me to draft the collar and showed me how to create the facings. I based the design on a pattern I already owned. Did I just state a distain for reinventing wheels?! There is a method in my madness. I want to be able to create things that I see in pictures, everywhere, armed with a knowledge base of skills to custom fit, rather than have to have a standardised pattern that doesn’t ever fit. And of course this top is a great vintage design and I love it!

self-drafted retro-style top

But there are issues. The underbust is too big and it doesn’t feel perfect enough. In fact it’s true to say that it’s too big all over.

back view of top


The material was a cheap soft cotton with quite a loose weave so that probably didn’t help my fitting issues either. But it is comfy!

I added the zipper at the side, in true vintage stylee and owing to the bias cut funnel-like collar that rolls over the back. I also added a shaped extension to the waistline so that I can tuck it in without bulgy lumps round my middle. I usually wear it tucked in with a wide belt but I wanted to show it in full for the post. I’m quite happy with it hanging out too!

retro check top full length

self-drafted top side view

I made another one up last night, with some alterations. I took a little out of the side seam allowance and made the waist darts more concave at the point. There wasn’t much improvement to be honest. In effect I made the best of a bad job and went to bed in a huff!

I am irritated that with all of the alterations that were made in order that this bodice fits, the pattern pieces are really irregularly shaped now. And owing to the massive darts that were removed horizontally from the back pieces (to reduce the excess fabric), I won’t ever be able to pattern match across the back 🙁

There is no way I am going to be beat though. With renewed vigour, I got up early this morning to draft another from scratch. I used my real body measurements along with some armhole standards, and low and behold it was a pretty close match. I just have to make a couple of small amendments. The armhole gapes at the front and there is a bit too much excess over the bust and so I have cut and closed a dart at the armhole on the pattern, to reduce the gape. The mid-armhole at the back gapes a little too, and I have smoothed the excess up to the shoulder, and remarked the shoulder seam to both front and back pieces.

And best of all, with this new draft I get to have a perfectly straight back seam so I can have a continued pattern across the back if I so please, yay!

Wow! this really is a learning curve.

Hope to share some more new Ooobop designs soon. Ones that actually fit! So come back soon and in the meantime, don’t forget to enter the Giveaway if you haven’t done already. Only 3 days to go!

TTFN x

PS. All credit to Mr O, of course, for the lovely photos and a lovely day out with the children on the Southbank


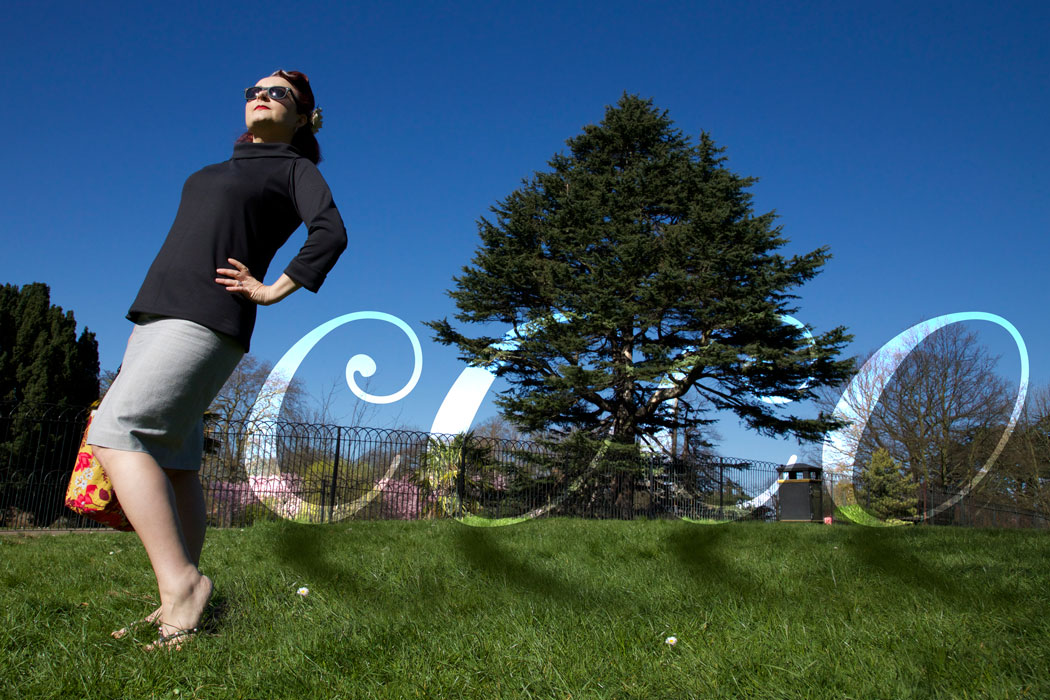
Coco

coco top

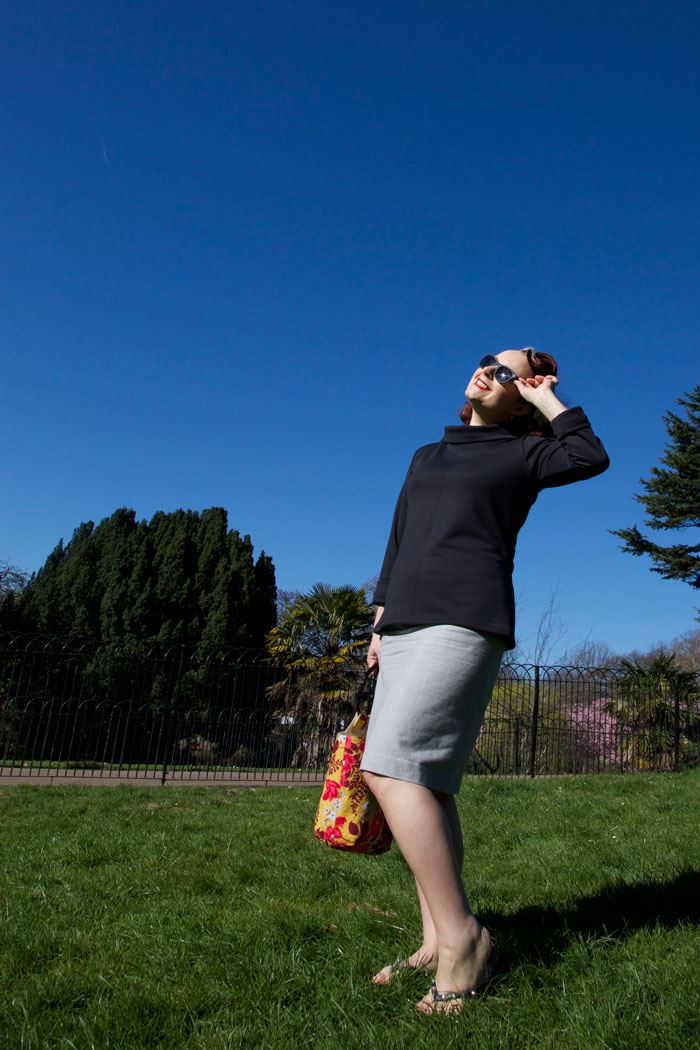
Now you won’t find many stretchy casuals on my blog as a rule but the beauty of rule of thumbs is that they can be changed in a click of the fingers. Move over wovens, and make way for the Coco that is stretch jersey (of sorts!)

coco top

I thank Tilly for this genius newbie. Not only for it’s ease of make…. 2 hours I tell ya! And that included pattern tracing and childminding! But a casual top with a retro vibe is completely up my street and something that was seriously lacking in my wardrobe.

Over the last few years… 3 years to be precise… I am so proud to say that I have not shopped the high street for anything but undies and cardies. My wardrobe is almost completely handmade by me. But there still resides a few too many black Primani T’s for my liking and this is where Coco could change all!

coco top

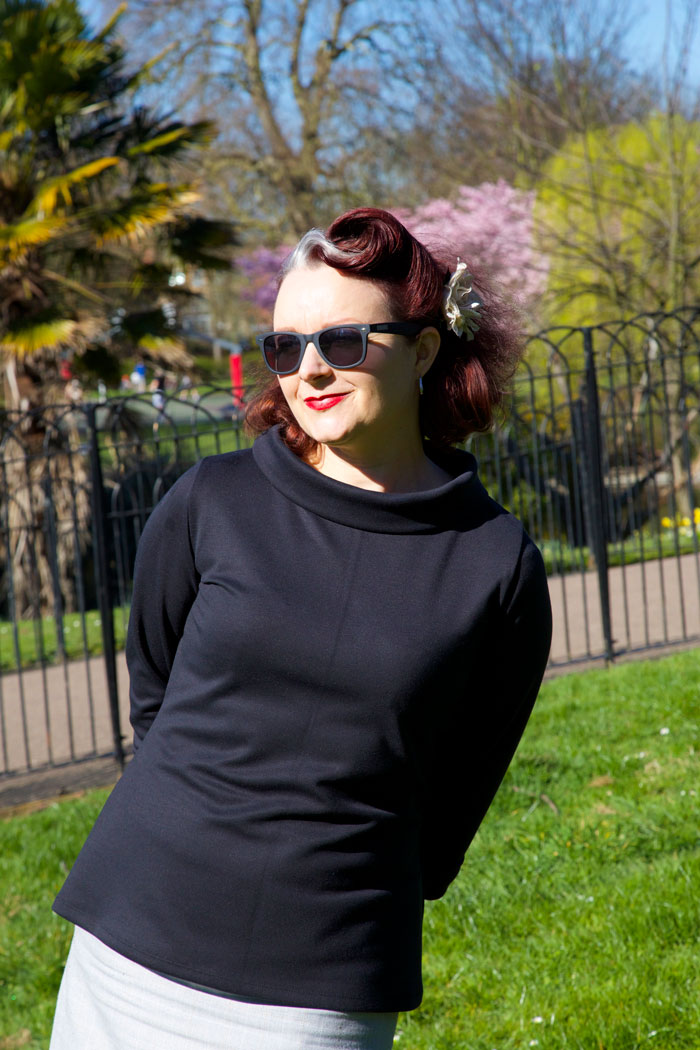
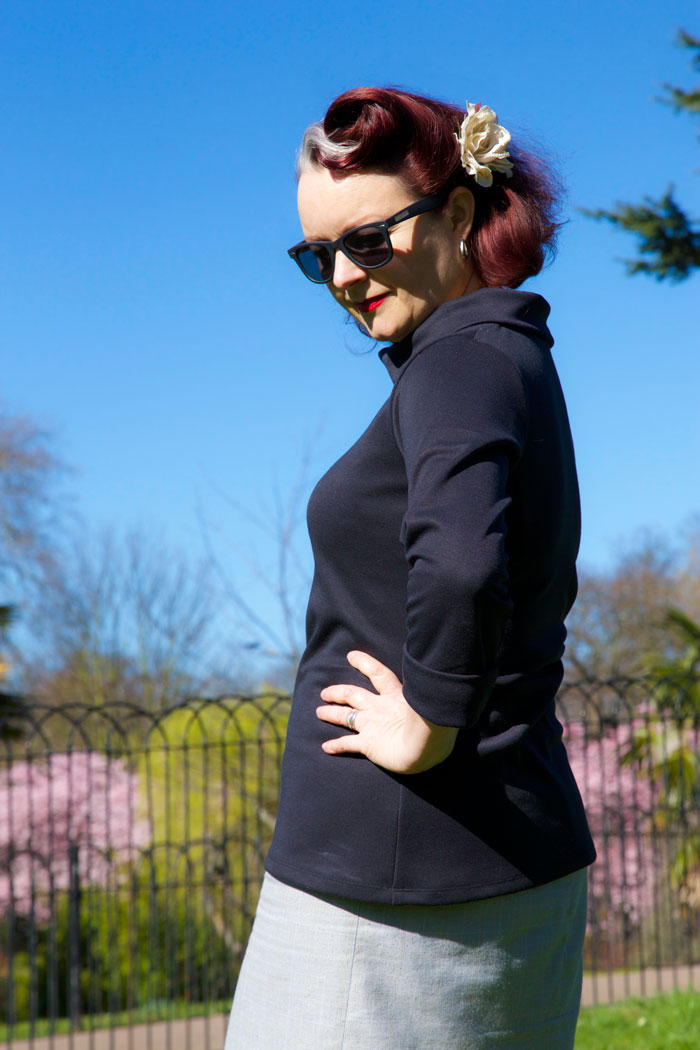
I just love the funnel neck and although this fabric doesn’t appear to have more than one single natural fibre, it is a perfect weight to hold the shape. And the cuffs are a wonderful addition to compliment the neckline.

coco funnel neck top

I think I could have gone up a size but I quite like how snug and fitted it is. This top could be serious friends with jeans or capris, with a mini or maxi, and I’m thinking a pair of plaid shorts would partner perfectly. Worn today with an old faithful pencil and a pair of flip flops to do the hockey run!

And it must be mentioned that Mr Ooobop deserves a medal for these photos today. He was in one serious hangover and suffered plenty a head rush when he got up from down low for those creative sky shots!

coco top blossom

Today is just beautiful which is why I’m keeping this short and sweet. Gotta dash to catch those last few rays and Mr O needs a ‘hairy dog’, poor deserved love!

So if you haven’t done already, do pop over to Tilly and the Buttons shop and grab yourself a copy of this pattern. It doubles as a dress pattern,  includes a plain neckline version plus you get to see Tilly herself model the cutest versions of all!