Make a PINsentry card reader case


Barclays PINsentry case

It’s one of those annoying but imperative things that live in the bottom of my handbag. Forced to live there because I need it, always: The PINsentry machine. But the trouble is, there’s all sorts of other stuff residing at the bottom of that bag too: bobby-pins, small coins, powder-puffs, crumbs… you get the picture. And these things are not conducive for a healthy device. It’ll get sick and at somepoint refuse to recognise my card at the most crucial time. Two previous ones have already met with their demise. In justified protest, no doubt.

So after all these years, I decided to do the honourable thing and replace the obligatory deflated bubble-wrap protector for something slightly more glamourous. And I have decided for the good of the nations PINsentry card readers to detail each step in the making so you can give yours a better future too.

Please note that this size fits the regular Barclays Bank PINsentry machine for other sizes you will need to adjust the template.

Materials:

  • 2 small pieces of fabric each measuring at least 320mm x 160mm
    (1 kind for the outer, 1 contrasting piece for the lining)
    I cut mine from Cath Kidston fat quarters
  • Small piece of wadding (final size: 212mm x 137mm)
  • Choice of closure: velcro, button or press stud
  • Matching thread

Step 1

Print out the template from the link here: PINsentry_machine_case_pattern (making sure you print it at actual size) and cut the following pieces from your fabric:
1 x case outer in main fabric
1 x case lining
1 x wadding piece
1 x flap outer in main fabric
1 x flap lining

pieces for pinsentry case

Step 2

With right sides together, sew flap pieces together with 1.5cm seam allowance, leaving the top edge open as shown in (A) below. Trim the edges close to the stitching (B).


Flap construction

Turn the right side out and press. Top-stitch a quarter inch from edge, all round, excluding top edge.

flap topstitched

Step 3

Position the flap with right sides facing to the outer fabric piece as shown below. The flap should sit 20mm in from the left side. Sew along the top, inside the seam allowance. About quarter inch from the top edge.

flap to outer

Step 4:

Now to make a ‘sandwich’ of all the pieces! Following the image below, first place the wadding on the bottom, then your outer case piece with the flap attached, and lastly your lining piece, face down on top.

Stitch all pieces together along the top edge as shown.

fabric sandwich


Fold back the lining piece  and give a good press.

top edge sewn

Trim the wadding so it doesn’t extend past the fabric edges. And also trim the wadding close to the stitching on the reverse seam as below, right.

trim the wadding

Step 5

Fold the assembled pieces over – right sides facing – to make one long tube with lining at one end and the wadding at the other as shown below.  Make sure the central seam matches:

fold over assembled pieces

Now stitch all round, leaving a gap to turn through in the bottom of the lining as shown by the black line below:

stitch all round

Trim seams all round, close to stitching but don’t trim the fabric above the opening (C).

Clip and then ‘box’ the corners of the end with the wadding, as show below (D). Just sew diagonally half a cm or so in from the point.

trim leave opening

Step 6

It’s getting exciting now! Turn through, give a light pressing and sew the open end of the lining closed. You can slip stitch by hand or just machine stitch over the end as no one will ever see inside!

turn through and close end

Push the lining inside the outer case and admire those box corners!

right side out

Step 7

All that’s left to do is to hand sew some velcro or closure of choice and snuggle your PINsentry machine safely inside.

velcro finish


Sure beats a dilapidated placcy bag!

PINsentry machine

Little things like this make me smile and this little thing is no exception. There’s something quite cleansing about stepping away from the larger projects (I’m looking at you, Boer War Jacket) to get a sewing hit from the smaller ones.

But don’t worry. I’m not ditching the bigger stuff. Oh no! Just procrastinating…. just a little! 😉


BHL Zena dress tested

bhl zeena dress front

So here is my version of the newly released Zeena dress pattern by the By Hand London girls!

It’s had so many wears since I sewed it I’m sure most of you have seen it already but it wasn’t quite right to post deets until the official launch date, which is today, hooray!

This dress is a seriously easy sew. There are no sleeves to inset, It is not lined, having just a neck facing, and you could even skip the pockets if you wanted to make it faster. Though I kept them in as a useful device for holding the skirt down on a blustery day!

The fabric I’ve used is very lightweight and drapey. A lovely donation from Handmade Jane. Hot orange with metallic gold spots. And why not?!

I foresaw issues with the sleeves and the tucks on the bodice if I were to use anything firmer. The skirt would probably be great though. Perhaps another option is to have lightweight bodice and midweight skirt. Those pleats would certainly stand to attention then!

bhl zeena dress back viewBut the more casual nature of this dress is what sold it to me. Especially on balmy days like today. Whilst I do love the fitted princess-seamed bodice of the Elisalex dress, (For the Love of Lawn, The Dress that Nearly Wasn’t, Speed Sewing for Sumer ) It feels more relaxed and cooler when the fabric isn’t so close to ones bod.

There’s lots of fabric going on in that skirt but the classy box-pleats take away that awful poof at the belly as is sometimes caused by gathering. I didn’t take a closer side view shot but I can tell you that the in-seam pockets sit hidden, perfectly inside those pleats. I don’t usually get the whole love affair with pockets but it does seem right somehow for a Zeena. I’ve only ever sewn them in one other dress I think, my Burda Maxi. But that was all together for more practical reasons!

bhl zeena dress side front view

It’s a bit shorter than I’d usually go for but I quite like that. I’ll like it better still once my pins have got some colour on them. They don’t get out very often these days! But there is a longer skirt option included in the pattern if you are after something a little more demur, along with three-quarter sleeves as a choice too.

I can’t guarantee what changes were made to the pattern once I’d tested it but I can say that I had no major issues with this one as I tested it. When I make it again I’m going to go crazy with French seams. Which I should have actually have done this time to save on the finishing!

One tip for those pleats though. Make sure you baste them along the top and down the pleat a bit to properly hold them in position before you sew skirt to bodice. I was a bit lazy with the basting and the pleats separated a little bit. Other than that it was a breeze. And I totally recommend it.

Here’s a link to the By Hand London Page where you can buy the Zeena Dress pdf download if you fancy one yourself. Happy sewing!

Photography by Daniel James Photographic

Nikita’s Prom Dress

Nikita prom dress title pic

I’m grinning like a Cheshire cat and welling up with pride as I sit poised to write this post. Meet Nikita, the sister of Jessica who was the lovely recipient of my first ever hand-made prom dress.

I knew there was another one on order, a year ago. After all you can’t make for one without the other can you?!

But what joy. What an absolutely pleasure to have another opportunity to make such a special dress. I’ve learned one hellofalot in this last year. Fitting mostly. This little beauty only took two fittings. I quite forget how many Jessica’s one took! I’ve learned not to be scared of cutting into the fabric. Learned how to be honest with measurements, how to be brave with fabric choices and mostly that I CAN make a dress befitting of a princess!

Nik modelling dress by the wooden door

Up until a few weeks ago, all Nikita’s dreams of her school leavers prom were wiped out when her school declared no funds for such frivolities, after all, this year. Everyone was gutted for her. Especially knowing how hard Nik has worked throughout her last school years… despite being asleep for most of them! Normal teenage behaviour you might assume but no, unfortunately for Nikita she suffers with narcolepsy. An awful condition which means she has to take very strong medication to keep awake. Lots of things trigger a collapse. Not least of all a fit of the giggles.

I reprimanded her dad recently, for his insistence on telling jokes one after the other but Nikita assured me it was fine because his jokes were so rubbish! She has the best S.O.H. ever!

It was such a relief when her school confirmed the prom would actually go ahead. But then a little panic set in when I realised I had a couple of weeks to pull off the dress.

Nikita wearing prom dress at Fulham PalaceI think by now you have the right to safely assume that Mr Ooobop, AKA the lovely Daniel Selway has been behind the creation of these blinding photos!

Helped by a scorching summer’s day and the beautiful setting of Fulham Palace, he has blown me away once again with his amazing self-taught skills.

Nikita wears ooobop prom dress at Fulham PalaceThe dress itself is fashioned from the same materials as Jessica’s, only in stronger colours. Red Duchesse Satin and Black polka dot tulle.

The halterneck bodice section is Simplicity 3825. Inspired by Nikita’s leaning towards a Marilyn-esque dress.

simplicity 3823 sewing pattern

I’ve had this pattern in my collection for some time and I’m so glad it came into good use.

I basted a layer of the dotted tulle over the bodice pieces and treated them as one for the outer pieces. Inside the bodice is self lined with the red satin. Its a good medium weight and gave the dress some necessary structure whilst not losing out to optimum swishy drape for the skirt.

Oh just look how divine her smile is!

By the fountain at Fulham Palace

The skirt is a full circle, of course. One can’t pose over street vents if the skirt doesn’t rise above one’s head! But actually a more demure pose was to be found next to a water fountain in the grounds of Fulham Palace!

Nikita sitting by the fountain in her prom dress

And lest I forget! There are the now signatory and obligatory 10 metres of soft-as-you-like dotted tulle that adorn said circle skirt. And no tears this time. I knew what to expect. I knew to pin section by section and I knew to baste… and to breathe!

walking barefoot in Fulham Palace gardens

walking away, barefoot

The back of the dress is genius in design. It has a wonderful elasticated panel which keeps the bodice fitted nice and snug with no gapes. I just love the effect that is created with the gathered netting over the liquid shiny satin.

back of prom dress bodice


ooobop prom dress in the parkI can honestly say that this dress is testament to everything I love about sewing. Not only about what I get out of the whole deal but what everyone else gets too. Nikita loved her dress and I feel so honoured to have made an original number for her. Mummy Tina was delighted to see her daughter have the best time in her new dress, Daddy Tim was very happy that I’d fulfilled the brief of a ‘modest’ dress and we are all so happy with Daniel’s outstanding photos.

Nikita will do well with whatever she choses to do. Of that I am sure. Nothing is going to hold this little lady back!

prom dress front

In the apple orchardAnd the talents didn’t stop there, oh no. Nikita’s lovely sister Jessica did such an amazing job of her make up for the prom and also today before the shoot. I’m so miffed I missed out on todays events. Slogging away in an icy office when I could have been out on location with the dream team in Fulham Palace!

Jessica doing Niks make up

So thank you girlies, for making a crazy sewing lady so happy and thank you Daniel for making my blog so pretty and thank you lovely readers for making it all worth it.

Portrait of Nikita

And the winner of the mystery giveaway is . . . !

Before I deliver the news that you’ve all been so patiently waiting for, I must first thank you all so much for your wonderful comments. So many kind and inspirational words. Blushworthy to say the least. And big thank you’s also for the newbies who recently subscribed. A big lovely Oooboppie welcome to you all! 🙂

Ok. Get on with it. I hear you say. Well I guess you should know what was in that mystery black box . . .
giveaway prizeHere it is, in all it’s mysteriousness! The contents of which include:

Burda Magazine, May 2014 issue
Handy service kit for sewing machines and overlockers
3m of novelty London print fabric
2m of polka dot turquoise fabric
3m of black lace
3 spools of Moon thread
3 different coloured pencil chalks

In order to get some fairness and squareness going on, I needed a trusty assistant. And I could think of noone better than Little Miss Ooobop herself. She just got a new haircut so is looking extra cute too!
A little shake of the entries . . .
shaking the entries

A little blindfolded stirring of the entries . . .

blindfolded and stirring the entries

A winner is picked . . .

A winner is picked

And the winner is . . .

and the winner is

Congratulations lovely Simona from Sewing adventures in the attick
The goodies are all yours!

close up winner
I’ll Email you shortly to retrieve a delivery address and will deliver it post-haste!

Flora – my new bestie!

Flora dress By Hand London

I can’t tell you how delighted I was to be asked by the By Hand London girls, to pattern-test for them, back in January. All honoured and everything I was!

The package arrived with goodies galore and a link to my fabric of choice from Ray Stitch. How could I resist this gorgeous Liberty Tana Lawn?!
Liberty Tana Lawn

But hang on a minute. The dress in the pictures doesn’t look at all like this fabric!

Well, you see, I kinda messed up a bit. I was clever enough to make a muslin before I cut into this buttery lawn, but I stupidly pre-empted adjustments that so didn’t need to be made. Three more muslins later with differing versions of the same adjustment, I was fast running out of time. What was I thinking? I rushed through the final version before I’d properly corrected MY mistakes. And I emphasise MY mistakes because By Hand London’s Flora pattern is spot on and when I came to make the one you see in the pictures, I made no adjustments whatsoever save a bit of an increase to the waist. Doh! Me and my meddling!!

Thankfully I still have just enough of the lawn to replace the front bodice and I certainly will do that and post it as soon as I can. I just love this dress soooo much!

Flora dress by hand london

So what is this fabric that isn’t Tana Lawn, then? Well my friends, I should have called this dress the Four Quid Flora because that’s exactly what it is! £1.99/m special dress fabric from Dave the Drapers in Shepherds Bush Market! I had a spare zip and some leftover lining so literally this dress cost me just £4. I can’t vouch for any natural threads going on but do you know what? I really don’t care. It has a sheeeeen! So shiny. It shimmers in the sunshine! And it has body. Enough to hold that beautiful structured shape yet just enough drape to create soft pleats and barely any creases.

flora by hand london dress

The dropped hem is clearly the most striking feature about the skirt section. And so I had to take care to finish it all good and proper. It’s not often your insides are on display to the general public! And hey, another Brucey bonus about this fabric is that the polka dots reproduce beautifully in reverse on the wrong side. Or perhaps it was the right side. Who knows? Dave certainly didn’t!

flora dress by hand london

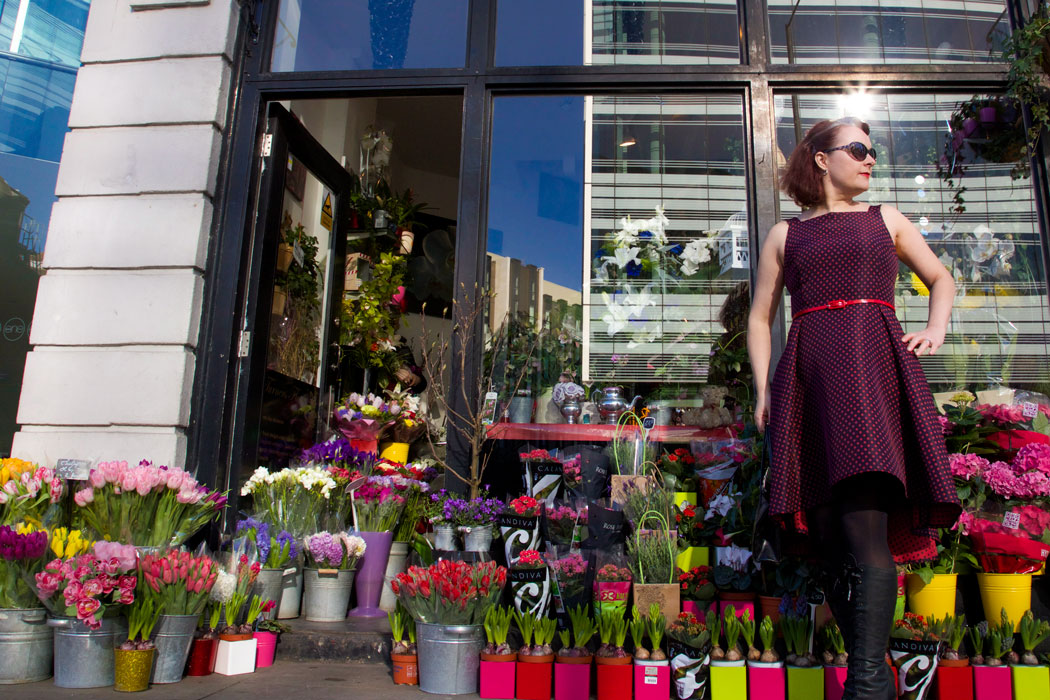
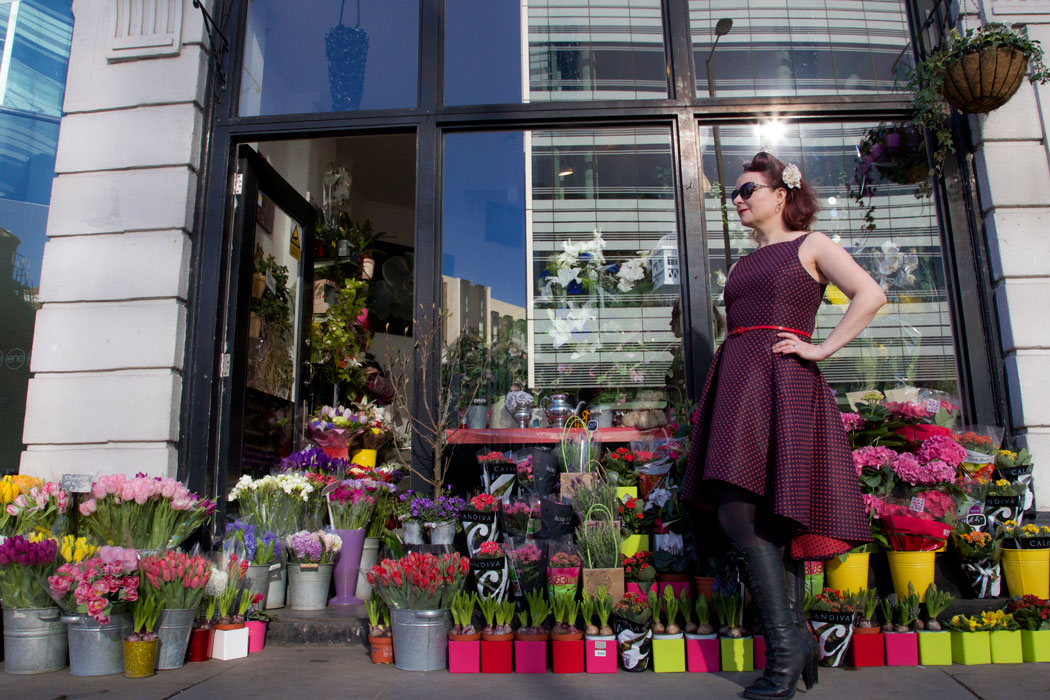
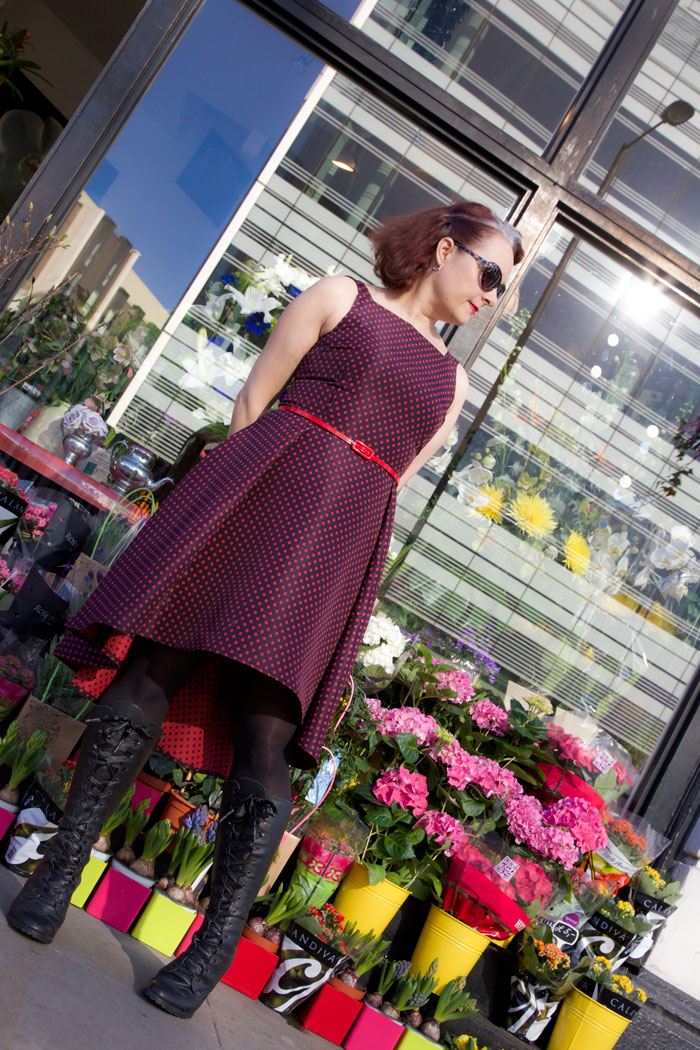
I must just give a quick shout out to Turners flower shop on Hammersmith Broadway, for kindly letting us shoot outside their pretty shop.

And also add that Mr O was risking life and limb to take these photos. I might have been on the pavement but he was practically lying in the middle of the road. Not ordinarily quiet round this neck of the woods! His dedication knows no bounds!

flora dress

I wholly recommend the Flora dress to anyone. Beginner or advanced. Such little input for such incredible output! And so quick to make… so long as you don’t pre-empt unnecessary adjustments like I did! And boy is it flattering. A lovely vintage style neckline and a full structured skirt. Who could ask for anything more? The first place we stopped at, two ladies commented on how they loved my dress. Ego trip or what?!

flora dress on Hammersmith Bridge

It has been such gorgeous weather in old London Town this week. I’m so loving the brighter mornings and I even got to come home from work in daylight this evening. I feel more energised and ever more ready to get on with some more sewing. I feel a few more Floras coming on for sure.

These last couple of pics were taken on Hammersmith Bridge. My favourite bridge of all the bridges in London. And just so perfect to stroll across at sunset.

flora dress on hammersmith Bridge

Now who remembers the Flora ads? I certainly do! Definitely worth a giggle!

[youtube https://www.youtube.com/watch?v=JmS3t5R3O6M]
[youtube https://www.youtube.com/watch?v=_piSsGckJw8]

The dress that nearly wasn’t

. . . but I’m so glad it is!

Spotty rose dress

Following on from the vintage rose print dress, I fully intended to make the next one from some gorgeous red rose cotton. But I knew I should improve on the fit of the bodice beforehand. I’ve turned once again to my trusty Elisalex bodice pattern. Why fix it if it’s not broke, I say!

I’ve taken the advice from the By Hand London site to perform a full bust adjustment. Something I never thought I would ever need to do for me. But on closer examination of my last version, and the one before, the upper bust was defo a tad too big whilst the fabric was more than snug over ‘the girls’. I’ve always gone by bust size and increased the waist, but never thought to go down a size and increase bust and waist. More than anything I plainly couldn’t be arsed! I must also learn to take bust measurements with whatever bra I mostly intend to wear!

Well. Big fat lesson learned. I now have a properly fitting bodice pattern that fits under arms, across chest, over bust and waist. Not bad for 2 years of (not) trying!

properly fitting bodiceAnyhows. This is not the reason that this particular dress didn’t happen. This spotty rose fabric has been sitting in the bottom of stash mountain for eons. I bought it from a charity shop and quickly decided it would only ever be suitable for a toile after doing a burn test.

Let’s just say I nearly burned down the kitchen in the process. Once the flames died down and the stinky fumes dispersed, my science test revealed that this fabric was totally synthetic and was never going to be acceptable in sweaty weather.

So I used it, with my dramatically altered bodice pattern to make a toile. Really not bothered if at first I didn’t succeed. I really didn’t want to cut into the lovely red fabric without knowing the alterations worked. But they did. Clearly. And all of a sudden I can forgive the fabric for being so unnatural! It’s amazing how blurred one’s vision gets when one is blinded by a darned good fit! I really must learn to be so snobby about fibre content!

front view of spotty rose dress

That said. I am still holding out for some 100% cotton gingham. How hard can it be? A sleeveless number in poly is fine but I can’t imagine having a sleeve, however short, in such close contact with my pits, in summer!

I wore it out to the park today in a sticky 26 degrees. Extreme test for a plastic dress. But because the skirt is so full and the fabric is so thin, it was remarkably cool.

Wearing the dress in Ravenscourt Park Gardens

Smelling the roses

I am still going to do the red rose version but I’m so pleased with this Brucey bonus one that I landed up with in the process! It has a 1950s vibe to it and of course is the perfect base dress to accessorise with a pair of crazy heels.

spotty rose dress

These heels being of the pink, furry leopard-print kind, of course!

sitting pretty on the doorstep

spotty rose dress

And I think you’ll agree that Mr Ooobop worked his magic as usual!

Princess Jessica’s Prom Dress

I think I have kept you all in suspense for quite long enough. This evening is Jessica and Tom’s leavers prom and so I am allowed to reveal the dress I have been working on for the last few weeks.

I was feeling a bit poorly today so Mr Ooobop, like the knight in shining armour he is, set off with his new birthday camera without sparing the horses. The following photos are some of the loveliest he has taken. And I think you will agree that the beautiful subjects contribute somewhat to the awesomeness too.

Meet Jessica. The most wonderful 16 year old daughter of my friend Tina. Can you now picture the pressure that was to create her a prom dress fitting for such a beautiful princess?!

Jessica having hair styled

Tayla Harris was in-house hairdresser for the evening and styled Jessie’s hair beautifully. Complete with little jewels to match her necklace.

Hair jewels
Hair jewels

And ooo… look. A cheeky first glance of the bodice! Such a tease, I know!

Hair styled with jewels to match necklace

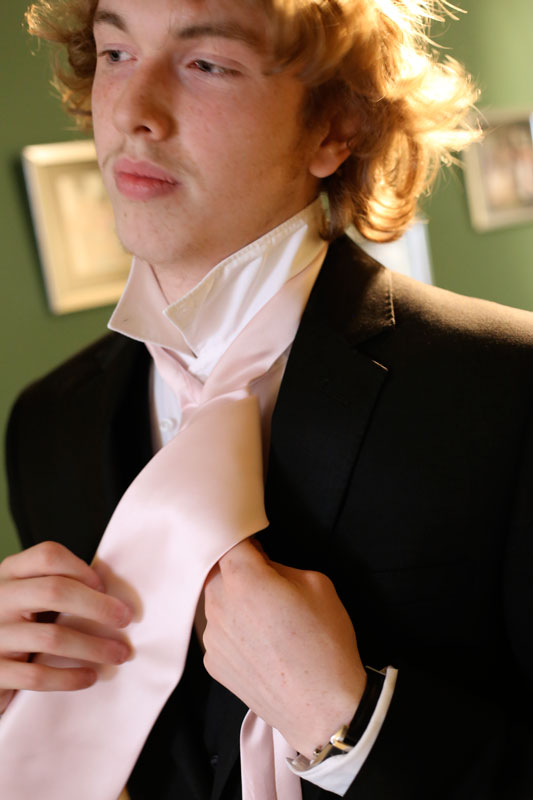
With make-up, hair and outfit complete, enter Jessie’s Prince Charming – the lovely Tom. I’m so pleased he liked his tie. He didn’t really have much choice in the matter, bless him. It was delivered seconds before this photo was taken. I only finished it this morning! And here we also have a side view of the prom dress. I’m getting there, honest!

Tom's arrival and receiving the tie
Tom’s arrival and receiving the tie

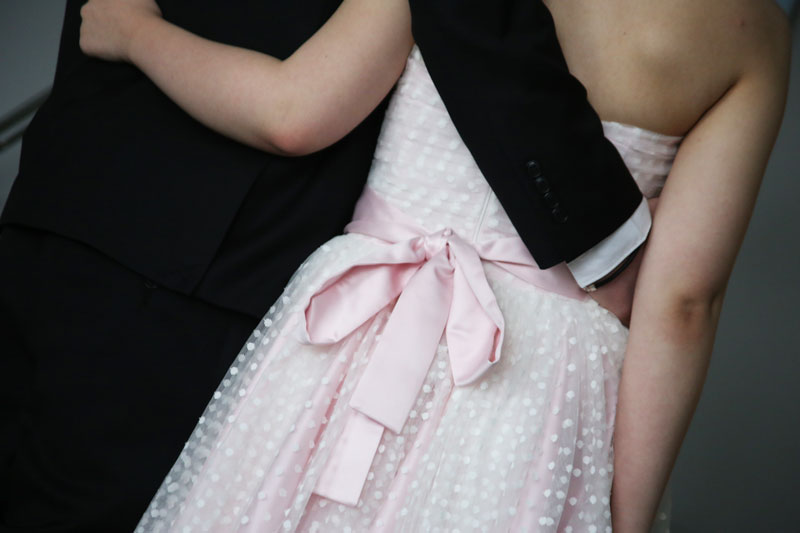
The tie was made to match Jessie’s sash as you can see. And Tom did a much better job of tying it than I did!

Tom putting on his tie
Tom looking more like Prince Charming every minute!

So now they were both dressed to impress, Mr O worked his magic and took some awesome shots of them together. Don’t they look adorable?

Jessica and Tom
Jessica and Tom
A beautiful portrait of the prom Princess and her Prince

I would love to be a fly on the wall tonight and take a picture of them dancing together. The dress is a circle skirt underneath 10 layers of gathered polkadot tulle so you can imagine just how twirly and frothy it would be.

A little dance to limber up!

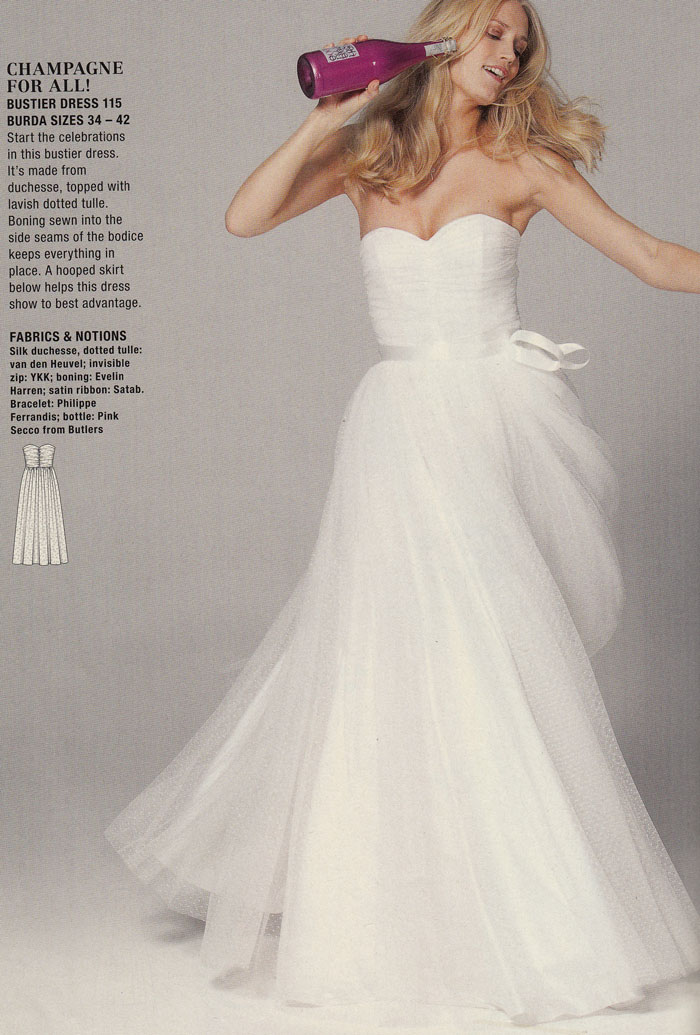
Jessie came to me with a firm idea of what she wanted and luckily for me there was a very similar pattern in one of my old Burda magazines. I’ve got quite a hefty collection now. It’s always a joy to go through back issues and see patterns you didn’t notice first time round. But this one was on the money! The only thing I had to do, knowing how standard the sizing works, was to do an FBA. And I had to learn how to do it pretty quick!

prom dress idea

Thankfully for me, and for Jess, I had recently come across a great set of instructions on the By Hand London site. These totally took the fear factor out of the whole process. And I learned so much. Not least of all to come down 2 sizes for Jessies petite body and then doing an FBA. It took just 4 fittings to get it right but oh it was so worth it.

Side view of the dress

The strapless bodice section of the dress is boned. For good reason! This was a first for me too. Though I did discover some fantastic boning in my local haberdashery department that sold pre-cased boning. I just had to sew it directly onto the open seams.

The front and back have rouched tulle stretched across 2 panels

The front and back have rouched tulle stretched taught across 2 panels. I love the way they ‘butterfly’ out from the centre seam. And I love how classic and timeless they both look here. Reminiscent of the 1950s.

Full skirt. 3 layers.

The tulle overlay is ivory in colour and works so well to soften the pink. Kind of like a frothy strawberry milkshake, don’t ya think?! Of all the techniques involved in making this dress, funnily (or not so funnily) the most tricksy part was gathering all those 10 metres into a 27 inch waist. I even made several gathering threads to avoid breakage but it was still a nightmare. I ended up gathering small sections at a time and pinning it on the underskirt, on the mannequin and then hand tacked it all together before I even thought of taking it to the machine!

The bodice and skirt are lined in full with a slightly darker pink lining. That was one of the easier bits! Unlike the Burda instructions, I sewed the circle skirt lining to the waist seam and then once the bodice lining was seamed at the top, I turned under and hand-stiched the waist seam of the lining over the raw edge of the skirt lining.

Oh yes! How could I forget? The shoes!! Check out these amazing Kurt Geiger shoes that Jessie snapped up in the sale for a mere £29! Pink patent leather with bows and bling!

Kurt Geiger shoes
Kurt Geiger shoes: Pink patent leather with bows and bling!

Have you got loveliness overload yet? I think I have. But hang on I forgot to show you the back. Pretty bow sash and all

back view of the dress

And so the ‘royals’, unfazed by their impromptu photoshoot, bade their farewells and headed off to the prom.

En route to the prom

I would so love to have seen everyone’s faces as they walked in together.

Outside the venue
Outside the venue

A massively big thank you to Mr Ooobop for these amazingly professional photos. I would never have got these together myself. I also have to thank Tina for asking me to make this dress for her beautiful princess. It has been such a huge learning curve for me. I don’t deny there was a fear factor involved. I had no choice but to get it right. But that’s how we learn fast, right?!

And last but not least for the ever obliging Jessica and Tom. You make just the perfect models and have brought such beauty to my blog! I am being totally honest when I say that these pictures brought a tear to my eye. I hope you guys had the time of your life! x

ooobop! review: Burda Style June 2013

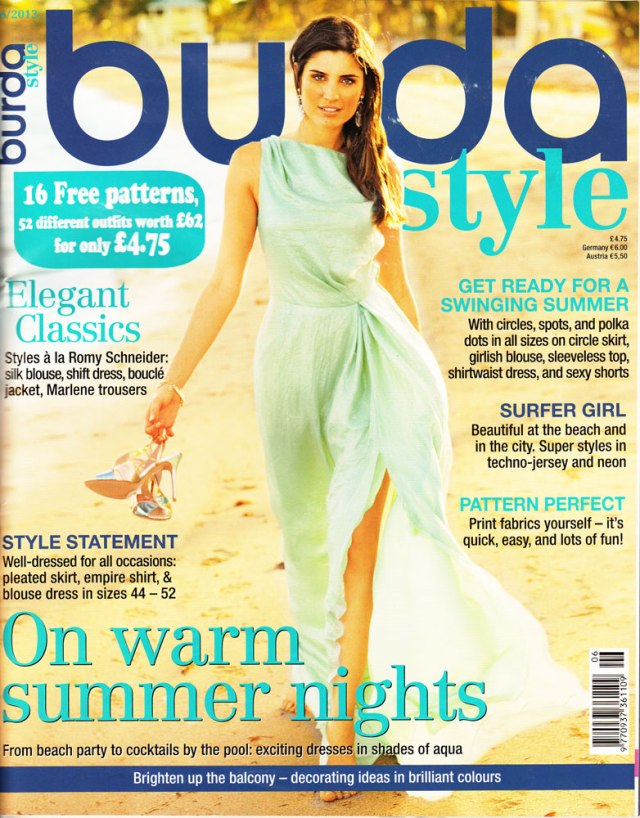
Burda magazine June 2013

Can you believe this is the summer edition of June 2013? I can’t. I’m wrapped in my fleecy blanky, fingerless gloves no less, shivering my butt off as I point blank refuse to turn the heating on. My toes are curled for no other reason other than I can’t uncurl them because they are frozen solid. Is this weather for real?

I really want to get excited about summer clothes, really I do. But I’m struggling. So if you hear a slightly less enthusiastic tone this month, please bear with!

First section up is… Summer Fashion… ha! “Keep looking stylish, even in the heat…” is the opening line of the first intro copy.  Ha bloody ha! Rub it in why don’t ya!

Summer fashion Burda June 2013Ok. I’m going to try. I actually do really like the hand finishing on the brown shift dress, bottom left (above). Its a great couture technique that I’m thinking of employing on a future wool crepe dress I have planned.

The shorts, centre, bottom row, are not dissimilar to the plaid shorts I made. These ones are made with stretch pique which sounds more comfy. I will defo give these a go as one of my gripes was the lack of facing with with Simplicity ones. I know I could probably draft one but hey, I don’t need to now! A bit difficult to see in the photo (top row, centre pic) but that t-shirt looks to be a good fit with side panels and neat little sleeves. Don’t have an overlocker as yet and I’m wincing at the thought of messy insides so I’ll just hang on a bit for that one until I win the lottery. Boy I can’t believe how much those overlockers are!

My dislikes are the pink pants, bottom right. I love this look on the right kind of body. I don’t have that kind of body, unfortunately so they won’t be appearing on my list anytime soon. As won’t that dress top left corner, funnily enough. I say funnily enough because at first glance it looks like a classy dress. Save the pompoms! But it’s not even the pompoms that are putting me off. I quite like them. Its more the “artfully laid little pleats” that appear on the right shoulder aligned with the left hip. Even from the photo I can see some annoying crosswise folds that would annoy the heck outa me!

So who doesn’t like lots of dots? That’s the theme for the next section:

Lots of dots Burda June 2013I think I can safely say I like everything in this section save the long shorts, first column middle row. Just a bit unflattering and boyish for me. I love the shirt-dress top right, most of all. If Me-Made-May’13 has taught me anything it’s that I need more shirt dresses. I love how comfortable and stylish and edgy they can be. It’s not to do with cutting edge design. More clever choice of fabric that makes a great shirt dress. And I’d love to have one for every day of the week. This is quite a slim-fit one and it sure fits the bill as far as I’m concerned.

The shift dress, bottom right corner, has some great side panels that are piped. I still haven’t attempted piping but this would be a great opportunity to practice. It would also be a great chance to practise some colour blocking too. Employing some block colour in those panels would create a great slimming effect.

The cowl top with gathered sides (top left corner) is a firm fave too. Much more stylish to wear than a plain old T! And I love the yellow swinging full skirt. Perhaps not in yellow though. It’s got plenty inset godets on top of all the gathering. And a big bow at the waistband. Dead funky!

The next section is all about beach wedding/party dresses. I truly have goosebumps right now thinking about how the chiffons and georgettes might feel next to my skin, but there are some pretties…

beach beauty section burda June 2013The cowl neck dress, bottom left corner, is my favourite here. With its side gathers and simple shape I think it could be really flattering and perfect for a few evening cocktails on the beach. The dress, top right, is quite stunning and doesn’t look that difficult to construct but there is some yardage of crèpe satin going on here, so it’s not really for the ‘thrifties’ among us!

I don’t dislike the others. They all have their place. Apart from the strange diagonal pleated bodice dress, top left corner – same issues as that purple dress in the first section. Oh, and that one sleeve wonder dress bottom right corner. Not sure I could handle that!

So, swiftly we move on to ‘Surfer Girl’. Not me. Not any part of it. I have noted there are a lot of runners that sew. Or sewists that run! I wish I could say I was one of those. But I’m not so I will leave judgement in the hands of the “Sporty Spices” of the sewing blogger nation…

surfer girl section June 2013That said, the little jersey skirt in the centre, bottom row, could be a quick and easy casual make for holidays and weekends. The jacket is a bit 80s for me, mind!

The Mother & Daughter section is at the very least tweeee!

Mother and Daughter section June 2013Would anyone ever consider dressing to match their daughter?

I quite like the dress, top centre. Though it looks a bit starchy in the batiste. I might be inclined to use something slightly drapier. I do really like the idea of printing on the fabric though. That would totally seal the uniqueness of the garments. You could really create some signature pieces with a clever use of design. I just made a skirt, similar to the star-print one, top right corner, but from an old vintage curtain. I love the deep waistband. I need to finish mine but I hope it looks as good as it does on this mummy!

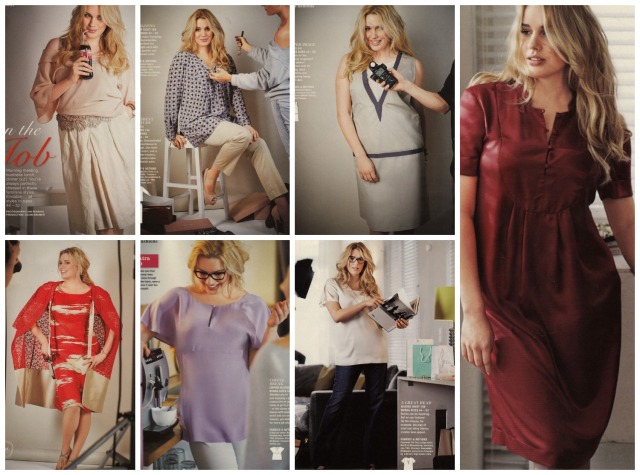
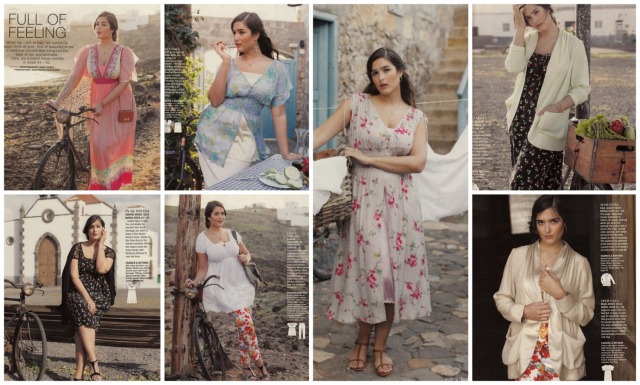
The Plus Section gets as much attention, if not more this month:

Plus fashions June 2013I love how each of these designs incorporate clever structured detail to flatter the curviest of bods. Simple lines and crepe satin exude the elegance and the loose cut sleeves and empire waistline of that red dress, bottom left is simple yet stunning. But the one I like most is the red dress on the right. Cute standy up collar and dinky button loops on a fabulous yoke bodice add perfect detail to really versatile dress.

So what do you all think? Any faves? Any absolute disses?

I’m off up the wooden hill to Bedforshire right now. I’ve given up trying to keep warm. But I’m still thinking shirt dress. Perhaps in some rockabilly print that I have in a box somewhere. I’ll dream about it and see how it looks!

Night all. And thanks so much for keeping up with my ramblings x

ooobop! review: Burda Style May 2013

May 2013 Burda cover

Well this review very nearly didn’t happen. Firstly because I was in a grump when I bought May’s issue – there was no way that anything was going to impress me that day – and secondly the usual onslaught of work that is always determined to steal my blogging/sewing time!

But do you know what? The delay in between purchasing the mag until now has been enlightening. I am seeing much more potential in designs that I had initially dissed and I am seeing some valuable ‘easy makes’ that might just dig me out of a hole for Zo’s ‘Me Made May ’13’! Admittedly I am in a better mood now the sun is shining so that also helps the different slant!

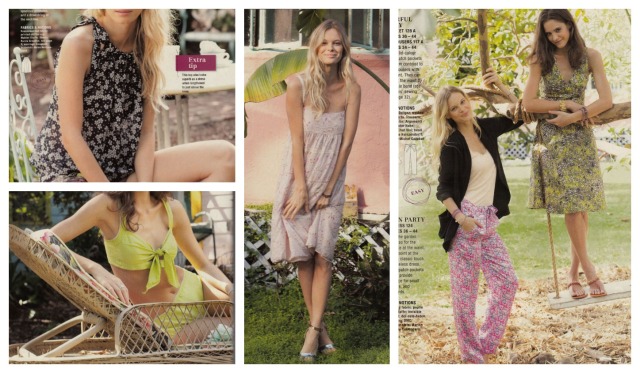
So without further ado, let me present Full Bloom, the Flower Fashion section.

Lots of pretty lightweight floral loveliness going on here. I so wish I had the guts to go for one of these jumpsuits/playsuits whatever you like to call them. They look such fun. I just don’t think I could take the heckling from the smalls!

May 2013 burda playsuits

A bit difficult to see the detail, but the gathered drawstring top (below, top left corner) looks to be one of those easy ones. I have a fine bit of floral chiffon that I think should do it justice. The bikini below that looks a bit homemade if you ask me. Possibly the fabric – metallic poplin? But that aside I do think with a long skirt attached to the bikini top, it could be transformed into a gorgeous maxi. But my fave by far, out of all these flowery numbers, is the green print dress, on the right. It has a flattering midriff section which I love and some cheeky patch pockets on the skirt front. Total win!

Burda May 2013 flower fashion tops and dresses

The top (below, top left corner) is a super easy make. Its a tulle lace top over a shorter jersey one, sewn together at the bateau neckline. If you don’t fancy the belly button action, you can always make it longer and I’m sure it would be just as pretty. The denim shorts are included too, though surely easier to cut some jeans down?

I keep coming back to the green, v-back flounce dress but I’m not sure I’ve got Twiggy enough bod for that. Pretty though.

The dress at the end couldn’t be simpler. A long straight cut shirt with low-cut armholes. Pretty much 4 rectangles! Made from transparent chiffon and worn with an underdress. In fact the underdress is far more complicated! Perfect for the beach or a picnic or wherever the sun shines!

Burda May 2013 flower fashion

Top Stars is next up. A great little collection of funky tops. The gathered draw-string top features again, in a plain brown crepe this time. Not much of a variation except for the length, I think but great to see it in a block colour. If it really is quick to whip up, I would love a few of these to stick in a holiday suitcase.

Burda May 2013 topsIt wouldn’t be a summer issue without a ‘whites’ section. So here are some of the more romantic looks this month. I personally could never leave the house in a dress as white as this and certainly wouldn’t survive more than half an hour in London if I did, but they would be well-placed on a sunny beach. The dress on the right probably shows in more detail how the upper section of the green print floral dress works.

Burda May 2013 white dresses

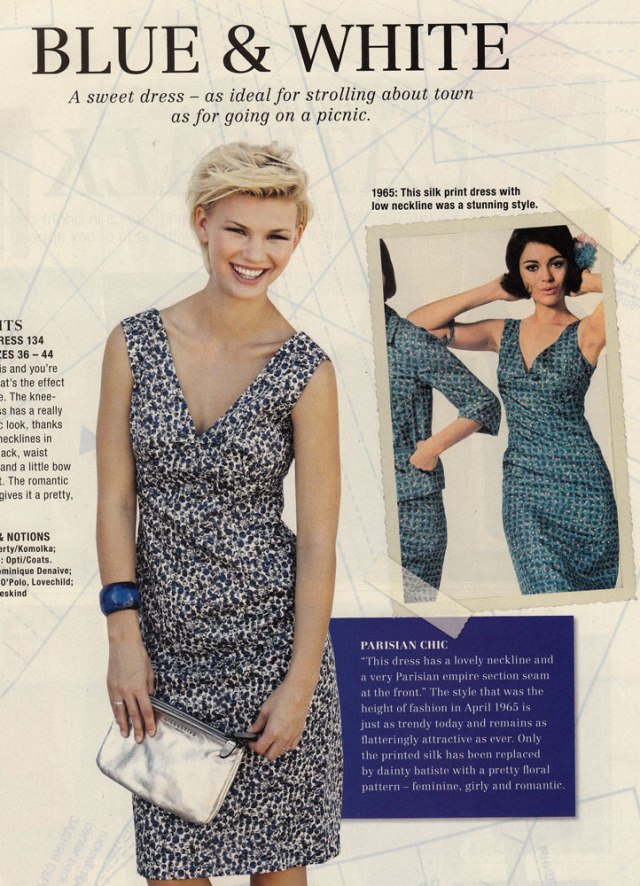
Add some blue to the white and behold my favourite section of the mag. The Vintage Style. This little beauty gets away with being so stylishly modern despite its top spot in the fashion charts circa 1965. Tricky to see but underneath the deep V-neck, it has a fabulous seamed empire line, finished with a cutesy bow.

Burda May 2013 Vintage dress

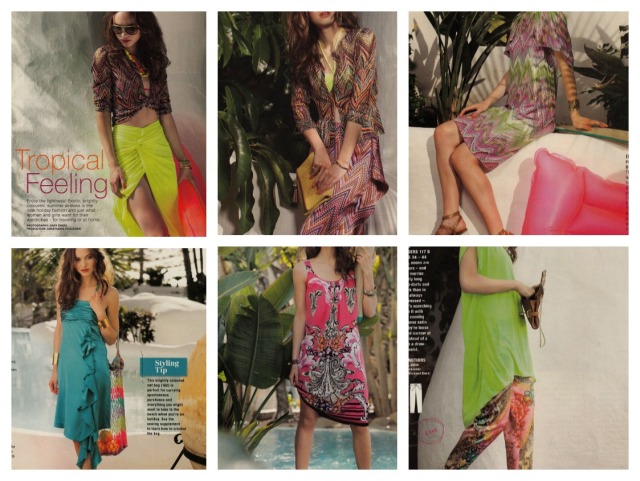
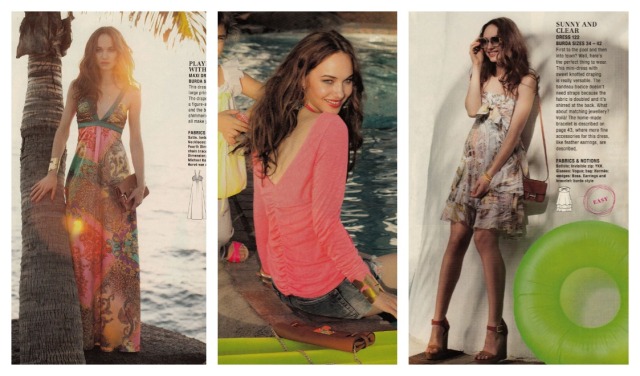
Given that my chances of a tropical holiday are very slim this year (or any year to be fair!) I’m finding it a bit hard to relate to the styles and colours in the Tropical section. 10 out of 10 for innovation though. I’ll wait till someone else tries that green knotted skirt!

Burda May 2013 Tropical

But I did pick a few tropical delights. Check out the gorgeous Maxi dress (below, left) in large print satin! How divine would that be as you floated off for a pina colada all tingly from a day on the beach! The centre top is a must-have too. I love all the rouched detail is in the back. And the dress on the right is such fun!

Burda May 2013 tropical favouritesI think the kids section is a little strange this month:

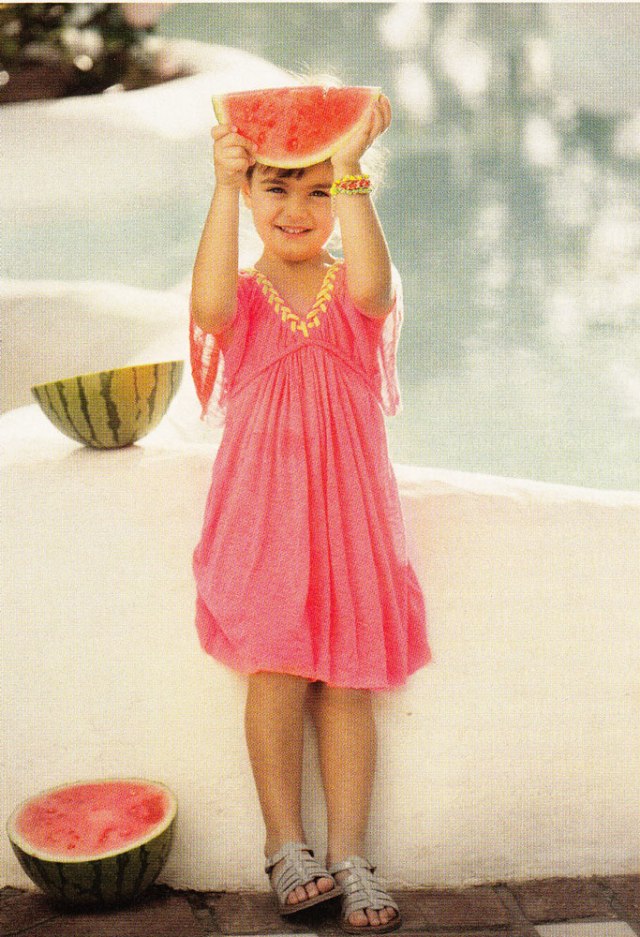
May 2013 Burda kidsApart from this little red number that I’m trying to persuade LMO to like!:

Burda May 2013 kids

But hey! I’m not going to push it too much. It’s not like I haven’t got enough on my list already!

And last but not least is the Plus Section. Not so hot this month. But some pretty functional pastels all the same. I really don’t think the shot of the pink jersey top and the grey taffeta skirt (bottom left) best portrays these styles. They both have fabulous details. The top has side gathers just over the bust and to the hem. And the skirt is a double layer, the over-skirt being pretty much a square which creates those lovely flounces. It also has a jersey waistband which would add a bit of comfort to the class!

Burda May 2013 Plus sizeSo there we have it, lovely readers. I do so apologise for the delay in getting this to you. No doubt most of you already have it in your clutches. But for those that don’t yet, I do hope it helps to bridge the gap until you get hold of your copy.

Happy sewing everyone! x

ooobop! review: Burda Style April 2013

Burda April 2013 cover

And so, as I sit, still in the depths of winter, double wrapped for good measure, It’s small wonder that I am less inspired by this month’s Burda than usual.

This is April’s edition for goodness sakes. I should be so eager to set about some fluttery spring makes, but its all too much even for my vivid imagination!

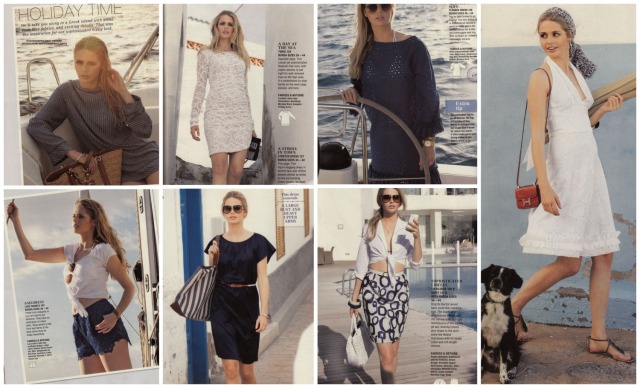
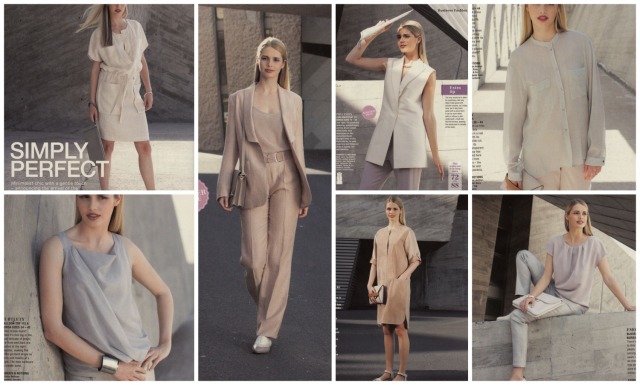
The Holiday section tempts me with a batiste maxi a cute bouclé shift dress and a smart pair of cigarette pants but though the rest are very holidayish they do nothing to float my boat I’m afraid.

favourite holiday fashions

Having said that, I do keep coming back to that little white dress (below right) but would have to invest in some ‘fashion tape’ for modesty reasons!

holiday fashions

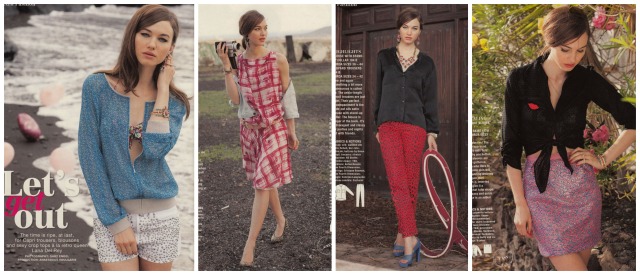
The retro section is always a sure fire bet for me and didn’t let me down with this adorable blouse, cute bustier top and equally cutesy dress. I wouldn’t change a thing about the blouse. It was undoubtedly designed with gingham in mind and the dress is a great showcase style for some statement fabric. Always sold on a sweet heart neckline. So flattering.

favourite retro fashions

I don’t dislike the others. I just feel retro is a bit of a loose term for the other garments in this section…

retro fashions

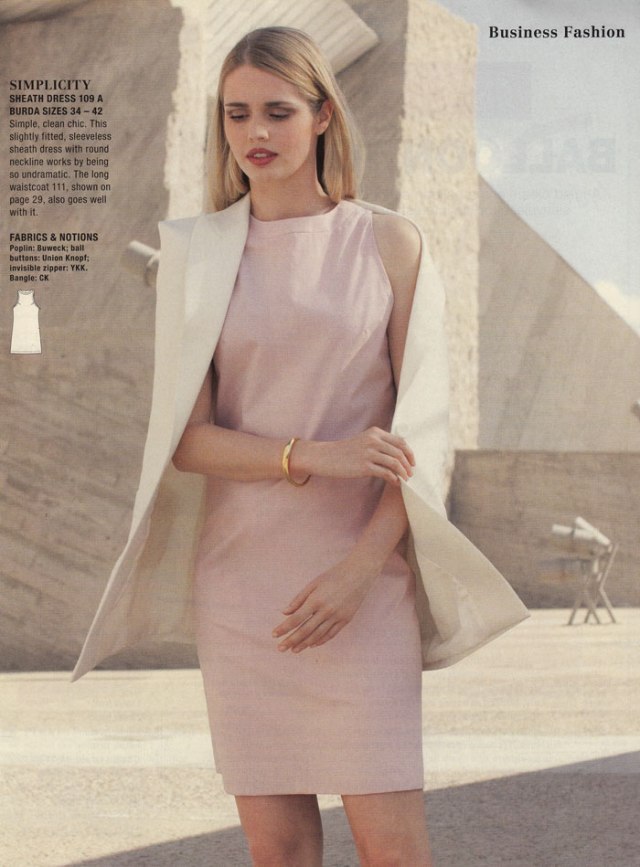
I’m a little bored by the business section. But hey it’s all very ‘fitting’! Some very interesting cuts even if they’re not my thang.

business fashions

That said, the little pink shift dress works well in a lightweight fabric too. Very simple to put together even though its been marked with 3 difficulty circles. Not sure why.

business pink shift dress

There’s a lot of pretty going on with the Plus Fashions. And a bit of an education for me too! I thought it was the lesser endowed that benefitted from an empire line. But no. Check out these delightful visions of ‘womanliness’!

plus fashions

And this one is my favourite. I particularly love the neckline and the slashed sleeves.

favourite plus size dress

An interestingly unusual suggestion for ‘Fathers and Sons’. Said parties in my house just gave me a ‘don’t even go there’ look before I even uttered a word! Shame really, because I think its all very charming!

father son vintage fashion

No further children’s section this month but for all of you crochet fans, there are some really gorgeous projects. I’m so seriously considering digging out those crochet hooks for some of this darling bunting!

crocheted bunting

crochet projectsOr perhaps I ought to consider a crocheted blanky to cover my knees while I work!

I do hope you continue to find these reviews helpful. I must say, in reviewing a lot of the styles grow on me from my first glances. There are always some surprising elements in a Burda pattern. Make no mistake!

Till next time, my lovelies. Happy sewing x