The SOI Miriam dress and jacket I always knew I wanted

I’ve wanted to make a classic dress suit for as long as I can remember. And I own very, many original vintage patterns that would have been perfect, believe me. But an overriding anticipated disappointment in the result always held me back.
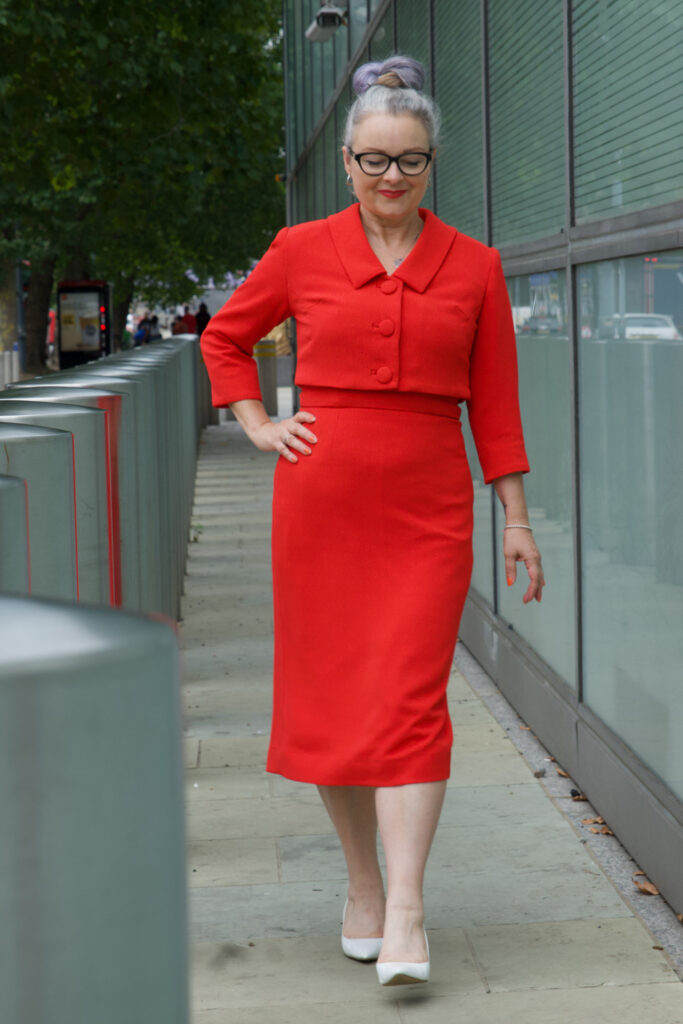
In fact its true to say I’ve altogether strayed away from vintage styles more recently, favouring an urge to be a bit more experimental instead. But I’ve never lost love for the classics. And when Lisa asked if I’d model for Sew Over It’s Vintage Dreaming collection I had to pinch myself. Every single garment of that Ebook is divine but the one look that took my breath away was Lisa in the pale blue polka dot Miriam set and Chantelle in the raspberry linen version. And I wanted it too!
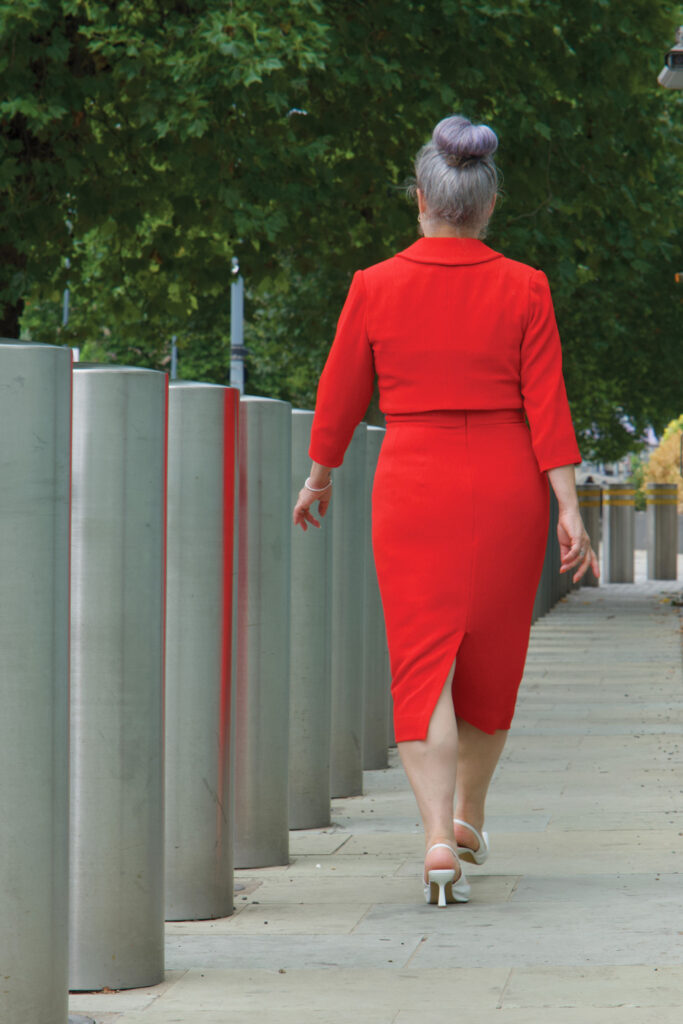
There was something massively nostalgic about Sew Over It making a return to vintage. Because that’s where they were at when I discovered them, when indie pattern companies were brand new and it felt so refreshing to have exciting options outside of ‘the Big 4’ pattern companies, and is exactly the point at which I was keen on sewing all things 50s and 60s. The main benefits of modern vintage-style patterns are the more realistic and modern proportions of the body measurements and also the inclusion of multiple size options so you can grade very easily between 2 or more lines to get a perfect fit. Most of my 1950s patterns are generally an unprinted tissue template for a singular size only. And generally speaking don’t fit straight out of the packet!
And so it was such a joy to cut a straight size 12 for the Miriam set with no fitting adjustments at all! 

The dress came together so easily and relatively quickly. This is largely due to the simplicity of the design, but also the instructions are very clear and concise. The only step I skipped was for the adjustable straps. I just made sure the straps were exactly in the right place and the right length by pinning and trying on and adjusting … about 15 times before finally sewing in place!
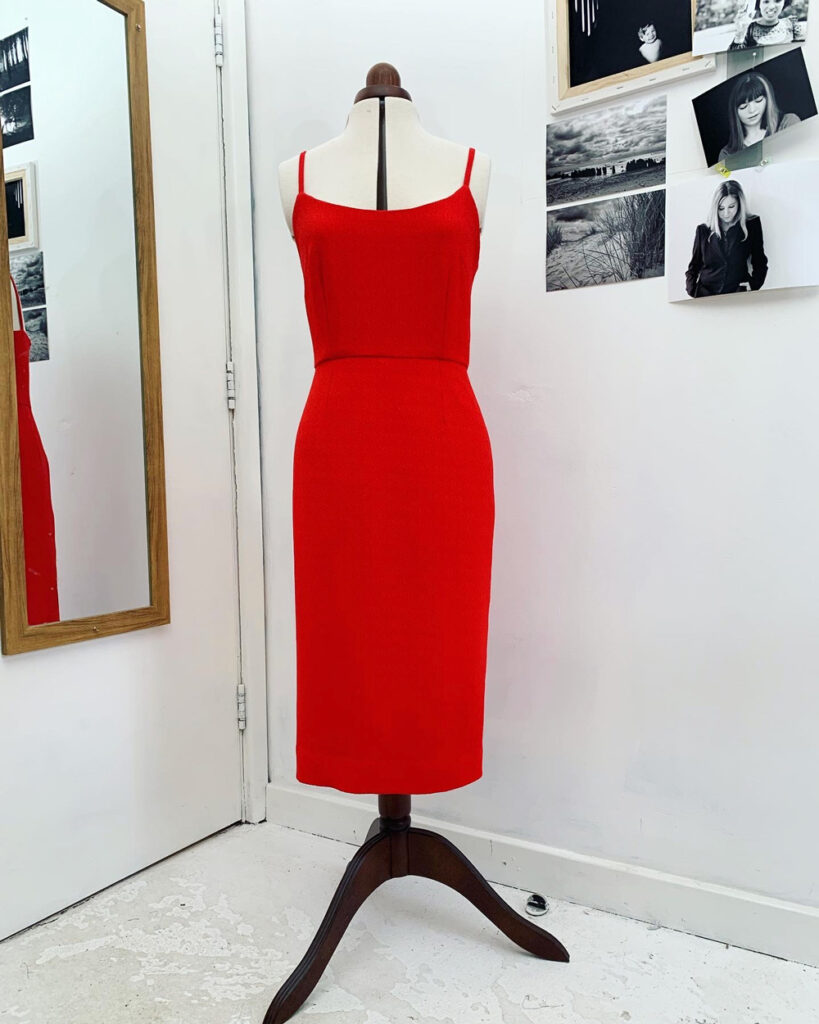
I used a medium weight, red textured crepe from New Crafthouse (always delighted to use deadstock) bought with a voucher I won back in April at the Spring Fling party. Also delighted that I’ve used it up relatively quickly and it’s not languished in stash! I’m trying so hard to create better habits recently regarding my fabric choices, sources and usage. More about that soon.
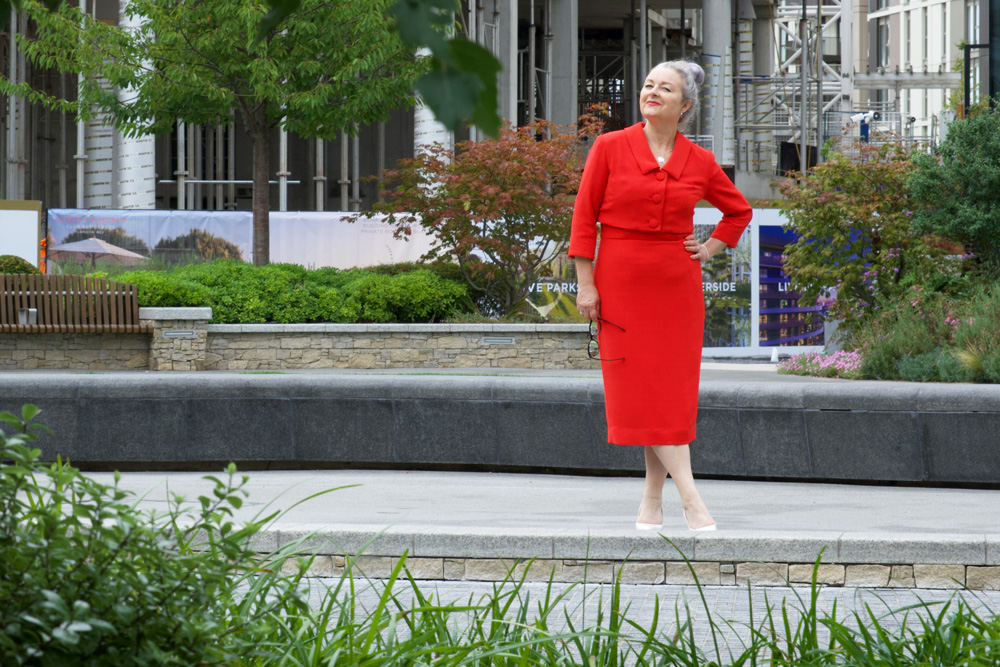
The jacket involved a bit more work. But that was mostly my fault! Although the fabric was great for the dress – it’s got great drape and is very huggy at the same time – I had  a feeling it wasn’t going to have quite enough structure for a jacket so I needed to employ some extra techniques. 

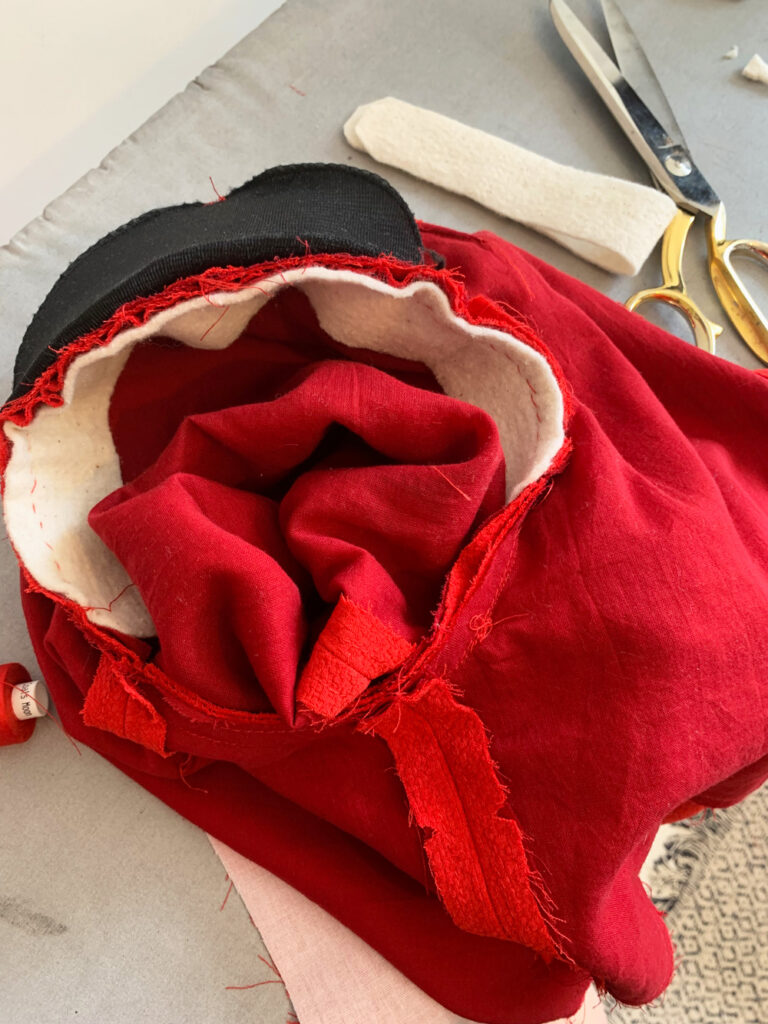
For starters, I underlined all the pieces with a red cotton voile – a great suggestion by SOI. I also padded the shoulders and added some strips of cotton fleece for the sleeve heads. I remembered to take a photo of the inner workings this time. Not quite so pretty though!
I had a horrible feeling that machine buttonholes were going to give me grief. I couldn’t bear to get to ‘almost finished’ stage only to ruin it all with raggedy buttonholes so I set about making old-school bound ones. And boy did I forget quite how faffy they are to do. I trialled some before I did the real ones. Worth it in the long run but I think I near fainted by holding my breath through the entire process. 
Its worth noting the importance of having those welt sections on grain. They will fold better and press straighter and give a much better finish.

And once I’d finished the button holes it made total sense to make covered buttons too. Luckily I had inherited a bag of the button bases and the rubber pressing tool a while back. The size was a little larger than suggested but it worked just fine.

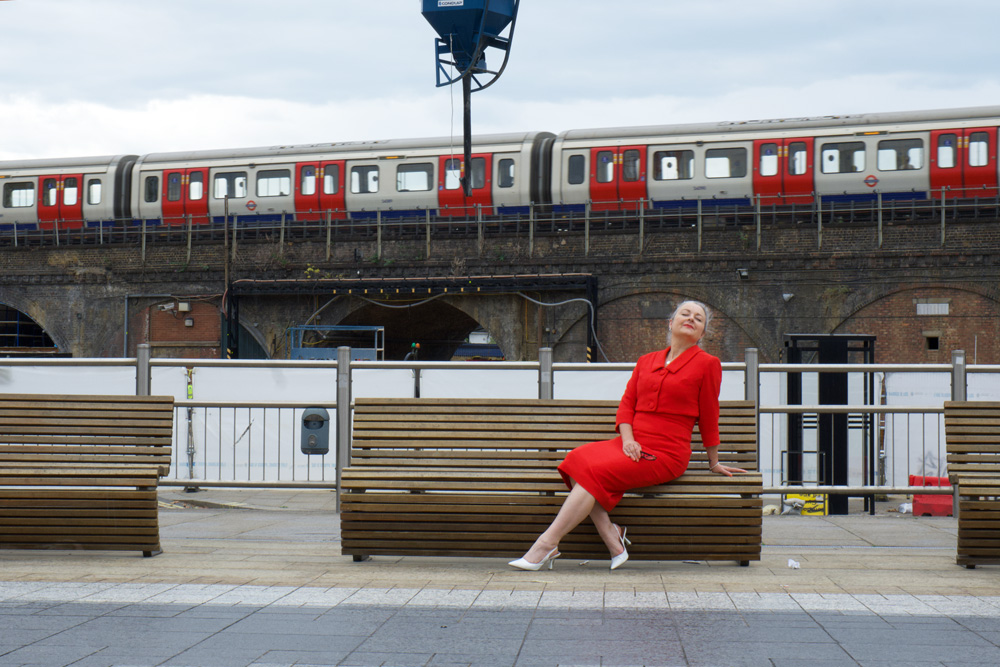
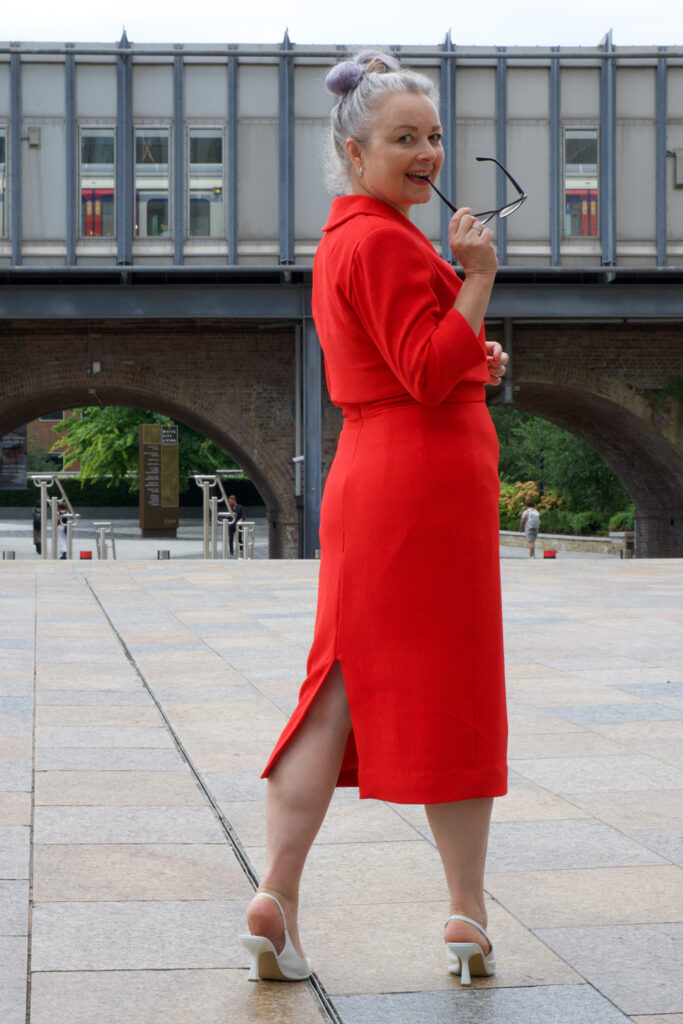
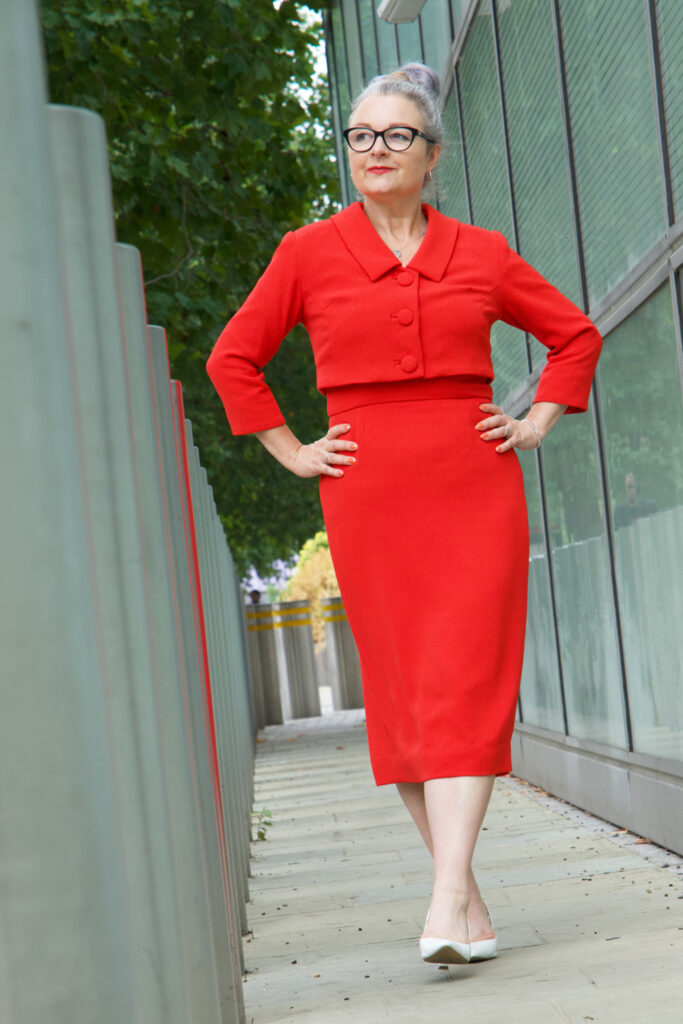
I completed the outfit in the nick of time to wear to my niece’s wedding and was so preoccupied I didn’t get any full length photos so all the thanks to Dan who took the time out to shoot these for me in and around where we work.

I just love how this suit makes me feel: mostly so grown up and properly dressed! It makes me walk tall and fills me with confidence. I got so many lovely comments from passing people, and that added to the feel good factor too! This is already a wardrobe bestie. And most probably will be for years to come.
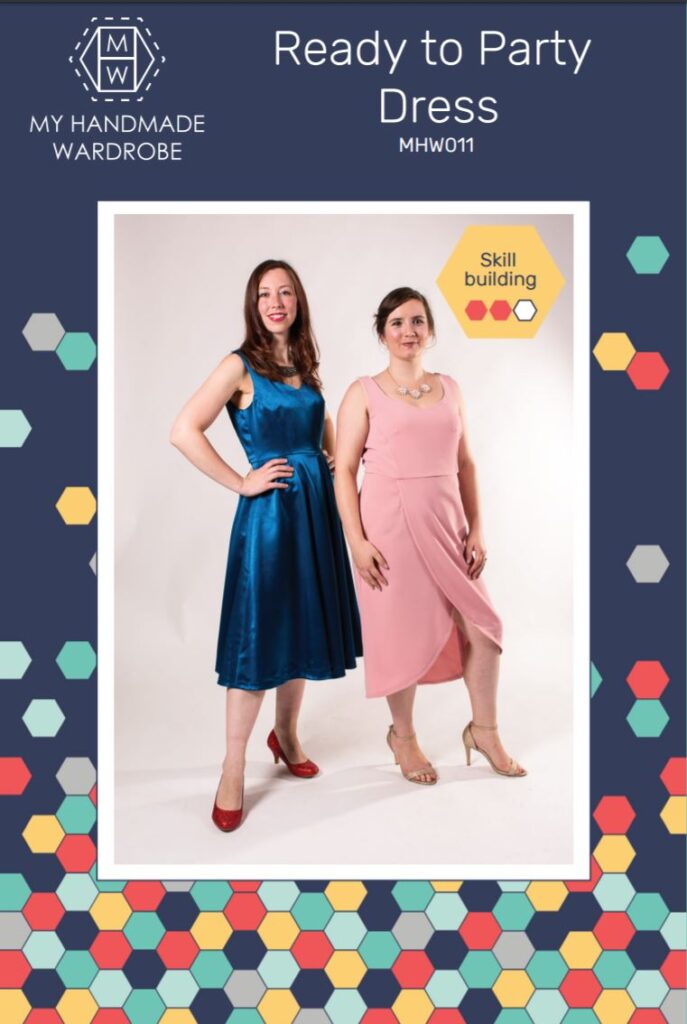
Ready to Party Dress

Original post written for the Crafty Bloggers Club

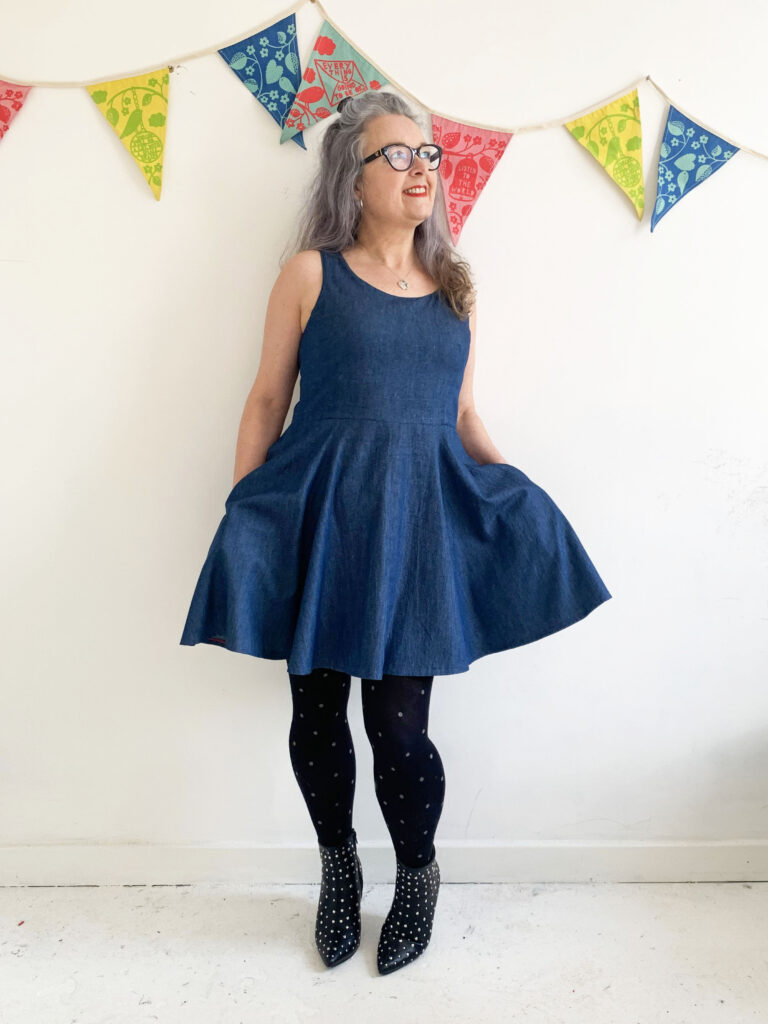
The first time I met the ladies of Crafty Sew and So was at their fabulous Dressmakers’ Ball in 2019. I’ve since been to their Crafty Sewing Camp and can verify that they throw a damn fine party! And so it seemed quite fitting that I chose to sew the Ready to Party Dress for my first experience with a My Handmade Wardrobe sewing pattern.

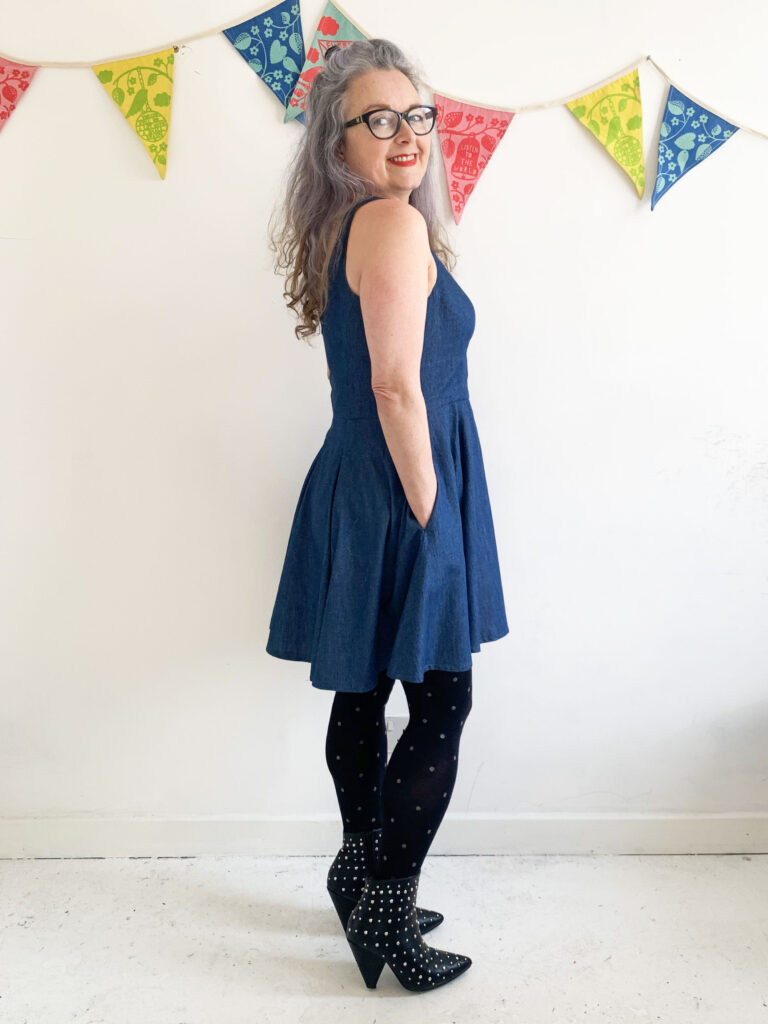
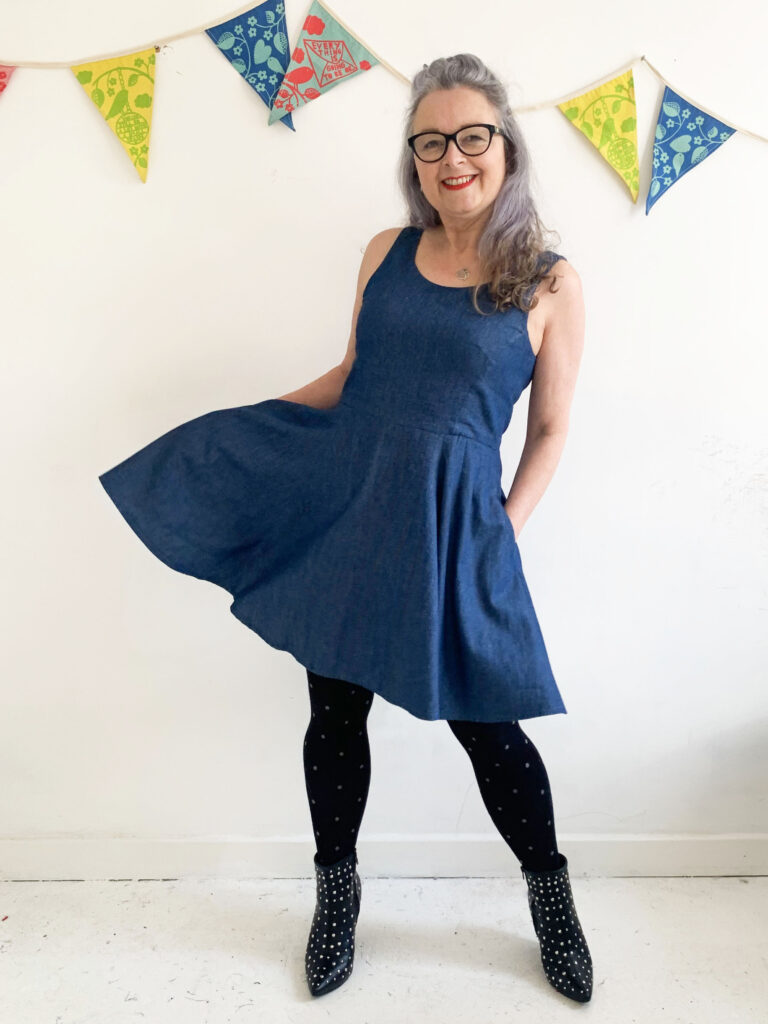
However, true to form and with no imminent fancy parties on the horizon I decided to make it up as an every day-dress instead. 

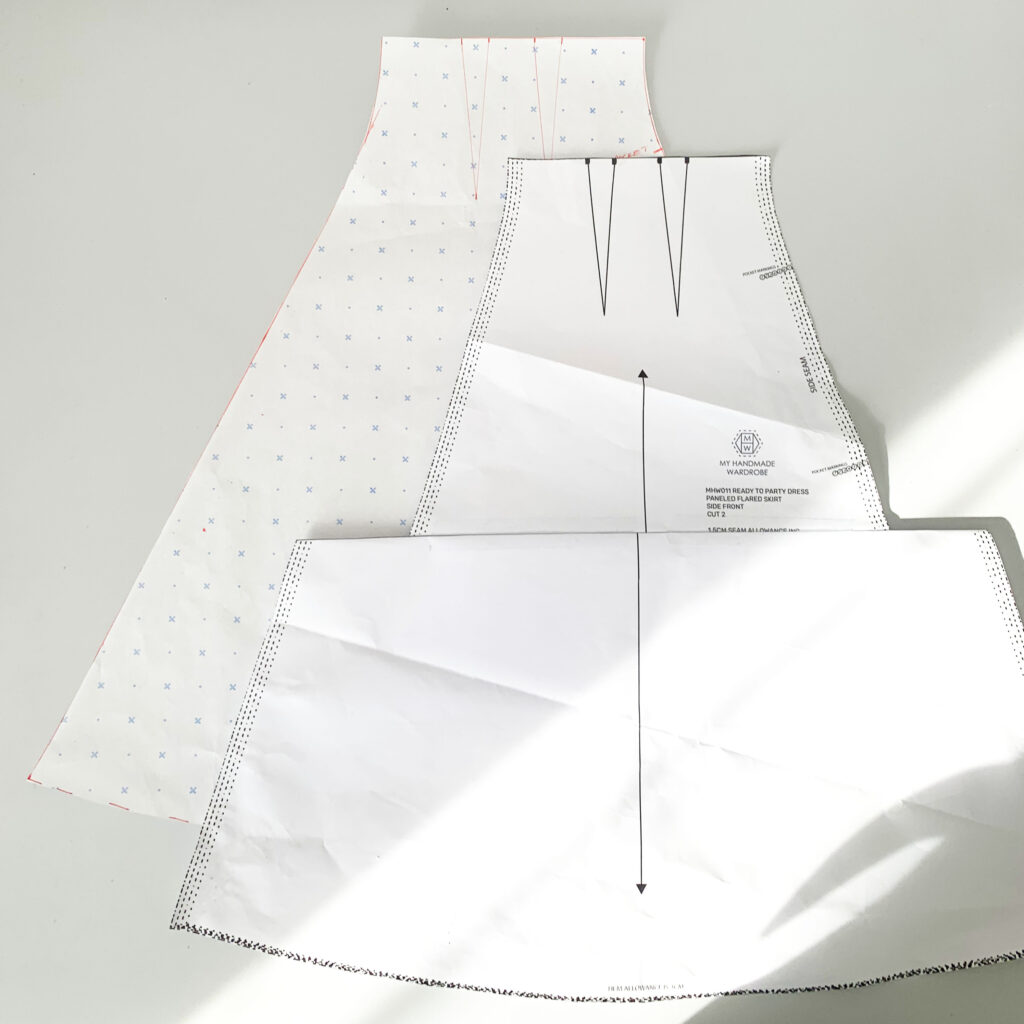
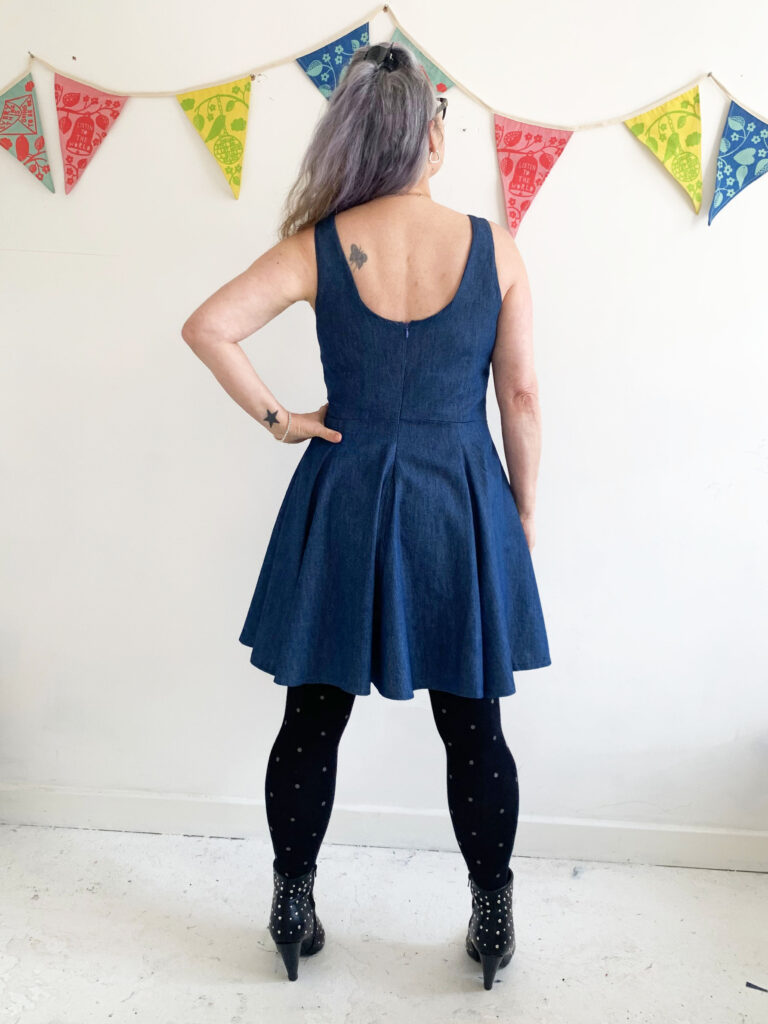
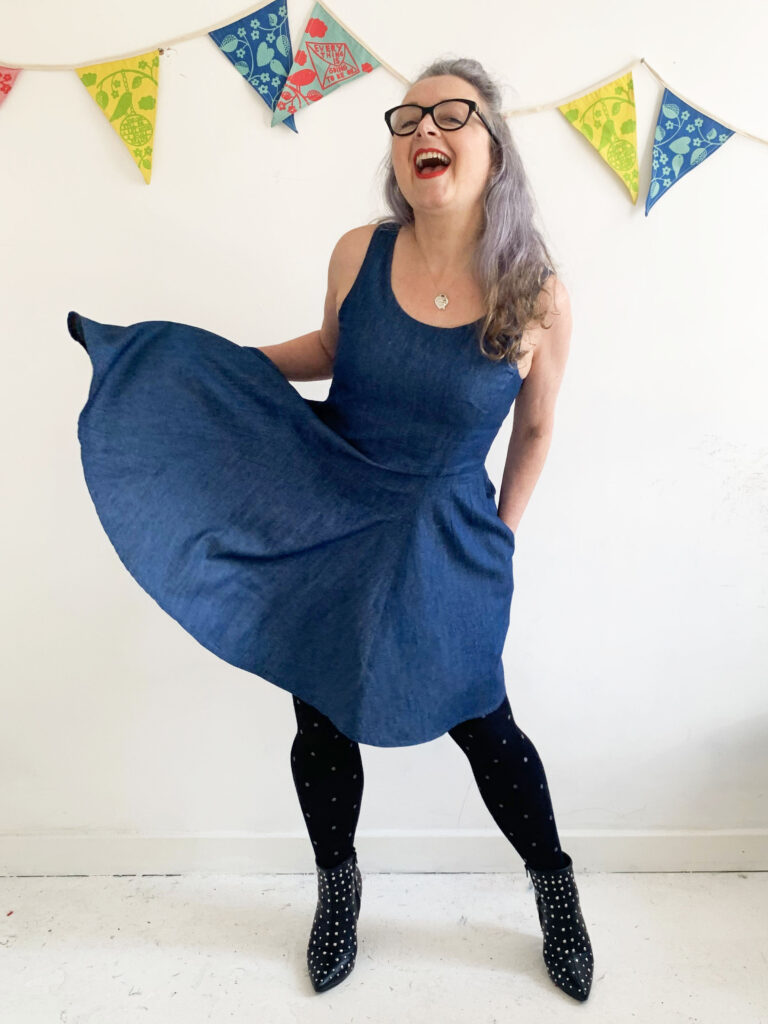
To make it more every-day, this dress was going to have to be substantially shortened for me. Before I go into more detail as to how I did this, I just want to add how interesting this skirt pattern is. It is made up of eight flared panels with a double set of darts on the side front and side back panels and the volume starts after the fitted section at the waist to create such a superb silhouette.

Each panel piece of the sewing pattern has a lengthen/shorten line which is super helpful as I really didn’t want to forego the amazing flare in the design. To be honest I wasn’t totally convinced I could remove a whole 9 inches without some sort of issue but hey, nothing ventured, nothing gained! As you can see there is quite a bit of a step when I folded up the excess. I sat and pondered a while and then convinced myself I just had to average out the difference to create the new pieces. So that’s exactly what I did. I traced the new piece and added the new side lines by drawing from the hem points to just below the waist shaping. And it worked!

I took my time sewing the panels, being sure not to stretch out the bias seams of which there are many, and I’m sure the results were helped greatly by using this wonderfully soft and forgiving chambray fabric, also from Crafty Sew and So. It drapes so beautifully and seals the deal with my ‘every-day’ mission. 

Because of potential bias behaviour, I did tack the sewn up skirt panels to my toile of the bodice while I sewed up the actual bodice. I felt it needed to hang a bit before hemming in case the hemline dropped unevenly and that proved to be a good idea. 

I cut a size 4 for the skirt and graduated down to a 3.5 for the bodice but next time I might just slither a bit more off to go from 3.5 to 3 as it is a bit roomier in the waist than I anticipated. That’s the beauty of having all the size lines to trace off!

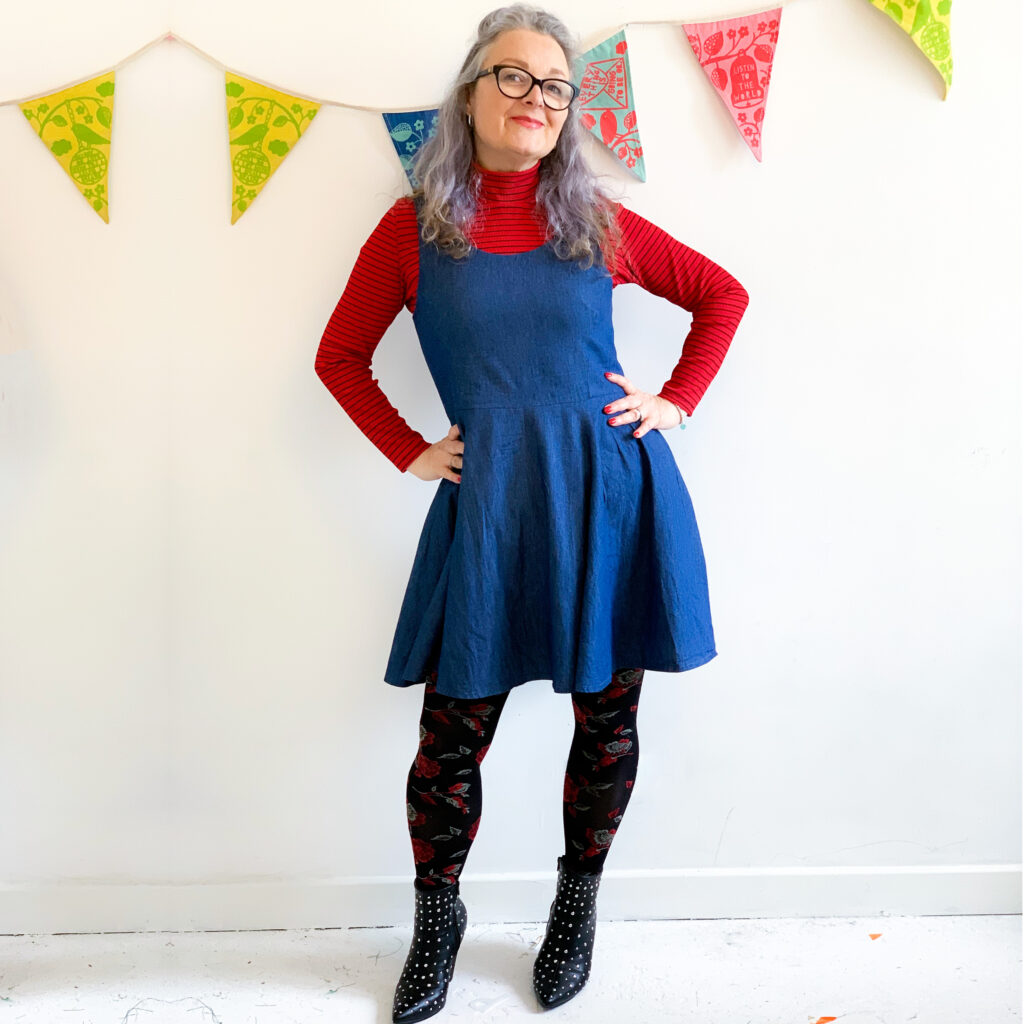
I was torn between choosing the sweetheart neckline and the round neckline of the bodice. And I was almost sold on sweetheart when I realized I could layer the round neckline version more readily with a t-shirt or turtleneck jumper underneath for a change of style and if it got chilly!

I love that its lined. In fact I love lining and the understitching process because it really does give a nice, neat finish.

Oh and I almost forgot to mention that it has pockets – lovely sized in-seam ones that get disguised in the drapes so you can stick anything you like in them with little chance of distorting the shape of the skirt!

I loved making this dress, it was a real pleasure to sew. And I love wearing it – its comfortable, versatile, flirty and feels good. And I can totally recommend this pattern and fabric combo. Because every day should be a party, right?! 

Working on the bias: My first Sicily slip dress

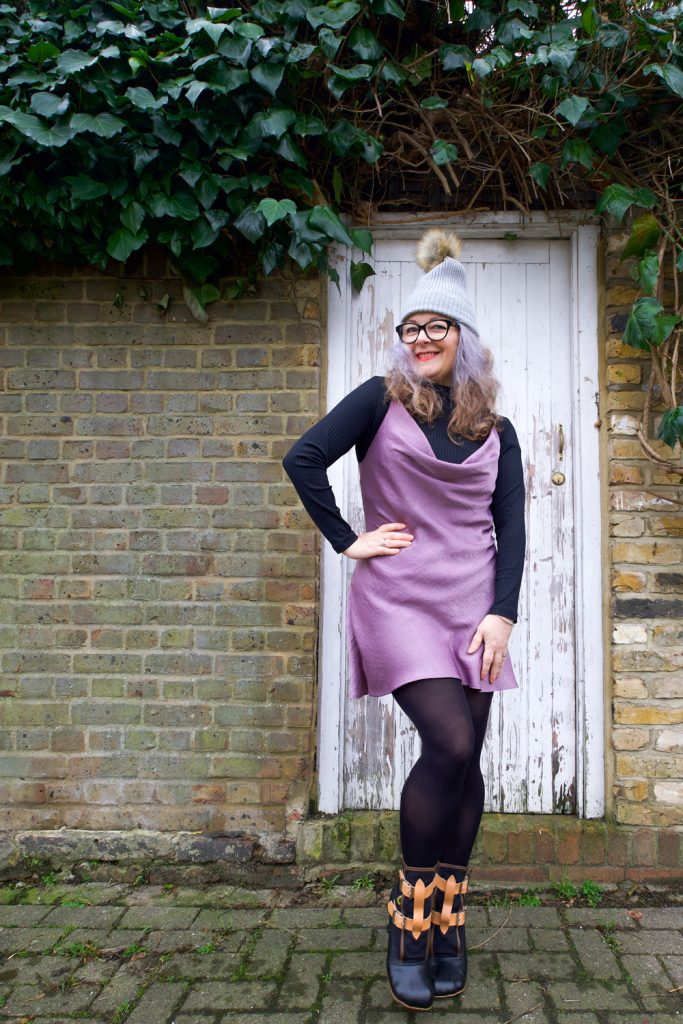
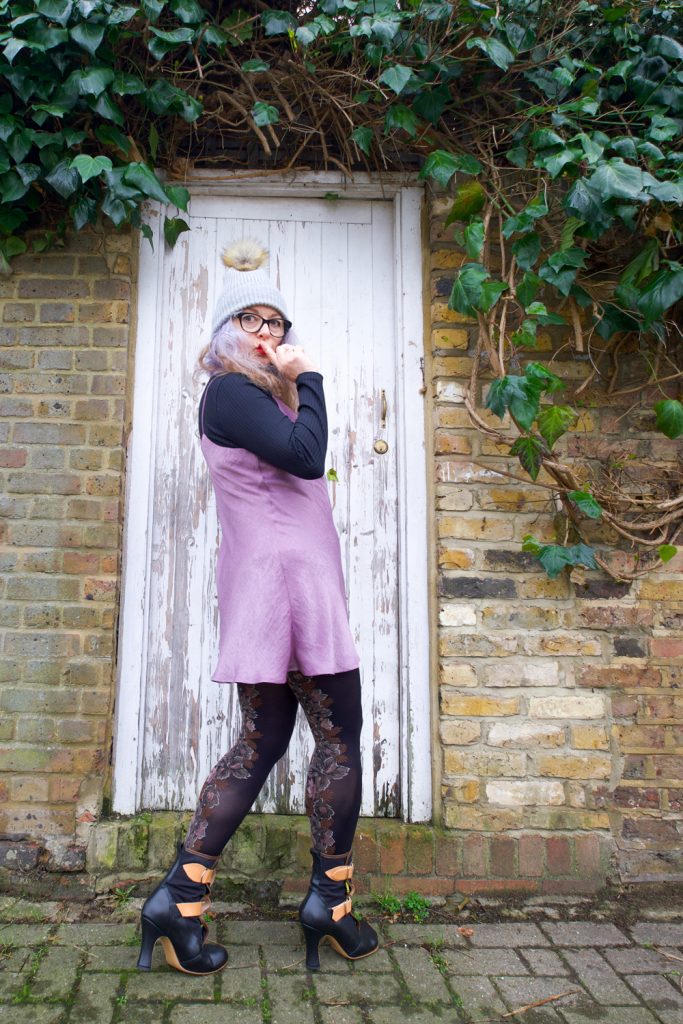
Janene is wearing her handmade Sicily slip dress and is posing with one hand on hip in front on a white door surrounded by brickwork and ivy overhead. She is wearing a self-drafted black turtleneck top, grey bobble hat, black rimmed glasses and Vivienne Westwood Bondage Boots.

I’ve been admiring all the Masin Sicily slips since I saw the very first one, with the same thought in mind each time ~ could I pull it off?!

It’s a very clingy nowhere-to-hide kinda dress and I’ve never been ok with putting my belly out there but I figured I’d never know the level of exposure until I tried!

But why the lilac Janene? Haha, I thought I’d get in there before anyone else does! Because to be fair I don’t often break out of my red and black palette. (I’ll be running back to safety after this post, don’t you chicken curry about that!)

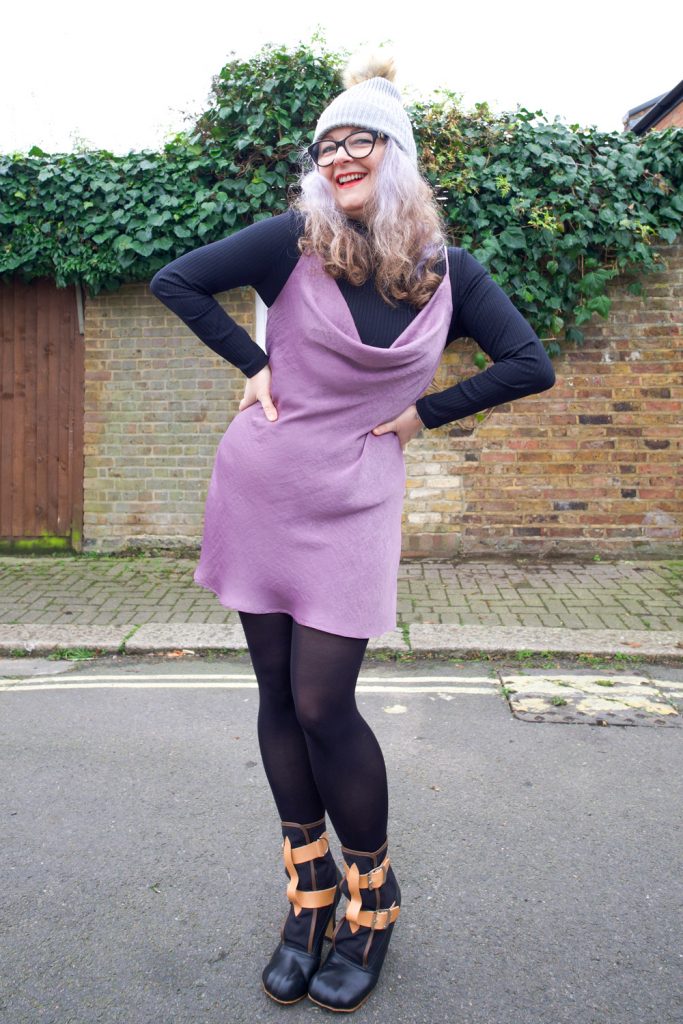
Janene is wearing her handmade Sicily slip dress and is posing with both hands on hips in front on a white door surrounded by brickwork and ivy overhead. She is wearing a self-drafted black turtleneck top, grey bobble hat, black rimmed glasses and Vivienne Westwood Bondage Boots.

Truth be told there was a lilac lovers party going on and fomo got the better of me! Hosted by Cut One Pair and Pigeon Wishes and to celebrate the collaborative button collection this is the second time in the space of a few weeks that an Instagram challenge has given me a push out of my comfy zone. My first being my now favourite jumper!

I have never sewn a bias cut dress. Save a bias cut skirt section of the BHL Jenna dress which I just realized I never blogged (doh!). And I can’t actually remember the last time I sewed a cowl neckline so I was really looking forward to (read, super apprehensive about) making this dress!

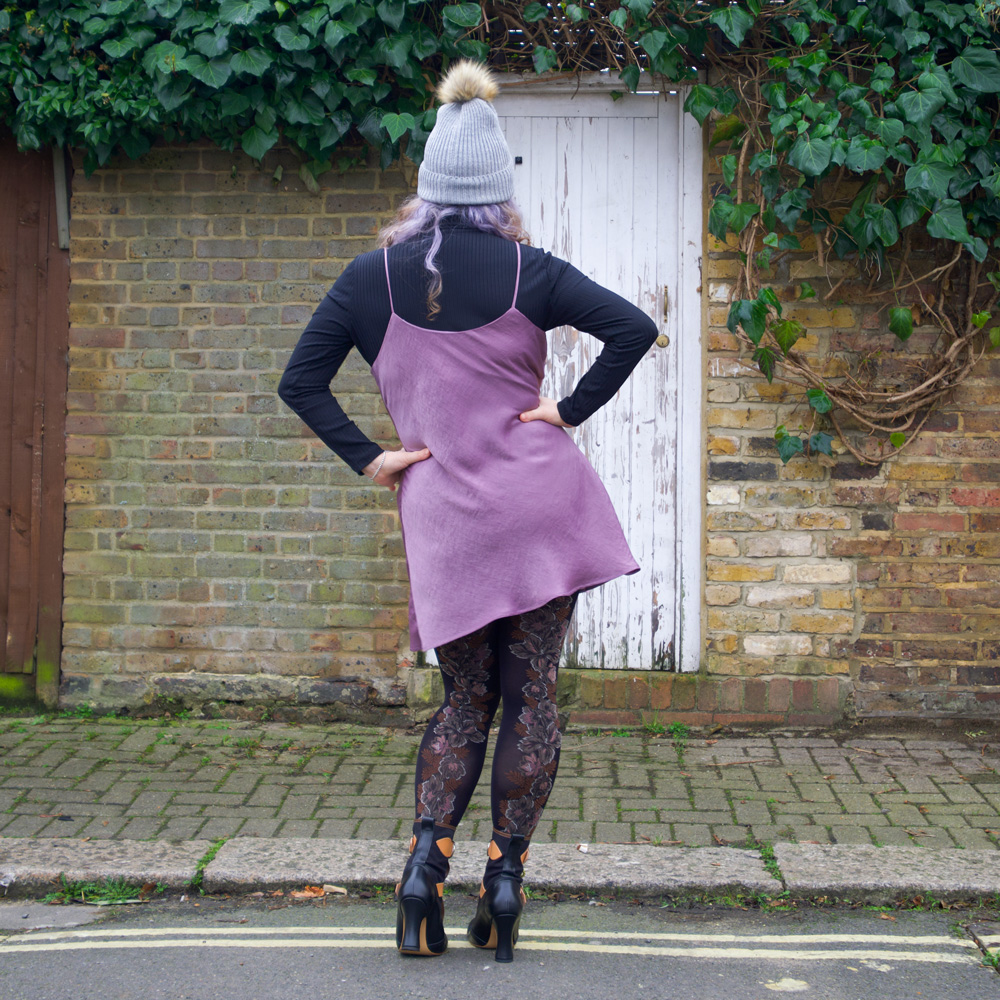
Back vew of Janene wearing her handmade Sicily slip dress. She is posing with both hands on hips in front on a white door surrounded by brickwork and ivy overhead. She is wearing a self-drafted black turtleneck top, grey bobble hat and Vivienne Westwood Bondage Boots.

Now for clarity (and first note to self) I have to say that putting together 50-odd sheets of A4 pattern pieces nearly drove me over the edge. And not for the first time. I don’t know why I put myself through this. Rewatching The Crown while I was doing it eased a bit of the pain but I so don’t want to do that again for a very long time!! Took me an age to get back up off the floor, if nothing else!

The next issue I had was cutting it out. I invested in an A0 cutting mat (Affiliate link) some time ago. It was quite pricey but equally worth every penny. I quickly learned that cutting slippery fabrics with scissors was not the best way forward the first time I tried! So I had both mat and rotary cutter lined up but still, working on the floor was a bit of a nightmare. I had to roll the rug back on the living room floor to pin the pattern to fabric and then roughly cut around each piece so they would fit on the mat to then be cut out more accurately.

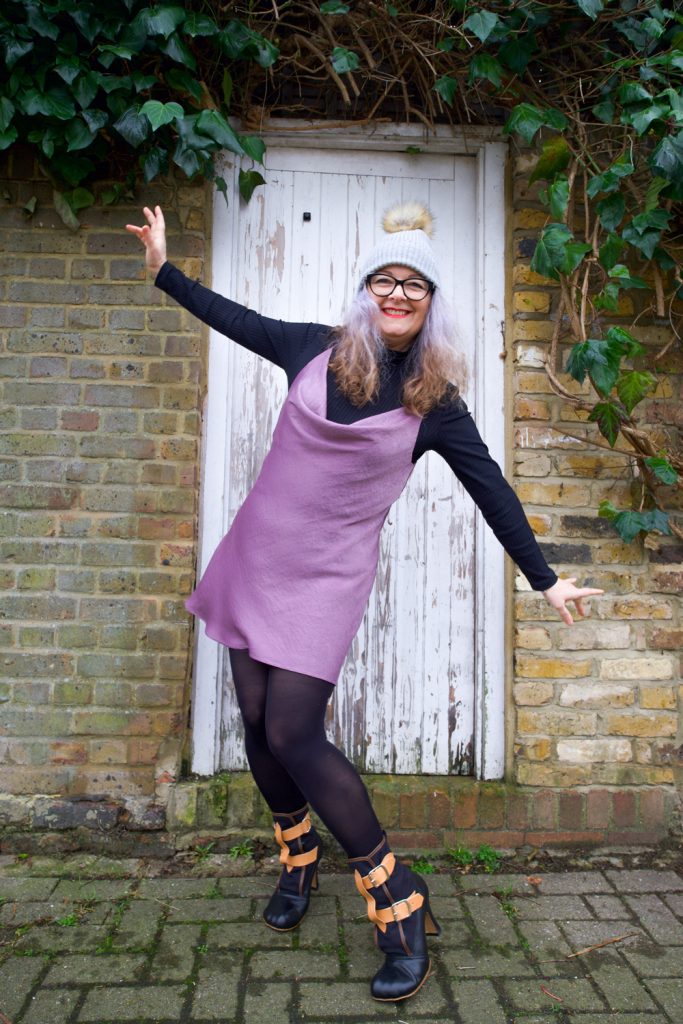
Janene is wearing her handmade Sicily slip dress and is posing with arms outstretched in front of a white door surrounded by brickwork and ivy overhead. She is wearing a self-drafted black turtleneck top, grey bobble hat, black rimmed glasses and Vivienne Westwood Bondage Boots.

It was better than I expected but the pinning and shifting of pieces was a little detrimental, I’m sure, and I’d have much rather have used pattern weights and cut on a large sturdy eye-level purpose built cutting table. Excuse me while I dream the sewing studio dream… again!

This is the first time I have used a sewing pattern by Masin and I have to say I found the instructions beautifully laid out, concise and super helpful. There’s a clear explanation of bias grain behaviour and how to pick the correct size. Having said that I still managed to pick a size too big because my hips are bigger proportionally than my bust (so I made the wrong choice instead of grading). And I think that is why my cowl neckline appears rather more dramatic than most. I’m still deciding if I’m comfortable with it. It’s perfectly fine layered with an undergarment but I’ve got a whole pack of tit tape at the ready for when I dare to wear it on its own!

waist up image of Janene, wearing Masin Sicily slip dress. She is holding 3 lilac colour carnations with both hands to the bottom of the frame. She is wearing black rimmed glasses and her head is back, laughing.

I was surprised that this view A with the skinny straps was suggested as the easiest version to sew. It’s taken me years to master those spaghetti rouleaus! But I have to say now that I’ve grasped it, I actually quite enjoy making them. I recently posted a little tutorial here if you are interested:  Rouleau Loops Made Simple

There are very few pattern pieces for view A – like front, front facing, back with facing, and strap – and no closures; so the rest of the instructions were super plain sailing BUT… and quite a big BUT…

I think I made a boo boo by stay stitching the bias side edges with a straight stitch. I’m not entirely sure because I could have stretched out the seams when it hung over the edge of the table as I sewed, or perhaps as I was sewing the actual seams. I did use a small wide zigzag stitch to French seam the sides but of course that was like closing the stable door after the horse has bolted! While the dress is hanging, the bias cut fabric is going to stretch more but the stay-stitching is going to… well, STAY! (Second note to self: try zigzag stay-stitching too!)

Side view of Janene wearing her handmade Sicily slip dress and is posing with right index finger on lip in front on a white door surrounded by brickwork and ivy overhead. She is wearing a self-drafted black turtleneck top, grey bobble hat, black rimmed glasses and Vivienne Westwood Bondage Boots.

All was not lost though. The worst of the puckering was near to the hemline and I had been mulling over a choice of midi and mini length at the start. So decision was made when I realised I could crop off the worst areas by going for a mini length!

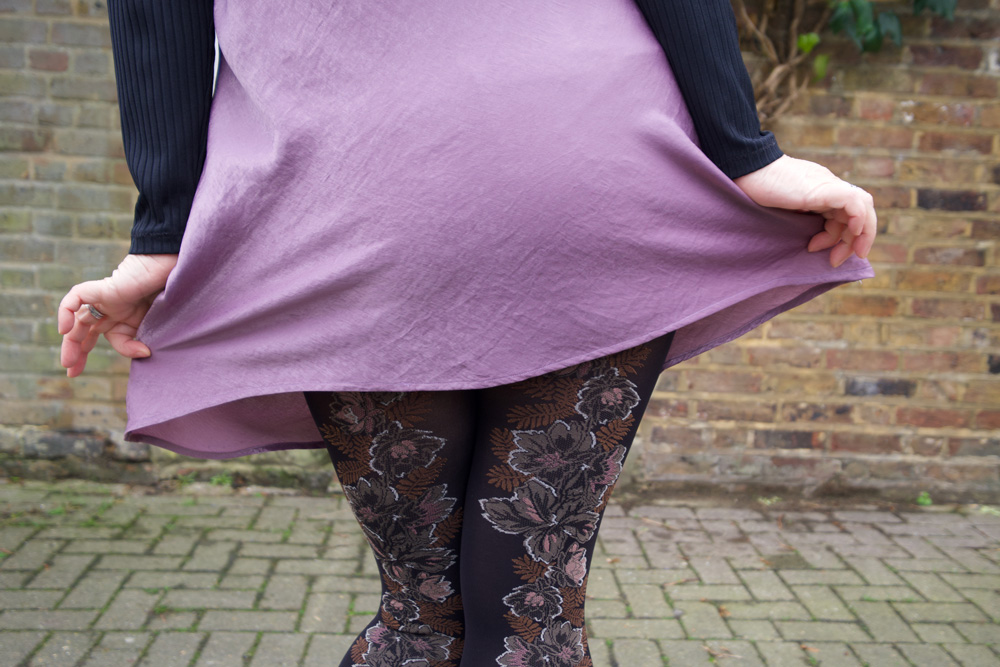
I’m pretty pleased with my hemming too. I sewed a quarter inch away from the cut line and pressed as instructed and then sewed close to the second fold. Even though this velvet touch poly is totally synthetic I was amazed that it pressed so beautifully.

Detail of small hem on dress. Cropped image of hands holding out skirt to sides

Once again I have learned new things. Testing things but valuable lessons all the same and nowhere near testing enough to put me off trying again – the absolute best thing about sewing adventures!

All in all I am delighted with the outcome and I will be revisiting this pattern again. Leopard print satin is already prewashed and sitting patiently atop the stash! So if anyone has any thoughts about stay-stitching bias dress side seams before I crack on, please let me know in the comments below. And I will love you forever!

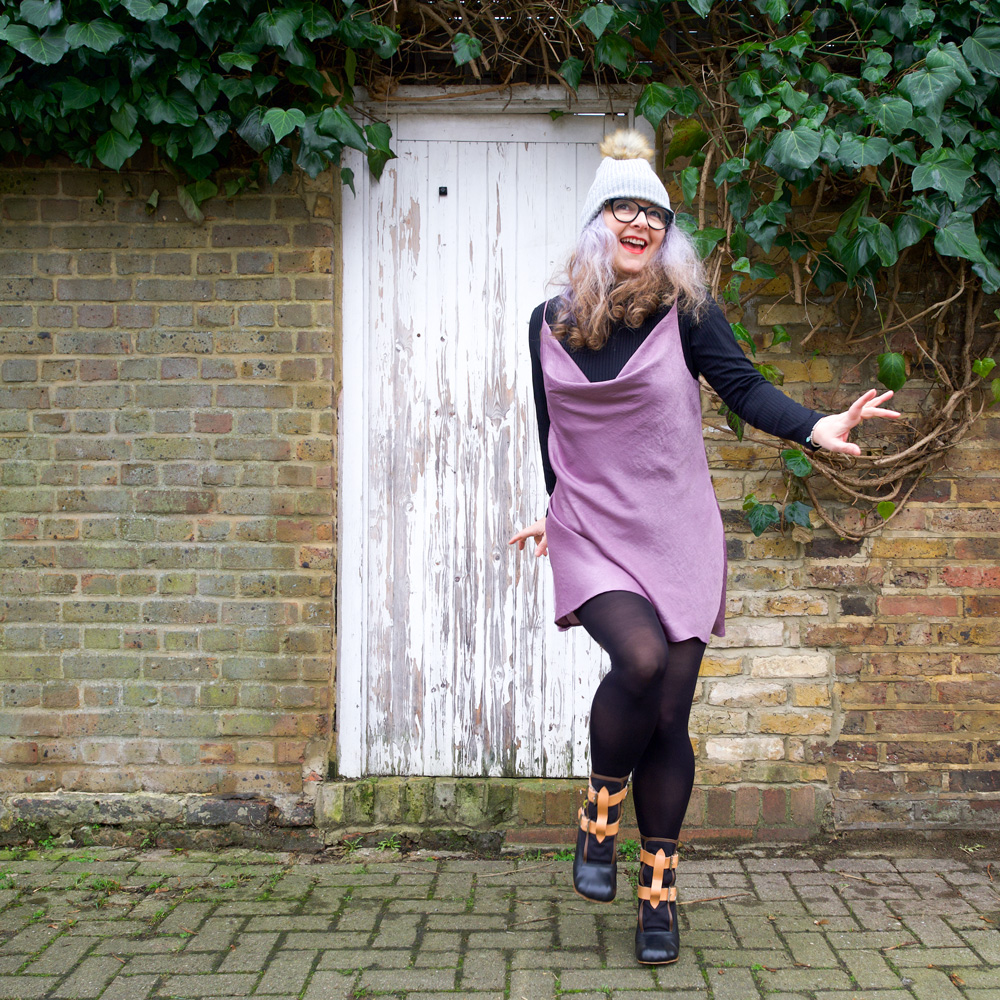
Janene is wearing her handmade Sicily slip dress and is skipping towards the lens in front on a white door surrounded by brickwork and ivy overhead. She is wearing a self-drafted black turtleneck top, grey bobble hat, black rimmed glasses and Vivienne Westwood Bondage Boots.

Lovely photos by Daniel James Photographic

Testing the Tamzin dress

BHL tamzin dress by ooobop

It’s been a while since I’ve taken on any pattern testing. I’ve been trying to claw back time so I can focus on a whole host of things that I want to work on and develop and I managed to resist the urge until By Hand London contacted me to test the tremendous Tamzin dress. How could I possibly refuse?

It’s so floaty, so folksy yet so cool and classy all at the same time.

And if you hadn’t noticed already there’s some beautiful bonus details which bring the added charm.

A square neckline is always a favourite of mine. I love the clean lines and that it shows just enough skin to keep it classy. The external front and back neckline facing is such a neat finish. I’m sure it helped that I used quite a lightweight fabric to get that topstitching nice and consistent but the proof will be in the pudding when I get my hands on some lovely linen for the next version. I just can’t resist the urge to embellish that facing much like Elisalex did.

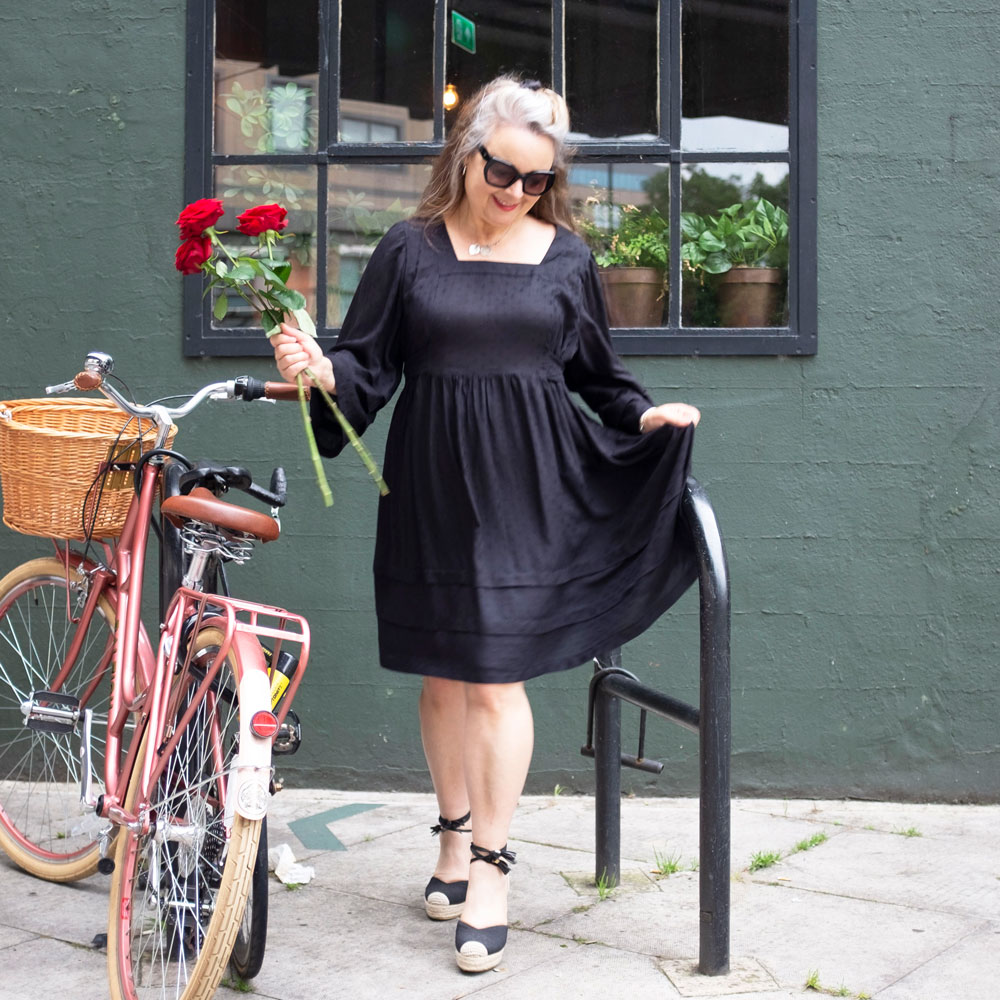
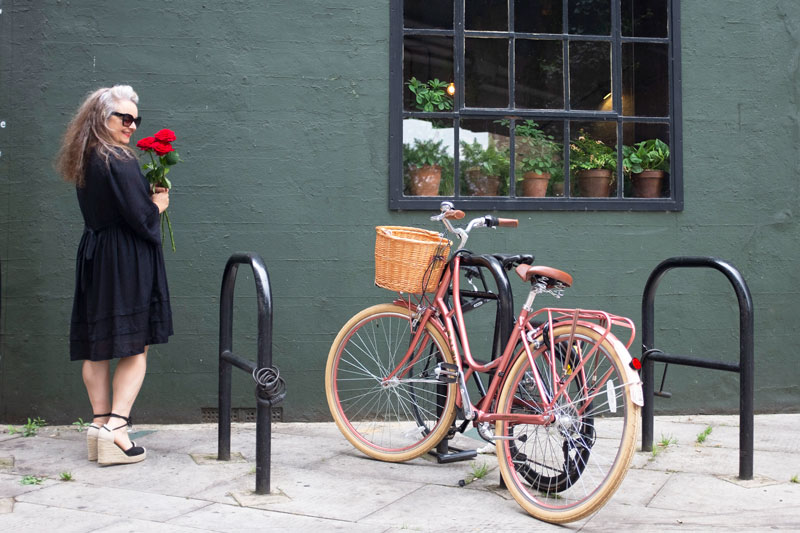
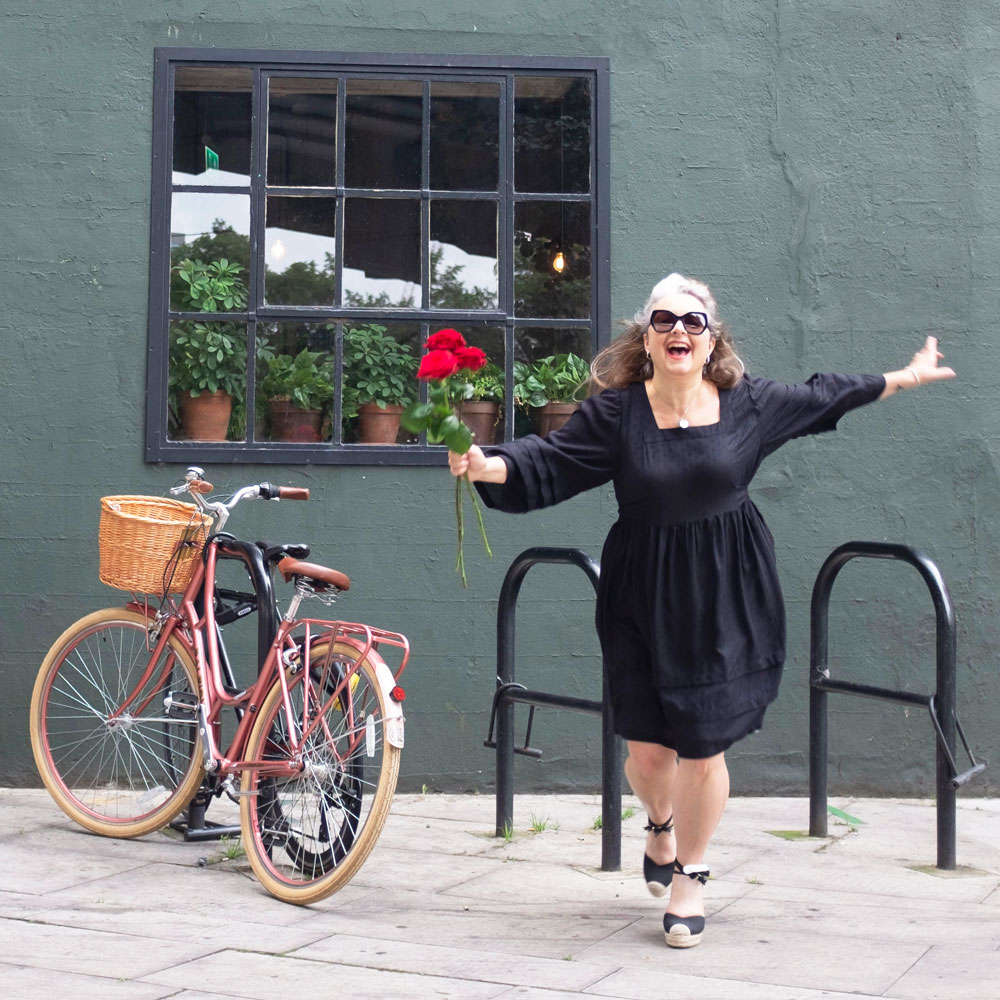
BHL Tamzin dress made by ooobop

Incidentally the fabric I used for this was won over a year ago, in the #brightsewing challenge hosted by @thepinkcoatclub and @theunfinishedseamstress. (I had entered my Yellow shiny appliquéd number!) Part of my prize was a voucher which went towards this amazing Atelier Brunette diamond viscose fabric from SisterMintaka. It is such a beautifully soft and draping fabric that I was almost too scared to use it. I wanted it to be for something special and, well now you see it!

I didn’t quite have enough for the full length of skirt – its quite hungry on the yardage due to those pin tucks and the sleeves pieces are huuuge! – but to be fair, I had already decided on a shorter version so there wasn’t any heartache involved. Except I sewed the pin tucks too small!

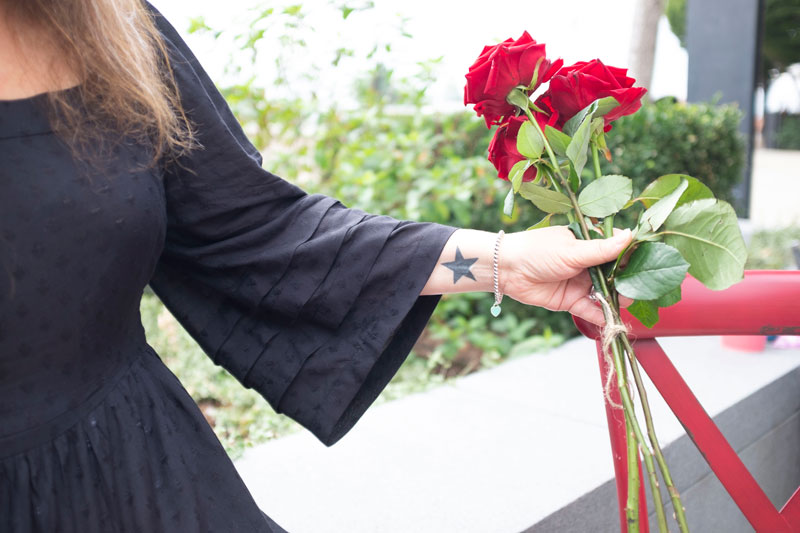
And let’s just take a moment to ogle at the pin tucks on the sleeves. Aren’t they simply divine?!

By Hand London Tamzin Dress sleeve detail

Before I read the instructions I had anticipated a right royal pain in the arse time of getting them even, especially with drifting draping fabric but there is a nifty technique included to make life so much easier and perfectly sized and spaced pint tucks to boot!

Now you may think I’m being lazy here but another selling point of this pattern is that there are no closures on this dress other than the delightful back ties. I don’t hate sewing zips as much as I used to but the joy in not having to sew one at all is immense!

BHL Tamzin dress handmade my ooobop

I chose the variation with the ties that start from the side front and wrap around the back. There is another version of the tie that starts from the back. But I wanted all that ribbon detail and for it to cinch me in at the waist.

I think you can probably tell already how happy I am with the result.

BHL Tamzin dress made by ooobop

The instructions were super clear, and it was a joy to sew. Not complicated at all but I must add that it’s not the quickest dress to whip up – those added details come at a price of a couple of hours more but it’s totally worth it.

Are you sold? Or have you made one already? I’d love to know what you think either way.