Self-drafted wax print dress

wax cotton dress side view
I’m not entirely sure how this post got shot and written today. We arrived home from Glastonbury Festival at 6am this morning – a little tired and emotional to say the least! Thank goodness for a great set of shades picked up for a tenner on site, from a pop up vintage shop (ironically, usually based in Portobello… just up the road from me!)

So, the dress… It’s mine, all mine! No pattern, vintage or otherwise was used in the making-of and I’m just a little bit proud.

I really wanted a new dress but without any faff. I really, really wasn’t in the mood for trialling various test versions – I’m getting so impatient in my old age! – And then I remembered that somewhere, in some pile or other, there was a pre-existing bodice block from a class I took about 3 years ago. To date I’ve only used it once, for a retro-style top, which is madness. Because it fits!

I only wanted a sleeveless bodice for the top, nothing fancy so it seemed daft to reinvent the wheel. I simply lowered the armscye and the neckline. Luck was on my side because this resulted in precious little gaping as often happens without any contouring. But I will nip a bit off the upper back neckline next time.

wax cotton dress self-drafted

My usual sway-back adjustment was already done and most importantly the bust area was a perfect fit.

Whilst we focus on that area, can we just talk placement? I’d love to be able to claim absolute intentions but the truth is, I was led my a small issue of just the right amount of fabric and nothing more, so I can only claim a happy accident – the likes of which Madonna would champion, I’m sure!

I just love this wax fabric. And I knew there would be further adventures when I made Lucy’s jumpsuit and Amelia’s baby dress.

wax print dress back

One of the most incredible things about this fabric is the price. A 6 yard bolt of Wax cotton can vary in price between £10 and £150, depending on quality, print, manufacturer etc. That said, this lovely red cloth was just £10 and retained all colour and structure after a regular 40° cycle and spin in the machine and it was so satisfying to sew with. More importantly I landed a fabulous handmade dress for a fiver!

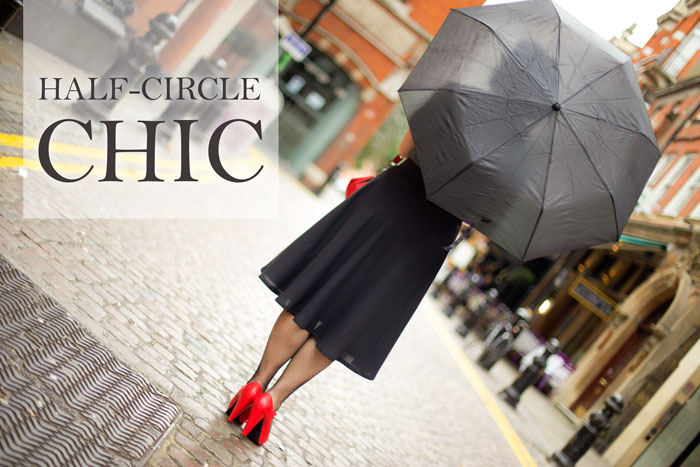
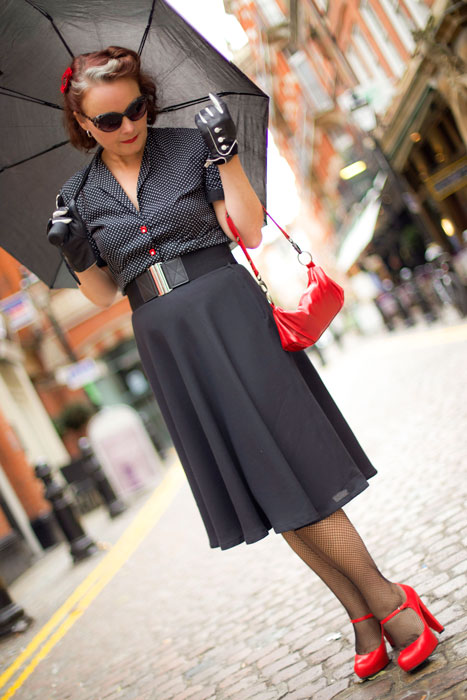
The skirt section is simply a half circle, the same self-drafted pattern I used for my black and my blue crepe skirts.

african wax print dress skirt

The zipper is inserted on the left side, like most of my vintage-style dresses but also because I didn’t want the seam of the skirt to go down the front with the focus on broken up print. No excess for pattern matching either!

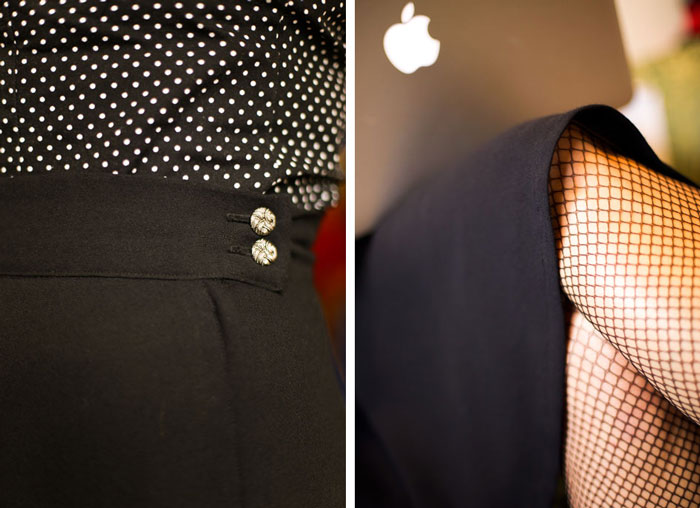
The belt I’m wearing was a steal from Oxfam at £1.50 and does a perfect job of hiding the connecting waist seam which obviously is interrupted and mismatched but I’m not so sure there’d be any way round that anyway. It’s not actually that bad but still annoys the pants of me enough to cover it up!

wax print dress side view

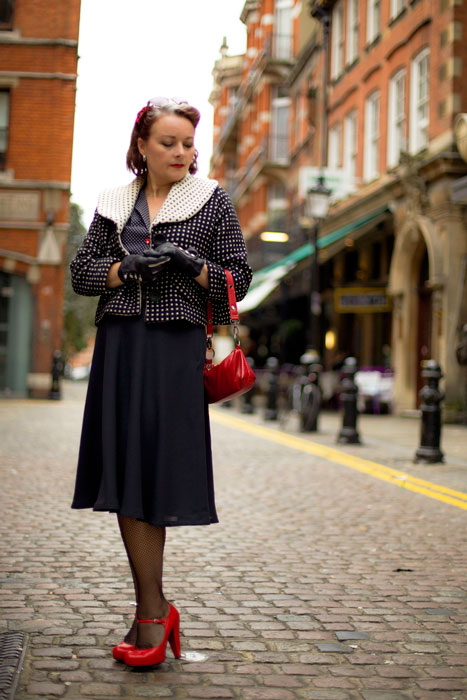
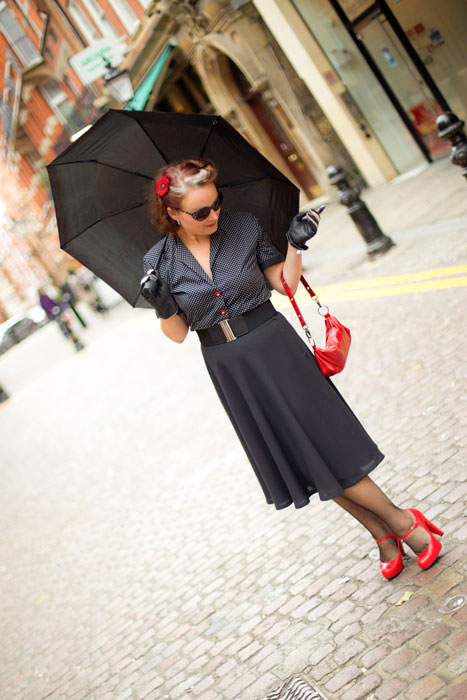
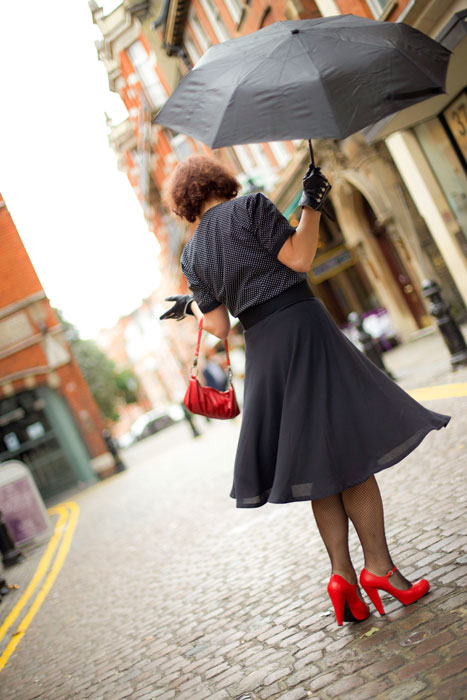
Daniel came up trumps again with these fantastic photos. They were taken at Freemasons’ Hall in Covent Garden, today. Such an awesome building with a massive star on the steps for me to stand in the middle of! I can’t believe how he gathered up the energy to do this after that long drive back. Or how he made me look so respectable after nought hours of sleep. He is such a superstar. So supportive. I am one lucky lady!


A blue half circle skirt

blue half circle skirt

This is my new half circle skirt. Self-drafted and made in a cobalt blue poly crepe.

Sounds pretty simple hey? Well to be honest, in principle it was. And it would have been a swifty project if I’d have remembered a couple of simple things.

ALWAYS MARK YOUR SELF-DRAFTED PATTERN PIECES AS SOON AS YOU’VE DRAWN THEM

Why? Well in my case, I have a fair few circle and half-circle skirt pieces that I’ve not only drafted for myself, but for others too. And in my haste I’d just labelled them ‘skirt front’ or ‘full circle’ and one just said ‘circle skirt piece no SA’. The latter was helpful, at least to know that I needed to add a seam allowance but none were any help at all to know if it was the right waist measurement, the right length, a full or half circle etc. What a twit!

blue half circle skirt

So first job was to redraft another, to my size. And second job was to ensure all that info was written bold and clear on the pattern piece for future use.

I’d already prewashed my fabric, so that was a win. The number of times I’ve been fired up to sew and didn’t have prepared fabric to hand is way too many to count. But swifty projects aren’t very swifty at all if you haven’t factored in to…

ALLOW A CIRCLE SKIRT TO HANG AT LEAST OVERNIGHT BEFORE HEMMING

Sewing a circle or half circle really doesn’t take that long but don’t bank on whipping one up, hours before a party because it has to hang at least overnight to allow the weight of the bias fabric to drop. This will almost definitely result in an uneven hem and will need levelling before hemming. I put mine on a dressmakers dummy but I’m sure if it was hung evenly on a pegged coathanger, you would achieve the same result.

So next there’s the levelling. I put the dressmakers dummy, wearing the skirt, on a table so that the hem is at eye-level. I use a metal rule from table top to my desired length and then mark all round with chalk or pins, rotating the whole dummy rather than spinning it (that’s another long story). I then go round a 2nd time to double check the measurements.

Once trimmed I sewed a quarter inch line of stitches from the edge and pressed up a hem. I stitched and in this case didn’t need to turn over again. But that might be necessary if fabric is more fraying.

blue half circle skirt

The lining of course needs the same treatment.

I rarely hate on any aspect of sewing, but I discovered this morning that I truly hate levelling, trimming and narrow-hemming lining fabric for a circle skirt, like massively!

It appears I’ve only made one other half circle skirt before, but it was so long ago, it’s well and truly worn out! So as much as I love this colour blue – quite unusual for me actually, don’t you think?! – I feel I must make a replacement black one too. And maybe a red as well!

I must at this point just big up my 12 year-old daughter who took these lovely photos for me. It was a very impromtu shoot as I was doing some shots of my eldest daughter who was face-painting in the park. Little Miss O brought her own camera along for some practice and certainly did me proud. Look out dad, someone’s hot on your heels!

Half-circle chic

half-circle skirt

This is my first self-drafted half circle skirt. Made from the finest poly-crepe and lined with some heavy stretch satin because gravity ain’t that clever!

I nearly went for wool crepe which I think would have worked even more beautifully, but the idea of messing up 2 metres @£40 was a little bit more daunting than @£9!

half circle skirt front view

The drape is lovely on the poly and I’m so chuffed with how flattering it is around the hips, but my oh my does that cause nasty stretchy bias hemline issues.

To draft the skirt, cut and sew together is child’s play. And it was a perfect project to practice a lapped zipper too. But to get an even hem on this skirt required patience of some saints. I blogged the other day about my time-starved, light-rationed sewing time so I won’t harp on any more about that but lets just say a massive learning curve was attained with the help of some basic tools, a bit of determination and a few swear words!

half circle skirt with jacket

half circle skirt front

I incorporated 2 buttons as a closure instead of the usual hook and bar and used black bias binding to finish the hem. And no I did not do it by hand!

half circle skirt detail

I so needed another black go-to skirt. And it feels right to go back to black. I do love a pencil skirt but I also love how swishy and elegant this one feels. A little bit Grease and a little bit Mad Men but also very much me. I can even run for the bus in it! Just need a few more 50s style blouses or peasant tops to go with it now.

twirling in half circle skirtAmazing photographs by Daniel Selway

Shedding some light on a dark subject

Head torch
I am time-starved. Especially when I get home from the office. Even more especially when it’s dark and my energy levels have dropped through the floorboards.

It’s frustrating mostly because I function fully from morning to afternoon, busily beavering away, designing, revising and artworking books like there’s no tomorrow. At lunch, I compose lists on Post-it notes. Lists of what I fully intend to do when I get home. Sewing projects mainly. Finishing off WIPs, drafting new ones and watching YouTube tutorials but then, as I walk through the door, adorned with Sainsbo’s bags, check on the homework, prepare the dinner, feed the masses, wash up and put the children away… someone or something sneaks up behind me and blatently steals my ‘get up and go’!

I find myself making excuses to myself. My best one is: “These damned energy efficient lightbulbs are rubbish. I can’t see a thing!”

I offloaded this woe to a work colleague on Wednesday and she suggested a head torch. Genius! Bhavini always has the best ideas. (Apart from Helen who invented #TuesdayCheeseDay!)

By Thursday I had completely forgotten that my half-circle skirt had already taken 5 evenings. And I had nearly forgotten that I had to unpick the hem already because I stupidly didn’t level it before stitching. Even when I did try to level the hem, apart from the light failing and it being virtually impossible to see where I was marking on a black fabric, the dress-form was slowly sliding downwards every time I twisted it round. So by the time I got back round to the first pin, I was pinning higher and higher! I said nearly forgotten!

Because thanks to Bhavini and her brilliant suggestion, Mr Ooobop’s head torch worked a treat. I could now see what I was doing, without a care that I looked like a complete fool, and that self same evening, my perfectly levelled half-circle skirt was finished.

working with head torch

I’m not sure if you’ve ever had the displeasure of a bias-stretched hem – honestly, two and a half unnecessary inches longer at the front more than the sides! – but I will never ever wing it again.

To get it right, I first measured the length I wanted with a tape measure from the waist, down the side seam to the hem and placed a pin. I then measured up from the bottom to the hemline, using a metal rule and continued pinning the new hemline all round. I rotated the whole dress-form instead of twisting it on the pole this time!

I then marked with tailors chalk, 1.5 cm all round, below the pins and once I’d double checked the markings, I cut off the offending excess.

I used black bias tape to complete the hem. Worked a treat!

I don’t have a shot of the finished skirt to show you as yet – I’m hoping to persuade my trusty photographer to take some at the weekend. But I do have a handy new device in my sewing box… hoorah!