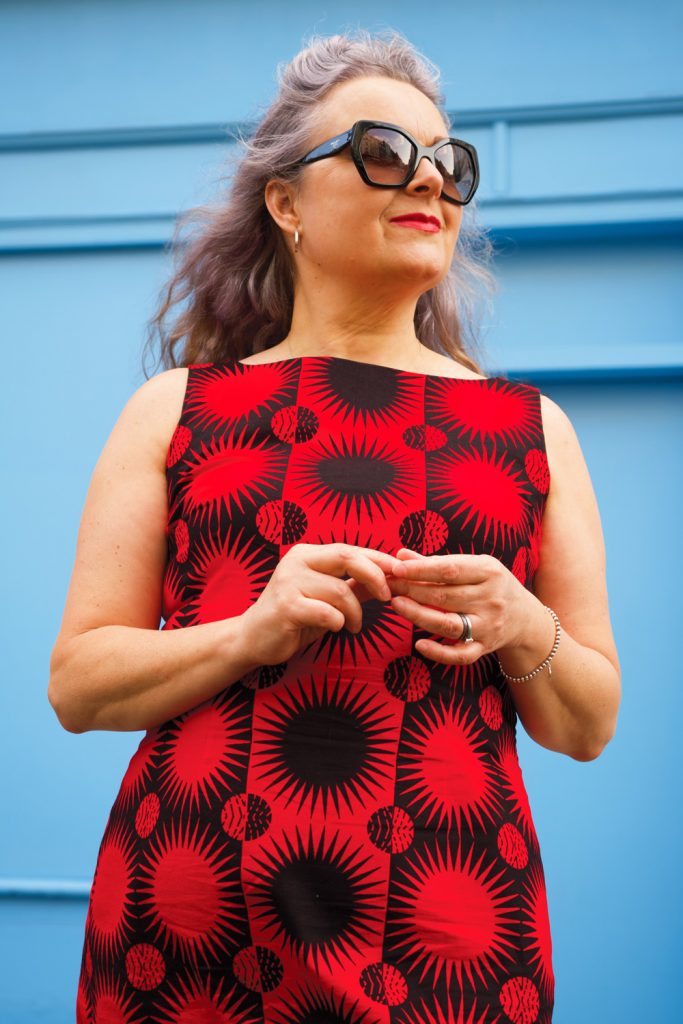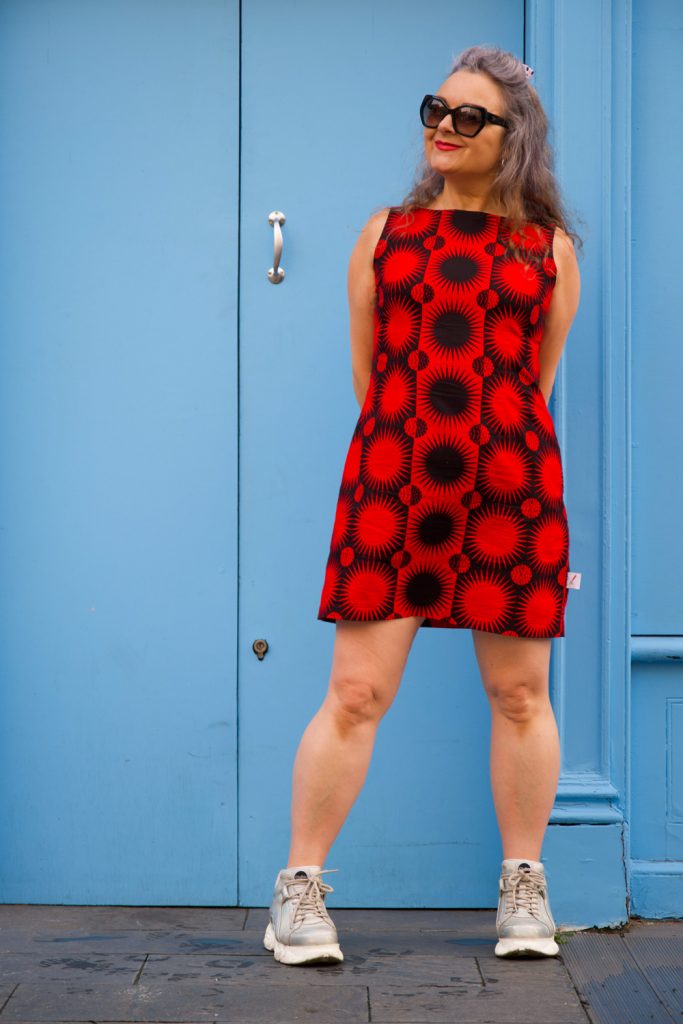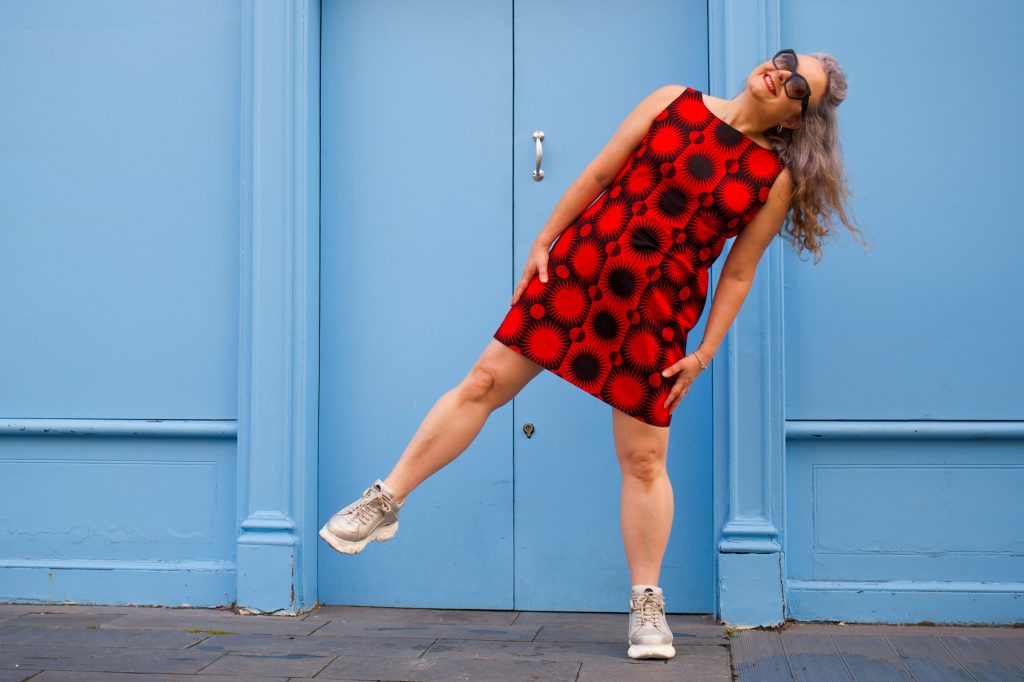
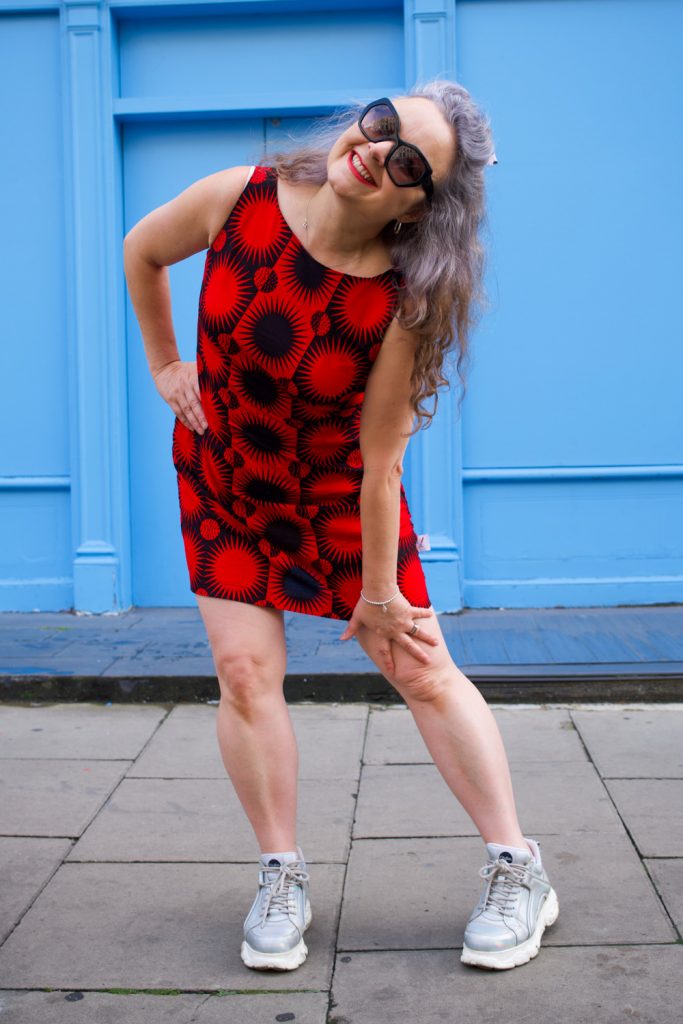
Fitted sheath dress in a graphic Ankara fabric

This is the dress I completed at the Crafty Sew and So camp, weekend before last which feels like a dreamy distant memory already, since I’ve been buried deep in work projects ever since. Thank goodness I realised the importance of taking a simple no-brainer project with me as I had anticipated a lot of chat and I didn’t want to be getting stressed out by fiddly details… or miss out on all the goss!

Sewing a sheath dress is a good test of fine tuning a fit as woven fabric has no forgiveness whatsoever! And I’m pretty sure I’ve nailed it now. It feels like it fits in all the right places and its amazing how that feeling transmits a confidence when I wear it. Well I can hardly blend into the background with this graphic print in any case!

I was hoping the Ankara fabric, with its strength and weight, would give good structure and I wasn’t disappointed. If you’ve sewn with it before, you’ll appreciate how your shears slice so accurately through the threads and the joy of ironing those sharp seams – especially helpful when pressing those understitched facings. They are so never going to pop out!

The dress pattern is simply a front and a back piece and an all in one facing to finish the armholes and the neckline. The zip is at the left side – something I learned from sewing a lot of vintage dresses and a method that means the back piece stays as one so there is no need to pattern match across a zip.

I would normally have tried harder to match across the side seams but I was working with a remnant here, left over from this crazy cowl skirt project, so I was limited with my placement options. Very happy that I used stash fabric though!

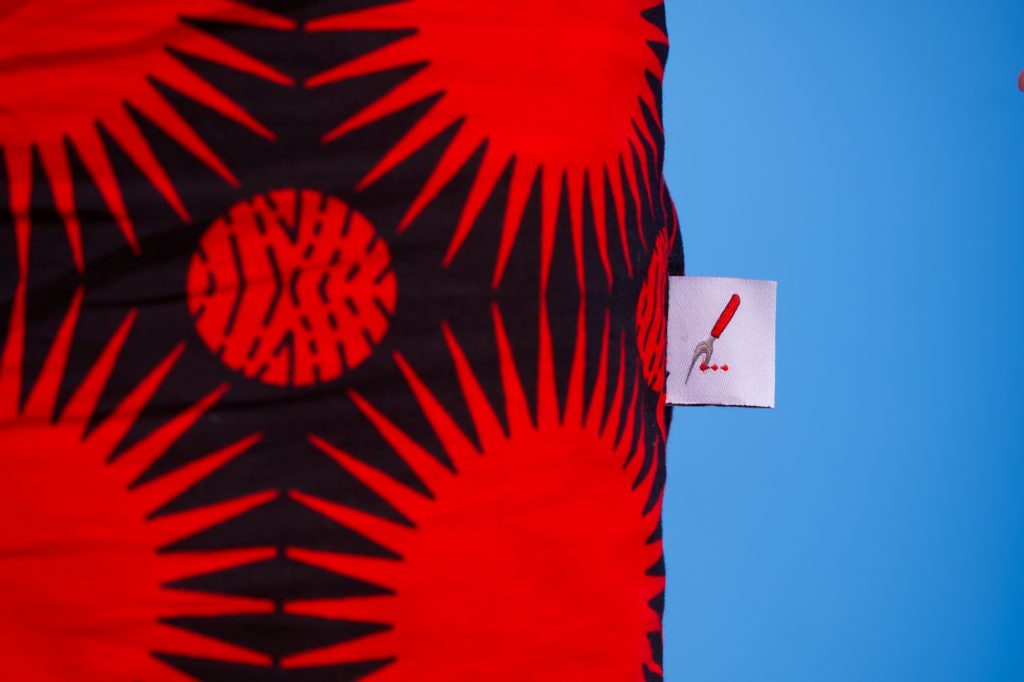
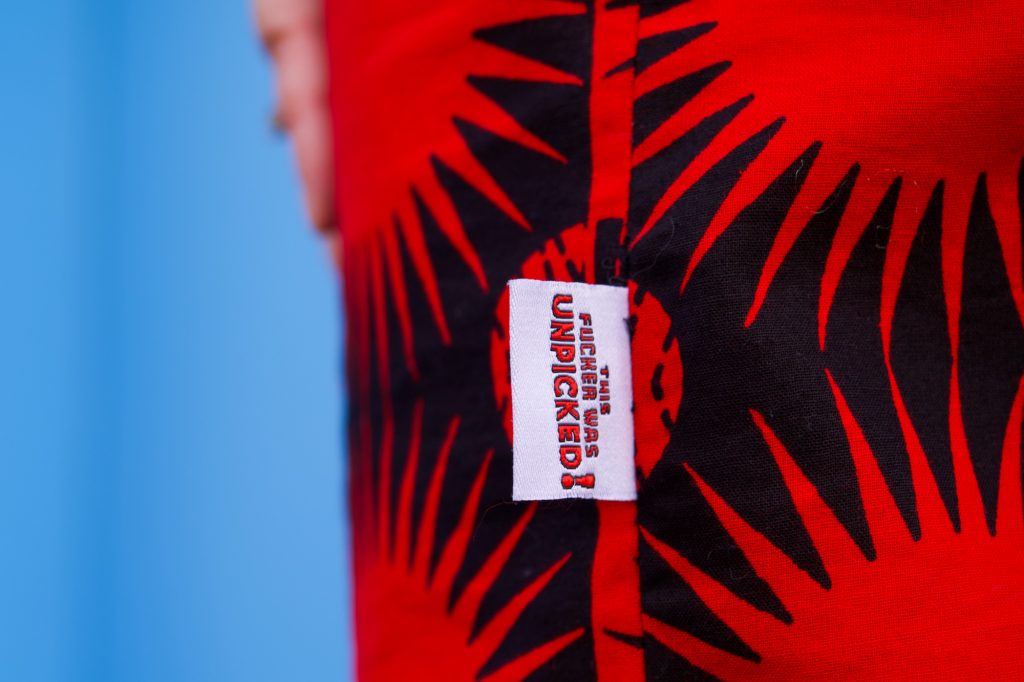
And whilst we are on the subject of side seams, I’d like to draw attention to the sweary label that Manisha from Manisha’s Fancy Fabrics kindly and appropriately gifted me from Sew Me In (explicit) Labels. Because, despite the simplicity of this dress, I had to unpick 3 seams at least due to distraction of talking and mostly laughing my head off. In case you need any confirmation, sewing alongside likeminded makers who share as much passion about dressmaking, is incredibly good for the soul but a little bit detrimental to productivity!

This won’t be my last sheath dress for a number of reasons:

  • Its a lovely no-brainer of a sew, once the fit is mastered
  • It uses precious little fabric
  • Its can be office-appropriate in a suiting fabric, casual in a cotton, dressy in a satin
  • It can be customised so easily

Thanks to Dan for these lovely photos. We were in Charlotte Street, and very much drawn in by the blue of the shopfront. We haven’t been up town for a long while and it was good to see the buzz is still there, with lots more pedestrianised areas for al-fresco drinking and dining.

Keep tuned for some more of my pattern drafting adventures. I’ve got a few plans up my sleeve!

A gold quilted mini-skirt


gold quilted skirt front

Nothing ground-breaking to see here, save a self-drafted mini skirt in gold quilted fabric!

I’ve been wearing my black quilted skirt to death, lately so I thought I’d better make another in case my work colleagues think I’m a dirty stop-out!

In fact I’ve been wearing this one on a regular basis now so it may be time for a third!

I made it a while back and completely forgot to blog it. Or rather missed every small good-weather-window to photograph it. So an indoor remote shoot it was. And I’m so going to get into trouble for ‘trespassing’ in LMO’s bedroom! Those pink walls are a complete giveaway!

gold quilted skirt back

I used the same process as last time, namely a shortened version of a self-drafted pencil skirt pattern; added a facing of black cotton twill, this time and an invisible zip.

The hem is hand stitched this time. Mainly because the backing is a woven black affair and easy to pick up on a couple of threads for the sake of invisibility.

It seems I’m in good company with my choice of gold quilting. Have you seen Karen’s (Didyoumakethat) metallic tunic dress? I just love how something simple can literally shine with a crazy fabric!

I also find it amazing that as the months get colder, my hemlines get shorter! Anyone else find the same?

Burda cap-sleeve top and a bit of a whinge-up!

burda style cap sleeve top

Once in a while a sewing project is sent to try us. This particular little smart-arse of a sewing project first lured me from the glossy pages of Burda Style around this time 3 years ago. It presented a cool, stylish-looking basic that could rock any skirt, shorts or pair of strides. Edgy with its contrasting shiny sleeve caps, close-fitting for sleekness of style and a raised neckline for a fierce, designer don’t mess with me touch. I should have got that message first time round really!

My self-imposed rule not to impart cash for cheaply made RTW clothes has been obeyed for a good few years now. And I’d say it’s largely been very easy and fun and rewarding. But to summon up the motivation to make what is fundamentally a basic black staple is much harder than making a pretty dress. That’s way more fun.

I cannot even begin to recount the hours spent on this tiny little top. It was definitely a test of patience. Largely because I didn’t do a muslin so no surprises really.

I decided to stick to the suggested fabric which was crepe satin – luckily there was little needed because this fabric didn’t come cheap either. Read on if you can really bear to listen to my gripes!

burda style 2012 cap sleeve top

First gripe: crepe satin. I will think twice before sewing those stupid shiny sides together in a hurry. They move! But having said that, lucky the shiny sides were inside because they also catch on just about anything that is vaguely rough. Like hands, unfiled nails, pins etc etc. It also frays. And so every seam, every edge had to be overlocked. Do not even attempt this top, in this fabric if you don’t have sufficient means to finish every single edge. And OMG, static alert! I tried this top on at least 10 times to check fit and shape of sleeve etc and the electricity ran at least 240v from root to tip of hair. This firmly remains one of it’s unforgiving factors!

The bust darts are way too low for me. I know, I know, I didn’t toile!

There are two zips involved in this top, or else you’d never get it on. One from the neck edge down the top of the left sleeve. And another under the left arm and down to the hem. Fine in principle, definitely not fine if you want two matching shaped sleeves! I bought a couple of quality invisible zippers from Dalston Mill. I remember thinking at the time that I should perhaps invest in more quality notions. I usually get them from Shepherds Bush market for a snip of the price. But it wasn’t such a good call ater all. Sadly the teeth were metal and so the zips less flexible coupled with the instructions to end the zipper a couple of inches from the hem, I ended up with one sleeve fit for a Gary Glitter tribute and another as a deflated floppy thing. Zipper aside, at that point I realised the sleeves were far too roomy in any case. They seemed to fit snugly on the model which is confusing given my substantial arm girth. So I removed said sleeve zipper and shaved a bit off each of the top sleeve seams to ‘smallen’ the sleeve cap.

Removing the zipper was a mare. Black on black, mostly with a crap lightbulb overhead and from hostile fabric that was just goading me to be snagged.

I put a new cheapo lightweight zipper in but made it run from top to bottom this time. Better but still not brilliant. Plus it took 2 goes to insert. Don’t ask! In hindsight I should have sewed another just to the seam allowance on the wrong side of the opposite sleeve to match the shape better. I may still do this.

The sleeve hems are hand sewn. Catching 1 of those damned threads at a time so it doesn’t make a mess of the right side. And the underarm seams are finished with a self made bias strip, hand sewn to the inside also. Slowly, slowly, catchy monkey!

So then there was the neck facing. Could well have been me but I’m totally blaming those Burda-style translations. I have such a problem with visualising even the simplest written instructions. Give me pictures every time. So after the umpteenth read, I gave up trying to understand and went ahead governed by my own hunches! They were rubbish hunches and I ended up sewing the bottom bit of the facing to the shoulder/top sleeve seam. What is wrong with me? I was all twisted and distorted and I was convinced the facing was the wrong shape!

A right proper meltdown ensued. Foot on the pedal-bin pedal, lid raised, dangled over the sprout peelings and prosecco foils, the whole thing was about to meet its demise!

Saved by a flash of possibility. I spared the wretched thing and spread it inside out on the ironing board to instantly see the issue: The lower end of the facing was meant to be sewn around the armhole… of course!!

cap sleeve top back view

More unpicking. More hand sewing. It worked. Kind of. But even though I’d used a stretch interfacing (My own recommendation, not Burda’s) it doesn’t behave the same as the outer and there is still an element of ‘pull’.

Although the sleeves are too big, the body is a touch too small. I clearly overestimated the stretch in this fabric and underestimated the difference in a petite sizing, which this pattern was. I might possibly get away with it in a dark room with a jacket on!


The hours involved to create something that is at best a black top, have completely taken me by surprise. I seriously could have whipped up a whole dress in as much time!

If I did it again, I’d go up a size and definitely redraft the sleeves.

I’m glad I didn’t give in though and I’m glad I found a way to solve the main issues. I hate being defeated at anything. I don’t often work with fine fabrics and clearly this is something I need more practice in next year. But for now I’m rifling though some good old fashioned vintage dress patterns where suiting and furnishing fabrics are my favourite friends. Onwards and upwards!

Happy New Years Eve, my wonderful readers. Wishing you all a healthy, productive and successful 2016.
With lots of love thrown in for good measure

Janene xxx

So totally Made Up with this dress!

Burda 0315 maxi dress on the lawn

Marylin Manson gig is a couple of months away so I’ve got plenty of time for make up and hair but the dress needed to be made in time for Karen’s Made Up Initiative September deadline. And by George, I did it with 10 days to spare!

I love how that little charity challenge had me think on my toes and come up with the goods quicker than I usually do. And I love how it made me think out of my usual box too.

walking in burda maxi dress

This is an unusual maxi dress from Burda Style mag. Well, unusual for me! I previewed the contents of that March 2015 issue as I do sometimes, to selfishly earmark things I would like to make so that I don’t have to physically rummage through the hundreds (tens) of actual issues on the shelf. And it paid off once again.

The hankerchief hem is what gives this dress its character. It’s effectively a square skirt drafted onto a fitted bodice. And works beautifully with stripes, or the horizontal pleats in this fabric, to highlight the draping sides.

hankerchief hem

The bodice has a lovely fit too with some long diagonal bust darts for shaping. Sorry, no chance of seeing them. They are totally cammo’d!

The fabric I chose isn’t your regular jersey, as Burda suggests, but it has just as much across-stretch which meant no need for zips or closures. Result! It’s black with splashes of silver dye/paint across it and the aforementioned horizontal pleats add a great texture to the overall design.

As you can see, I omitted the sleeves. I really liked the almost raglan seamline and wanted to retain that shape.  To do this I raised the top of the under arm seam by 1″ and just redrew the curve of the armhole. That left a very narrow shoulder seam of course but that’s what I loved about it. There was a facing piece for the neckline, I just had to draw one for the armholes given no sleeves. But having done that I realised there would be a clash of facings so I faced both armholes and neckline simply with black bias binding instead. It was a breeze and finished it off so neatly.

ooobop standing by waterfall

I didn’t have to overlock the inside seams because this completely unnatural fabric doesn’t even fray. Incidentally I didn’t even hem it for the same reason. Just made sure the hemline was a fold line of one of the pleats!

walking away in the maxi dress

Instructions were given to sew the in-seam pockets after the rest of the dress was put together, leaving the pocket holes unstitched. Bit odd I thought but not unreasonable. The only unreasonable thing was how exactly my brain responded to that. First I couldn’t decide what way round the pockets got to sit and then, because I’d decided the underside of the fabric would be the inside of the pockets, I can’t tell you how much of a sweat that brought on!!

Burda maxi dress by the riverside

I did consider leaving them out altogether… whilst having the first of the hissy fits. But then I considered how this would be a brilliant back-up camping maxi dress. And that meant it had to have pockets for matches, torch, bottle opener etc. See, to all who doubt, I can be forward thinking when I want to be!

ooobop standing by a waterfall

And that was really the only fiddly bit. Yes I know now how daft that sounds. But if I were to have used an ordinary fabric, say jersey, as Burda suggested, it would have been a total doddle!

I’m sure you’ve already guessed that the talented Mr O took these pics. Most impressively, I might add following his return from three consecutive gigs this weekend, in the pouring rain, on pretty much nought sleep! He’s a keeper! 😉

burda maxi dress shot overexposed

Drafting a skirt block made clearer

self drafted skirt front view

Why on earth would I want to go to the bother of drafting a skirt block when I already posess a pattern collection of monster proportions? Good question.

Well apart from the fact that I am the world’s greatest procrastinator, it’s mostly because I plainly just don’t like not knowing about stuff! Well, that plus the fact that I wanted to create a perfectly fitted skirt! I have managed it once or twice before, by adjusting patterns, but only by the power of ‘flook’ and not by any knowledgable means.

Making a fitted skirt pattern is something I have been wanting to do for such a long time. I looked into taking a course but was really shocked by the prices. I guess I set my hopes high starting with the London College of Fashion!  Getting a course to fit in nicely with work and children is a bit tricky too. So I set out on a mission to self-teach! It has taken me a long time to get my head round it (the old grey matter aint what it used to be!)… and get round to actually doing it.

The truth is, I am quite impatient and the idea of some mountainous mathematical process leading up to the joyful part of sewing wasn’t very enticing to say the least. But if I am ever to realise some of these far fetched designs I carry round in my head then I have to start learning to draft a properly fitted skirt block at the very least!

To be honest. Now that I have sussed it, it seems remarkably easy!

The hardest part of this process was being totally honest about my own body measurements! I’m forever thinking I’m smaller than I am or believing that if I make anything at least a half a size smaller I will loose some pounds to fit into it properly! But I had to be true to myself this time if I was going to go to the effort of making something to properly fit.

The following instructions have been compiled from various sources and put together here in a fashion that is clearer to me. I can’t claim this as the best way forward for everyone. So if you are going to use these instructions and make a skirt from the pattern, please make a toile first! I needed, in any case to document the instructions as a note to self because even after my first attempt, I forgot some of the process! This method really did work for me and it would make me such a happy bunny if they work for you too, so be sure to let me know!

All measurements are in inches (sorry). I use millimetres in all that I do at work but I can’t break away from imperial measurements for sewing and cooking!

Drafting the basic skirt block

First make a note of your measurements.
It is easier if someone does it for you. Less chance of cheating!
Make sure the tape measure is comfortable and not tight.

You will need 3 measurements:

  • Waist
  • Hip
  • Length

and the following materials:

  • A large piece of paper, that is just over half of your hip measurement by just over how long you want your skirt to be. (Tape pieces together if necessary)
  • A long ruler
  • A pencil
  • A right angled triangle/set square.

NB: this pattern allows for 1 inch of ease which can be altered to suit.

(Click on the images to enlarge)

STEP 1:

On the left hand side, draw a vertical line the length you would like your skirt to be.
Mark the top point as W. (W to L = length of skirt)
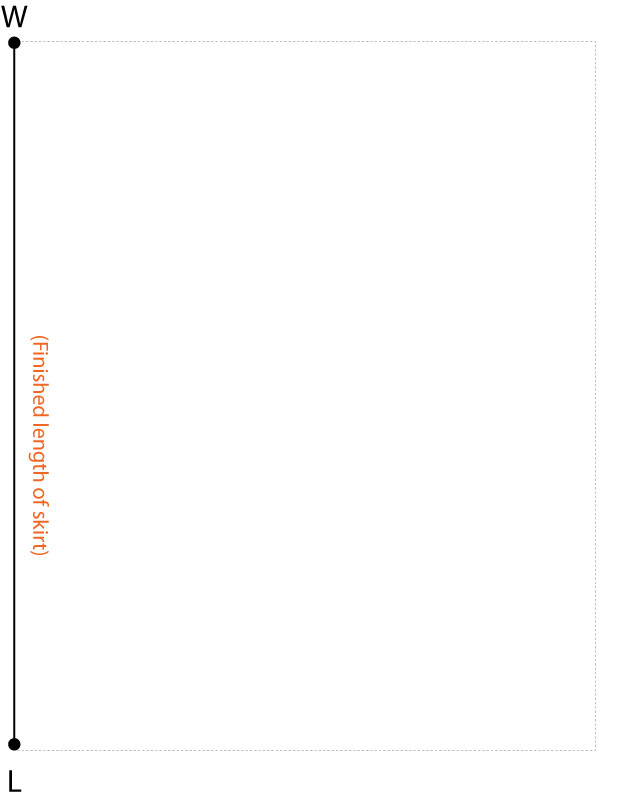
drafting a skirt block step 1

STEP 2:

Draw a line at right angles to point W, to the length of half your hip measurement + 1/2 inch ease.
Complete the rectangle.
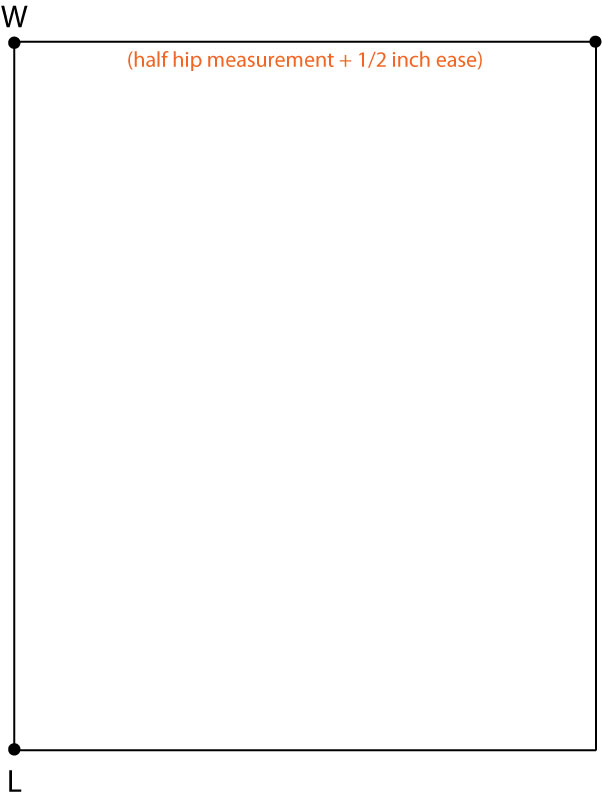
drafting a skirt block step 2

STEP 3:

Draw a vertical line between the two outside edges, at a distance that measures 1/4 hip measurement plus 1/2 inch ease, from the centre back seam. This will separate the front from the back pieces.
Mark the left vertical line as centre back and the right vertical line as centre front. Draw arrows on centre front to remind you to position centre front on fold.
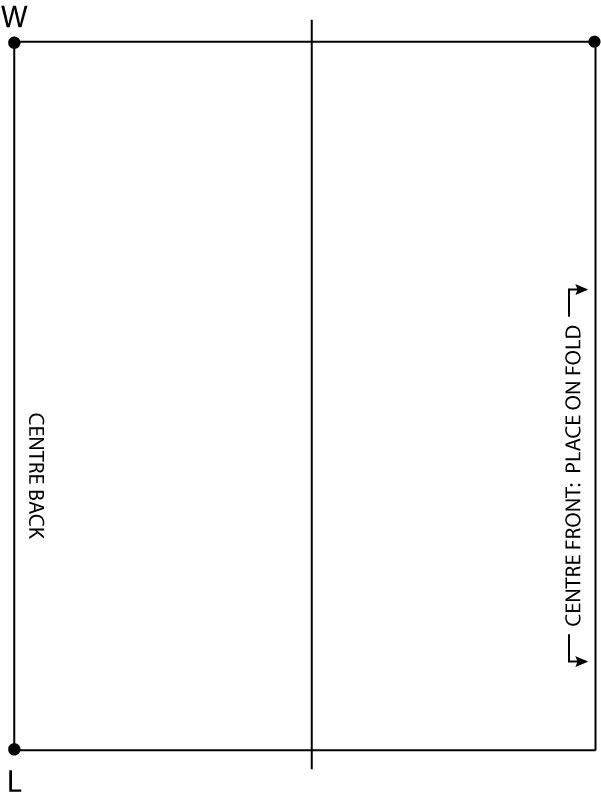
skirt block step 3

STEP 4:

Measure 8 inches down from the W point. Mark this new point with H. Draw in the horizontal Hip Line.
Measure half way between the Waist Line and the Hip Line and draw a line across. This is the Middle Hip Line. Mark it MH.
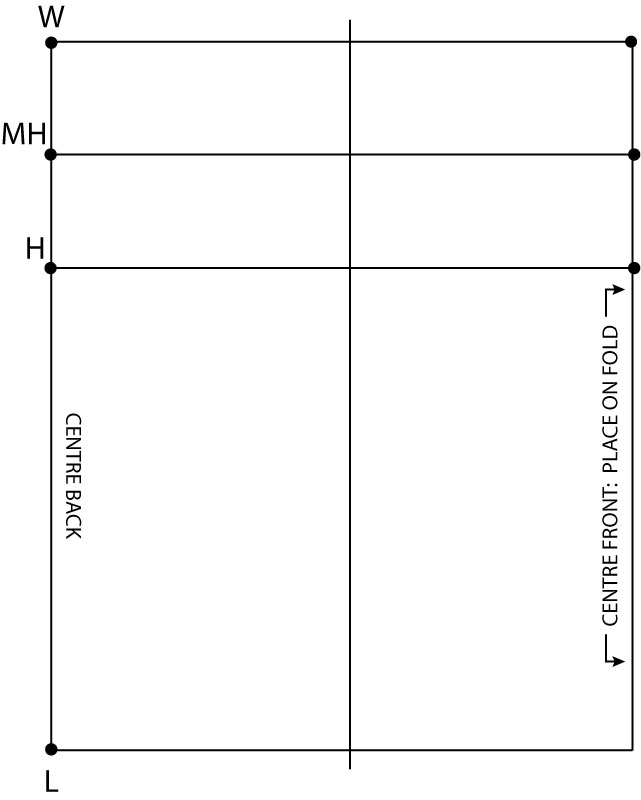
drafting a skirt pattern step 4

STEP 5:

Draw a line from point W that rises to half an inch above the Waist Line.

Measure across from point W, diagonally up to the new guide line, the distance of 1/4 waist measurement + 1/4 inch ease + 1.5 inches for 2 back darts. From that end point, draw a line down to the point where the Hip Line meets the centreline. This creates the hip curve and a shape to the waist.

Repeat the process for the front pattern piece to create the hip curve for the front side. The diagonal waist line for the front piece will be 1/4 waist measurement + 1/4 inch ease + 3/4 inch for 1 front dart.

You can use a french curve or freehand to give a smoother curve at the end.
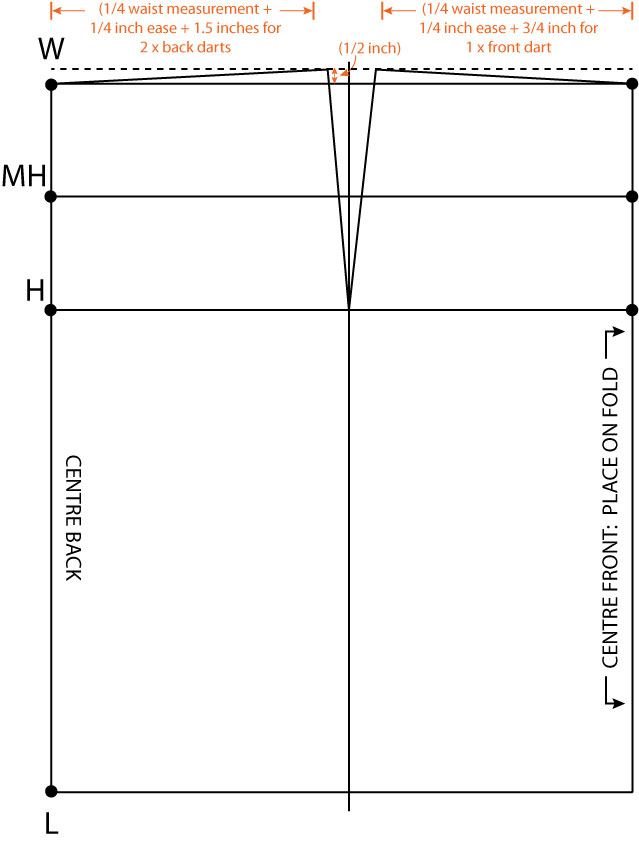
make a skirt pattern step 5

STEP 6:

To create the front dart: find the centre point of the wast line on the front piece and draw a vertical line, from the Waist Line to just before the Middle Hip Line. This is the central fold of your 3/4 inch wide dart. Draw in the dart as shown below.

To create the back darts: draw 2 vertical lines equidistant across the Waist Line. The dart nearest the centre back line extends to an inch and a quarter down past the Middle Hip Line. The other back dart, nearest the side seam, extends just to the Middle Hip Line. Draw in the two darts, each 3/4 inch wide at the top, as shown in the diagram below.

NB: please note that although these darts appear to be standard measurements, you may very well have to alter them to suit your own body shape. Making a toile will highlight if this is necessary for you or not.
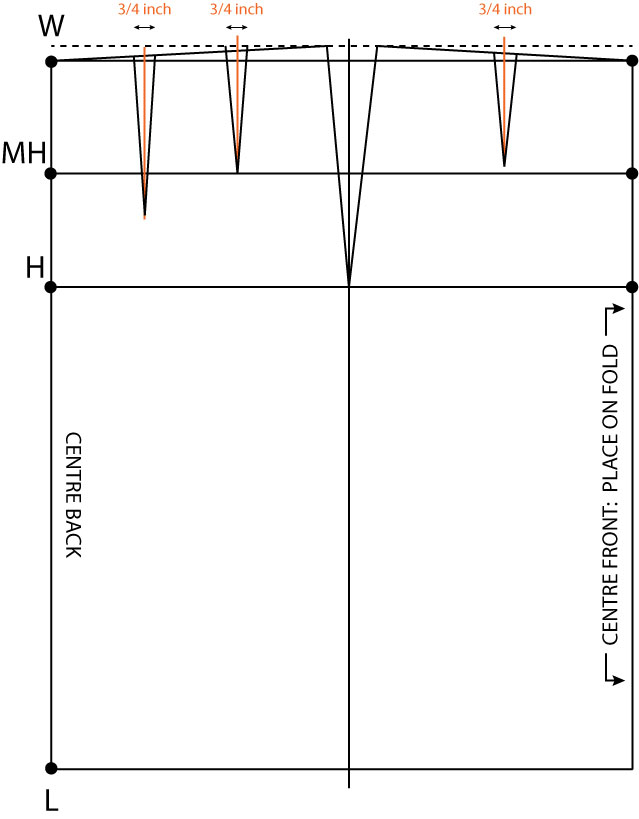
adding darts to skirt pattern step 6

Et voila! The tricksy bit is done!

All that remains is to smooth those curves, cut the front and back pieces apart and add seam allowance. You should be familiar with this process if you regularly use Burda Style patterns from the magazine! 5/8 inch is usual. A good hem allowance is between 1.5 and 2 inches.

Remember not to add seam allowance to the centre front, but do add it to the centre back.

To create the facing, I traced from the Middle Hip Line up to the Waist Line on both pieces, cut out and folded the paper on the dart lines to create the curve at the waist. But you could alternatively make a waist band, whereby a facing piece is not necessary.

I do hope this is of help and that I didn’t make it too confusing. Do shout if I’ve missed anything or if there is anything you don’t understand.

First skirt from the self-drafted pattern
self drafted skirt side view

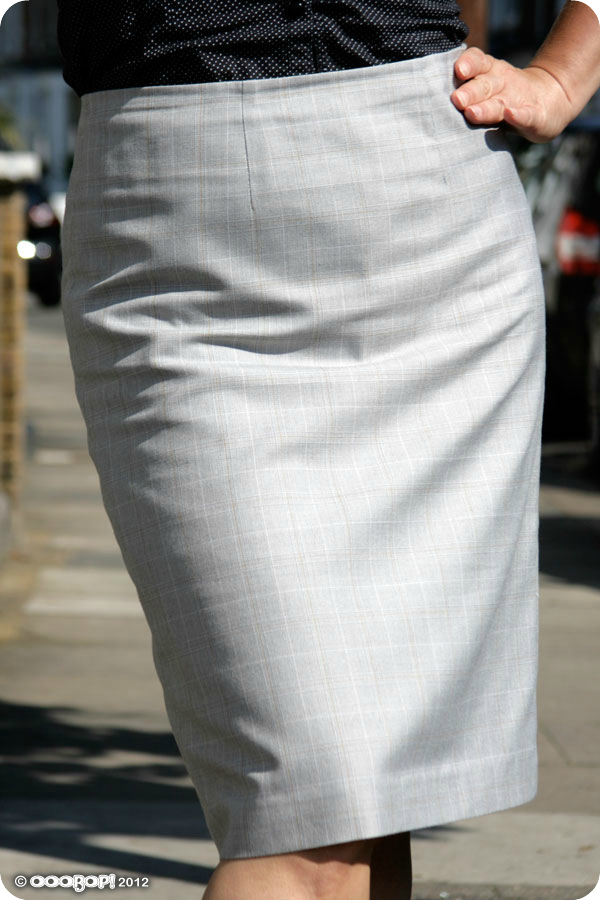
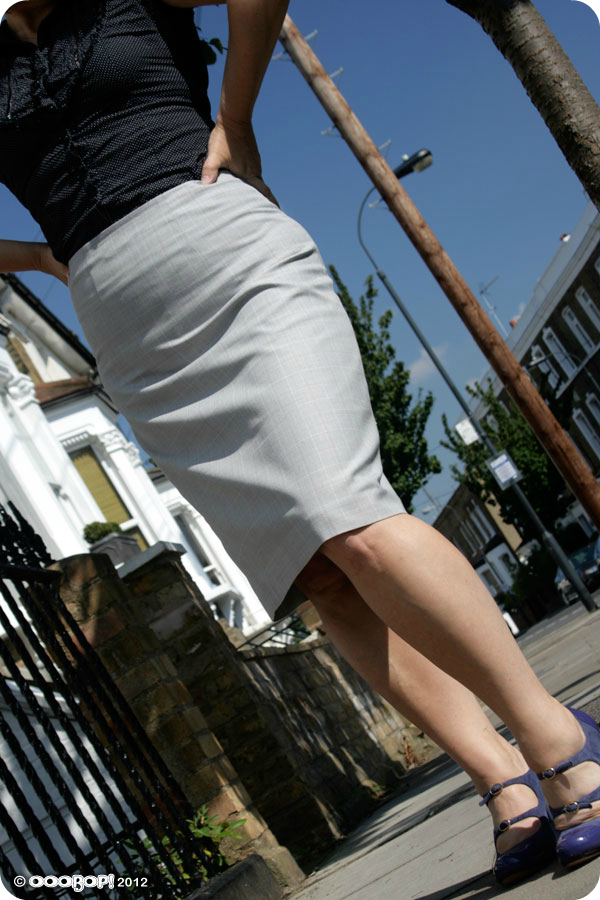
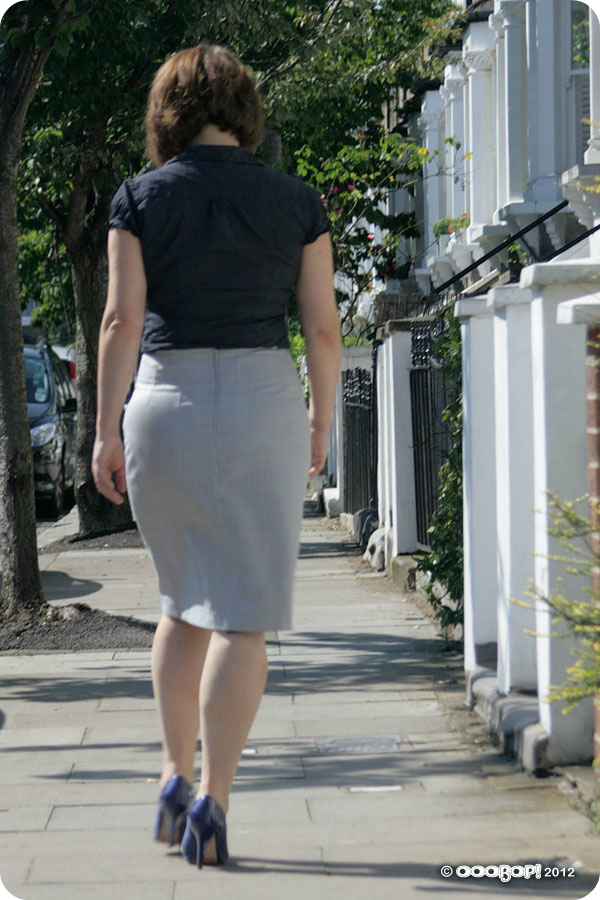
Probably the most boring skirt I have ever made, re. choice of fabric, lack of features… not even a walking slit, standard length etc. BUT, by the same token, probably the biggest learning curve so far!

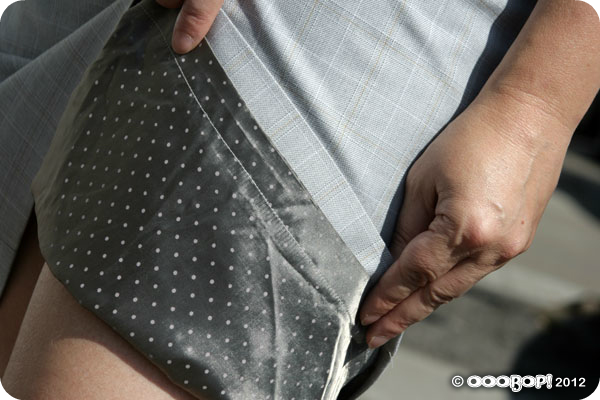
This is a very wearable toile. I’m so glad I did this. Pencil skirts are a great go-to for work. Especially in neutral colours. This is a very lightweight, cheap suiting fabric and I never thought it would be wearable but with the addition of a lining it gained a bit more structure. To create the lining pieces, I cut the same skirt pieces from below the line of the facing and added a couple of inches across the width of front and back for ease, which was incorporated as a pleat along the top seam line. Incidentally the two-tone polka dot lining is far more interesting than the self fabric! I found 3 metres of it in a Charity shop recently for £1!
polka dot lining

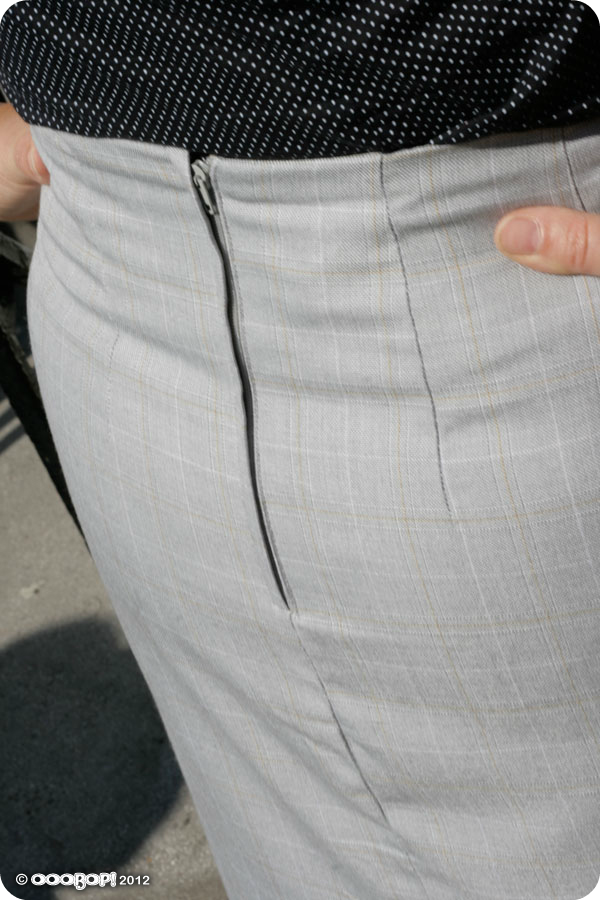
I inserted a lapped zipper but I still need a little practice in that department! One great tip I picked up along the way, however was to take the loose thread from the baseline stitching of the zip, thread a needle and take the thread to the inside of the garment. You can then either knot the ends together with the bobbin thread or, in the case where the bobbin thread is too short ( I have an automatic cutter and this often happens) you can just do a couple of reinforcement stitches and snip. It  all helps to create a flawless finish on the outside.
lapped zipper

I love the idea that I am on my way to making custom fitted garments. Im sure it will be a very rewarding journey.

I am going to experiment a bit more with variations on this block before I steam into the creation of a bodice block. I like the idea of changing the darts to princess seams, perhaps with piped seams, making it more of a wiggle skirt with a vent, and making a high-waisted version too. Oh hours in the day… where art thou?!
back of skirt