Vintage Butterick clutch cape

butterick 2556 clutch cape

Until I found the pattern for this I didn’t even realise there was such a thing let alone that I wanted one so much! On Googling ‘clutch cape’ one is presented with all manner of cape styles accessorised with a clutch bag but only one or two images of a vintage pattern oh and one fox fur version for a snip at $1,285.00! I can only assume it came into being and then disappeared from the world of fashion in a puff of smoke through lack of demand.

Well of course, that makes me love it even more!

butterick 2556 clutch cape pattern

The idea is that you can rest your hands in the naturally forming pockets where the shawl collar meets the hem. It is also the only way of holding it on in gusty weather as there is no other system of closure. But even without such gusts it does sit in place quite nicely due to the shaping of the shoulders.

There’s not much choice to be had in the Goldhawk Road faux fur range at the moment. I am assured that it arrives in October. But I don’t have patience of saints and I settled on this textured black fur fabric at £14.99/m. It only takes 1.25 yds but I bought 1.25m to be on the safe side and it was plenty enough. I like the pattern of the texture and it is actually quite silky for being faux.

butterick 2556 clutch cape

There’s some dart shaping on the fronts and back piece which you wont be able to see of course. And there is interfacing sewn into the collar to give a little structure. And so that if I want to look like a wicked stepmother it will stand up and stay up!

Youngest daughter tried to halt plans by saying it was plain weird and even Mr O made noises about me looking like Basil Brush. But they know full well that those kind of comments just roll off my feathered back!

butterick 2556 clutch cape back view

There is very little to construct and therefore it was very simple to make up, however I had to re-read the instructions to make sure I hadn’t missed anything re the lining insertion. The lining consists of the front and back pieces sewn in the same way; sewn together at the hemline, with right sides facing and then, having pressed the seam allowance all round, hand-stitched to the cape. Of course the problem that caused was that the lining was visible at the hemline. It needs to be shorter.

So, given my ever growing annoyance for things I’ve not done properly, I dutifully unpicked it (which is no mean feat if you’ve ever stitched lining to fur with small stitches!) and chopped off the seam allowance from the hemline and reattached. I could have gone half an inch more to be on the safe side but that seems to have done the trick.

It’s perfect for days like today, deceivingly sunny with a sneaky chill in the air. I haven’t begun any autumnal sewing yet and my polka dot Flora dress most certainly would not have got an outing today with bare shoulders. And it wouldn’t look out of place with an evening gown or ‘casualled’ down with a pair of jeans if that’s what takes your fancy.

butterick 2556 clutch cape front

In an effort to find a location with no gawping passers-by, these photos were taken down the side of Shepherds Bush Empire. I knew this building was quite old, built in 1903 in fact, but didn’t know that of all the acts performed there, Charlie Chaplin was one of them!

I was just saying to Mr O how sewing and blogging and photography has changed how we have taken notice of our surroundings. There is so much history to be had, right on our very doorstep!

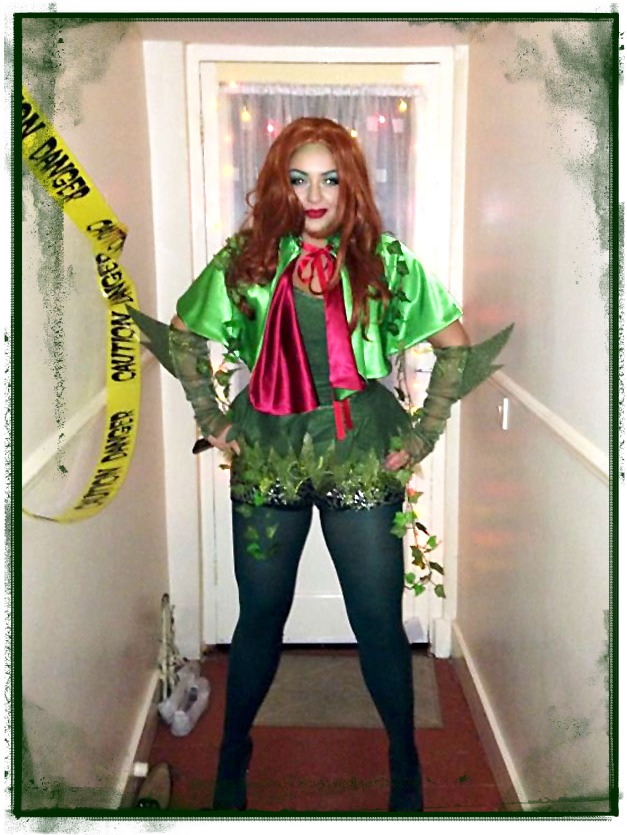
A cape for Poison Ivy

poison ivy front

Meet my biggest little girl! Hardly a villain but seriously rocking the whole Poison Ivy thing!

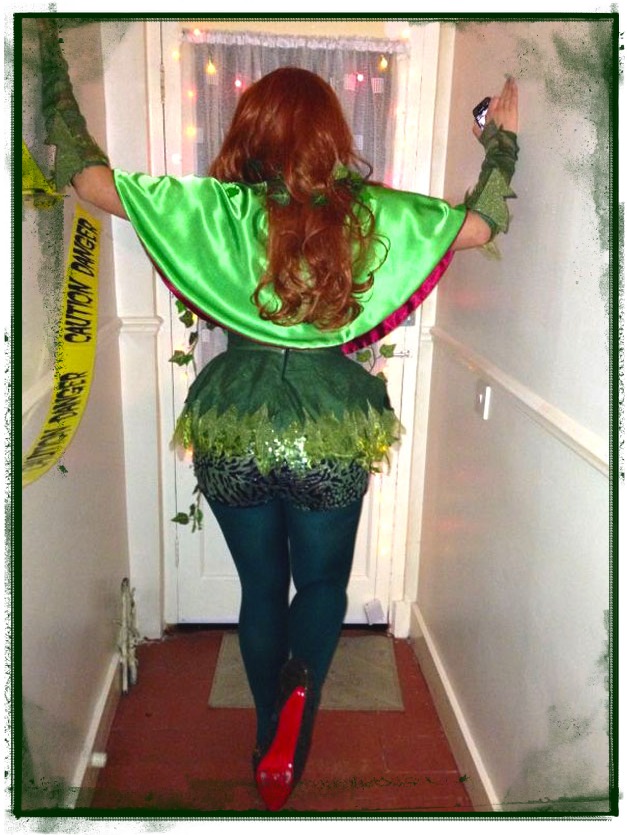
It’s not often I get asked to contribute to her wardrobe. It is in fact never! So I was very honoured by the request to make a capelet for her Halloween costume. Yes I know this is a bit late in the day, soz, but I wasn’t allowed a sneak preview on the day (something to do with me being an embarrassing mum at her last party I would think!) and had to wait patiently for photographic evidence so I could share it with you.

poison ivy back

It was a very fun and quick project and even ‘biggest little’ was impressed! If you knew her like I do you would know how amazing that is!

poison ivy

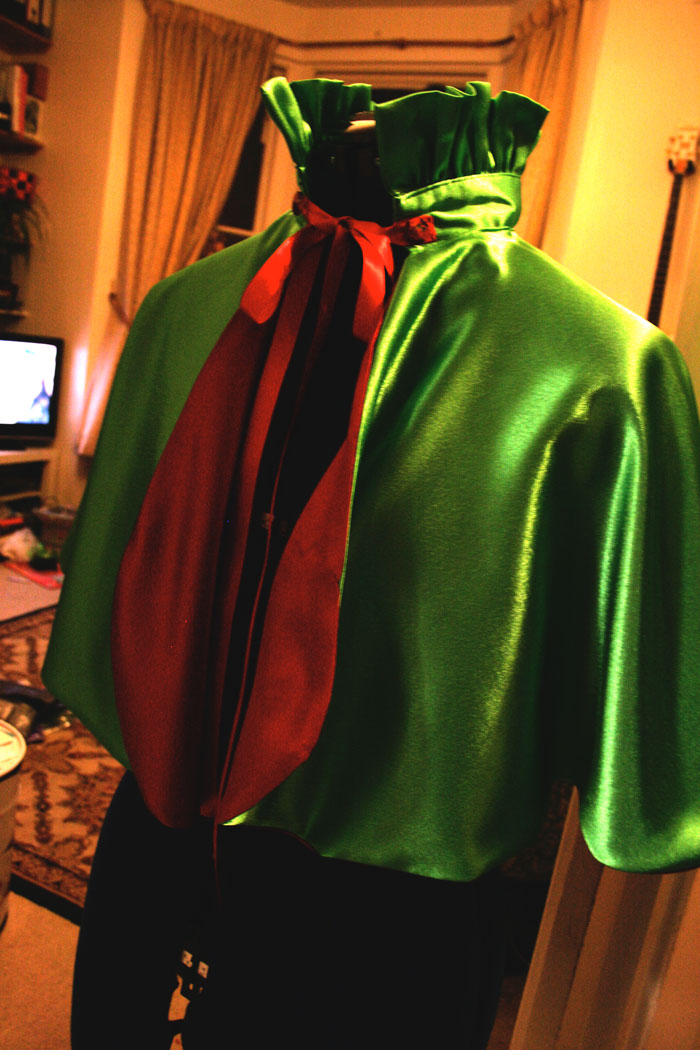
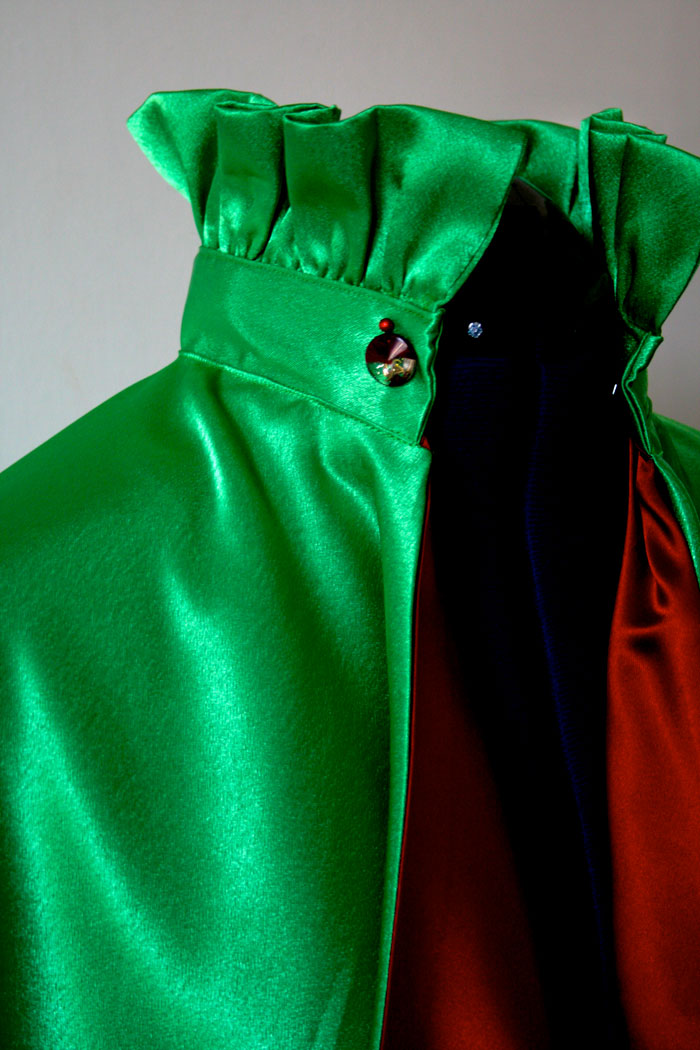
Here’s a better picture of the stand-up collar. You cant see it for all the red luscious locks!

cape on manequin

The exterior is a bright green poly satin fabric with red satin lining and I used some glitzy buttons at the neck to cover the ends of the ribbon. Should have sewn them in the collar stand really!

It was a very simple project for quite an effective fancy dress accessory…

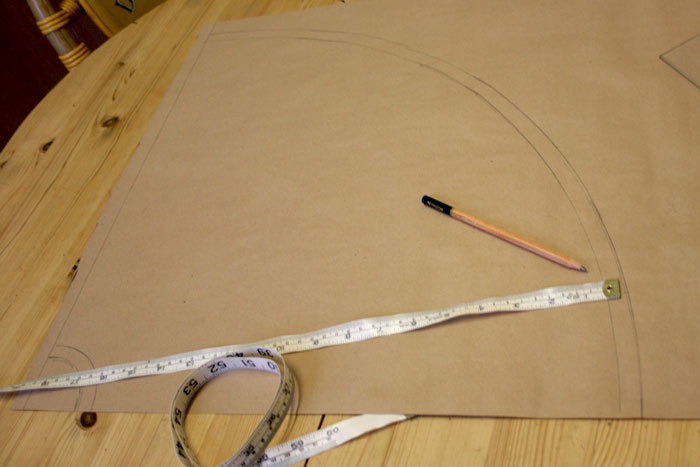
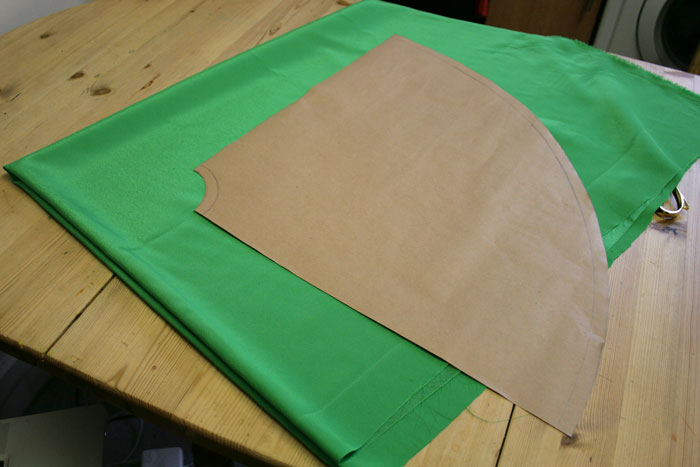
First I measured the neck (plus ease) and the measurement from the neck, over the shoulder to just below the elbow. Using Pi (22/7) I worked out the radius to draw the neck hole and from that circumference I could mark the length of the capelet and draw the circumference at the hem (plus SA)

circumference formula

Have you ever wondered what that little hole is for at the end of your tape measure? Well I sure have found a use. If you position and hold down the tape measure at the distance required, on the centre point, or corner of your paper, you can put the point of a pencil in the hole at the other end and draw the arc of the circle. Its not as accurate as a compass but I don’t have a set of compasses that large and this method was good enough!

draft circle

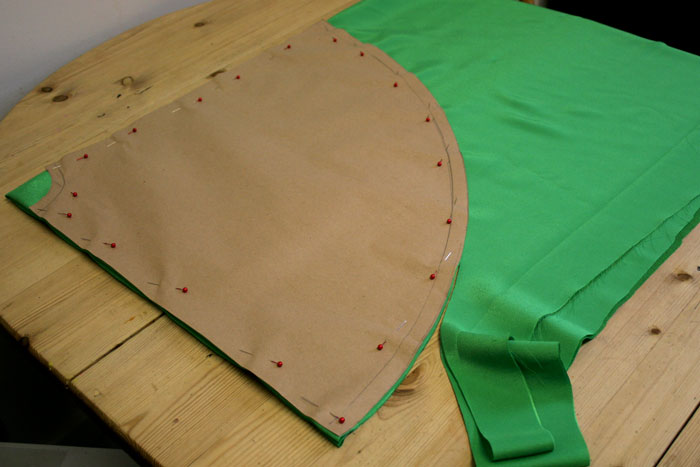
I folded the fabric into quarters and pinned the pattern, making sure it was butted to both adjacent sides.

folded fabric

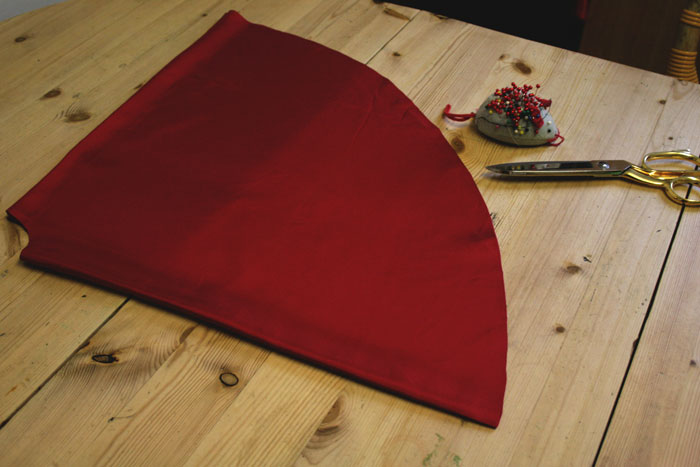
pinned patternI did the same with the lining and cut out. This is not my favourite fabric to work with, I hasten to add!

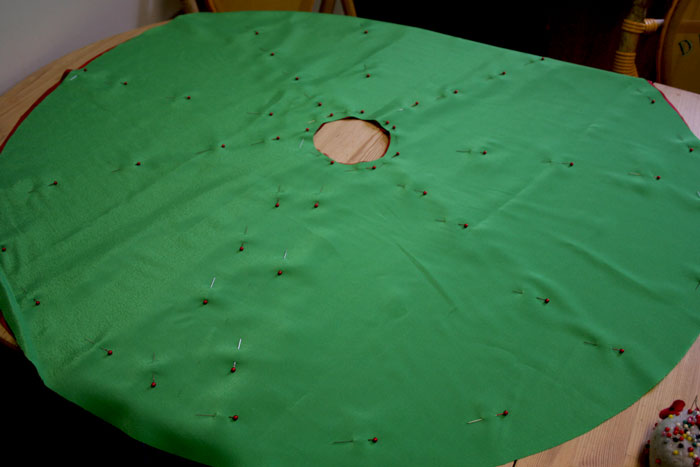
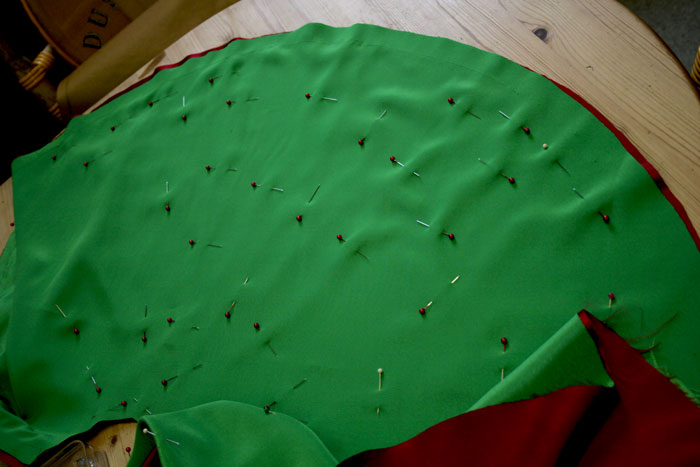
cape liningNext up, I pinned the self to the lining, right sides together, using lots and lots of pins. I am telling you, this is soooo not my favourite fabric to work with. It slipped and slid all over the place!

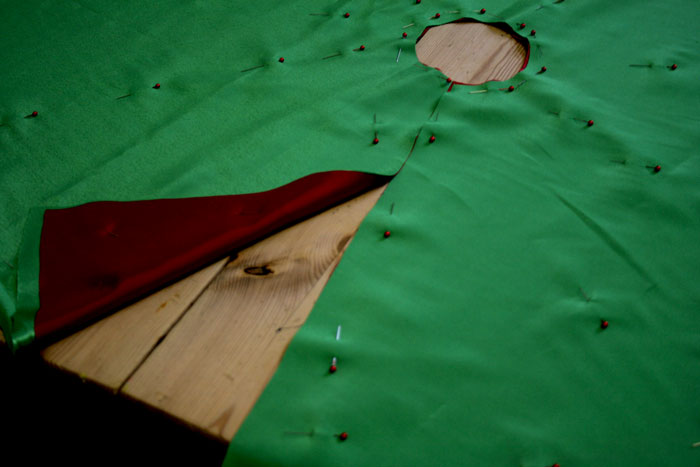
pinned lining and selfThen I cut the front opening. You can see just how far out I was with the cutting/positioning of this slippery stuff!

cut opening

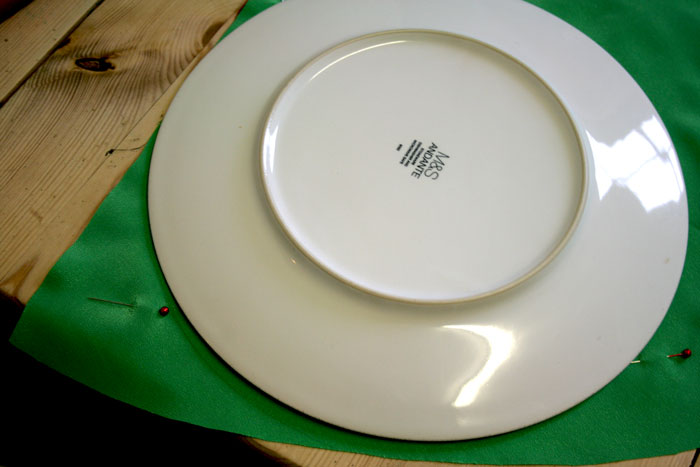
But I saved the situation with a genius idea to round off the corners! And note my next exclusive dressmaking tool…. a dinner plate!

round cornersI stuck in some more pins before I attempted to sew around the base hem and up the front openings. But it still took 3 or 4 attempts. It was like a couple of magnets repelling against each other!

more pinsI left the neckline open while I constructed the collar. First I made the collar stand. The measurement for which was the neck measurement (plus ease) by 5 inches (I think!)

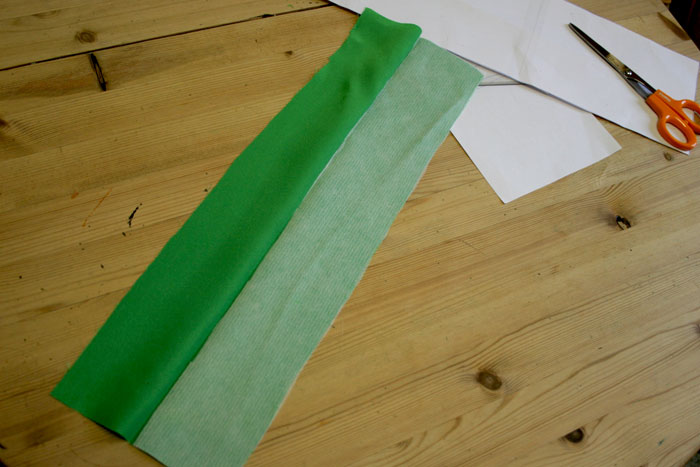
I folded it in half, lengthwise and applied fusible interfacing to one side.

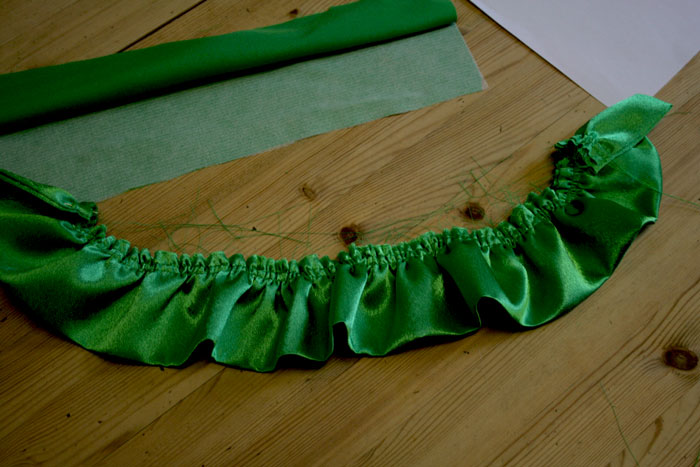
interface collar standTo make the ruffle, I cut a strip the same width only twice as long, folded, pressed and seamed the short ends, right sides facing. I gathered the raw edges to the same length as the collar stand.

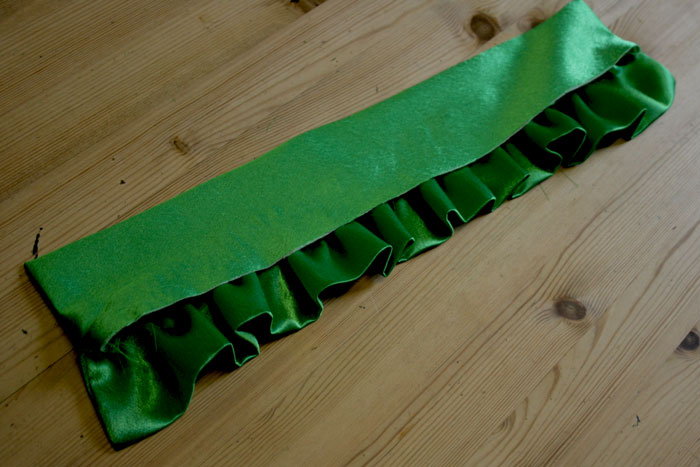
ruffleI don’t have pics for the next stage but hopefully it will make sense. I sewed the short ends of the collar stand together and turned right side out. Matching raw edges, I pinned the ruffle to one side of the collar stand, right sides together, careful not to catch the underside.

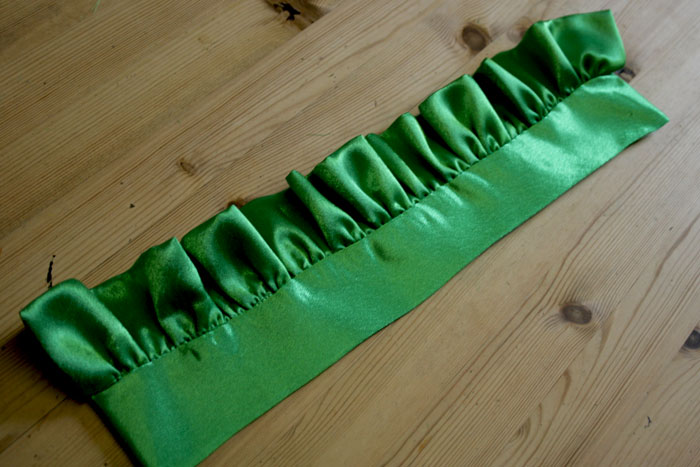
collar ruffleI turned the ruffle up, hiding the raw edges inside and gave it a press to keep it in place. I then folded in the seam allowance from the remaining side and topstitched in place.

finished collarAgain I am missing a few pics, but to finish off I sewed the base of the collar stand (the folded edge), right sides facing, to the neckline of the self side of the cape. I then folded and pressed in the seam allowance on the lining and top stitched to the other side of the collar, very close to the edge.

poison ivy cape

Buttons and ribbons were then sewn in place.

Hope this gives you some insight. So sorry for the missing pics. I will be more diligent with my tutes next time!

This is indeed a very fun and quick make… but I would advise a woven fabric just for sanity’s sake!