ooobop! review: Burda Style November 2012

Burdastyle magazine november 2012

A little later than usual but I do hope that November 2012’s Burda Style magazine serves to whet your appetite and make your sewing list longer all the same!

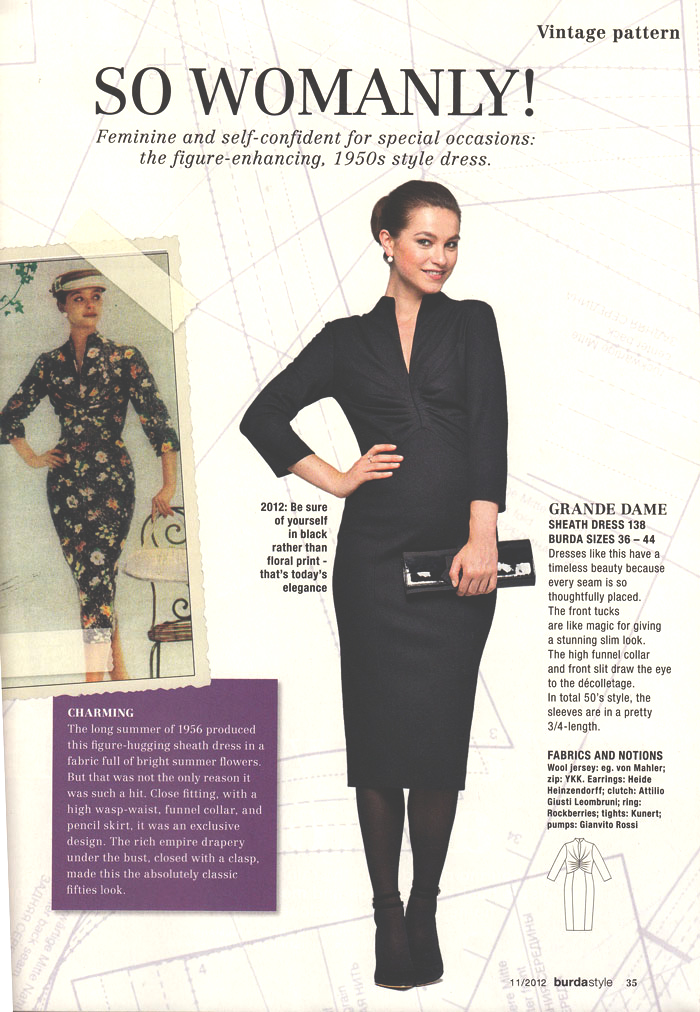
I’m going to jump straight to the Vintage pattern because that is exactly what I did in the shop and it is so totally my favourite and my best! I do like it in black but I also like its original floral form. Such style in the fifties! Bring it back, I say!

burda november 12 vintage

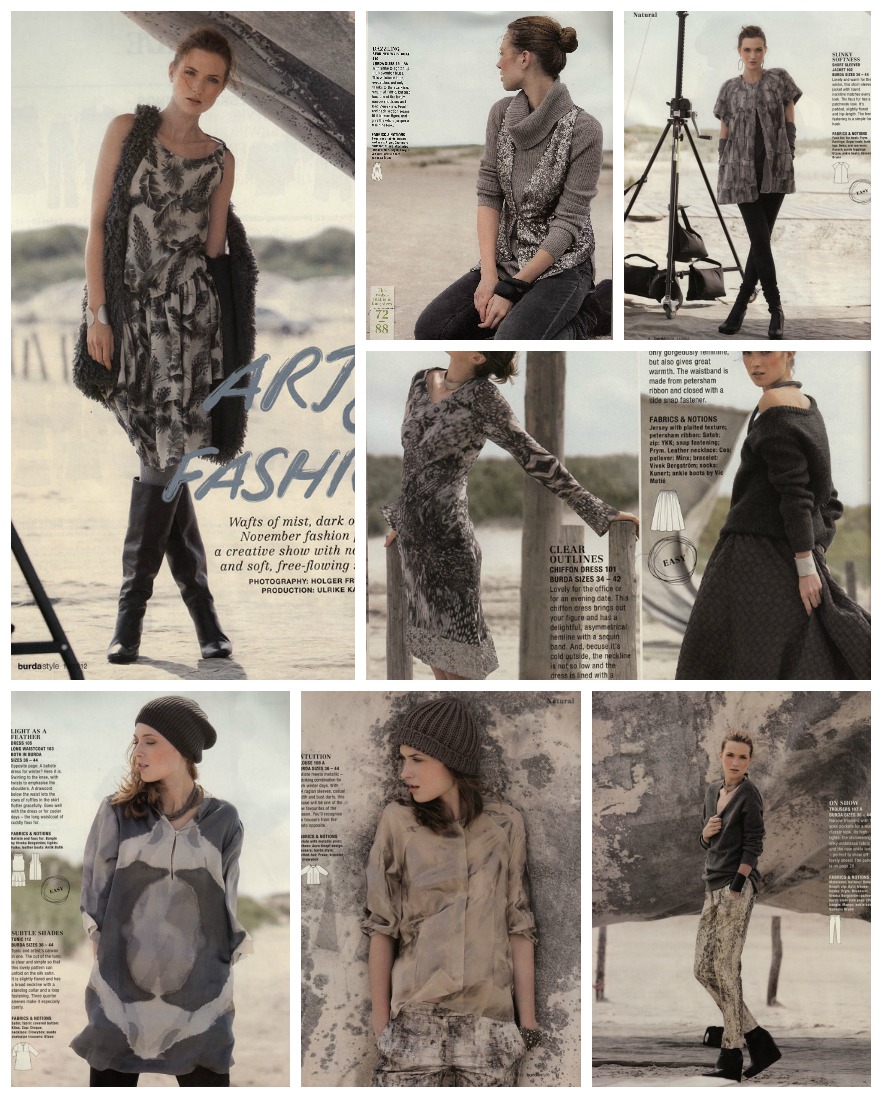
Lots of lovely misty neutrals in the first section this month. I am quite surprised to see a floaty batiste dress (top left, below) considering the chill factor but I like it all the same, especially styled with boots and the faux fur waistcoat. I am also tempted by the blouse, centre bottom row. Batiste with a metallic print…. not sure I will stumble across that fabric choice in the Goldhawk Road, but always worth an ask! It’s got 3/4 raglan sleeves and bust darts so its simple but not completely shapeless.

The trousers (bottom right) are nagging me to attempt my first pair of trousers. These ones have hip yoke pockets and are ankle length to display some fabulous show-off shoes!
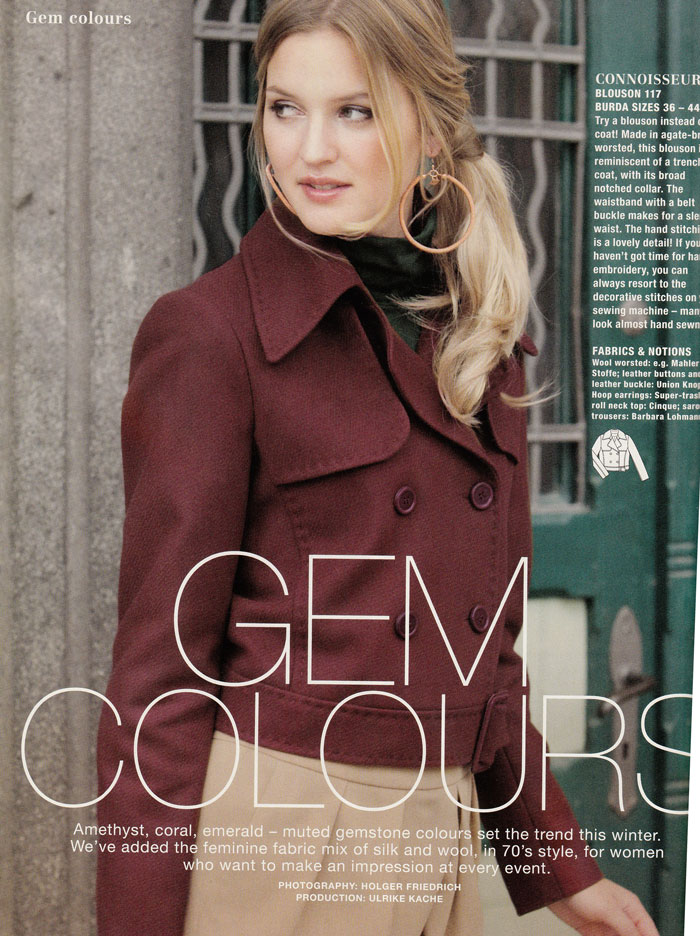
art of fashionNext up is the Gem Colours section. You may have already have seen some of these patterns on the Burda web site. They were quick to go up this month.

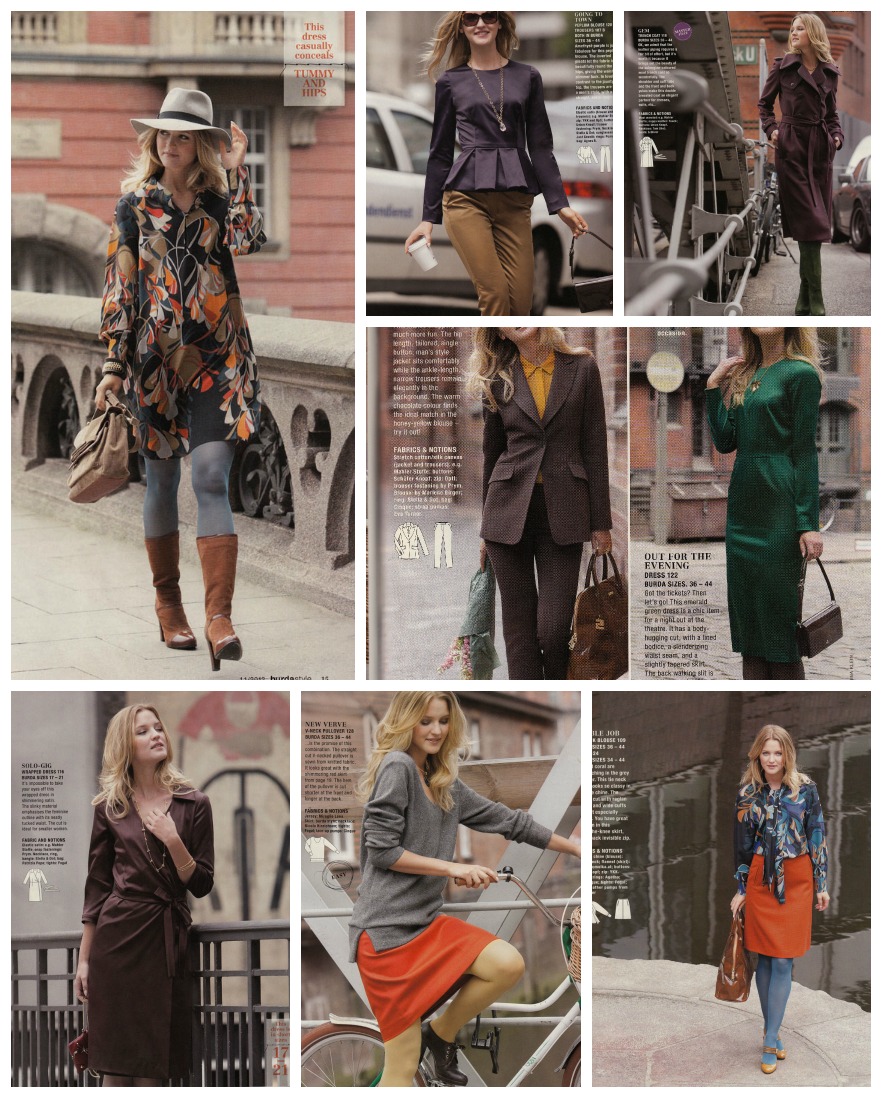
This jacket or ‘blouson’ as its called here, would present such a rewarding project. Having just completed my first proper jacket I’m itching to employ some more tailoring techniques and this one looks like it could present a few more. Its got some beautiful hand stitching going on which gives it such a professional finish.

Gem colours

Undertones of the 70s with oranges, purples and browns are the order of the day for Gem Colours. I’ve not worked with crèpe de Chine before but I think the first dress (below, top left) would be a great place to start. It’s semi-fitted and has a wide neckline, with broad sleeves that taper into slip on cuffs. Perfect for those bloaty days or when you just want to throw something over a pair of leggings or sturdy coloured tights before flying out the door.
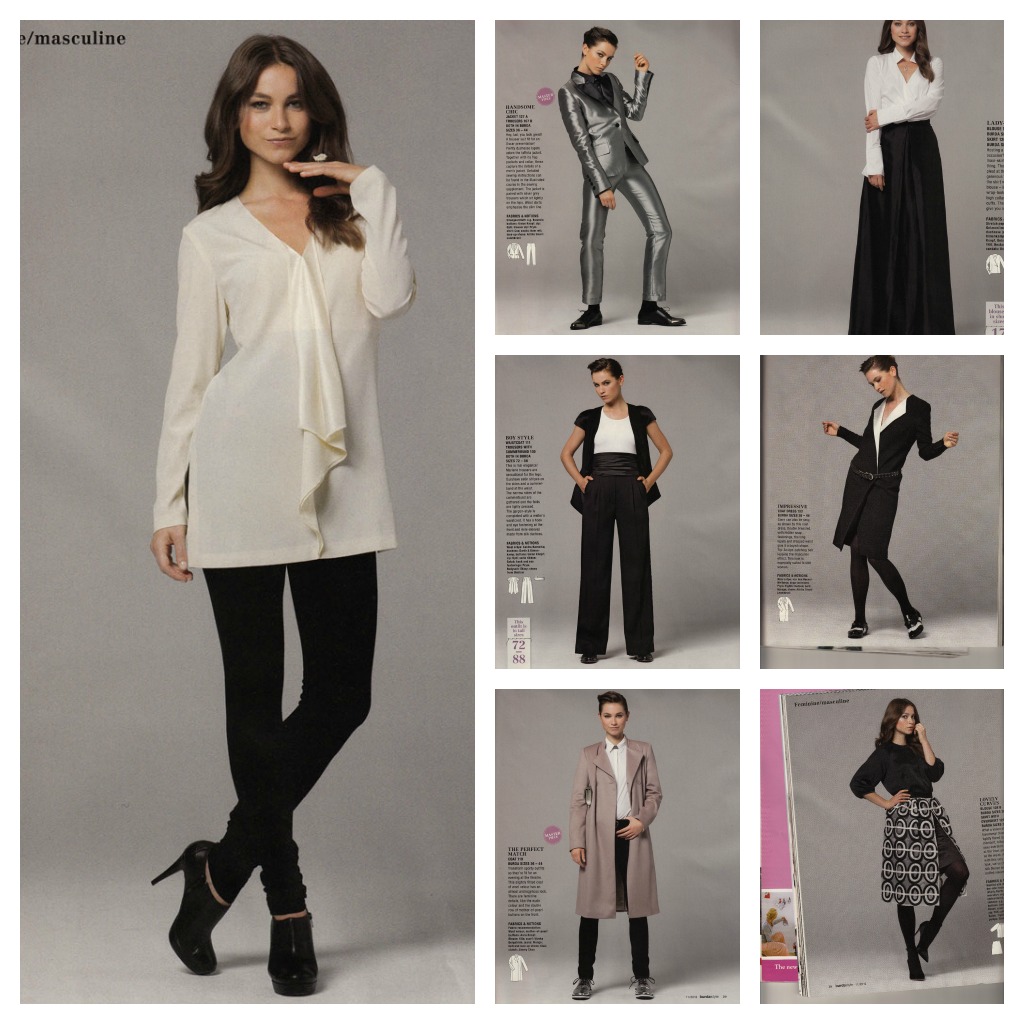
gem coloursTwo Sides of Me is an interesting section this month. I like the dress!
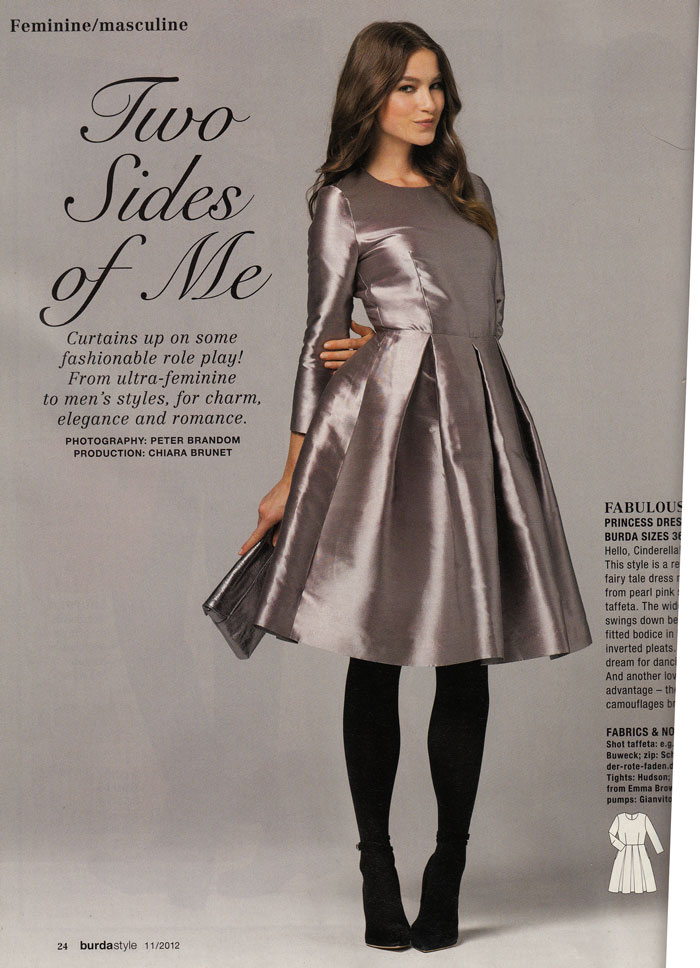
Two sides of meNot too sure about the boyish looks. Bit boyish for me to be honest! But I’m quite drawn to the blouse on the left. Not my usual style but I like the idea that this could be whipped up a couple of hours before a theatre date! It is made of stretch silk satin here. Much like my pin up pants, so I bet it feels gorgeous on!

Two sides of me

I kind of flicked past the Knits section to get to the Kids. Nothing against knits, honest, and I feel bad now for not including them. But they just seemed like staple loungewear. And I need to avoid making stuff that everyone is going to think is from ‘Primani’!

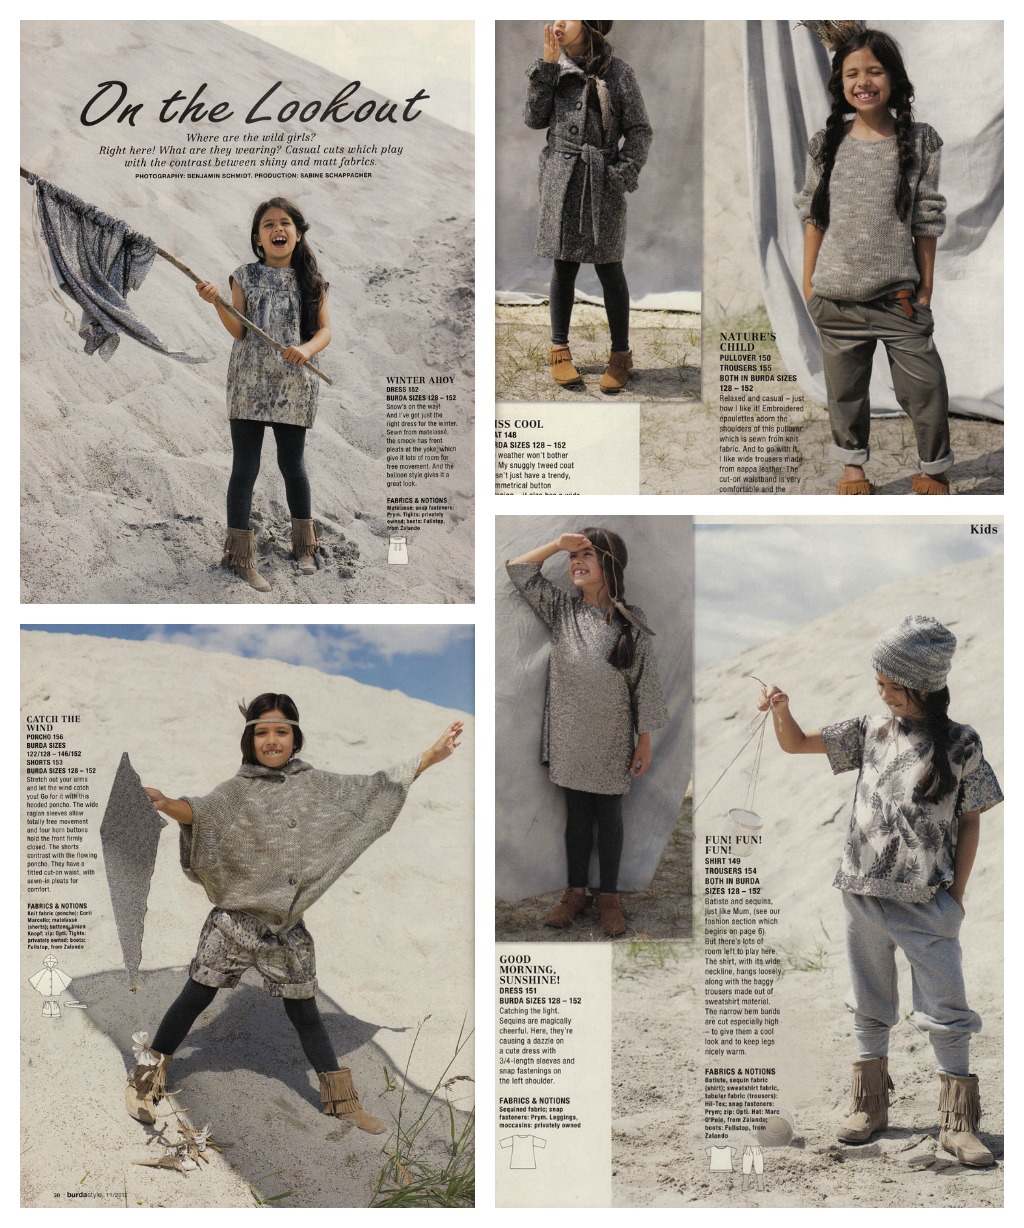
But… there is some totally cool kid stuff as usual. Keeping the neutral theme and mixing up metallics and matte. Lovely textures and fun, chic designs that will even fit Little Miss Ooobop!… hoorah!!
Burda Kids november 12And a Burda mag would never be complete without some hot plus-size gorgeousness. My picks this month are very vintagesque. Creature of habit, moi?! Very elegant and sexy and perfect for a hot wintry date!
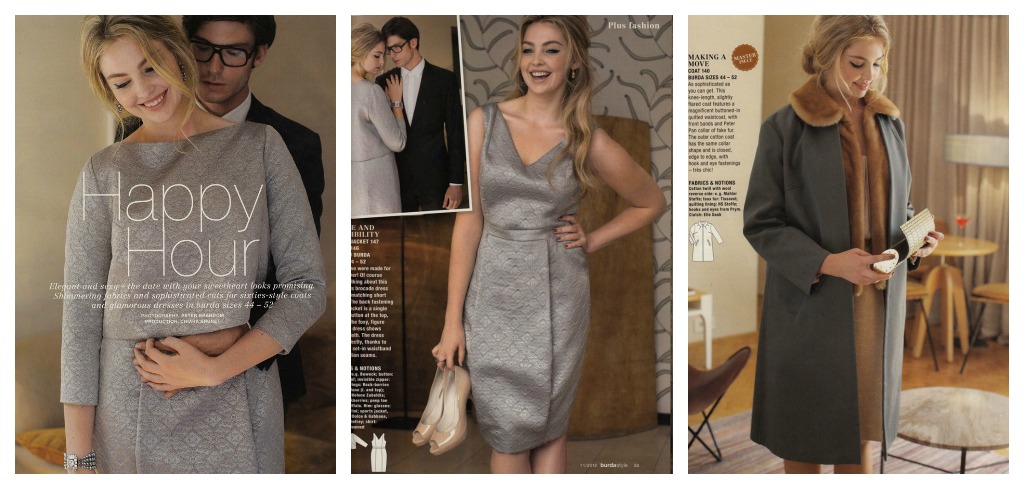
plus sectionAny faves? Any dislikes? Feel free to share your thoughts!

Burda 11/2010 Jacket #130

burda jacket 130 Nov2010

Oh where to start?

Well, from the very beginning would probably be a good idea! I started this jacket way back in February but was wearing it in my head from the first time I saw it in Burdastyle mag 11/2012! I completely ignored the number of coloured circles which indicate level of difficulty. Half a circle short of the most difficult… how difficult would that be?!

It transpires that it wasn’t particularly difficult, once I’d deciphered the 2 magazine columns of instructions, though my strops might have suggested differently. I really don’t respond well to written instructions as much as pictorial ones!

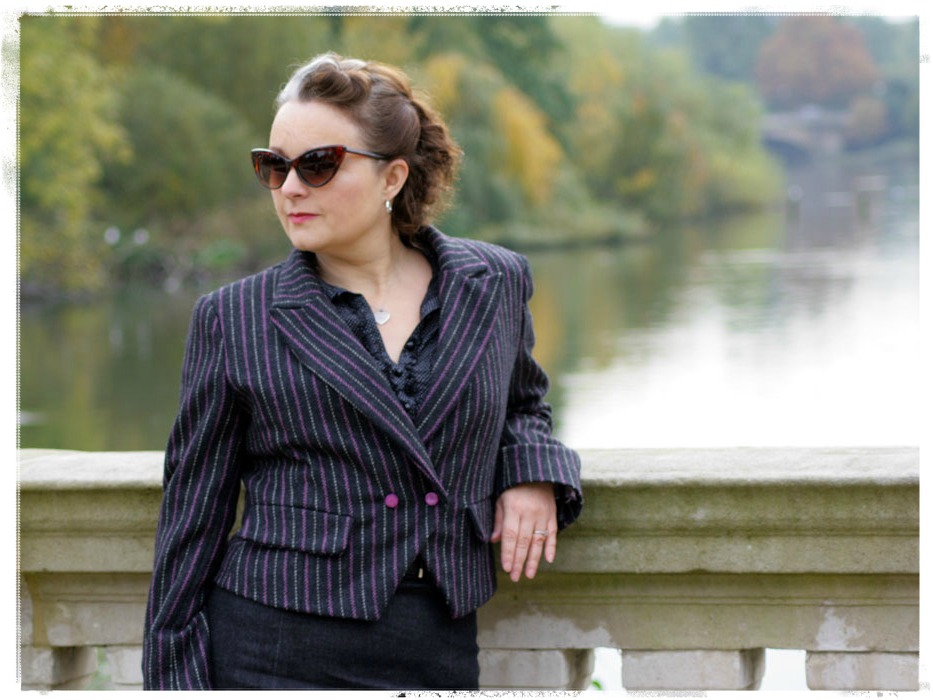
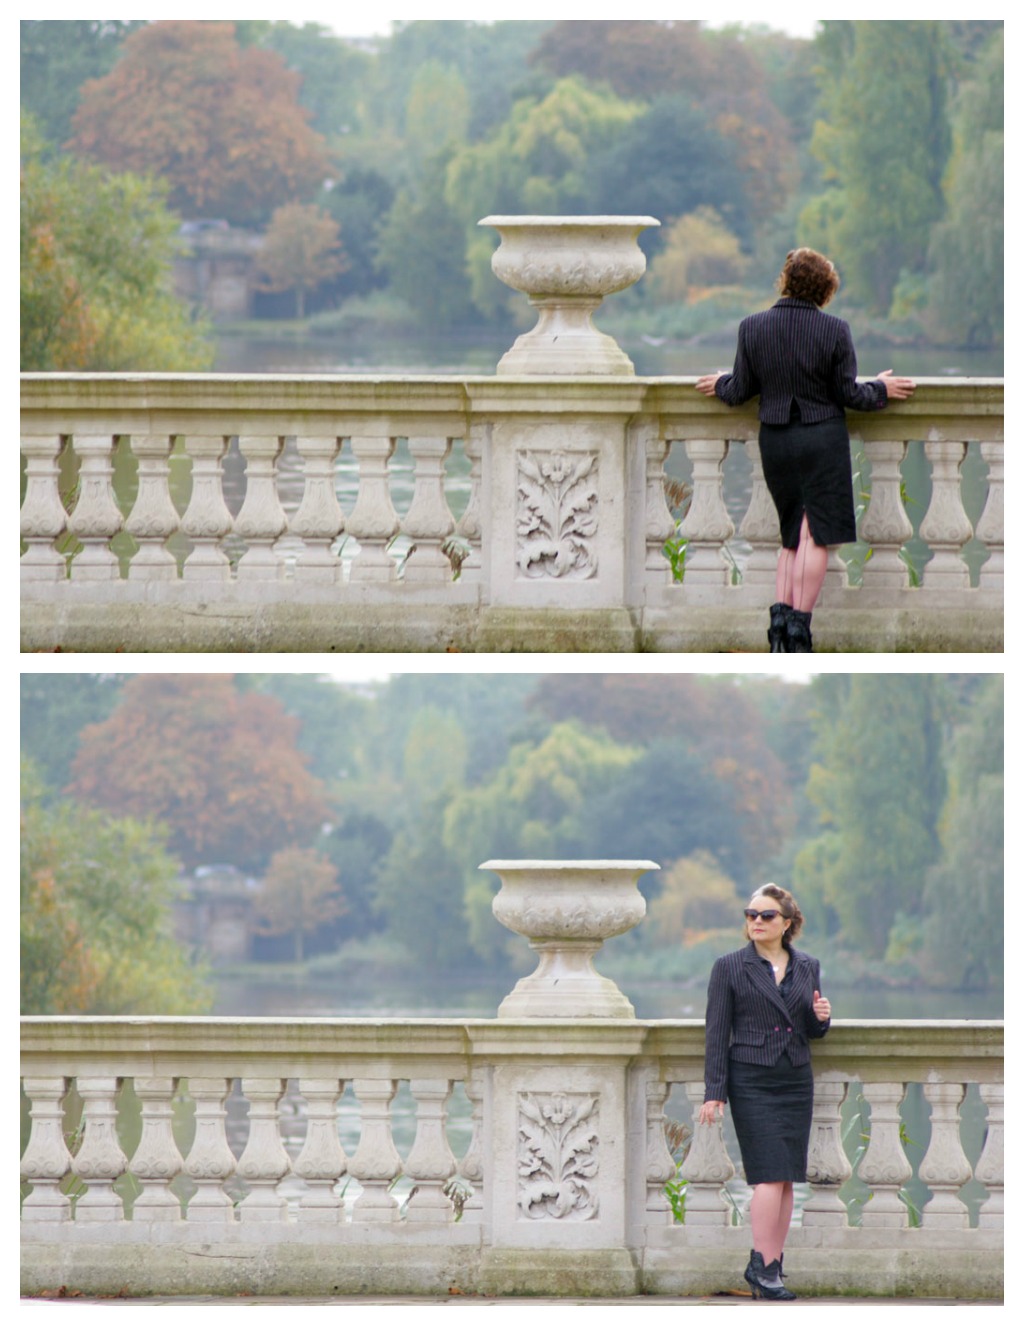
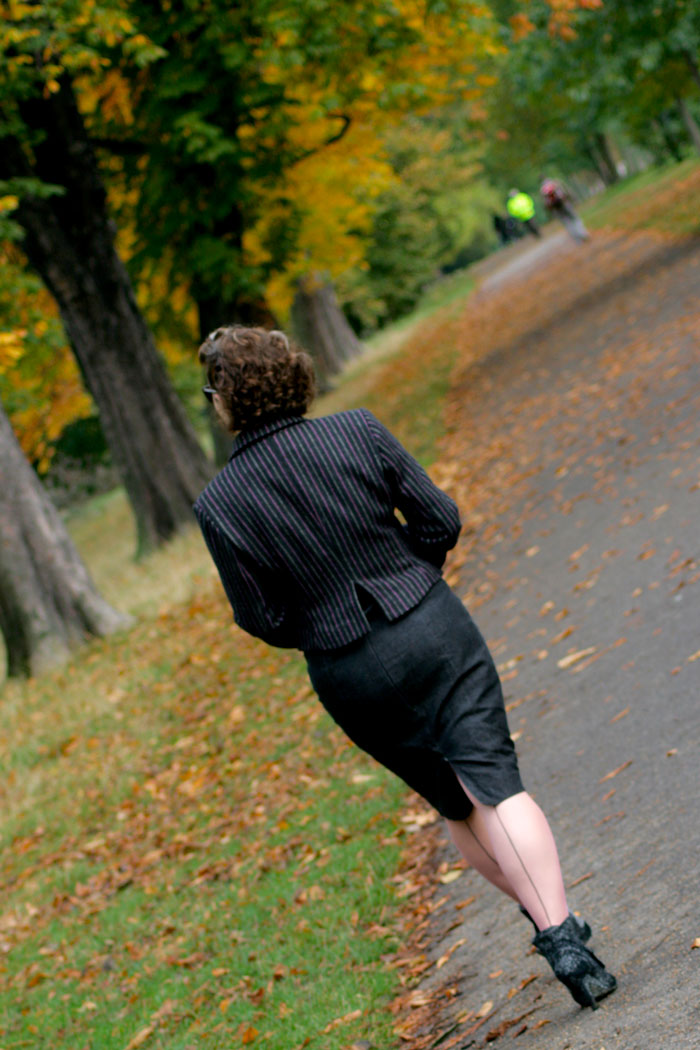
I will do a follow up post with all the niggly construction bits but for now I am so happy to present the finished jacket that was kindly and so brilliantly shot by Mr Ooobop! today. Kensington Gardens provided an amazing autumnal backdrop, despite the lack of sunshine and we had a lovely stroll while Little Miss Ooobop! went to a bowling party at All Star Lanes.

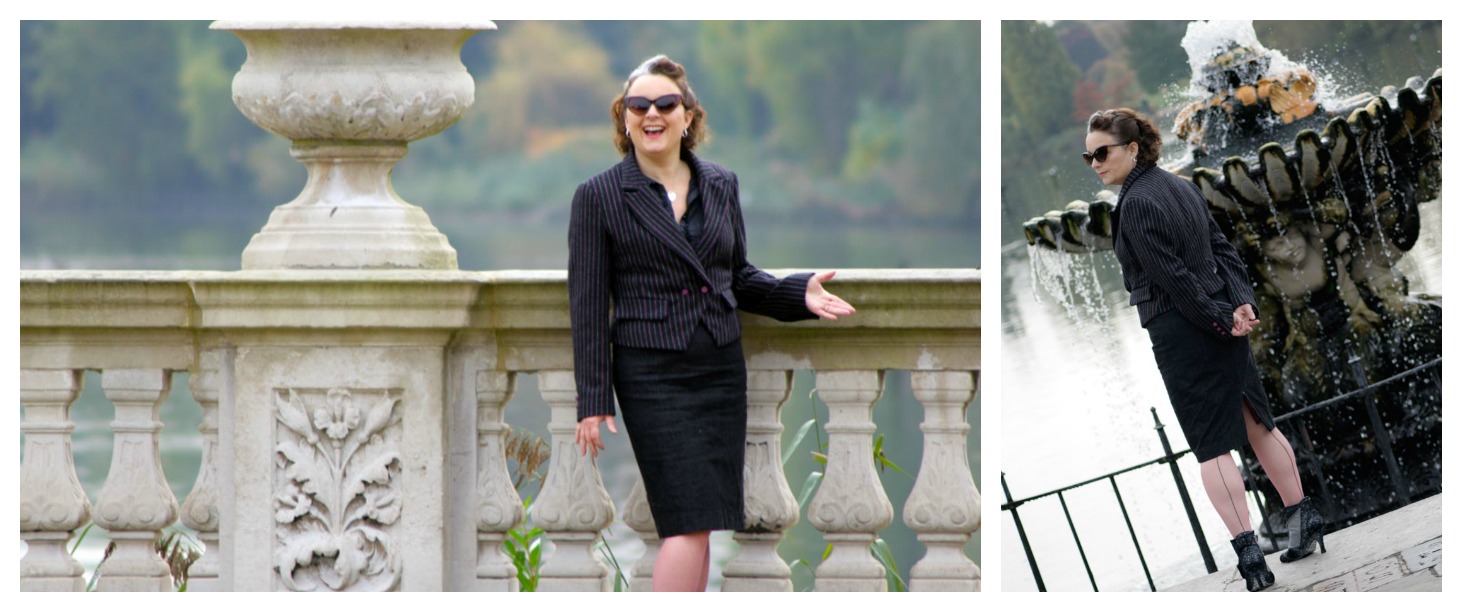
These were taken at the Italian Fountains near Lancaster Gate. It was lovely and misty but still the colours of the trees were beautiful.

burda Jacket Italian Fountains

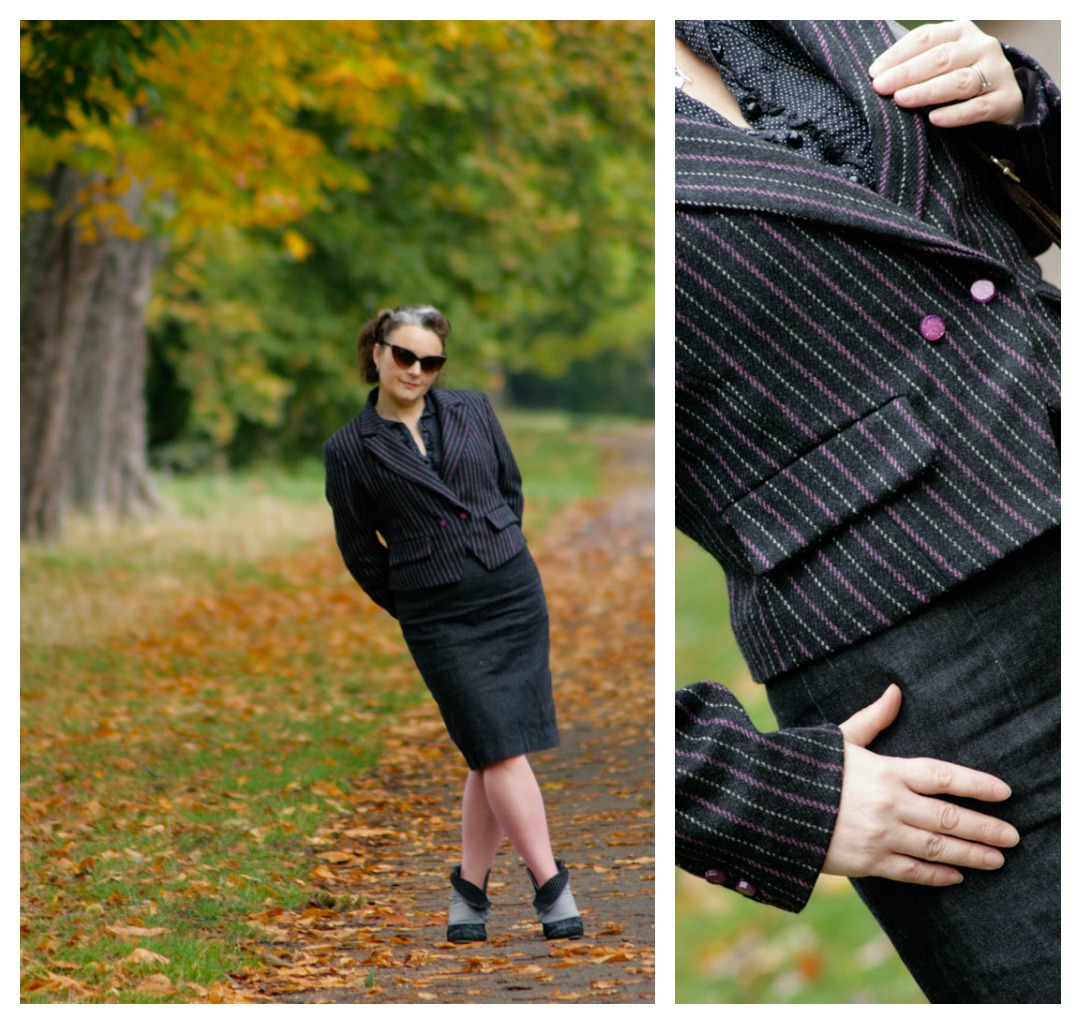
burda jacket shot by italian fountainsDespite the lack of blue sky, my trusty photographer was determined to make use of the gorgeous colours and he got some great detail shots too.

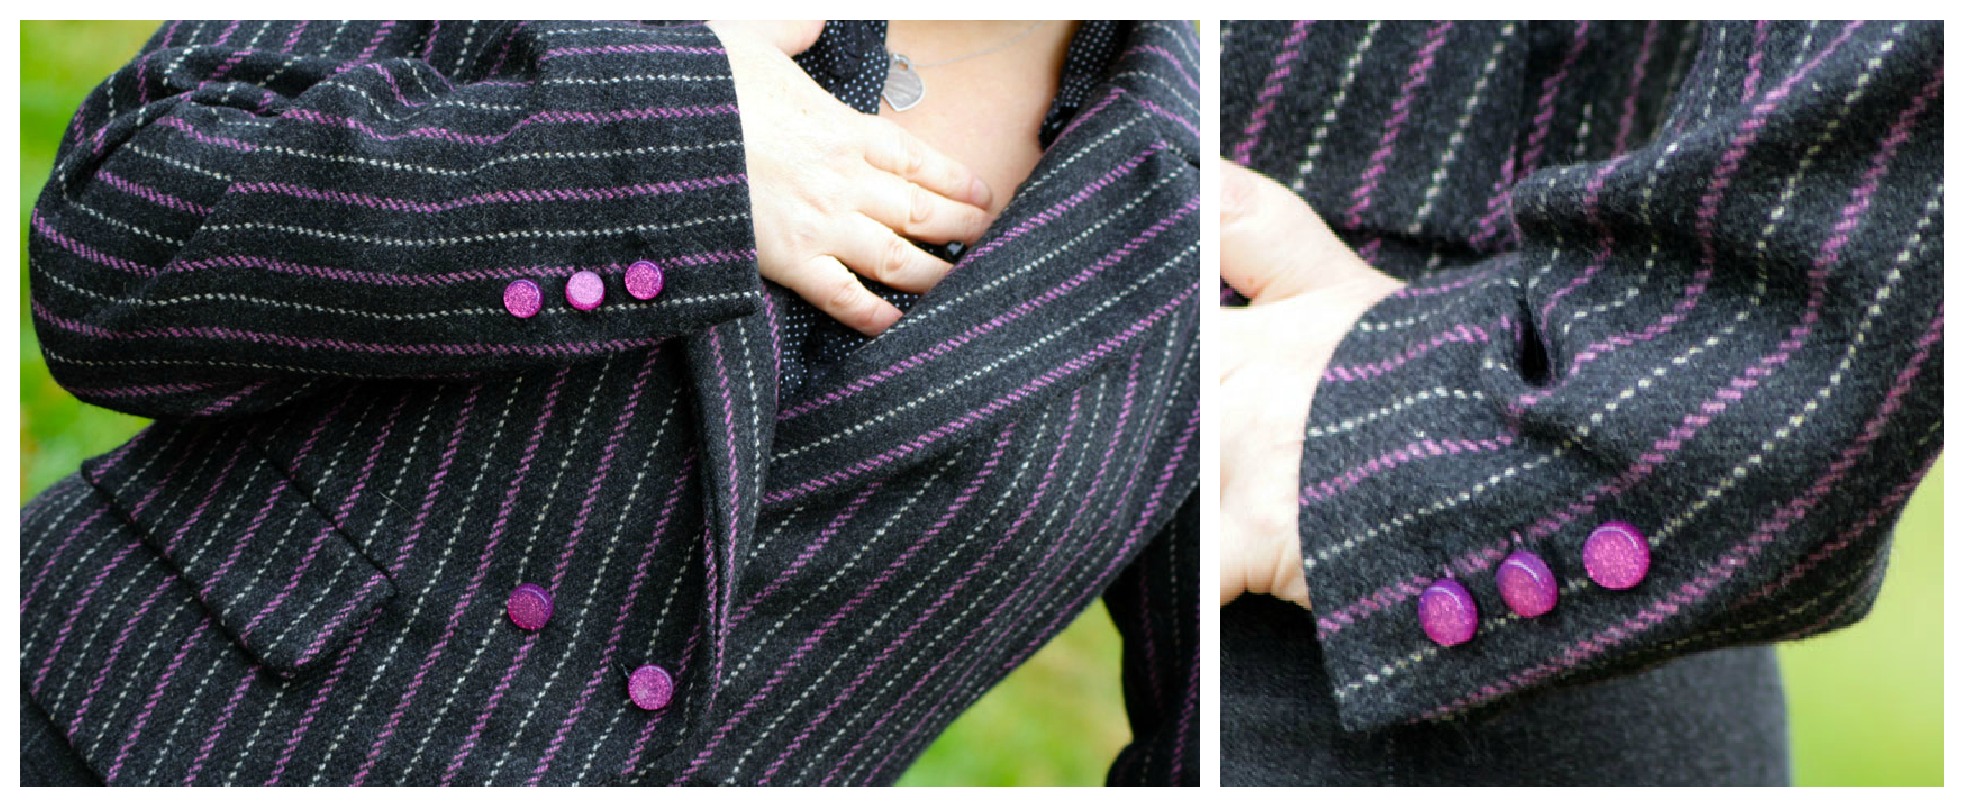
burda jacket autumn leavesI’m so loving the sparkly raspberry buttons!

sparkly raspberry buttonsBesides being so happy to have finished and be wearing my jacket, today also proved how we take for granted all the beautiful open spaces that London has to offer. So many on our doorstep. Must get out more often!

Wishing you all a wonderful weekend. I’m off to find a tiny project!

burda jacket in the leaves

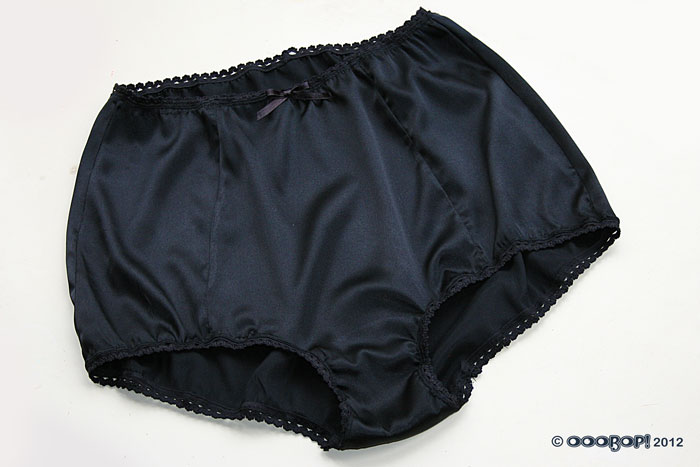
50s pin up silk knickers

silk knickers

Well Bridget Jones, eat your heart out. Mine are big and all silk!

There has been a lot of knicker making activity going on in blogworld recently. For example these pretty French knickers by Kat at The Couture Academic, these ‘little pants‘ made by Rachel at the House of Pinheiro and just check out Gertie’s prolific pant production line! Plenty ’nuff inspiration to ease me gently into the beginnings of lingerie-making.

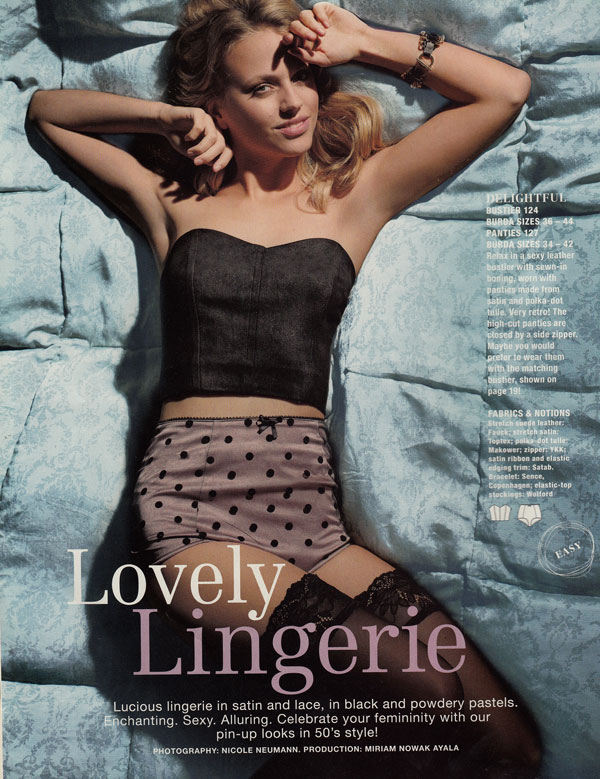
As with most things I do for the first time, I headed to my Burda Style magazine collection, remembering a Lovely Lingerie section in issue 01/2012, which of course included the perfect pattern.

Burda Style LingerieThe only thing that flummoxed me was that these ones had a side zipper! I can’t get my head around having to zip up your pants in the morning, call me old-fashioned! I guess the rationale was that the over layer of tulle wasn’t too stretchy and I for one would never be able to get non-stretchy nicks over  my hips!

So first mission was to find some stretchy lingerie fabric so I could omit the zip. I went in search of stretch cotton satin but on presentation of skirt-weight cotton sateen each time, I gave in to the more luscious lure of 100% stretch silk. At £15 metre, these are definitely the most expensive but certainly the most luxurious pants I own. My faithful haberdashers in Shepherds bush market stocks the elastic lace at 50p a metre which softens the blow!

silk knickers bow

These were such an easy and delightful make. Though I don’t want to give you a ‘bum steer’ (!) They are more time-consuming than you would think, to stretch-and-stitch the elastic lace, top-stitching it twice on each opening . . . especially on to slippery silk.

Oh, and by the way, I make no apology for the lack of modelled garment. How could I possibly compete with the way that Scruffy Badger so confidently models her frilly knickers?!

The Daphne dress

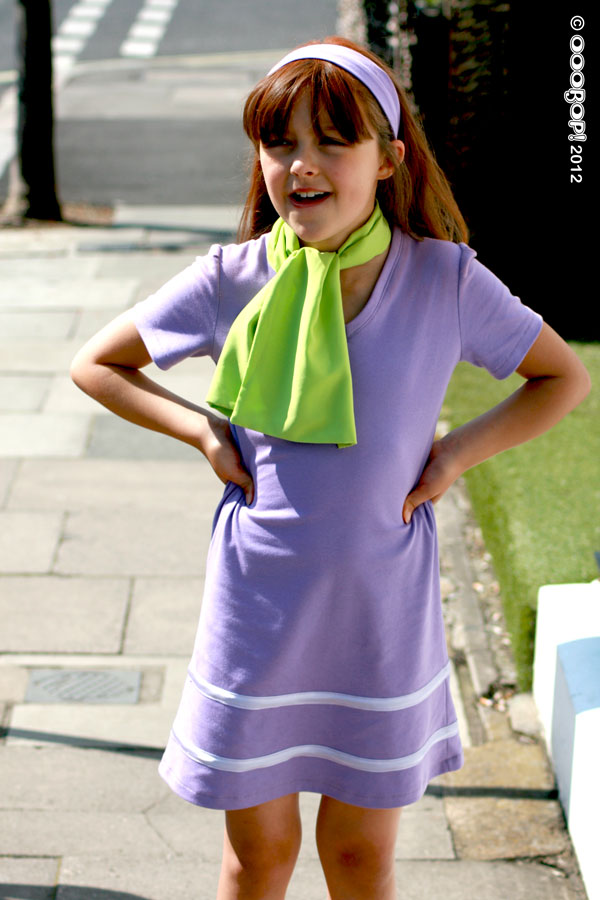
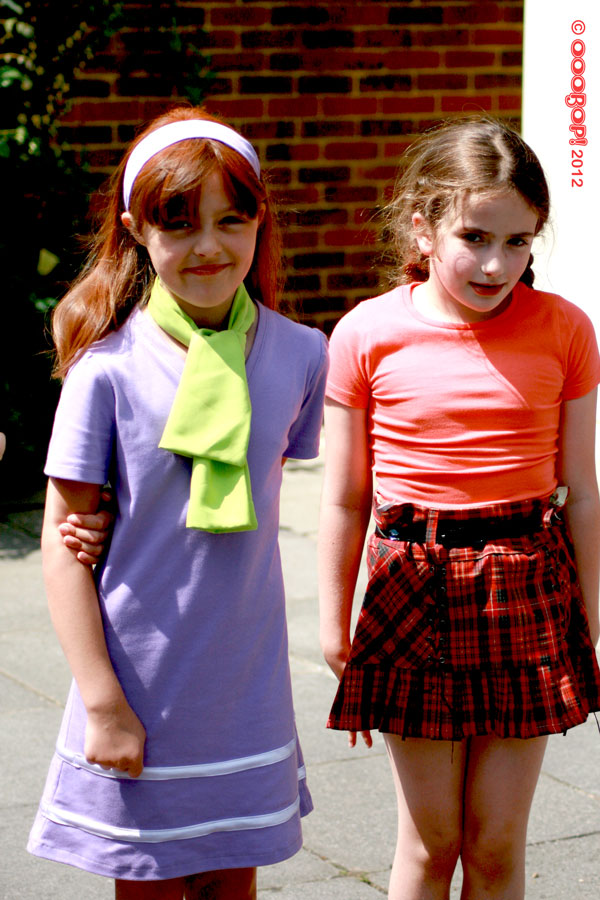
In between the quilting and the vintage dresses and the obsessive pattern buying I’m quite often being art-directed by Little Miss Ooobop! for her next dressing up party outfit. Today was her friend’s birthday party, Scooby Doo was the theme and she wanted to be Daphne.

Daphne from Scooby Doo

Burda Style 10/2010 came in handy, and not for the first time, with a great kids pattern for a long T shirt. The original had a button placket and long sleeves which wasn’t an option for Daphne’s dress. Believe me, LMO does her homework good and proper. The only requested variation was that the dress had short sleeves in case it was sunny. She wasn’ t wrong, that daughter of mine… what a glorious sunny day we had today.

The fabric is a mauve stretch cotton jersey which we found in the first shop we went into! And at £3.99 a metre, a bit of a bargain too! The satin bias trim was from my favourite haberdasher stall in Shepherds Bush market for 40p a metre! No other notions. A v-neckline makes sure of that.

Daphne pose

To alter the pattern I simply cut the the body back and front on the fold, ignoring the placket shape. I lengthened by 4 inches and changed the neckline to a V-shape. And shortened the sleeves of course.

I used the trusty side-cutter to do a faux serge on the seams. Honestly it works like a treat! And I used a stretch stitch to finish the hems on the skirt and the sleeves. I have finished a v-neckline with stretch jersey once before, on my spotty top, and it was great to practice it once again. In fact I think I did a much better job this time!

LMO with missL

The hairband is quite literally a tube of the stretch jersey. A head measurement minus an inch. No elastic involved. I just relied on the stretch of the fabric and it was fine. I wasn’t going to get too bogged down with it as it was going to get ruined by orange hair spray in any case!

The neckscarf is half a metre of finest lime green polyester, seamed all round with a gap for turning! Actually I was lucky to be served half a metre. Apparently only regular customers get that deal!

The only tricky thing about this project was getting said daughter to pose. It’s getting harder and harder to get her to willingly and graciously pose. It normally involves hard cash but today we got off light with a double scoop ice-cream!

Daphne with ice cream

Lady grey retro top

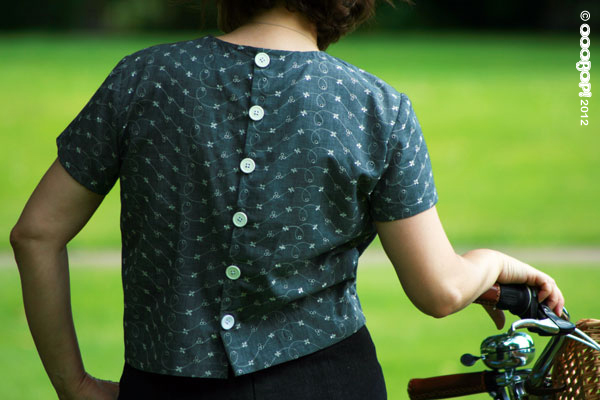
burda top 131 back

I saw the pattern for this top in the May issue of Burda Style (2012) and it made the project list, even usurping the more ‘urgent’ projects! The back as you can see is fabulously buttoned all the way down which I love but have you ever tried buttoning yourself up back to front? I have got better with practice though, and I reckon I could give Houdini a run for his money now!

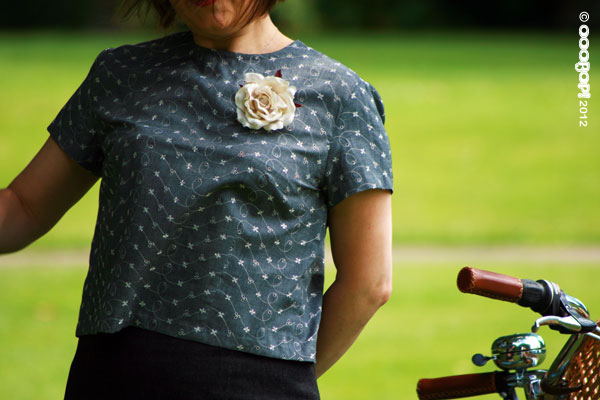
burda top 131 front

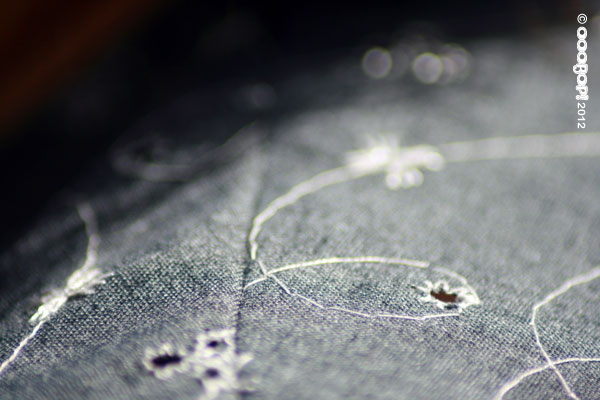
The fabric suggestion was for embroidered batiste. I didn’t have any of that to hand but knew the fabric had to be a little bit interesting to make the front not look so boring! I have a heap load of this white eyelet stuff in my stash. I thought it was cotton but when I did the burn test it proved not! I still thought it would be better dyed. I always feel a bit prim and proper in white! This is the result of using black dye on a not so totally natural white fabric…

eyelet fabric detail

I quite like how it turned out. The dye coverage is uneven, probably only colouring the small amount natural fibre content to get this linen look. And the embroidered detail, which I knew was synthetic, unsurprisingly remained white.

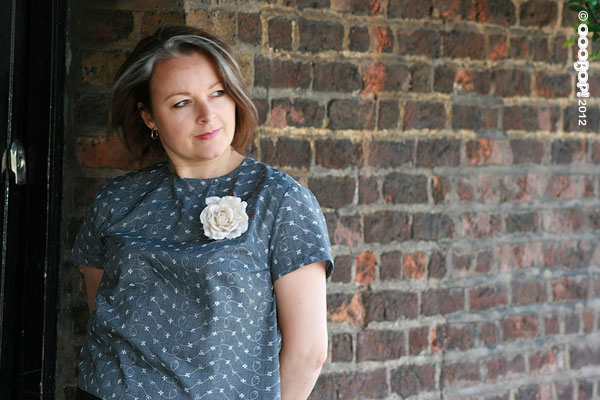
retro top front

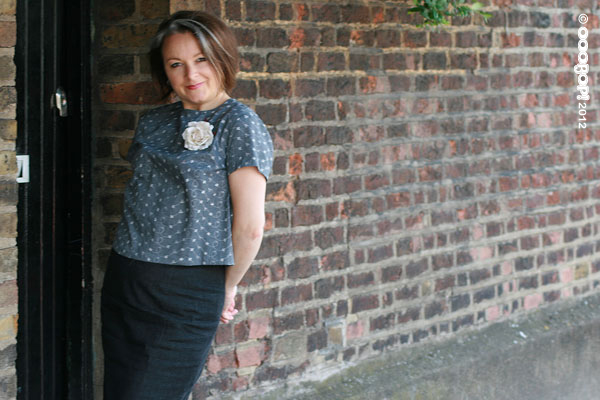
I went up a size from my usual, (given the few extra pounds that have decended upon me recently) but to be honest I probably needn’t have done. The style is very boxy even though it has front and bust darts. But it is very cool to wear, perfect for what appears to be our summer (not holding my breath) and perfect for teaming with pencil skirts for work.

retro top front view by wall

So apart from taking it a size smaller the only other alteration I would make is to the neckline. The instructions were to sew the bias binding 1cm past the seamline. This struck me as a bit weird as it would have been easier not to have added a seam allowance in the first place, surely? Anyhows I sewed the bias binding ON the seamline…. afterall isn’t that what a seamline is for? It turned out ok, much like a vintage jewel neckline but I am going to try omitting the seam allowance next time, just to give a little more room to breathe!

A proper pencil skirt

pencil skirt

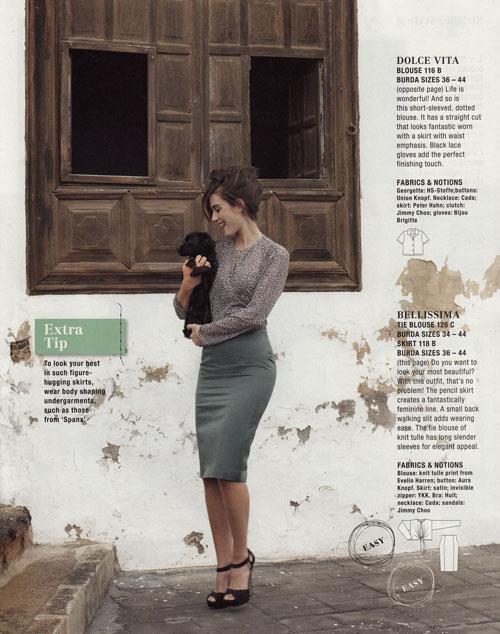
I do believe I have sewn a garment in the same month as the current Burdastyle! Not sure that has happened before. But I was very excited about April’s edition and I knew I would make this skirt.

burda_april_2012_puppy

I love classic, timeless styles. And the pencil skirt is no exception. Worn anywear, anytime, dressed up or down, it makes getting dressed for work or an evening out, a mindless operation! I also love that it can be modern or vintage, whatever you team it with.

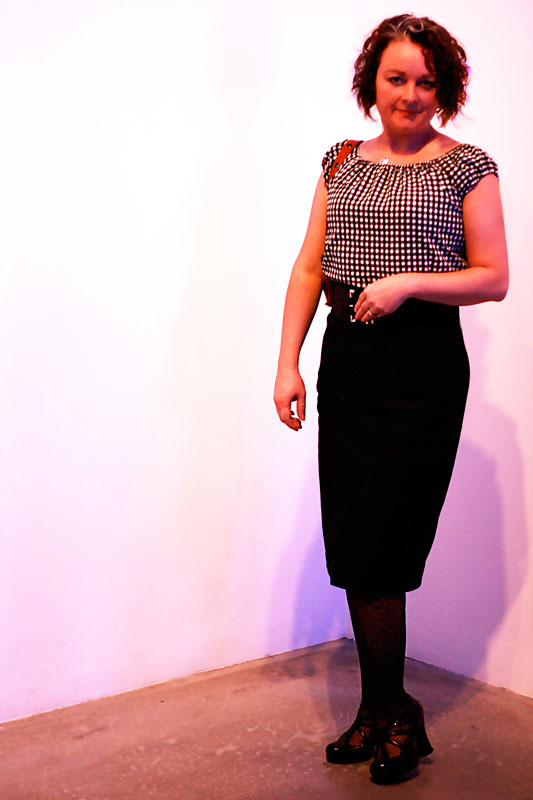
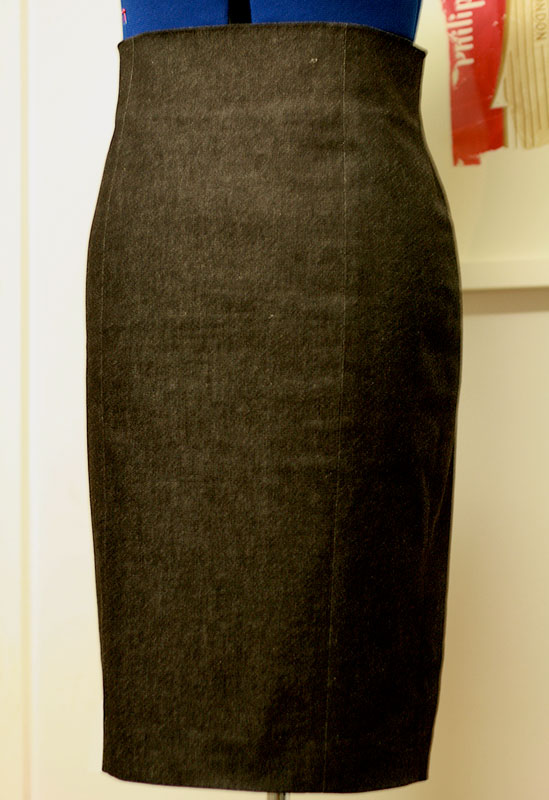
Satin was the suggestion for this particular version but there was another one with a gabardine recommendation. Satin is a bit too posh for work and everyday so I set off to get some gabardine. I bought some but wasn’t filled with the usual glee once I’d parted with my cash. Praps it will soften a bit in the wash, I thought! But just as I was on my way out of the shop my eyes continued searching – as they always do – and I spotted some black stretch denim. That’s the stuff, I thought. And I was right. Comfy, casual but smart and sturdy enough to hold me in, in all the right places!

pencil skirt

This is possibly the shapeliest pencil skirt pattern I have come across. Largely due to the panels and princess seams I would assume. It is really high waisted and a lack of waistband allows for a shapely top at the waist, or near under-bust!

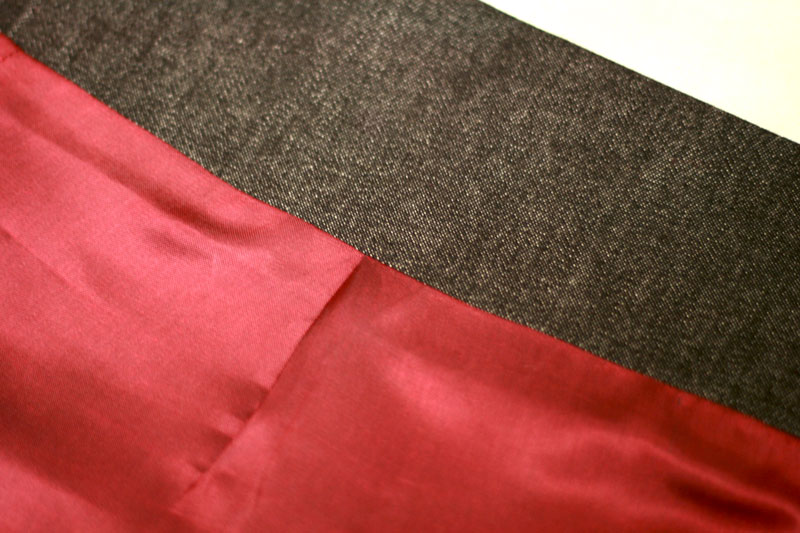
The instructions didn’t relay details of a lining and I have learned hard lessons from not including one so I dug out some deep red poly lining, cut the same pieces as the skirt, minus the facing and allowed a pleat in the front.

lining pleat

I felt quite pleased with myself for remembering this trick but alas it wasn’t enough ease to have just the one in the front. I should have really allowed for another two, one at the top of each back panel. It really is a very snug fit!

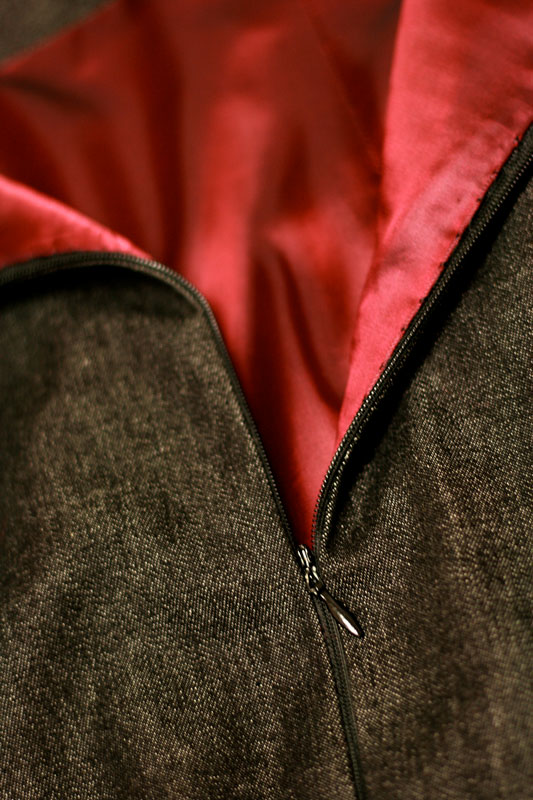
The invisible zip went in without any probs. It lines up and everything!

invisible zip

I will definitely return to this pattern at some point and would love to make a posh version and include the couture techniques suggested on the Burda Style website, namely adding boning, underlining etc.

But I seriously must not veer off the project list any more than I already have! I have much more interesting projects to fry, not least of all my jacket! I can report that it is, at last, taking shape, all be it in the initial stages, but it has a body, nonetheless, and some welt pockets with flaps and a collar ready and waiting its turn….. honest! 😉

Ooobop! party dress

party dress back view

I have been designing this dress in my head for quite some time. I design a lot of things in my head –in the shower, on the bus, when I’m meant to be doing something else and when I’m nodding off to sleep – it’s a busy old head!

Anyhows, an invitation to the gorgeous Rhonda’s 30th bitthday party was a great prompt to put some of these ideas into action. I met Rhonda’s mum, Tina many moons ago when we moved next door to her and she soon became more than a neighbour. More confidante, great friend and the most wonderful childminder to my son. So this party was really a family affair and I needed a dress.

party dress full skirt

I’ve got real issues with buying clothes from high street shops nowadays. I haven’t bought anything new (save underwear and shoes, of course!) in over a year and get much more satisfaction in making something myself or striking lucky in charity shops. I did think about making it a conscious decision when I started this blog but I know how flaky I can be and I didn’t think I could stick to that rule. Turns out I didn’t have to make it a rule. It happened quite naturally. I much prefer dreaming of what I want and making it or ‘rescuing’ from charity shops rather than settling for what’s out there. And now I really feel like I’ve moved on.

party dress twirl

This is my first dreamt of, self-designed and handmade dress. And I am chuffed to bits. The bodice pattern is slightly modified from Burda Style’s Wedding Special, issue March 2011. It has a v-back, a high neckline and is perfectly fitted with waist and bust darts. Below is the bridesmaid dress as featured in the magazine.

burda bridesmaid dress

The skirt section is self-drafted. It is a circle skirt with the inner circumference double the waist. The fabric is either silk or cotton, a silky cotton… or maybe a cotton silk! I did a burn test and it burnt to dust so its definitely void of any synthetic fibres! I had enough of it to self-line the bodice and it feels lovely against my skin and was cool enough under the flashing lights on the dance floor!

party dress front

I made the sash from a 3 metre, double layer length of chiffon, tapered at the ends and top-stitched.

party dress sash detail

The rose print allowed for some interesting placement on the back. Quite happy about that!

party dress back

The dress is worn over an organza petticoat, again, self-drafted, which although not complicated, was more of a test of my patience than the dress. I will blog the petticoat separately given that I haven’t taken any photos of it yet.

Unsurprisingly I didn’t get chance to hem the skirt by hand. And in a way, I’m quite glad I didn’t spend the time – can’t imagine how long it would take – I went for a machined baby hem instead.  First I ran a line of stitching, a seam width, along the hemline. I used this as a pressing guide and it pressed up beautifully. I then tucked in the raw edge to the fold and machined again, using my quarter inch foot which made it really easy to keep a small and consistent hem. I was careful not to stretch the fabric as I went round so it didn’t pucker. I pressed it again… this fabric really is a pleasure to iron!

The most amazing thing about this dress is that it cost £3.50! £3 on the fabric – an incredibly lucky find in a charity shop – and 50p on the invisible zip. The sash cost much the same!

The fabric was a little slippery and needed lots of pins to hold in place. This is my first dress in a silky fabric and I anticipated it being troublesome. That said, I really worked fast on this dress. Mostly because I had a party to go to and I suppose because there was no expense at stake… apart from my time! It irons beautifully and hangs so effortlessly so I can forgive the grief it gave!

It took one evening to draft the skirt pattern, cut the fabric and assemble/line the bodice; a couple of hours to sew the skirt on to the bodice (I am really not a fan of gathering!!) and putting in the zip. I hand finished the inside lining, hemmed the skirt and made the sash the morning of the party.

I’m very pleased with how it turned out. I love the fabric and Im happy that a special stash piece got used for an appropriate project. It was just waiting for the right moment!

Thank you to Mr Ooobop! for the ‘action photos’ and lots of lovely birthday wishes to Rhonda x