Handkerchief hem dress

ooobop design hankerchief hem dress

Lockdown forced me to buy fabric online. Not my favourite thing to do but needs must when Covid pulls the rug!

I headed straight to Minerva – amazing selection; easy to navigate website and very competitive prices. I’m also a fan of the accompanying videos that showcase the fabric in action so you can get a fair impression of the weight and drape.

I was on a roll with the Shelby rompers, having made a starry one, a tropical one and an upcycled one in relatively quick succession, and my plan was to make a plain one that was a bit more casual and downplayed for those days when you want to be slightly less visible. Read: any excuse to go back to black!

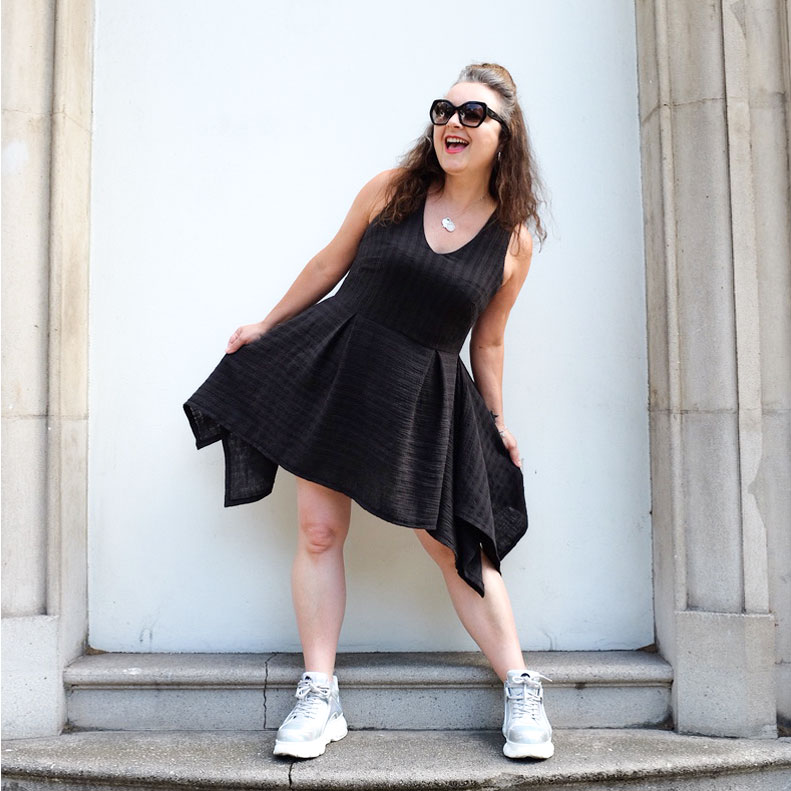
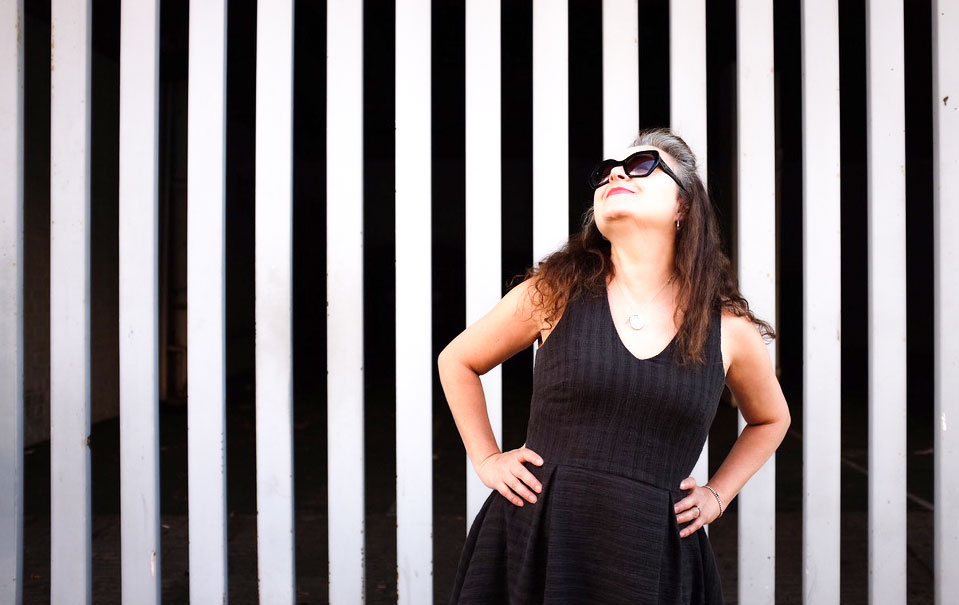
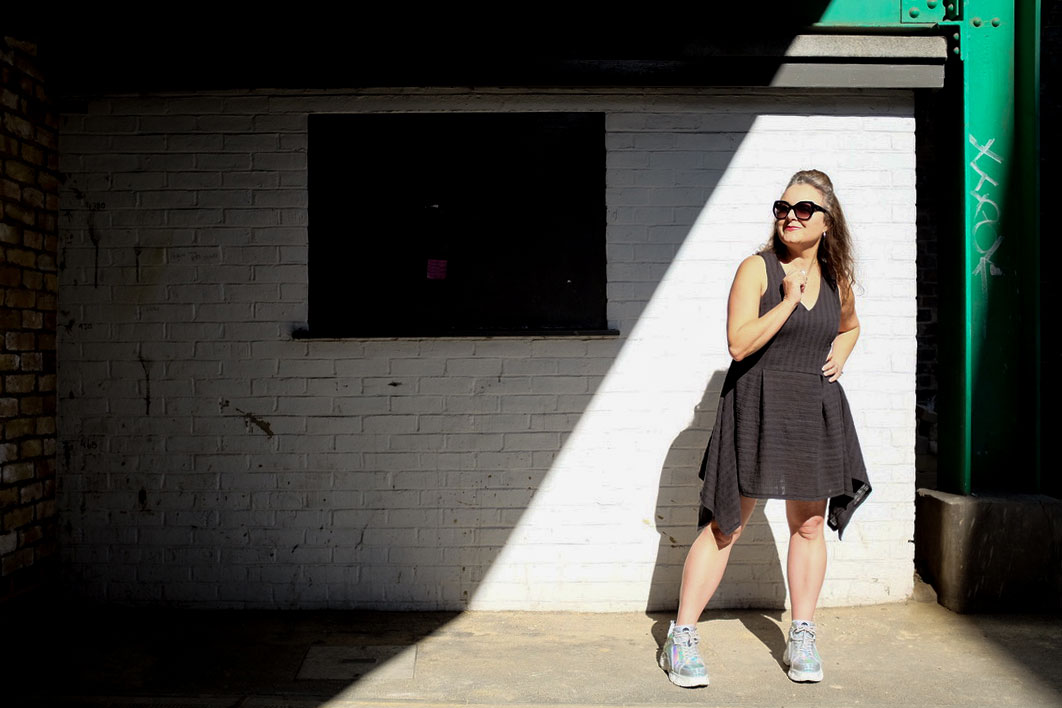
I’m a sucker for black. But even moreso for a black fabric with a texture. And linen is a firm favourite. So I figured this crinkle cotton striped linen gauze would tick all the boxes. Black was sold out unsurprisingly, so I went for charcoal which actually champions those slubs with way more contrast.

But when it arrived I was a bit miffed. It wasn’t at all as I’d imagined. It was a bit scratchy, a bit wonky with it’s loose weave and worst of all, following a prewash it contracted to half the width! That lovely slubby texture totally worked against me, didn’t behave at all like regular linen and was almost elastic! – I was dead scared to make it into a romper. What if one leg ended up longer than the other, lol!

ooobop hankerchief hem dress
Channeling Blondie and Parallel Lines!

Despite the disappointment I rejoiced in the realisation that I’ve come far enough into my dressmaking journey to know when a fabric isn’t going to cut it. And the tantrums are few and far between now, because I’m quicker at finding solutions. Also the fabric completely softened after a prewash and I was more determined than ever to let this fabric do the talking.

So I went off piste. Not accidentally I’m sure because I’ve always got a catalogue of crazy designs in my head and sometimes they make it to a page in my Fashionary book so they’ve got a better chance of being realised. A summer linen dress incorporating a fitted sleeveless bodice, with a v-necklline and a handkerchief skirt would be it’s destiny.

ooobop hankerchief hem dress

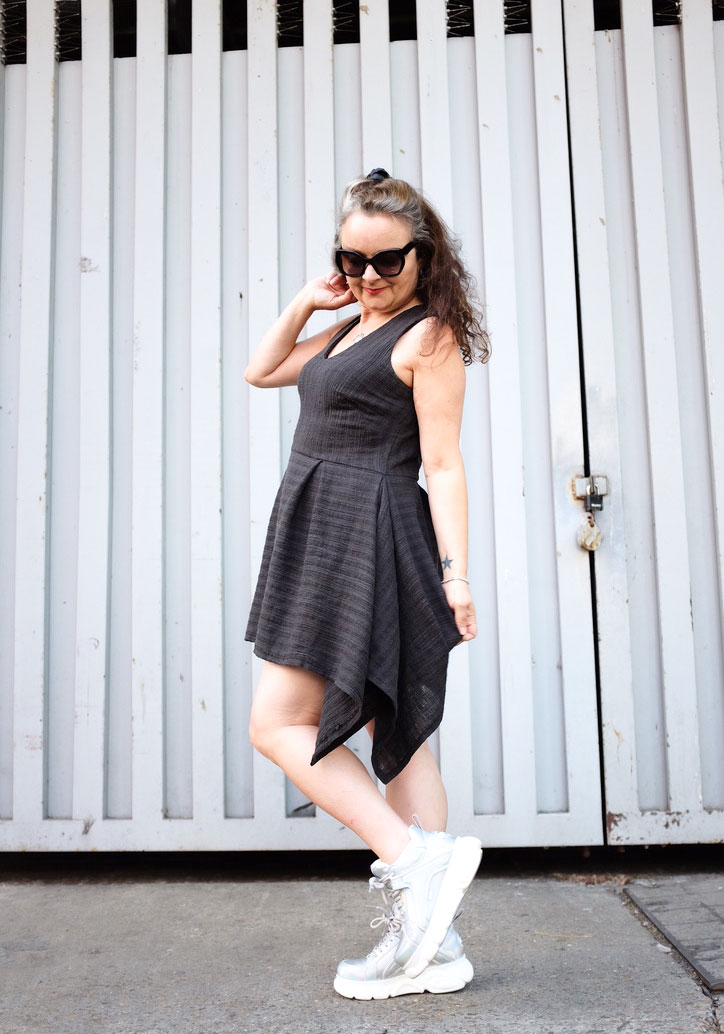
I reached for my bodice sloper, added a v-neckline and narrowed the shoulders. I also swung the darts to fashion a double French dart for no good reason other than I’ve never done it before. And I really like the result!

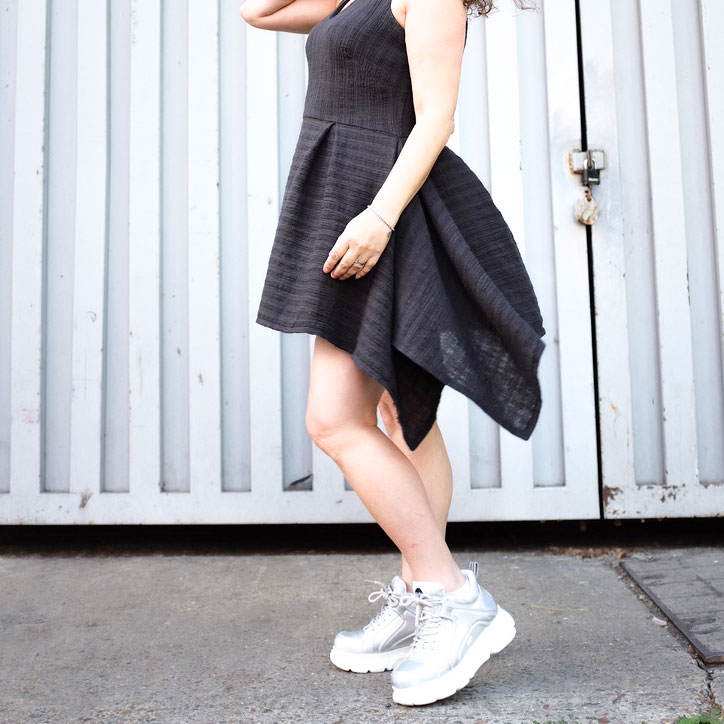
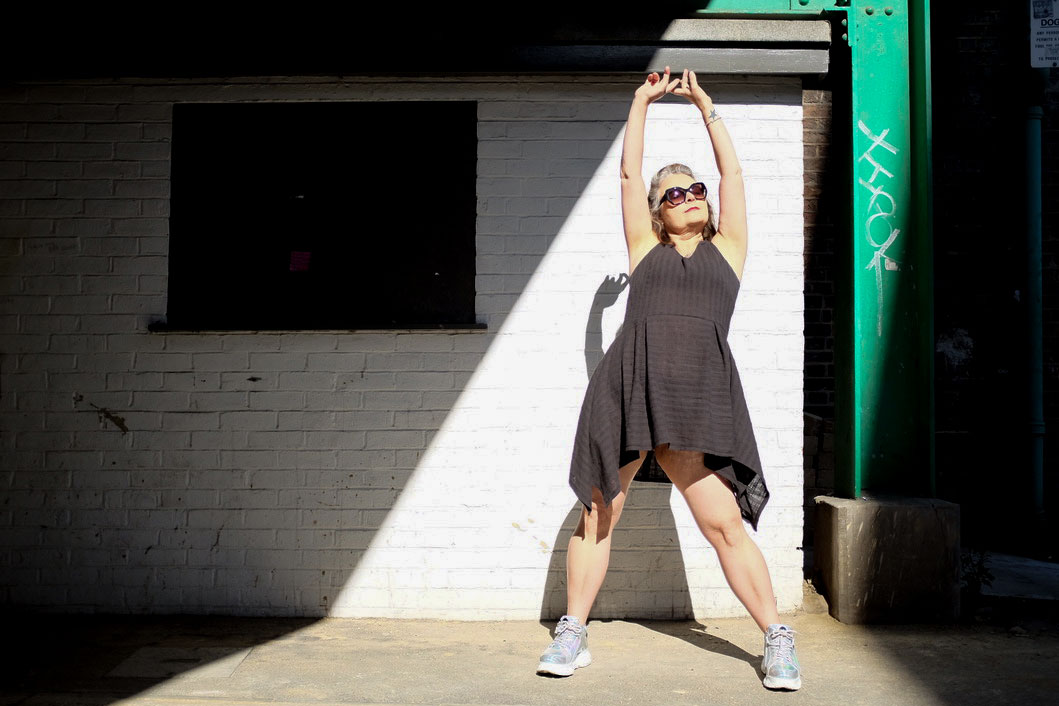
The vertical stripes of this linen lend themselves perfectly to the bodice but I decided to switch the stripes horizontally for the skirt section because I much prefer how horizontal lines fall at the sides. There was precious little worry how it would all hang for cutting it on the cross because I was playing to it’s wonky nature in any case. And it turned out good. In fact more than good. I love it!!

ooobop design hankerchief hem skirt detail

I have to cite a few influences here: Liz from this year’s GBSB for sticking to her alternative fashion style. I realised I was drifting away from mine and she’s unknowingly reeled me right back in! My bestie Laura Bird who loves an All Saints asymmetric number, always sporting an ‘interesting’ dress and Burda Style for first introducing me to a hanky hem!  I made my first maxi dress here and a second silver one here  and they are still my favourites though this is my first short dress with a handkerchief hem.

So how did I cut the skirt?

I decided on the length of the skirt (the depth) and factored in seam allowance and hem.

I made the width of the skirt to the following calculation:

Front piece (cut 1) = half waist measurement + (2x length of skirt) + 8inches for 2 box pleats + (2x hem allowance)

Back piece (cut 2) = quarter waist measurement + (1x length of skirt) + 4inches for 1 box pleat + seam allowance + hem allowance

I marked the centre of the front piece and 4 inches either side to tack the box pleats. I overlocked the bottom of the bodice piece and the top of the skirt pieces before pinning and sewing in place. I sewed up to the side seam on each piece and then sewed the seam allowance of the extra fabric along the top edge. After the centre back edges were overlocked, I inserted an invisible zip and enclosed the top part of the zip with the facing.

Finally I hemmed all four edges of the skirt and mitred the corners. And oh what a neat little finish that is!

ooobop hankerchief hem dress

I know it’s not the most groundbreaking dress. But I made it to my own order and an image in my head and it really feels good. The fabric feels good against my skin in this heat and I love how carefree it is.

I finished up sewing it yesterday morning in good time for Dan to have a practice with his new camera. (Clever, hey?!) And I’m delighted with the results. Thank you oh clever talented husband of mine!

ooobop hankerchief hem dress

Also…new shoes!!  Buffalo hologram numbers that literally turn rainbow in the sunshine. And yes I know I’m probably channelling 90s Spice Girl. And no… I’m not about to grow up anytime fast!

BHL Zena dress tested

bhl zeena dress front

So here is my version of the newly released Zeena dress pattern by the By Hand London girls!

It’s had so many wears since I sewed it I’m sure most of you have seen it already but it wasn’t quite right to post deets until the official launch date, which is today, hooray!

This dress is a seriously easy sew. There are no sleeves to inset, It is not lined, having just a neck facing, and you could even skip the pockets if you wanted to make it faster. Though I kept them in as a useful device for holding the skirt down on a blustery day!

The fabric I’ve used is very lightweight and drapey. A lovely donation from Handmade Jane. Hot orange with metallic gold spots. And why not?!

I foresaw issues with the sleeves and the tucks on the bodice if I were to use anything firmer. The skirt would probably be great though. Perhaps another option is to have lightweight bodice and midweight skirt. Those pleats would certainly stand to attention then!

bhl zeena dress back viewBut the more casual nature of this dress is what sold it to me. Especially on balmy days like today. Whilst I do love the fitted princess-seamed bodice of the Elisalex dress, (For the Love of Lawn, The Dress that Nearly Wasn’t, Speed Sewing for Sumer ) It feels more relaxed and cooler when the fabric isn’t so close to ones bod.

There’s lots of fabric going on in that skirt but the classy box-pleats take away that awful poof at the belly as is sometimes caused by gathering. I didn’t take a closer side view shot but I can tell you that the in-seam pockets sit hidden, perfectly inside those pleats. I don’t usually get the whole love affair with pockets but it does seem right somehow for a Zeena. I’ve only ever sewn them in one other dress I think, my Burda Maxi. But that was all together for more practical reasons!

bhl zeena dress side front view

It’s a bit shorter than I’d usually go for but I quite like that. I’ll like it better still once my pins have got some colour on them. They don’t get out very often these days! But there is a longer skirt option included in the pattern if you are after something a little more demur, along with three-quarter sleeves as a choice too.

I can’t guarantee what changes were made to the pattern once I’d tested it but I can say that I had no major issues with this one as I tested it. When I make it again I’m going to go crazy with French seams. Which I should have actually have done this time to save on the finishing!

One tip for those pleats though. Make sure you baste them along the top and down the pleat a bit to properly hold them in position before you sew skirt to bodice. I was a bit lazy with the basting and the pleats separated a little bit. Other than that it was a breeze. And I totally recommend it.

Here’s a link to the By Hand London Page where you can buy the Zeena Dress pdf download if you fancy one yourself. Happy sewing!

Photography by Daniel James Photographic

Virgin wool win!

front of basler skirt

I visit charity shops on a regular basis, almost always blinkered, and head directly to the fabric section and back. But a couple of weeks ago I was drawn magnetically to the back rail and to this wonderful tartan skirt.

tartan pleated skirt
The lady who served me knows me all too well and said she just knew it had my name on it!
The label read ‘Basler Collection’, which I hadn’t heard of but I was assured it was sign of good quality.
Back at base and on further inspection, that was verified…

Basler label generous seam allowance
The seam allowance is very generous for RTW. Even on the lining seams.

French tacks held the facing in place.

The pattern matching is faultless, across all pleats and seams.

And an internal button and loop adds that extra safeguard to zip-ups and unintentional zip-downs. Fine quality zip too!

internal button loop

The hem is blind stitched by hand. Though I can’t guarantee this was an original feature.

I only say that because the detective in me has spied that the previous owner had made adjustments to make it smaller… by making two fat darts at the back of the skirt. Inclusive of the lining. Very lazy and detrimental to the positioning of the side seams but I suppose that’s the sewing-snob coming out in my know-it-all self!

fat darts

All the above aside, this lovely skirt was way too big for me and way too granny-long. And so my mission which I chose to take to the table, was to fix it and properly. I put my £7.99 where my mouth was and turned this beaut into something that should have already have been in my wardrobe.

Yes I know I could have made one from scratch. It’s not that tricky. But not for anywhere that price tag. The label says 100% virgin wool. Virgin, I tell ya! I even had to Ask Jeeves what that was! Transpires that stuff can sell between £20 and £80 per meter!!

And so I was already quids in. And so I decided it was worth the work.

First to unpick those fat back darts.

Initially, I was going to pin the excess at the waistline whilst wearing the skirt. But have you ever tried to do that without stabbing yourself or at least getting both sides even.

Common sense prevailed thank goodness and I opted to measure my waist, measure the waist of the skirt and deduct the first measurement from the second…. doh!

Once I determined how much I needed to lose (6 inches in total!), I divided by 4. I needed to mark 1.5 inches down each side from the top of the waist band and gradually blend in with the side seam where it felt natural. I was quite keen to keep the width of the pleats and to create a more A-line silhouette at the same time

I needed to separate the facing from the skirt and also the lining from the facing. More detail was revealed in a 1cm fusible stay tape at the top, sandwiched between the main fabric and the facing.

inside facing
Inside, between facing and main fabric – small seam to unpick
right side facing unpicked
Right side facing: Top edge of waistband unpicked.
side seams chalked
New side seams marked with chalk along a French Curve
excess cut away
New seam sewn and excess fabric cut away

Once I’d stitched and pressed the seams open I tried it on for fit.
All was good so I evened up the seam allowance and overlocked. I left a generous SA as before as there’s every possibility I’ll need an increase after Christmas. This skirt is definitely in for the long haul, baby!

I didn’t reduce the width of the lining. Merely pleated the excess to one side. Never a worry to have the lining bigger than the skirt.

Lastly, I just needed to shorten it. Luckily this skirt was cut perfectly so all I need to do is follow the horizontal line of tartan to cut.

I overlocked the edge, pressed well and hand stitched with invisible stitches

New Hem
New hem

Ta darrrrr!!

Me in my new perfectly fitted Basler tartan skirt!
I wish I’d have taken a before picture now. There is such a difference. The shaping has made a much better silhouette and the shortening of the length has made if much more modern!

Not quite as exciting as a brand new make. But I’m so glad to have gained a great quality skirt at a fraction of its worth and to have given it a second life… and of course the feel good factor of having donated to a good cause in the meantime. Win, win, win!

back of basler skirt

And throughout the whole sewing process some totally fond ‘virgin’ memories sprang to mind …