Vintage western shirt #3… of the linen kind


70s shirt Butterick 5007

It’s been a while since I made Mr Ooobop something. Quite shameful really for all the lovely photos he takes for me. So I’m delighted to have finally finished his latest shirt. And he loves it, thankfully!

The hardest bit for me was being back behind the camera again. Well out of practice I was. But luckily Dan has more patience than me and was very obliging as I got him to mill around on Barnes common!

This is the third version I’ve made from the same pattern – Butterick 5007 – A 70s men’s western shirt.  The kind of shirt you have to imagine beyond the pattern pic:

butterick 5007 pattern cover

Mr O is quite good at that. Non-conformist to a T for Taurus he is, and believes very firmly that if it ain’t broke, don’t fix it. So all that needed to be altered this time was the choice of fabric. The flowery fabric used in the last shirt I made him was gorgeous but faded so quickly in the wash. Such a shame. So he chose this gorgeous black linen with embroidered details.

butterick 5007 shirt

When we came to buy the fabric. I didn’t think I would have a problem with pattern matching because the little embroidered motifs were quite sparse but that’s where I massively slipped up. Didn’t really consider placement, did I…doh!

Placement isn’t really that difficult if you take time and consider each piece and where it’s going to sit with the adjoining pieces, of course, but when you’ve purchased only just enough fabric for the job and it was end of roll, it creates a problem or ten.

You can move the pieces around to work as much as you like but sometimes that ain’t very economical and you end up short of material for all the pieces. Luckily enough I had some spare plain black linen floating around because what was left didn’t leave suitable areas for the cuffs, collar stands and one of the pockets. I also used some of the plain stuff for the underside of the pocket flaps.

butterick 5007 mens shirt

It’s a close-fitting shirt, which required a bit of fitting but that was done on the first version, which incidentally has disappeared from my blog but here’s a pic of it. I just love the vintage Laura Ashley curtain fabric I rescued here. The beard, not so much!

B5007 with double bass

In all cases, the pointed collar is large. He likes it that way. But I did include a stiffer facing this time so it is even more exaggerated!

The back and front yokes are cut on the bias. Fine for the back but I did some serious head-scratching on the placement decisions for the front yokes. In my head I wanted the design flipped and symmetrical. Why my brain couldn’t let it lie I have no idea!

70s shirt back yoke

70s shirt front yokes

I love how the above picture shows the texture of the linen. It is one of my favourite fabrics to work with. And I’m told it feels great and is dead comfy to wear too! Also shows up some of the painstaking topstitching. I had clearly forgotten just how long this takes. It can’t be rushed. And I couldn’t do it at night-time. Sewing black on black with stupid crap low energy ethical lightbulbs is not good for anyone’s health. So I’m glad I waited for weekend daylight hours to get a neat job.

You can’t see from these photos, and you probably wouldn’t have noticed in real-life and close up either, but I interfaced the cuffs and button band in a white fusible woven interfacing. French stuff. Great quality in fact. But when I cut the button holes it was a little irritating to see the white edges. So I got my Sharpie out and coloured them in… shhhh!

The buttons aren’t an exact match for the blue in the embroidery which bugs a bit but I’m keeping eyes peeled for a closer colour. They can always be replaced at a later date. But I so wish I’d put the buttons on the other side of the cuff. Mr O doesn’t often do his cuffs up so you don’t get to see them side on!

70s shirt shaped hemline

He also doesn’t like to tuck a shirt in much. And so it’s great that the shaped hemline gets a showcase. I used a bias tape to finish the edge because I forgot to lengthen it again I much prefer how it looks.

B5007 in black linen

It was really lovely to catch an hour or so of the sunshine in Barnes, today and especially lovely to spend a little time with this fella. We’ve been like passing ships lately. And he’s off again now to do a gig in Kent! So what’s a girl to do? Crack open a bottle and crank up the sewing machine I guess! Tough life on a Sunday afternoon, hey!

70s western shirt for men

Happy sewing, everyone!
 

Make your own Zhivago-inspired fur hat: FREE pattern download

make your own fur hat free patternquick sewing projectHappy new year lovely followers!

I’m so delighted to share this pattern with you as my first post of 2015. It’s a timeless, vintage-style fur hat that will keep you warm and toasty in the most stylish way possible! And it’s a real quick project to sew up for that quick sewing fix when time isn’t on your side!

It really is so super easy to make. Just download and print out the FREE_fur_hat_pattern and follow these few simple instructions. The hardest thing about this hat will be to get your hands on some quality fur of the faux kind!

The pattern corresponds to my head size which is 22.5 inches or 57 cm.
You may need to adjust the pattern to personalise the fit.

You will need:

  • 1/4 m of faux fur (retailers will only usually sell you 1/2m at a time but its often worth an ask!)
  • 1/4 m of lining fabric (or find some scraps in your stash)
  • coordinating thread
  • a vacuum cleaner to hoover up all the fluff!

Instructions:

  • Make sure you print out your FREE_fur_hat_pattern at actual size, and check with the test square (on page 4 of the pdf) that it has printed correctly. Cut out and paste the sheets together to match the layout on page 1 of the pdf. Complete the hat band and crown sections as full pieces as instructed on the pattern then cut out.

NOTE: Before you pin the pattern to your fur fabric, think about what direction you prefer the fur to lie. On this particular hat I made, the pile strokes downwards on the band, from the top of the crown, down towards my eyebrows! On the top circular piece, it strokes from front to back. Incidentally, the centre back of the hat is where the band is seamed.

TIP: When cutting your fur pieces, cut on the reverse and just snip carefully through the backing fabric so as not to cut through to the actual fur on the right side. You will achieve a much better finish on the seams.

  • Pin the pattern to your fur pieces and cut out, paying heed to the tip above.
  • Pin and cut out your lining pieces. It doesn’t matter for the circular lining piece but make sure the band is cut on a straight grain to avoid stretching.
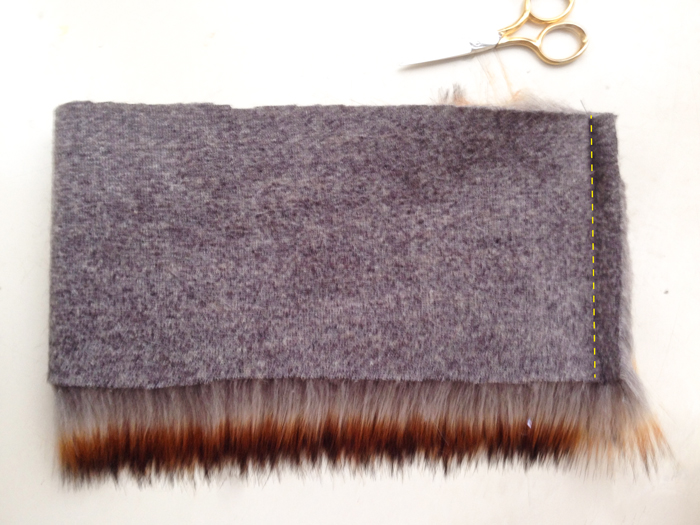
  • Take your fur band piece and fold in half, right sides together. Pin the short ends together, making sure the fur is tucked inside, and stitch using a 1.5 cm seam allowance following the direction of the fur.

seam fur band

TIP: When sewing fur fabric, Increase your stitch length a little so prevent thread tangling.

  • Finger-press the seam open and hold in place with a couple of tacking stitches top and bottom of seam.
  • Pin the fur circular crown piece to the hat band, making sure the fur is tucked in and checking the direction of the fur is correct. See note above. Sew the seam using a 1.5 cm seam allowance.
pin and stitch crown to band
Pin and stitch crown to band
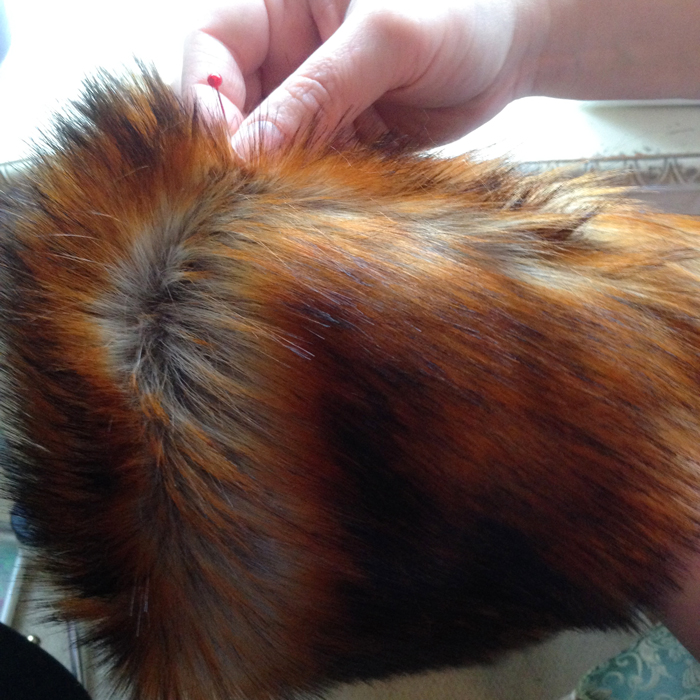
  • Turn right side out. Using a long craft pin (a normal pin or needle will do) drag it along the seam allowance to free the fur that has got caught in the seam.
picked trapped fur from seam with pin
Pick trapped fur from seam with pin
  • Now take your lining piece for the band, pin the short edges together as above and stitch with a regular stitch length and a 1.5 cm seam allowance. Press seam open.
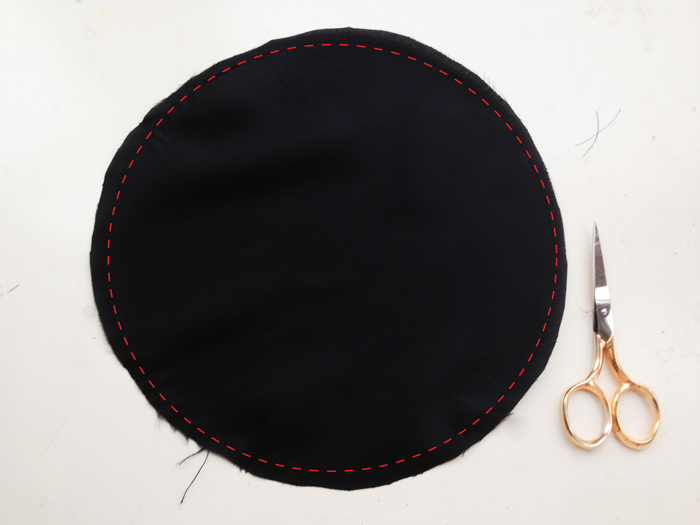
  • Stay stitch the circular lining piece within the seam allowance, to prevent stretching.
Stay-stitch circular lining piece
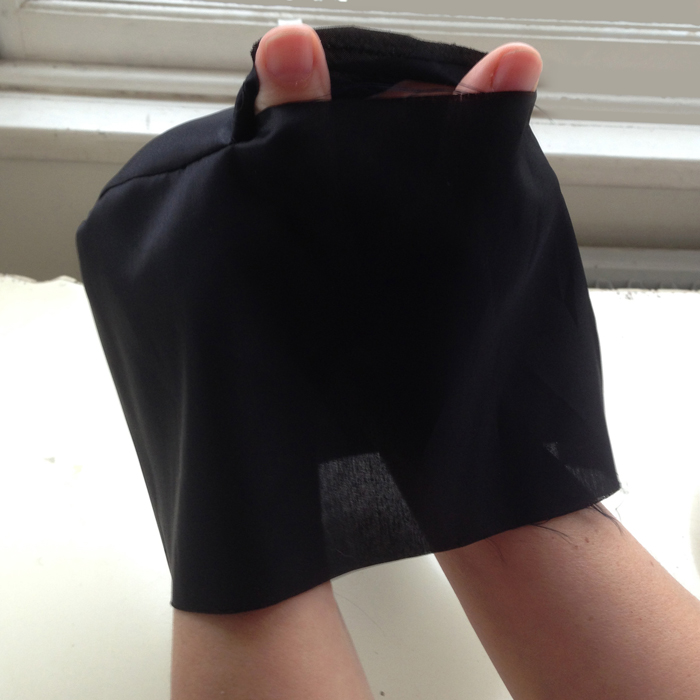
  • Pin the lining piece for the crown along one edge of the band and seam together, leaving a about 4 inches / 10cm open for turning.
leave opening in lining
Leave opening in lining
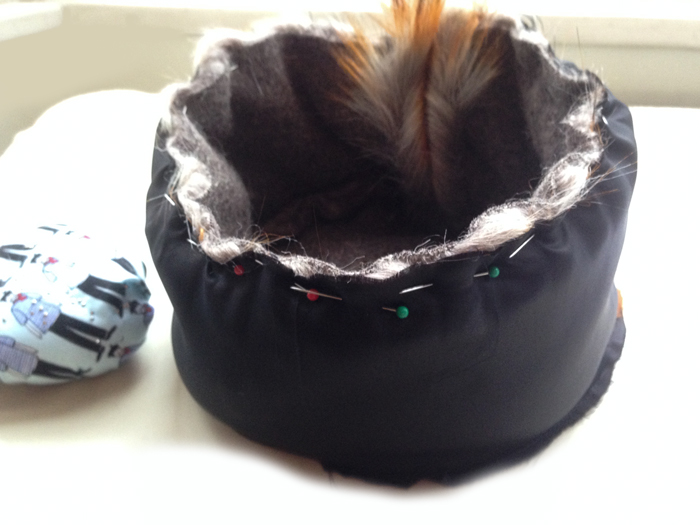
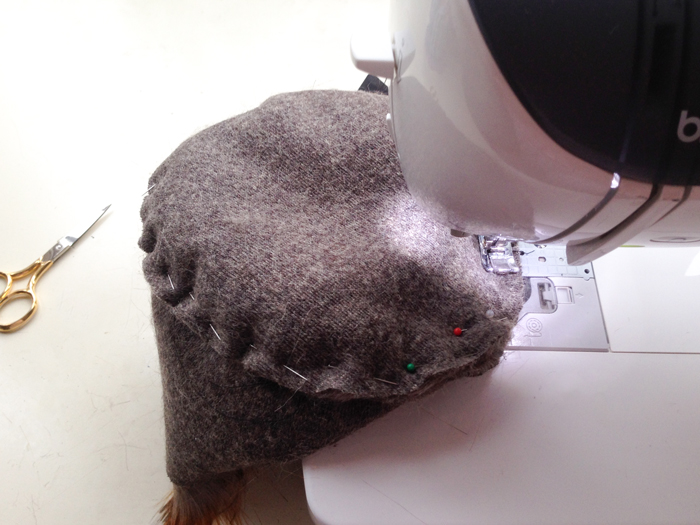
  • With right sides together pin the rims of the lining and the fur hat together. Effectively the fur hat will be sitting inside the lining. Pin together, matching the two centre back seams and stitch along the entire edge, securing the stitching, beginning and end.
Sew lining to outer fabric
Pin and sew lining to outer fabric
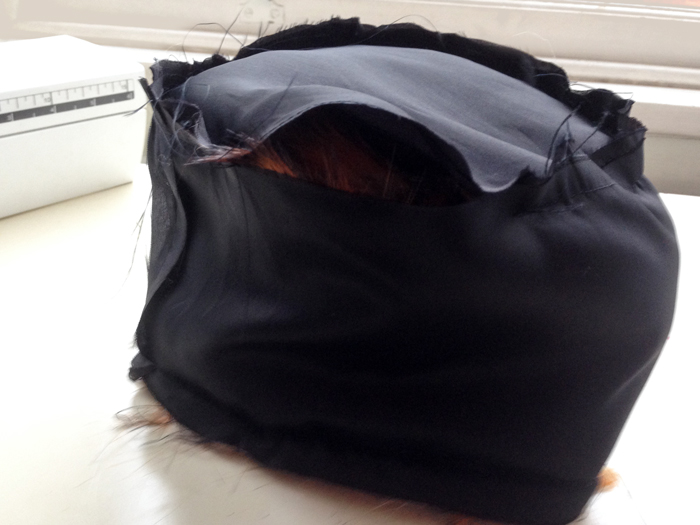
  • Turn the hat to the right side through the opening left in the lining, and you’re almost done!
Turn hat to the right side through this opening
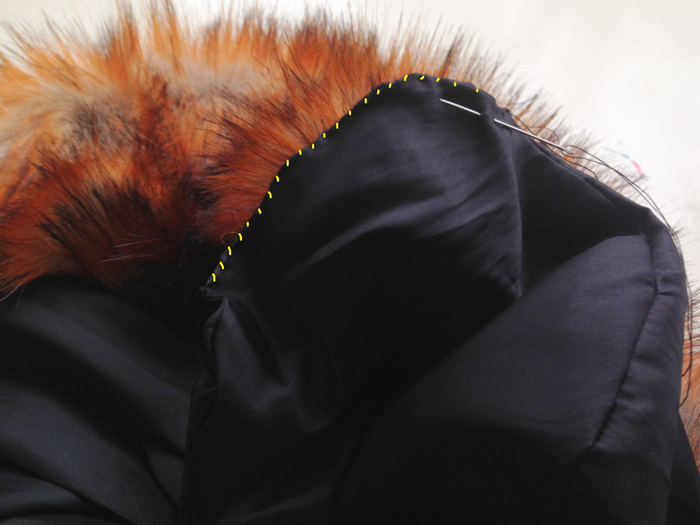
  • Pin the lining opening together, tucking in the seam allowance, and slip-stitch closed. With matching thread, obvs!
Slip stitch the to close the opening in the lining
Slip stitch to close the opening in the lining. With matching thread obvs!

Now all that is left to do is to don your new fancy fur hat, step out in the snow and hum the theme tune to Doctor Zhivago!

Please shout if anything is unclear. I’d be delighted to hear how you get on.

Faux Zhivago: handmade retro-style fur hat

handmade fur hat

I watched the film, Doctor Zhivago lots of years ago, snuggled up on the sofa with my mum. Can’t say I remember much about the plot but the music and the coats and the hats stayed with me for sure!

So when I found a crazy retro-style furry black hat in Oxfam, I knew I could and should shamelessly copy and create one of my own even if I didn’t have the lips to pull of a sultry pout, Julie Christie style.

So here is the Ooobop faux fur, Zhivagoesque, vintage-style hat that will laugh in the face of any Russian-style snowfall that threatens over the next few days.

handmade vintage style fur hat

I care not if my children walk ten paces behind me.

I care not if Mr O likens me to Rab C Nesbitt’s Wife.

And I care even less for all those sideways glances in the high street. They are just jealous eyes!

My ears are warm. My bad hair day is irrelevant. And Lara’s Theme tune is on loop!

handmade fur hat Doctor Zhivago style

The faux fox fur – I keep having to state faux because it actually feels too real to be faux! – was a bit pricey but it was a justified birthday spend up gifted by my lovely mum. I got it in A-One Fabrics in the Goldhawk Road and it is such good silky quality. Only needed half a metre and that was enough for a trial one that went wrong, this one which didn’t, and perhaps a matching fur muff to come! Do people even wear those nowadays?

I probably don’t need to declare that it was Mr O that took these fab photos – late last night, with next to no light but one of those god-awful energy saving bulbs and a few fairy twinkles. I certainly wouldn’t have had the patience. Very happy to sit with a glass of bubbly under the Christmas tree while he worked it though!

I was hoping to have a little tute prepared for you to accompany this post but that was serious wishful thinking on my behalf! Working on it nonetheless. And for anyone who fancies a furry head warmer like mine I’ll be posting a pattern and a tute next post, post-haste!

Till then lovely followers, I wish you all the loveliest of wishes; Wrap up warm, keep safe and beware the nutters on the road!  x

handmade fur hat

Camping it up in a Burda Maxi

Burdastyle Maxi DressThis is the Burdastyle Maxi dress from May 2014 issue and it literally took an evening to trace and make, plus a morning to finish seams and hem.

I love the gathered front loop detail created by some clever drafting and a drawstring. The straps are a lovely and incredibly practical feature too. Each strap is folded in half and the fold is attached in position to the front bodice. This creates a double strap which separates over the shoulder where the visual is 4 spaghetti straps at the back. No irritating slips off the shoulder. No embarassing wardrobe malfunctions!

And I have to mention the fabric. I went in asking for linen lawn. I knew it was a bit of an ask and I’d anticipated the screwed-up-face response that I got in each and every shop. I even predicted the suggestion of cotton lawn instead. No, no, no. Burdastyle definitely stated linen lawn. Kind of a contradiction of terms really, so I’m wondering if its a translation thing. Anyone know?

So with no linen lawn and an urgency to make this dress before I went away, I asked if they had anything soft and drapey. No not polyester. Eewww sweaty! Though to be fair it was very soft and drapey. No not cotton. It’s not nearly drapey enough. Too crispy and neat. Apart from the lawn, possibly. But oh the creasing. I was tempted by tangerine muslin. Really tempted. But I’d have to have lined it for modesty purposes and I really couldn’t be arsed. I was about to give up when the viscose was presented as an option. Only in black or white but also only £4.99, with all the softness and drapeyness I could ask for. Bargain! Done!
And what a joy to work with. I took my time to cut it out because it did move around a bit on the table. especially when I was cutting on the bias. It has got a little natural stretch to it. But to be fair. It is drapey, black and relatively casual so no glaring errors are going to cause a stir here.

I made it a couple of weeks ago when I last went camping so this was it’s second trip out into the wilds of West Sussex!

So there I was, minding my own business, floating around the campfire in my new maxi dress, relishing the soft swishes of viscose around my ankles with stars in the sky and Mr O at my feet. Doesn’t really get much better than this . . .

. . . then this happened . . .

Burda Maxi Dress photobombed

Right on cue!

It’s a small miracle I got the first picture sans bombing to be honest!
I was going to leave out the in-seam pockets to hurry the process. I never really got the excitement when other people go on about pockets. But I’m glad I did and boy do I understand now! Torch and lighter in one, cash and phone in the other. Look, no bag!

And who wants serious posy photos any hoos?!

Burdastyle Maxi dress photobombed

You get to see how the straps separate at the back in the picture above. Clever, no?

You can also get an idea of how the elastic at the waist cinches the bodice in to create a much more flattering silhouette than it would have done otherwise!

You must also be feeling my delight at the depth of my in-seam pockets!

The bombing barrage came from nowhere. Actually it came from all angles. Sabotaged good and proper by a gang of onesie-clad cheeky girls!

Photobombed by onesie girls

The absolute cheek of it!

photobombed by the girls

Hang on a minute. Remind me whose shoot this was?

There was only one thing for it . . .

Maxi dress bombs the children

Seriously ladies, this dress is great for camping. It’s great for slinking down the shops too. And methinks in a drapey sandwashed silk it would be super sexy and glamourous, no?!

If you don’t have May’s Burdastyle mag then here’s a link to where you can download a pdf pattern.

And for anyone who is keen to know more about the delights of viscose, here is a fine clarification of the making process and its properties.

Hope you all had fun sewing times this weekend. Or maybe you were out camping it up too?


ooobop! review: Burda Style October 2013

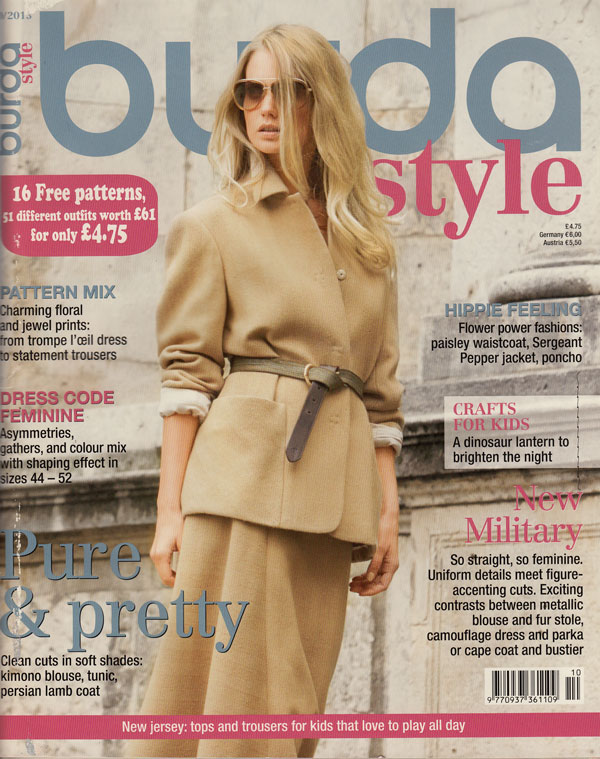
Burdastyle magazine October 2013

Before we skip to some of the inside shots of September’s Burda Style Mag, I just want to reiterate the wording of the flash on the cover.

16 Free patterns, 51 different outfits worth £61, for only £4.75!

So whether you like 51 or just 1 of the following styles, you must agree, it’s still such an amazing cover price.

There’s a bit of a War and Peace theme this month but before we launch into that, it opens up with a softly, softly approach. I’m not really a pastel person or a boxy one for that matter and so I wasn’t grabbed by any of these. A close fitting ‘nude’ dress would have me feeling just as self conscious but I like the wrapped over pleats on the front waist of the dress, bottom row middle pic. I also quite like the asymmetrical skirt, top right, but I’d have to see views all round to be convinced. I think it might not look so great from the other side! Now generally, I do like a square neckline as in the tunic, top centre pic but what is going on with it rolling out? Too big/too small, not pressed? That would annoy the pants off me!

The A-line skirt that sits directly below has large hip yoke pockets. I am so going to incorporate those into another skirt.

Nude jersey dress

Light and breezy is the theme of the next section. Lavish cocktails of lace and silk, flowers and bouclé, jersey and sequins.

Of all these, the sequin mini skirt grabbed me the most (bottom row 3rd column). Not that I would make it with said crunchy fabric, more tartan or plaid wool. Quite by coincidence, I was planning on drafting one of my own last week. Looks like I wished hard enough!

The dress is quite nice. I think I’m being sold on the print though. Its a great shape but it is a variation of that tunic in the first section so I’m assuming the same issues with the neckline.

I may have liked more in this section had it not have been for the accompanying style tip on the page of the pink bouclé coat. Apparently ‘The egg shape form is ‘in’…’  Noooo! I don’t want to be an egg shape!

Light and breezy fashions burda october 2013

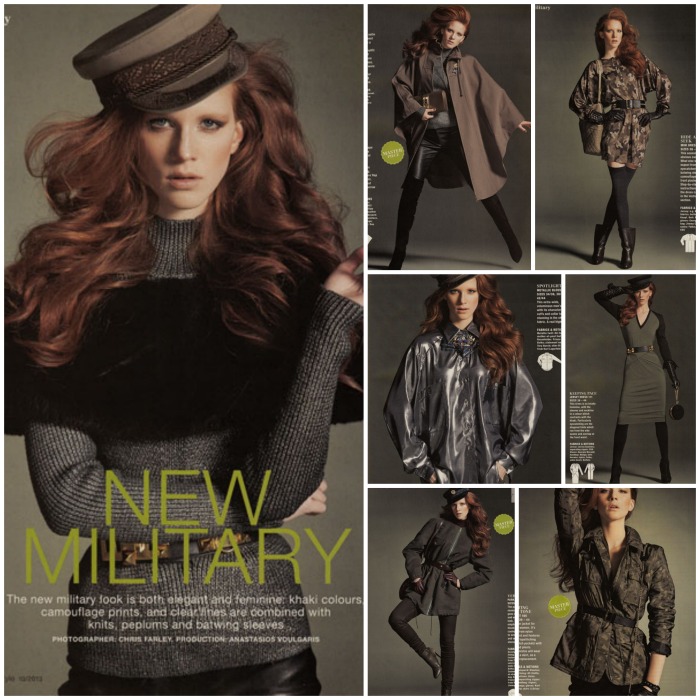
So to war it is then with the New Military section.

I love the opening furry lined mini cape. No fastenings. Nothing complicated. Just a chic little snuggly accessory. There is another, more practical cape of coated twill, top row, 2nd column. But I’ve never been one for a practical choice!

Now it’s probably the styling. This model and her mane is very striking, it has to be said, but there is something about that camo mini dress, top right. It is fundamentally a long-sleeved T with batwings and a front placket closure, cinched in with a belt, and I like it a lot!

You can keep the metallic voluminous  shirt though!

The dress certainly looks better to me in darker contrasting colours (middle row, far right). I’d wear that and those fancy gloves!

military fashions burda october 2013

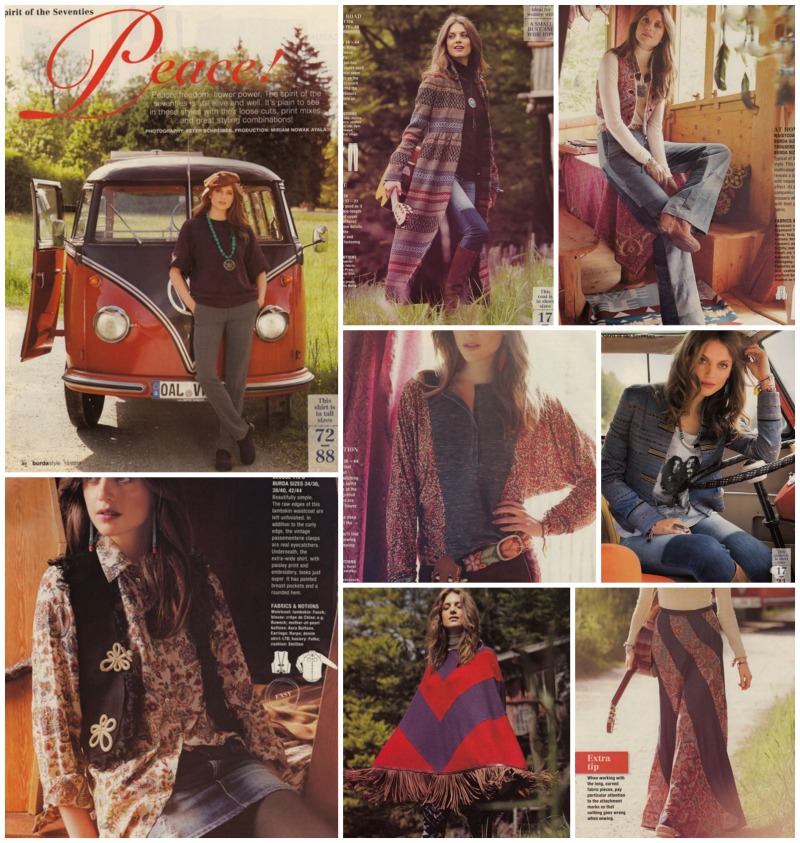
And just as the army greens take hold, the Peace section comes bearing flowers and paisley. Never did I think that flares, ponchos and banana skirts would make such a return. But hey, each to their own.

The maxi coat is lovely (top, centre). Ankle-length with fitted upper section and gathered skirt. A standing collar with hook and eye fastening is a neat touch too. But I already have the loveliest coat pattern, as you know!

It’s a bit difficult to see the detailing of the jacket, middle row, far right, but it is essentially a uniform-style Sergeant Pepper jacket. Timeless and always so cool. Apparently its the ‘it’ piece of the season!

70s fashions burda october 2013

Plus fashions are a bit slim on the ground this month.

I’m not sure I approve of asymmetrically cut blouse with laid-in and partially stitched pleats with one white lapel (top row, middle pic). Far from being clever and a little bit unusual, it just looks like a bodge job. Sorry Burda. It looks far better in the ‘dark gemstone shade’ below it. All those odd fancy details are a little more subtle!

However the leather trousers (opening pic) save the day. I had no idea you could get ‘stretch leather’. Perhaps they are referring to ‘pleather’. You know how things get lost in translation. But maybe there is such a thing. mmmmm…. the possibilities!

Plus size burda fashions october 2013

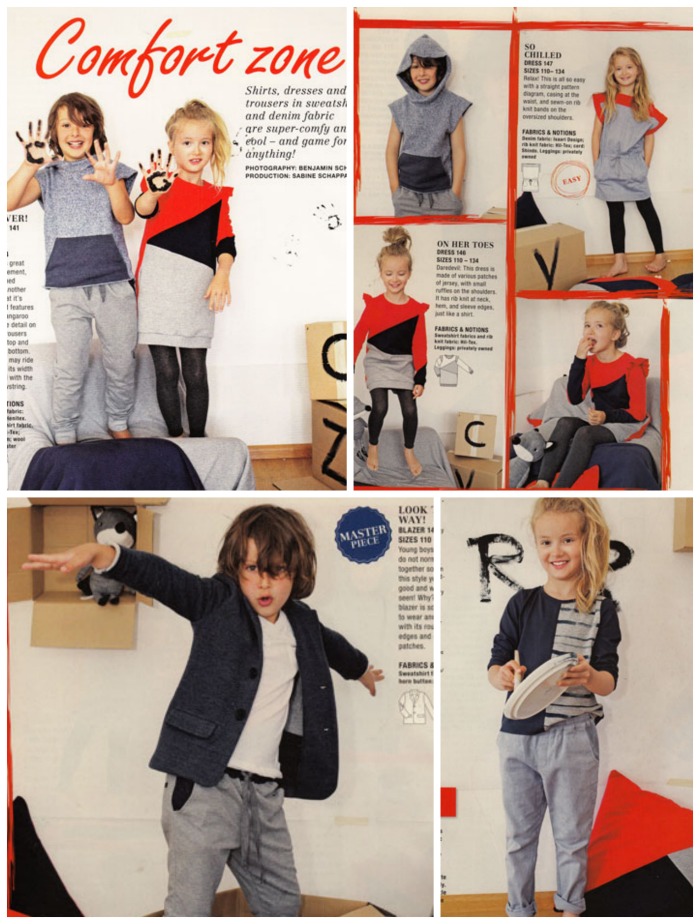
And so to the kids! Shirts, dresses and strides in jersey and denim. Perfect for mucking around in.

I love the little girls jersey dress, made from patches with cute ruffles on the shoulders and ribbing on the neck cuffs and hem. Quite a bit of faffing I should think but the end result is really neat.

The little boys blazer steals the show though. Also made from sweatshirt fabric, it looks so cool but with the elements of stuffy and prep taken away.

kids burda october 2013

There really are only a couple of defo makes for me in this issue: The skirt and the little fluffy cape. But that never ever deters me from looking forward to the next issue of Burda Style.

I can be inspired by a sleeve or a shape or a colour or a photographic location… and inspiration is what so totally floats my boat!

Me Made May 13: My final days

So here we are. The final days of Me Made May ’13! I feel quite sad in a way. But relieved. And accomplished. And enlightened. So thank you SoZo for setting this brilliant challenge. I didn’t realize quite what a knock on effect it would have. Or how it would make me feel. I wholly recommend this challenge to anyone who has yet to take the plunge. 

I really didn’t think I would make it to the end of the month. For sure there were repeats and some days no photo evidence at all. In reality, taking a photo of yourself every day is really difficult. Easy at first with all the initial enthusiasm for the challenge but then harder each day as the sun disappears, the hubby sets of earlier for work and the outfits get more tight-fitting the older they are!

But the journey was worth it. It was fantastic to focus each day on each hand made garment and realise where I’ve come from and what I’ve arrived at. Confirmation on what I’ve learned and achieved was invaluable. I don’t have time to stop and think properly about most things these days, especially what I’m going to wear on any particular day. So this was a fantastic excuse for self-indulged focussing, on past experience as well as some future plans. Oh yes, of course the flip side of the coin has meant my project list has increased ten-fold. But hey that list always makes for sweet dreams, if nothing else!

So to wrap up… the final days of  Me Made May ’13.

Jersey cowl neck top

DAY 22: Silk touch jersey cowl top and wool pencil skirt
Neither of these are blogged, I made them so long ago. But the cowl top is made from a free pattern on Burdastyle by Ichigogirl. Its the same as the stripy one I made. The skirt is a Simplicity pattern that my mum gave me to kick start my sewing antics. It has a little vent on the front knee. I didn’t line it, unfortunately and this is something I would never do with wool now. I should really go back and line it. It would hang much better and not stick to my tights!

Day 23 black self-drafted pencil skirt

DAY 23: Black self-drafted pencil skirt
This is possibly the most worn and practical of garments in my wardrobe. It fits like a glove, because I drafted it to my exact measurements. It’s properly lined and the lining is even properly attached to the vent. The waistband incorporates a woven interfacing so it doesn’t roll and is fastened by a hook and bar instead of a rubbish ‘eye’! It was a fantastic learning curve making this skirt. So absolutely worth all the effort that it feels fantastic to wear. I always imagined a whole weeks worth of these to choose from and I still think that is highly necessary. They are perfect work skirts and glam up nicely for a spontaneous evening out too!

DAY 24: Stripy wool mini A-line skirt
A miserable day. No sunshine at all, so the woolly skirt came back out. No photographer today I’m afraid. I’ve come to realise how much I wear this skirt. Mostly when I can’t think of anything else to wear. It fits; it’s comfortable; it goes with DMs… and it keeps my butt warm!

Day 25 mmm13 Elisalex shortened

DAY 25: The shortened Elisalex
Today was the 20th anniversary of the day my dad died. Always a sad day. But always a good excuse to don a pretty dress and catch up with my wonderful brothers and sisters, nieces and nephews. The cemetery is a bit of a trek from the bus stop so I needed to sport something easy to walk in. Small heels means small skirt in my world so there was only one thing to do. And that was to chop the bottom off my test Elisalex dress! So glad I did. The duvet cover did good! Although I love my longer rosy version, it’s kind of ‘for best’ but this cheeky little version is now a great little throw-on when-the-sun-shines-and-go dress!

DAY 26: Grey pencil skirt
No photographic evidence today. I wore the first pencil skirt I ever drafted which still fits pretty well. Its lined but has no vent. I was taking things one step at a time back then and to learn to create a vent was information overload! I have to take pigeon steps but it still works. It’s a good staple, though a little boring. It’s days are numbered as soon as the others are on the cutting table!

Day 27 goat eating dress

DAY 27: First summer dress of the year
Today we went to the Surrey County Show. An ideal place to sport a full on flowery frock. Not such a great idea to wear in the goat tent though! Note that Mr O sought his photo opportunity before letting me know what was occurring! I still love this dress but I need to take some volume out of the back. I didn’t notice before but it gapes at the zip. I’m pretty sure its a simple fix. And hopefully it will fit better.

Day 28 Danielle dress

DAY 28: Danielle dress
Now here’s a blast from the past. Almost 2 years ago to the day. It was a bit of a squeeze, I can tell you. So much wrong with this dress but I still like the vibe of it. The fabric was a charity shop find, unsure of the content but it’s soooo itchy and scratchy. I thought I was being out there by using red lining but that turned out to be a no-no with the pale open weave fabric on the skirt! I can’t really breathe in this dress and you can tell by the pull across my chest but this dress is a lovely reminder that I should make another that fits in a much lovelier fabric.

Day 29 button back top

DAY 29: Button back retro top
I was fast running out on day 29 so it was a great propmt to rectify some issues with some garments I don’t tend to wear any more. This one in particular was really annoying to wear because I made the neckhole too small. I really liked the jewel neckline but in reality it kind of chokes you to death. Only problem was that the first buttonhole started right at the top, so to lob a centimetre off the neckline would halve my first buttonhole. My need to wear a me-made top spurred on a quick fix and I replaced the buttonhole with a press-stud and sewed the button on top so nobody will ever know!

Day 30 vintage pencil skirt with pockets

DAY 30: Vintage pencil skirt with pockets
Not yet blogged but again, a hurried make out of desperation but boy I’m glad. I’ve been meaning to make this for yonks! It still needs some fine tuning and this is really just a test garment but I will fill in the details when I blog it. But what’s more to say? Its a pencil skirt with pleats and front pockets… hooray!

Day 31 1940s shoe dress

DAY 31: 1940s shoe dress again!
A shameless repeat but one I’m prepared to wear again and again. This is by far one of my favourite dresses. It gets comments from total strangers as I stroll down to Sainsbo’s. It’s cool and comfy and is covered in shoes! This is the item of clothing that I need at least 5 more of. Along with 7 pencils skirts, my wardrobe should have at least 7 of these too!

And so we leave the month of May and venture on to pastures new. A prom dress for my friend’s daughter is on the go, FBA’s and all, a bespoke pencil skirt for my daughter’s birthday present and another that was bid on by my friend at the school auction. (Far too nervous to ask what she bid!)

Thank you as always for your wonderful comments and support x

Me-made May’13: My first week
Me-made May’13: My second week/
Me-made May’13: My third week/

Me Made May 13: My third week

I did it. I actually made 3 weeks of Me Made May ’13! It wasn’t as desperate as I thought it would be and I’ve really enjoyed it! The only thing that has been a bit tricky is getting a photo when the mister has left earlier for work.

Most of the garments I have worn this week have issues. Mostly fitting issues. Things drafted either too big or too small and things that no longer fit because of some unwelcome poundage that crept up over the last year or so! I must learn to create things that fit in the now and not for when the pounds are shed. Because it doesn’t work like that!

Another revelation, which comes as no surprise to me, is that I need more skirts and tops for work. I’ve no shortage of ideas. Just got to pull my finger out!

So here we go. Week 3 of  Me Made May ’13.

pin dot jersey top

DAY 15: Pin dot jersey top
New Look 6753. This is one of the few jersey tops I’ve made. I like how it’s an easy-to-wear casual top but it’s not my favourite top to wear. Perhaps because I made it too big and its defied all my attempts of shrinkage too! I have since been advised to make a size smaller when using stretch fabric. I’m sure I’d love it more if it fit more snuggly. Still better than a Primani top though!

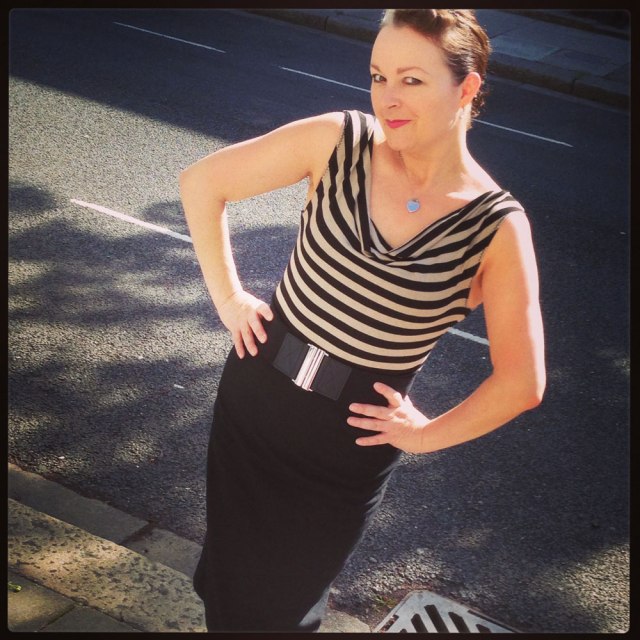
stripy cowl top

DAY 16: Stripy cowl top
This was a great free pattern from the Burdastyle website. Really simple to put together and really easy to wear. I’m not convinced I graded it up properly, or enough for that matter so the cowl isn’t as dramatic as it could have been. But I still like it.

pinstripe wool jacket

DAY 17: Wool pinstripe jacket
This is a pattern from Burdastyle magazine, issue 11/2010. It was my first venture into tailoring and is anything but perfect but it prompted me to delve more into the art of old school tailoring techniques which are now ready to employ when I embark on another. Once again I overestimated the size but that means it’s great to wear with a few layers underneath and boy I needed them today! The pinky mauve pinstripe means it doesn’t really go with much apart from a flooky pinstripe skirt that I owned already!

floral mini skirt

DAY 18: Floral mini skirt
I made this in march last year and it still feels good teamed with Docs and a cardi. Keep meaning to make more of these. They are so simple and so cute and so easy to wear. So long as its none too windy!

tartan shorts

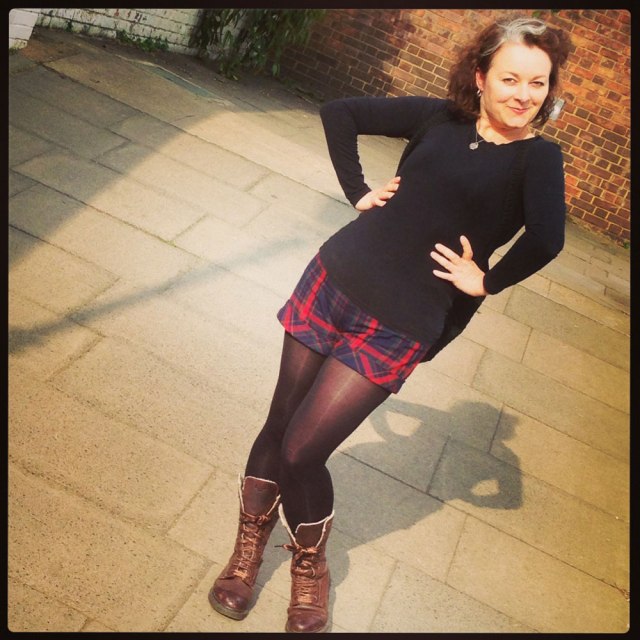
DAY 19: Plaid shorts
I do enjoy wearing these. Despite the fabric going all bobbly on me. Only on the weekend, mind. Won’t catch me in the office with that much leg out! I wore them down to the river pub to meet some friends. The pattern I used was Simplicity 2659. A simple and satisfying overnight make. There will be more of these. It’s just a matter of time. However I will not be using the twill tape facing method. I will draft a properfacing this time. They do need a bit more structure at the waist and front. And I must make them a wee bit bigger next time!

black rose party dress

DAY 20: Black rose party dress
This is me and my lovely fella, the last of the party people, at the end of his spectacular 40th birthday party. It was taken in the wee hours of the morning and so I’m very glad the photo is such poor quality! The dress, which I just about fit into, was whipped up overnight for a party March last year. I have since found some very similar fabric which will be another one of these one day!

DAY 21: Wool check skirt
I didn’t manage to get a photo of today but rest assured it was a me-made kinda day. I wore the same wool check skirt I sported on the second week, day 10. Crazy that May has turned out cold enough to sport a woolly skirt more than once in the space of a couple of weeks.

Can’t believe there’s only one more week left. I think I’m going to have to dig real deep now!

Laters! x

Me-made May’13: My first week
Me-made May’13: My second week/

Me Made May 13: My second week

If I’m honest, I thought that So Zo’s Me Made May ’13 would be an easy 4-poster for the month of May. I really thought it would help to bridge the massive gap between my sporadic makes and make me look more efficient than I actually am. Well, it has been a good gap-bridger for sure, but it hasn’t been a doddle!

I’m sure many of you can relate to the pre-work madness of getting kids off to school, while catching up on the jobs you were meant to do the night before, shouting threats of x-box confiscation if the son doesn’t arise anytime soon, feeding the cats with one hand and signing homework books with the other before getting one’s own butt out the door to work. So throw a rummage through the drawers for a me-made outfit and fluttering of the eyelashes at the general direction of ones hubster for a quick photoshoot into the equation and, well you can imagine what the neighbours must think!

But all that aside. It has been a total eye opener. I have worn things I had completely forgotten about and there has been a realisation of how much I’ve advanced. I may even go back to some of these projects and fix some niggling issues. But I equally might not!

So here we go. Week 2 of  Me Made May ’13.

Vintage wing collar blouse

DAY 8: 1950s wing-collar blouse
Butterick 556. Im still very happy with this blouse even though the shoulder pads have gone all lumpy and weird in the wash! The sleeve heads leave a lot to be desired. I remember thinking at the time that the sleeve looked more gathered than eased into the armscye. I really need to make another but better. So good to wear to work.

Day 9 1940s shoe dress

DAY 9: 1940s Shoe Dress
Butterick 2638. This is the same pattern I used for the red version and with the same issues, ie button placement. I think I prefer the shorter length sleeve. The shoe-print fabric was such a great find from a charity shop. It’s 100% cotton with such a smooth finish. I need more of these dresses.

Day 10 wool check skirt mmm13

DAY 10: Wool check skirt
I wasn’t expecting to include this skirt in May. It’s a blanket-weight wool, an ex-throw in fact, turned pencil skirt! But we all know how the weather in Blighty is a constant surprise! I self-drafted the pattern. I didn’t stay stitch the waistline before adding the waistband, hence why it probably came up a bit bigger and just noticed that the lining peeps at the hem otherwise, quite happy with this one.

Day 11 mmm13

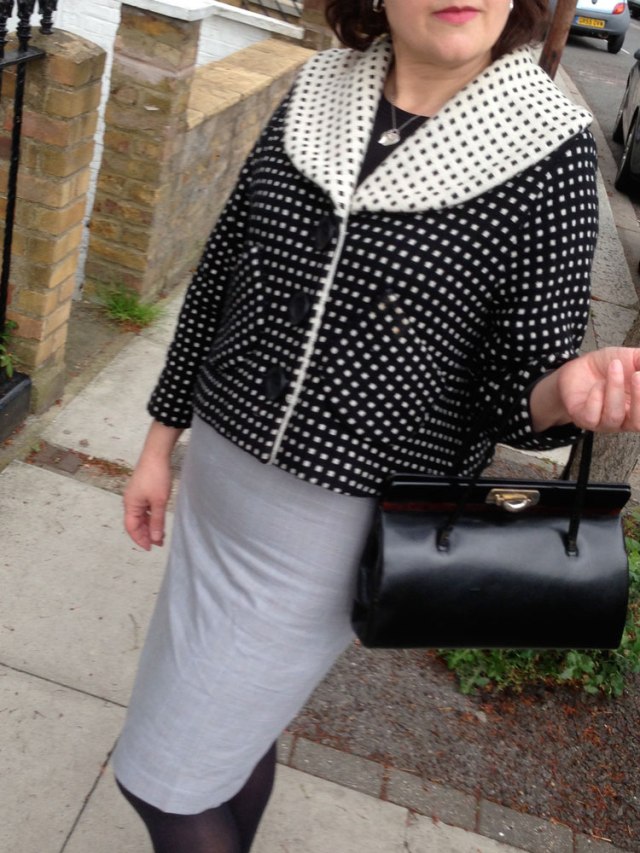
DAY 11: Dotty shawl collar swing jacket
I made this a good couple of years back from a free pattern in Sew magazine. It is a great spring jacket with three-quarter sleeves and I love the fabric. I had to create the buttonholes by hand but apart from that it was very easy to put together as far as I remember. I do enjoy wearing it. Something about the collar makes it feel vintage and glamourous.

DAY 12: Grey pencil skirt
Hubby off to work early + non obliging offspring = no photo! But see photo above. I wore it yesterday too. Don’t judge!

day 13 stripe wool skirt

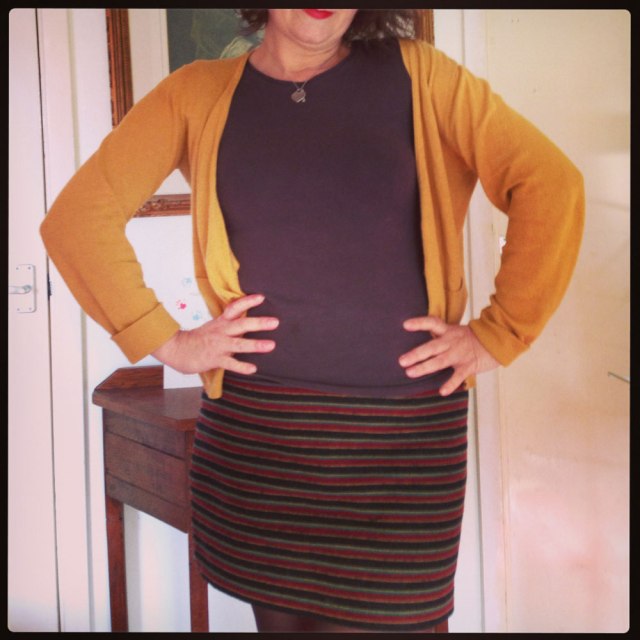
DAY 13: Stripy wool skirt
You really can tell how chilly it was this week. All the wool came out to play! This is a very simple A-line mini skirt from Burdastyle magazine. The fabric is a twill-backed Italian wool from Ditto Fabrics in Brighton. Very lovely to wear.

Day 14 lace peasant top

DAY 14: Lace-trimmed peasant top
I didn’t think I had much love for this top. Mostly because it’s white and partly because of the lace. But seeing it here with a black skirt and after wallowing in all the lovely comments I got at work, I think I do now. One of the quickest tops to rustle up and tuck into a skirt. I need a red one! 

Feels so good to round up week two. Only a couple of days for week three… eek! See you soon! x

Me Made May 13: My first week

Not so very long ago I signed up to So Zo’s Me Made May ’13. Whereby I pledged to wear something handmade, every day throughout the month of May 2013. I did leave it till the very last minute, knowing what a flake I can be. And to be honest I could do without creating extra work for myself. I really do have plenty ’nuff on my plate right now! But… what fun! And what revelations…

So here is what I pledged:

‘I, ooobop!, sign up as a participant of Me-Made-May ’13. I endeavour to wear at least one handmade garment each day for the duration of May 2013’.

There was still a big pause before I pressed the ‘publish’ button. I don’t have an issue with wearing something handmade every day. In fact that it an ultimate goal. I would love to own an entirely handmade wardrobe. It’s having enough to last a month that’s the issue right now! So I think you might be seeing a few repeats unless I can rustle up some emergency quick-makes!

Here are the first 7 days along with my discoveries:

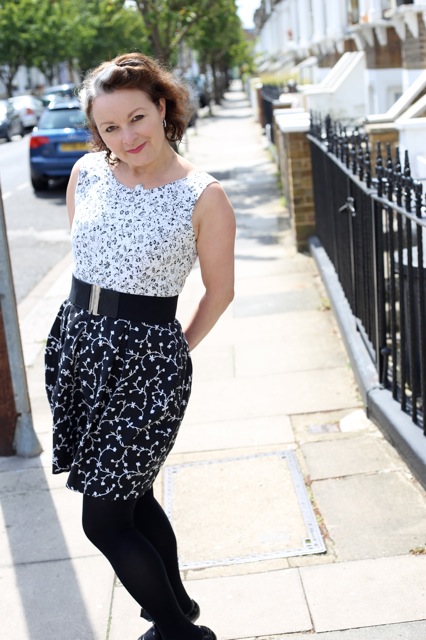
Blouse pattern from Burda Magazine September 2011 issue

DAY 1: Gingham Burda Blouse
Have since learned that this shirt is too long and hence too tight on the hips.
An easy fix… if I get round to it! Would love to try one in a block colour
to make use of those fabulous shoulder darts. Should also wear it with a belt.
It’s not the shapeliest of blouses!

day2_norman_hartnell_top_mmay13

DAY 2: Norman Hartnell blouse
Very fond of this blouse. Very easy to wear. Perfect for work or going out.
And given that it was a relatively simple make, I need to make more!

day3_1940s_red_dress_mmm13

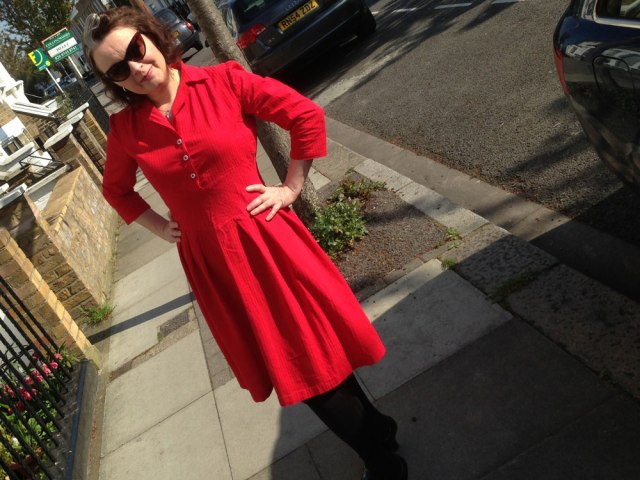
DAY 3: 1940s Shirt-waist dress
I still love this dress. Any dress with a midriff gets my seal of approval.
Have since learned to be more precise when sewing buttons in position.

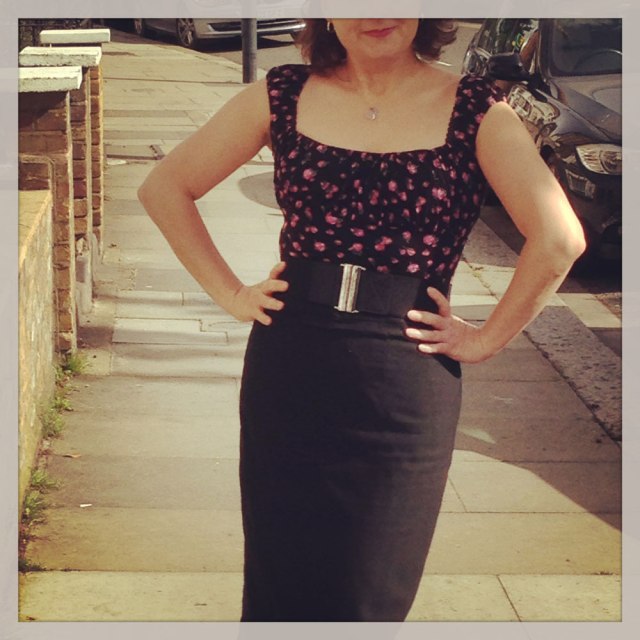
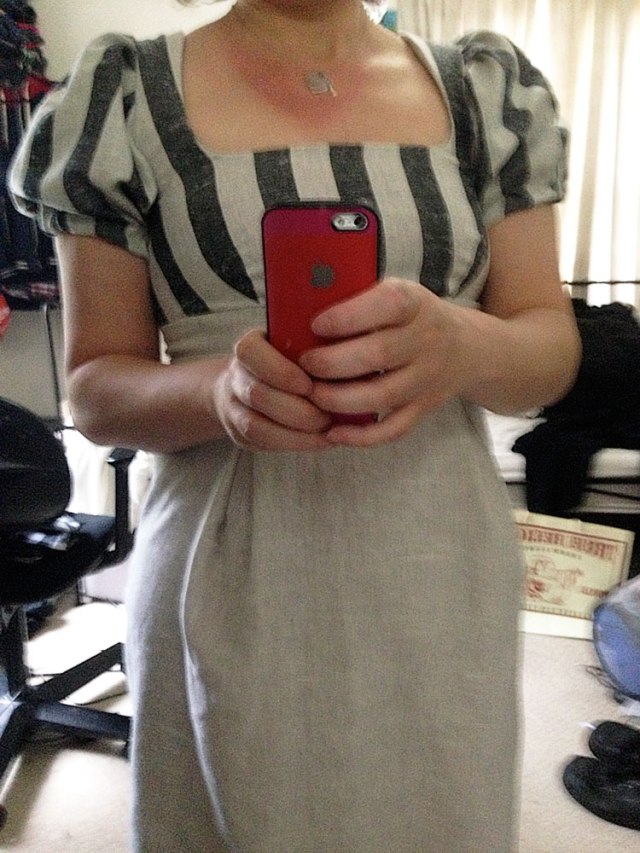
Day4_70s_dress_mmm13

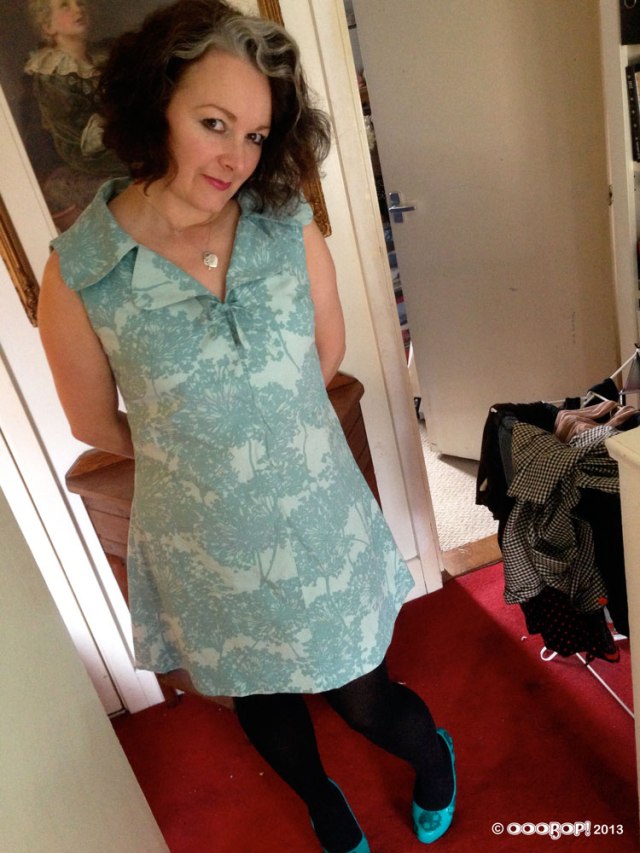
DAY 4: 1970s Dress
I have neglected this dress. I didn’t line it and so I can’t successfully wear it with tights
which is kind of a necessary requirement in the UK!
Would happily make this one again. The shape is very cute and I do love
the statement collar!

Day5_NewLook6750_mmm13

DAY 5: Daisy dress with red bias trim
New Look 6750. One of the first dresses I made, hence not blogged.
Note to self: As lovely as cotton voile is, it’s not very good at
hiding all those lumps and bumps, expecially if one has made the dress a tight fit!
Also must remember to allow a bit of ease when binding sleeve hems.
Near cut off the circulation in my arms!
Only dress so far I am not entirely comfortable wearing.

Day6_Elisalex_mmm13

DAY 6: Elisalex dress
Dress completed and worn to a picnic on this day. By far my most
favourite dress. incredibly comfortable. Very stylish and very satisfying to make.
It’s a keeper!

Day7_gingham_-peasant_mmm13

DAY 7: Gingham peasant top
One of the easiest tops I’ve ever made. Love wearing it with a pencil skirt.
Need to make some capri pants to pull off that Doris Day look.
Keep meaning to add a tiny black bow to the front neckline!

One of the great things about this challenge for me, is having some proper attention focussed on each garment. I usually throw things on without a thought, especially when I’m off to work, in a ‘that’ll do’ kinda way. I’ve been wearing far too many rubbish Primani T-shirts when I don’t really need to. If I just make a few more tops, I can ditch them altogether, especially if I include a quality t-shirt or two on my project list. Wearing me-mades on a daily basis really does have a feel good factor.

I’m sure the next few weeks will get more and more challenging and probably with some new revealations but so far so good and lessons learned already. Cheers Zo!

Kiki’s vintage cushion cover

When my good friend Kiki asked me to make a cushion cover from her late mother’s Biba skirt, I kind of refused. Big time! I love my friend Kiki so much and would do anything for her but cut up a Biba skirt?! She was going to have to drug me first!!!

She texted to say she was on her way with said skirt. It didn’t look like I had a choice. In fact she was at mine before I got back myself! Mr O had a cuppa on the go. I went straight for the wine. This was going to be painful.

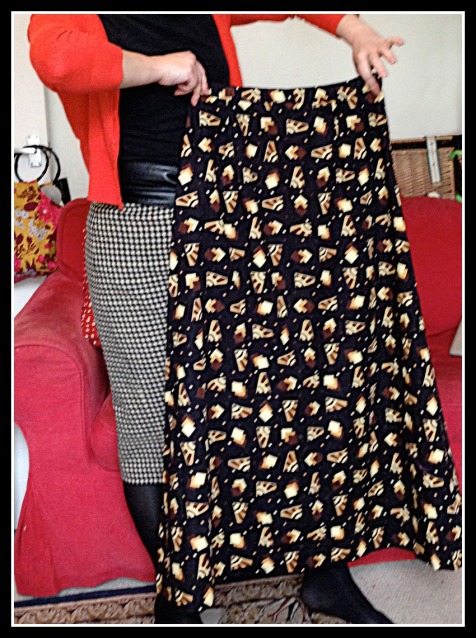
Luckily for me, Kiki gets things muddled all the time. (I really should write a dictionary of exclusive Kiki words and terms. I’m sure it would be a best-seller!) What she meant was that the skirt was a Biba-esque-style maxi skirt that her mum had hand-made in the 70s. She couldn’t see herself in it and to be honest, neither of us could get it over our thighs!

Jean's original skirt

Well. That was a relief but still didn’t make for easy cutting up. But I warmed to the idea that Kiki would get daily pleasure from it being on her sofa instead of folding it away in the attic forever.

There’s quite a lot of fabric going on in a maxi A-line skirt. Plenty enough for a 50cm cushion pad!

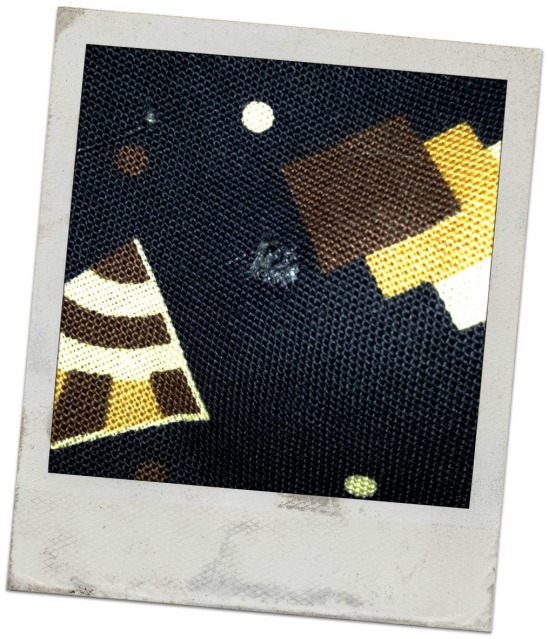
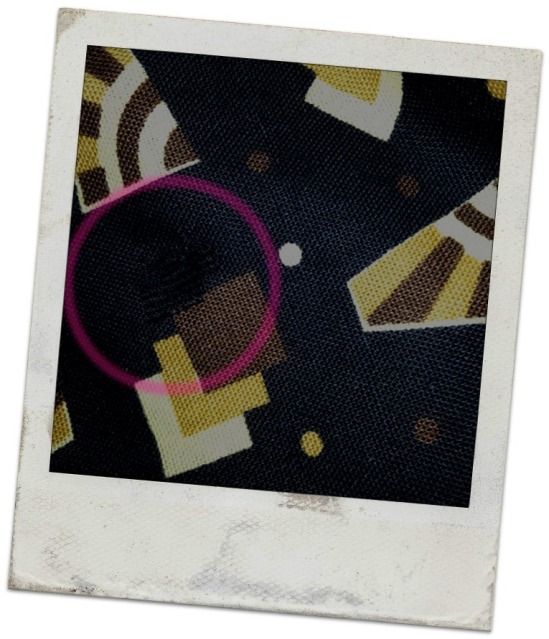
But there was a moth-hole. Typically right in the middle of where I needed to cut.

moth hole

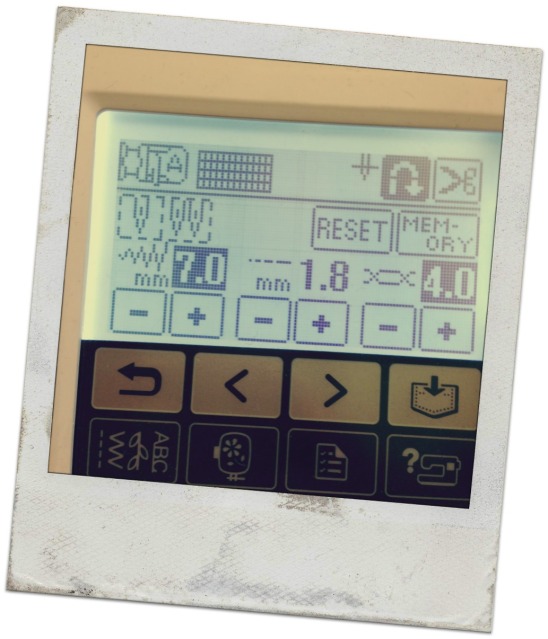
I’ve not used the darning stitch on my machine before now.

darning stitch

It doesn’t mend totally invisibly but far better than a poke in the eye and a fraying hole!

darned hole

Nothing complicated about the cushion cover itself. Just two squares. Zipper sewn to top edges first. Seamed all round. And Bob’s yer uncle!

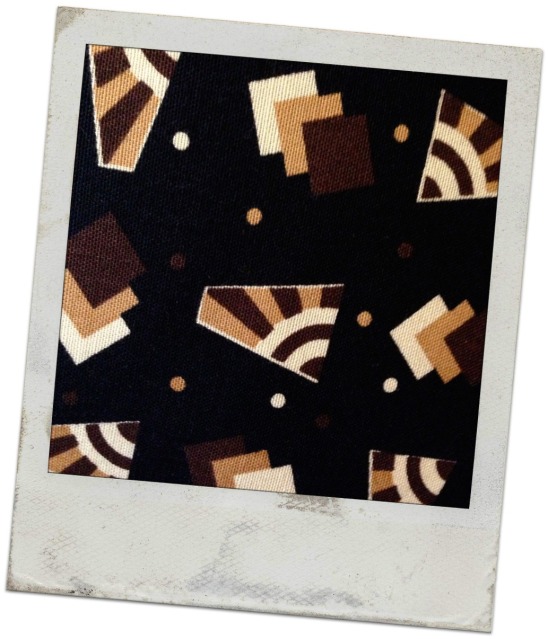
Such a great geometric design on this fabric. It’s great quality cotton furnishing fabric of some kind.

geometric fabric detail

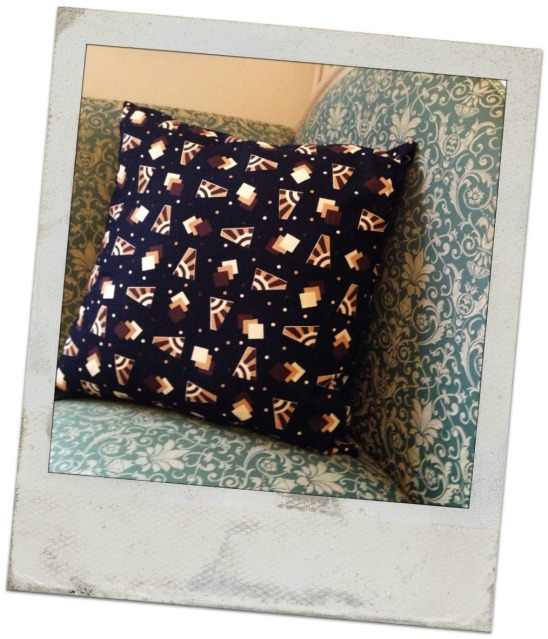
And I have to say – I think it looks great on my sofa! Kiki can take as long as she likes coming to collect it!

finished cushion