The Windmill Sails block

Windmill sails quilt block

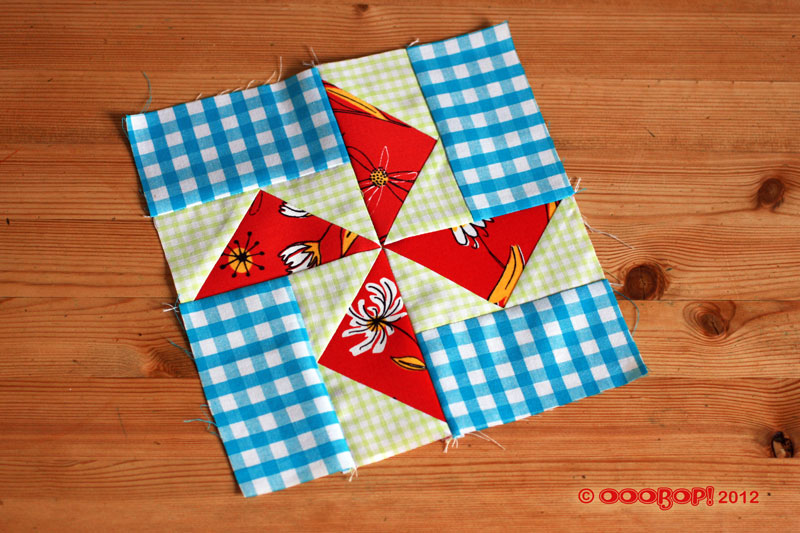
Quilt block number 12, the Windmill Sails block, from issue 13 ‘Art of Quilting’. I appear to have mislaid issue 12 but there’s no real urgency… I’ve still got 69 others to do!

I totally recognised the order of piecing this time, purposefully not looking at the instructions to test how much I have learned so far. I think in fairness, even though there are a fair few pieces, it was a pretty easy one to work out:

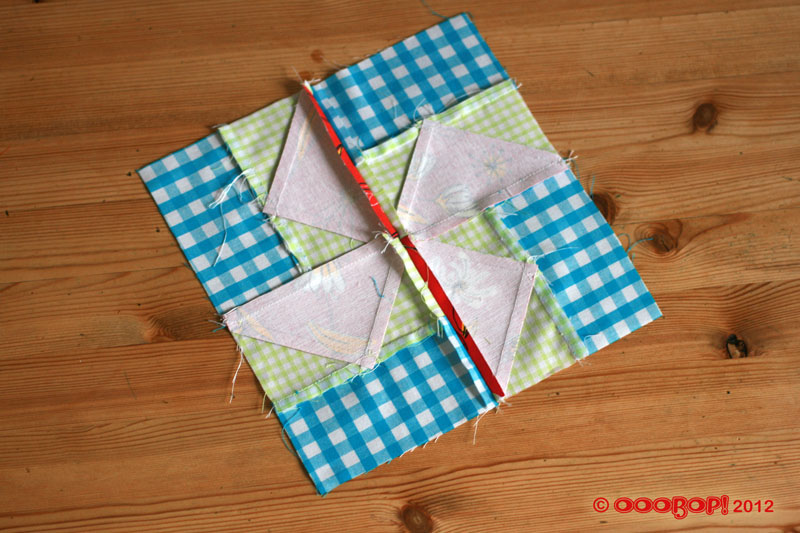
The 2 smaller triangles were sewn to the diagonals of the larger red triangles to make 4 rectangles. The blue gingham then sewn to the side of the red fabric point to make a small block. Then the four blocks sewn together. I thought I was going to have to seek reference on which way to press the seams but even that seemed pretty natural, until I got to the last centre seam where I had to check to find out that it must be pressed open to get it to lay flat.

windmill sails block reverse

I had a bit of a mare with the blue gingham though. The grain of the fabric wasn’t in tune with the checks and I had to decide whether to go for straight grain or straight pattern. I opted for the first even though it is hugely annoying that the pattern isn’t totally straight and I think I did the right thing because when I pressed it at the end it made for a perfect square. Might have been a different story if I’d have gone against the grain. Oh my! I really didn’t think these little things would have me thinking so much!

Block Facts:

Name: ‘Windmill sails’ or ‘Louisiana’
History: Each of the fifty states that make up the USA has its own embematic quilt block. This represents the southern state of Louisiana
Level: Some experience needed to make the centre seams converge neatly.
No. of pieces:16

Progress report:

Block 1: The Double Four Patch
Block 2: The Whirlwind
Block 3: The Sailboat
Block 4: The Shoo-fly
Block 5: The Trafalgar
Block 6: The Windmill
Block 7: The Chequer Square
Block 8: The Diamond Square
Block 9: The Cactus Pot
Block 10: The Sawtooth Star
Block 11: To come!
Block 12: The Windmill Sails block

The 4-birds-with-one-stone plaid shorts!

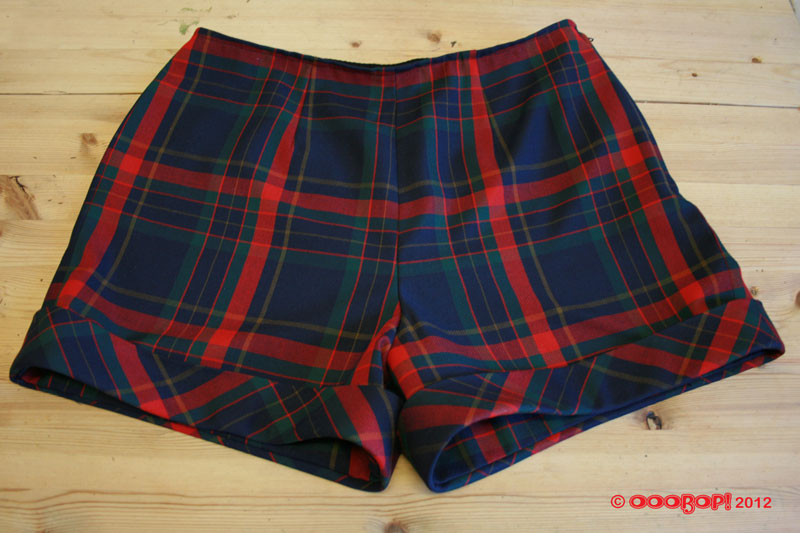
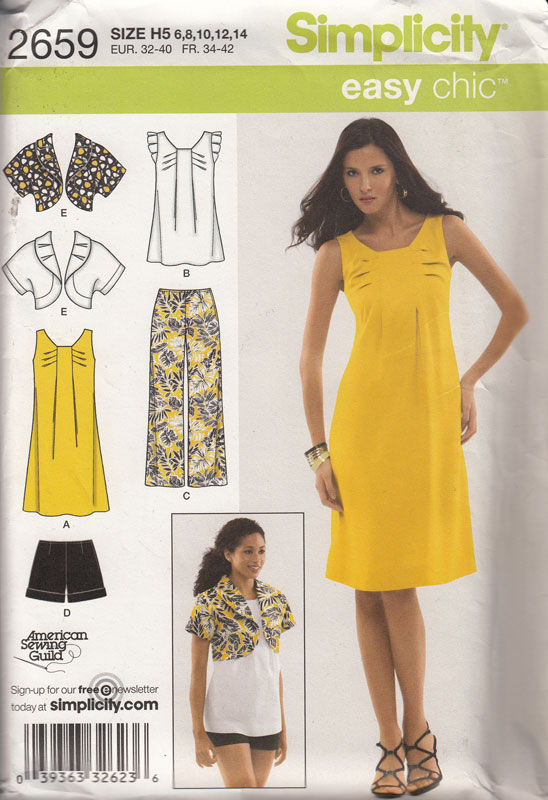
plaid shorts simplicity 2659A little bit of sunshine was all it took to inspire these shorts. Don’t panic! I’m not about to get those pasty pins out just yet! I much prefer to wear shorts as spring attire with a pair of 60 dernier tights and the trusty Docs! That photo will have to wait until I can grab Mr Ooobop! to work his photographic magic. In the meantime, I’m afraid we’ll have to make do with my boring pics.

The 4-birds-ness came about as follows:

  1. After my recent pleasure working with and deciding to invest in better fabric (re the audition dress) I also made a conscious decision to wade into ‘stash mountain’ for practice projects and toiles rather than buy any more substandard material. This plaid/tartan fabric was quite a large piece left over from my vintage plaid dress. Its totally synthetic, I’m sure, but it was a good weight for these shorts and so minor stash bust #1 achieved!
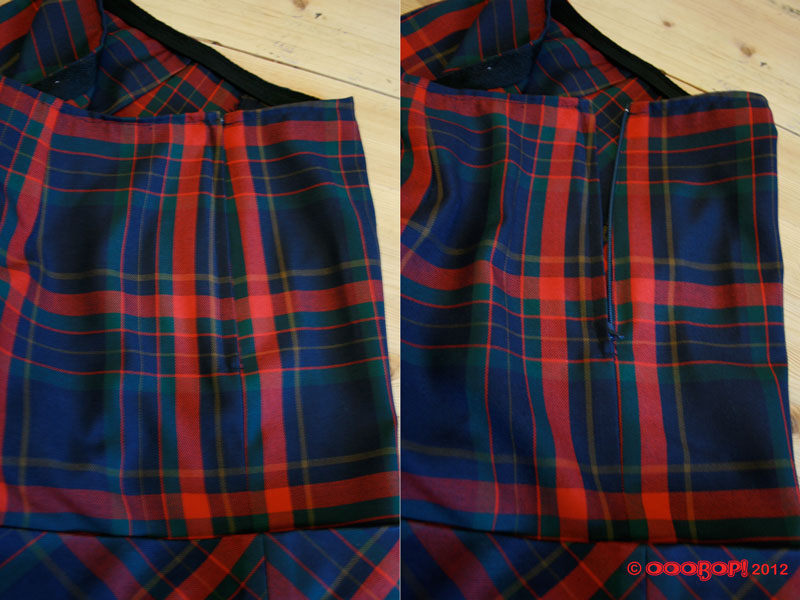
  2. I’ve been hearing the words ‘lapped zipper’ on other peoples blogs and in sewing mags quite a lot recently. And I figured it should be something I should know how to do by now. Since getting the hang of the ‘invisible one’ (after some practice, mind) I have kind of forgotten that there is any other way of inserting a zip. Of course I headed straight to YouTube as my first love of demos. I am far more receptive to watching someone demonstrate it for real! Turns out that this was the perfect kind of zipper for these shorts. I think I did it properly. Well, the zip goes up and down and the lapped bit covers the teeth so that’ll do me and will also tick the box of having mastered a new (for me) zip technique.
    plaid shorts side zip
  3. Plaid matching has always been a bit flooky for me, I have to say, and using this fabric on a small, uncomplicated project gave me the chance to practice matching up those seams. Both left and right side seams are as near as dammit and at least across the front and the butt the horizontal stripes line up. Shame I couldn’t do the maths on the side seam of the cuff. I have to say though, having the checks line up across the zipper had me doing a little dance round the ironing board!
    plaid shorts side
  4. And finally the fourth birdie was the mere fact that I have never made a pair of shorts before. This pattern is Simplicity 2659 and I’m pretty sure it came free with an issue of Sew magazine. I’m not sure I would ever make the dress. I can make my belly stick out without any extra help thank you very much, but the top could be cute and I’m sure the bolero would work with a classic dress! Anyhows, one baby step closer to making a pair of trousers but its defo a baby step I am very likely to repeat with some different fabric.
    simplicity 2659 pattern

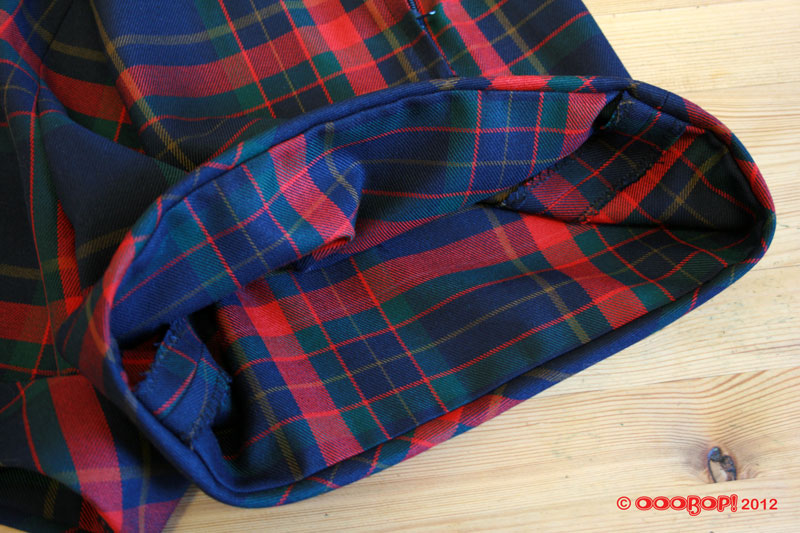
The cuffs of these shorts are my favourite addition. I love that they are separate and cut on the bias. I wasn’t expecting that as the turn ups on the sleeves I did for my wing collar blouse were technically a very deep hem, turned back on itself. The bias of any sort of checked/plaid/tartan fabric is fabulous against a straight grain of its own kind and I think it really looks neat. Finishes off the hem inside perfectly too.

plaid shorts cuff

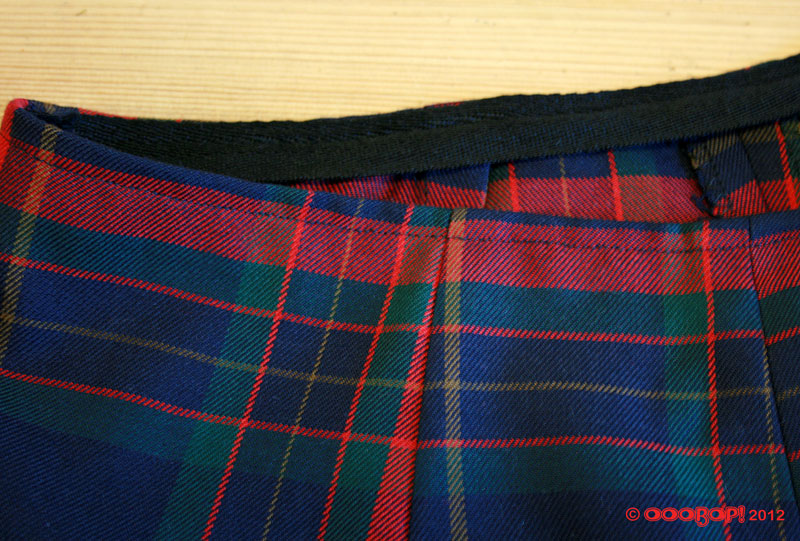
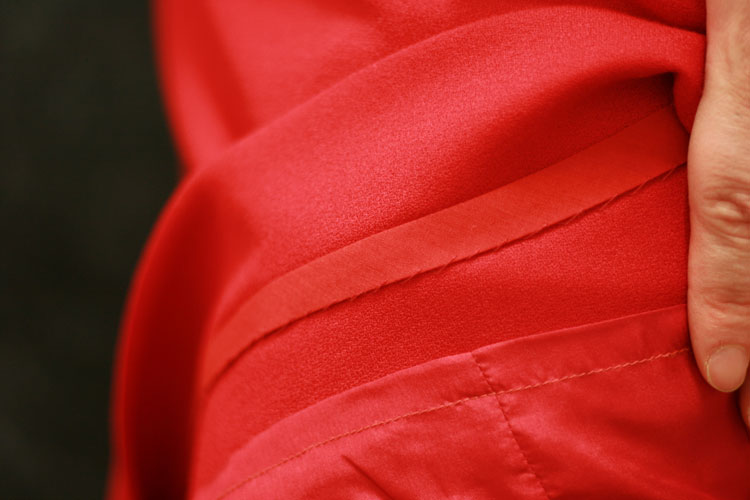
I would say that I lost big points on the waist finishing. I have never finished a waist without facing or waistband before and this pattern called for the use of twill tape at the inner waist edge. Very simple to understand and to achieve but I really must remember to stitch from the top when I’m doing things like this. That way I will get a much neater and straighter line. It won’t get noticed, I know, as my children will be horrified if I start tucking my tops into shorts but I know I could have done better. I just find it very amusing, and everso slightly annoying, that a little bit of topstitching is my main cause for concern on this tiny project!

plaid shorts waist

I highly recommend this shorts pattern for anyone wanting a little project to run up in an evening. I’m sure they would look great (on someone else) in a more summery linen or gingham… ooo gingham… imagine the cuffs!

Sashing time!

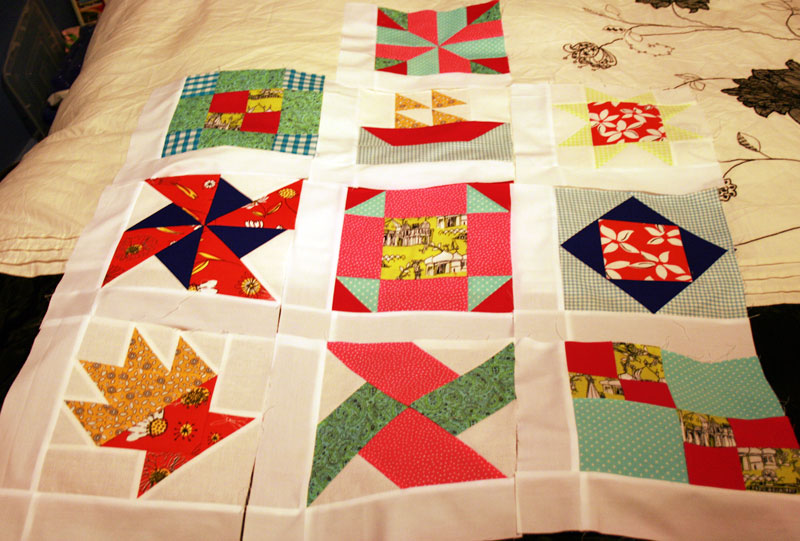
first 10 quilt blocks

Issue 11 of the Art of quilting is all about the sashing… and a tutorial for a cute little drawstring bag, oh and an interview with Jennifer Hollingdale. I’ve been putting this off this next stage mainly because I have been distracted by more glamourous dressmaking projects… among other things! But also because I thought it would take ages and wouldn’t be much to write home about. After all I still haven’t even scratched the surface with this quilt!

But ‘you know what thought, thought’ as my mum would say! It was a really relaxing thing to do this evening and has made my first 10 blocks visually larger so they look slightly more impressive spread out altogether!

It came together a lot quicker than I had anticipated too. Rectangles of white sashing fabric were pinned along the left edges of the blocks and and then ‘chained’ together. I love doing this as it really speeds things up. Following a good pressing, with the seam towards the sashing, I ‘chained’ the corner sashing squares onto the remaining rectangles, snipped and pressed and then sewed these onto the bottom of each of the blocks.

I have a neat little pile of mags up to issue no. 17, complete with a the necessary fabric pieces, just begging to be pieced together so they can hang out with their chums! But you know what I’m like… I will just have to find something else to do in the meantime!

Progress report:

Block 1: The Double Four Patch
Block 2: The Whirlwind
Block 3: The Sailboat
Block 4: The Shoo-fly
Block 5: The Trafalgar
Block 6: The Windmill
Block 7: The Chequer Square
Block 8: The Diamond Square
Block 9: The Cactus Pot
Block 10: The Sawtooth Star
Issue 11: Sashing of the first 10 blocks

The audition dress!

V8280 audition dress

I made this dress last weekend to wear to an audition on Friday. I’m afraid I can not speak of the adventures it had or the reaction it got as I am sworn to a confidentiality agreement so I can only tell of the making of the dress itself!

V8280 Roland Mouret dress

I’m sure, for most of you lovely sewing people out there, you have already guessed it to be the Roland Mouret knock off by Vogue – pattern no V8280 – the Galaxy Dress. But perhaps it wasn’t instantly recognisable without its signature sleeves.

V8280 galaxy dress

On reading lots of reviews about how the sleeves would be best placed on a pitch against the New York Giants, I did run up a quick toile to test out their outrageousness. I wasn’t too scared by them but I wanted this dress to be right and not feel too self-conscious in it! So I went for Vew A. It looks a bit boring on the envelope but I do believe this is probably the classiest dress I’ve made to date.
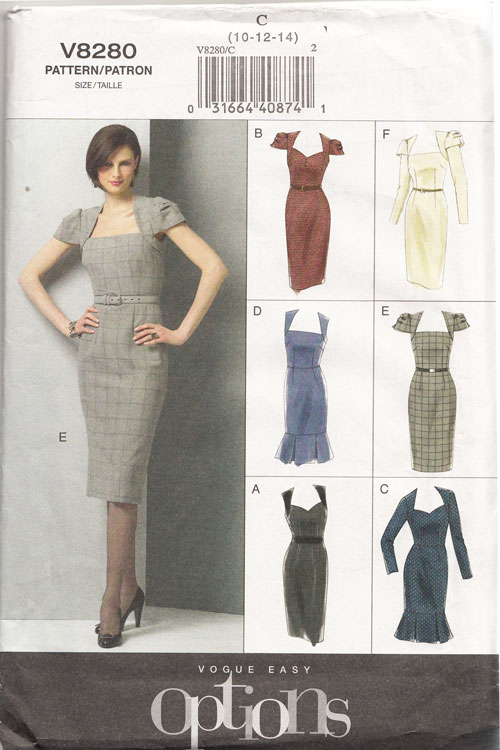
v8280 sewing pattern

Might have something to do with fabric choice though. I’ve come to realise that the longer I keep up this sewing lark, the more choosy I’m getting about quality of materials. For sure I still love a charity shop find but in truth, nothing beats shopping specifically for the most appropriate fabric. I needed to impress with this dress so it had to be good stuff. I chose wool crepe and silk lining. Oh what luxury! I have really started something now! Just look at the texture in that wool…
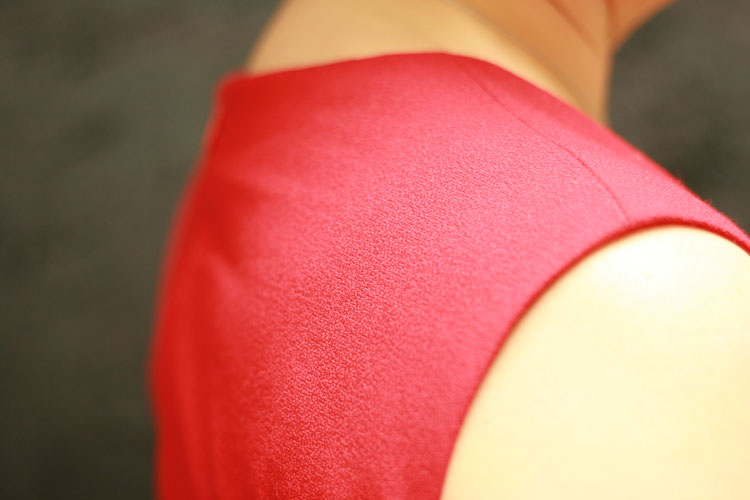
wool crepe texture

I love the way that it pressed so beautifully yet didn’t crease too much when it was worn.The wool crepe was £15.99 and the silk lining £6.99 a metre from one of my favourite fabric shops in the Goldhawk Road. Probably my most expensive make, around £42 in total but the blow was softened after I checked the prices of similar wool and silk in Berwick Street, London…. more like £30 – £80 a metre!!!!

If I’d have had the time, I would have made a full toile to check the sizing properly. I overestimated the sizing of the bodice and ended up taking it in by 3 inches under the arms. I will definitely take it down a size next time. And oh yes, there will be a next time!

This is also my first experience working with a modern Vogue pattern. I have heeded the warning of others about their ‘vague’ instructions, but I found this one to be very simple to put together. Bearing in mind I didn’t go for the sleeves!

Once you get the hang of the ‘flanges’… lol – or once you get used to calling them ‘flanges’ – it will all make perfect sense. And they do help to create a very flattering neckline. I chose the sweetheart neckline just because I think its more feminine and reminiscent of  glamourous ’40s ladies.
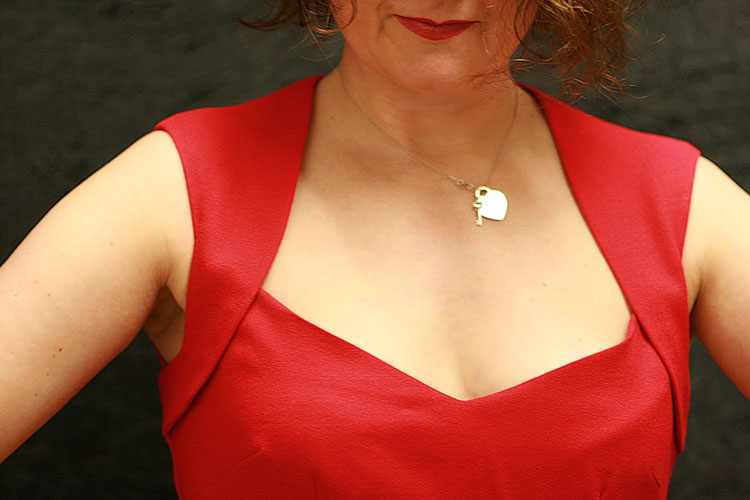
sweetheart neckline

Working with this fabric was a dream and made inserting a zip and lining up darts and seams, a breeze.

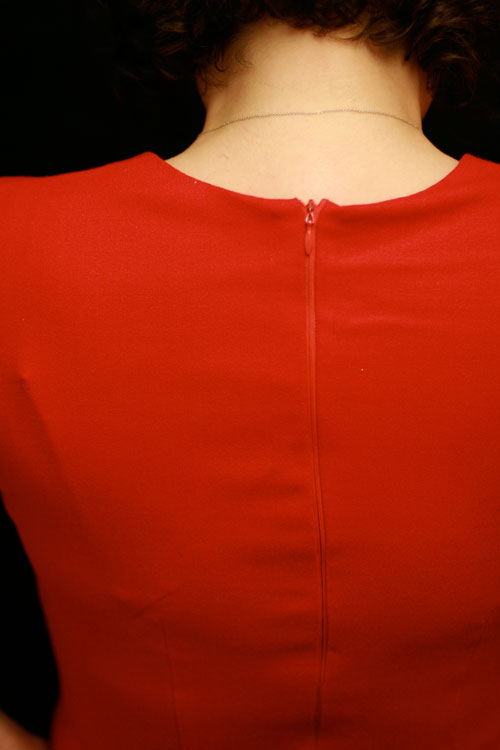
v8280 back view

invisible zipper

There were no instructions to fully line the dress, only to line the bodice. But from past experience I know I will never get away with an unlined skirt. My biggest fashion blunder was to take my coat off in the entrance to a party only to find out my unlined dress had ridden all the way up to my armpits. The worst (or most life-saving moment) of that was that another guest had to tell me. Otherwise I’d have strutted my stuff onto the dance floor like a complete fool, outdoing any Bridget Jones moment! And so I cut the lining, the same as the skirt but with an additional half inch added to the side of each piece. I sewed the back seam from the zipper opening to the top of the vent and the side seams but didn’t make the darts. I pinned the waist of the lining to seam allowance of the skirt section, first pinning at the side seams, then to the back openings, with one pin at the centre front. I then folded pleats at the dart positions and pinned those in place before sewing to the seam allowance all round.

I’m not entirely sure this was the best way forward. There may be more professional ways of doing this but it worked, for me, anyhows!

I bound the hem with bias tape and machine hemmed the lining. Tricky old stuff, silk lining. Seems to carry far more static than poly lining, when ironed. But boy does it feel good! Raising one’s own standards is very amusing!!
bound hem

And all that is left to say is thank you once again to Mr Ooobop! for being amazing in every way. Not only does he dutifully take lovely photos for me, he is the most amazing support for my often waining morale and makes me so happy… gush gush!

He will insist on a leg shot though!

side detail on tights

A certain night-attire ‘party’ sewalong!

I’m sure most of you will know what I’m talking about but I’m having to be slightly cryptic as my ‘thingies’ are a surprise gift… and I won’t be able to reveal them in all their glory until the end of May.

I wasn’t going to post any progress reports, mainly because I didn’t know how, without giving the game away, but to be honest, if a certain person endeavours to follow these clues I should be impressed that he shares an incredible interest in what I love to do! Either that or he is bloomin’ nosey!

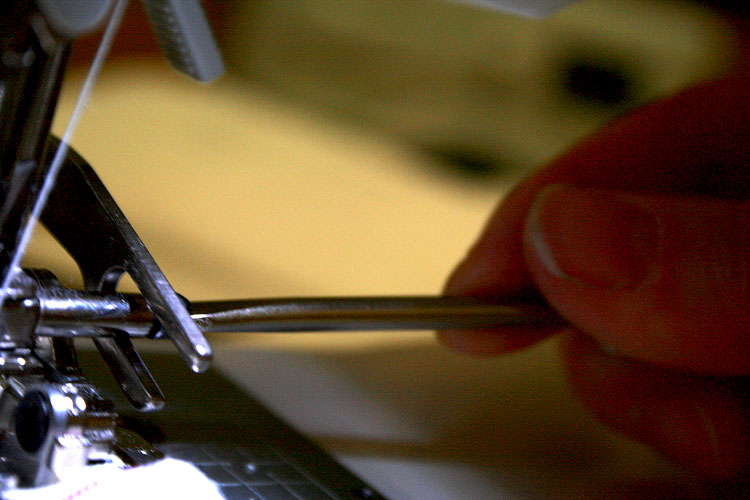
But the main reason for this post, not only to let the lovely Karen know that I found a window to jump on board, but I made another amazing discovery about my sewing machine. It serges! Well, of a fashion, I’m sure! There I was, head cupped in hands, eyebrows raised in awe and jealousness at Karen’s beautiful serged seams when… ping! I remembered a strange mechanical foot among my machines accessories and reference in the manual to a ‘side-cutter’! Oh the joy, the joy!! I WILL have beautiful 5mm seams too!

side cutter foot

Took a bit of getting used to though, as you can imagine! And I’m sure I can get a better-looking, tighter stitch with a bit more fiddling. But the needle kept falling out! I checked and double checked that I had attached the foot properly, mainly because it does’t sit firmly in position. It is such a clumsy attachment and it kind of wobbles around.

needle falling out

But according to the manual, I had, and there was no reference to this problem in the troubleshooting section either. So I just used the little screwdriver to really tighten the needle clamp screw. Perhaps I ought to be doing this anyway, whenever I replace a needle. I just usually tighten it with my fingers but clearly it needs to be tighter when the fork attachment of the side-cutter is hooked over it.

tightening needle clamp

Anyhows… I am as happy as some Larry’s and quietly confident I will make the party on the 28th once I figure out my disguise!

The Sawtooth Star block

sawtooth star quilt block

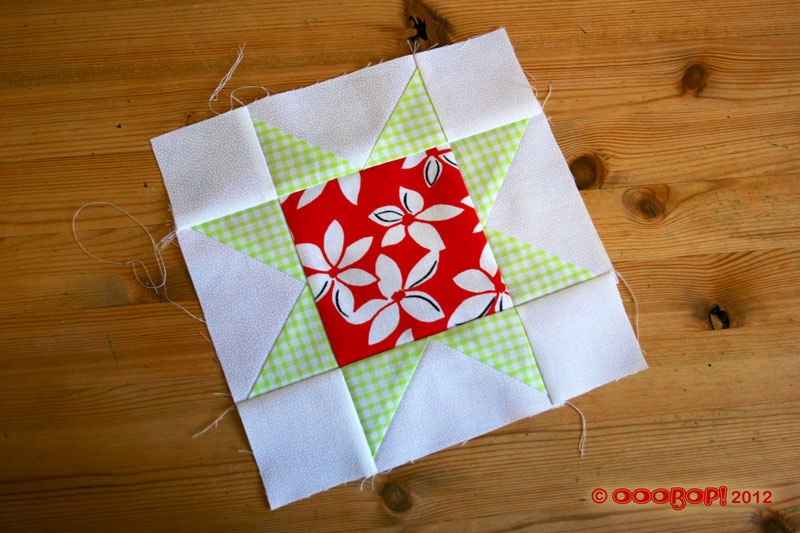
Quilt block number 10, the Sawtooth Star block and more importantly, one whole column’s worth of the final quilt! Not that these first 10 do actually sit in the same column but it is still an eight of the way there, all the same! It helps a lot that my lovely neighbour has subscribed me to the ‘Art of Quilting’. There is of course an obligation but it is the nicest kind of pressure!

It’s becoming easier to recognise the order in which these block pieces should be assembled. I just find it a bit tricky knowing the best way to press the seams. It’s not always towards the darker fabric, as I thought. So I am still very much paying attention to the instructions for that advice. Hopefully that will become second nature eventually.

To make this one, two smaller triangles were attached either side to the diagonals of the larger triangle to form a rectangle. Four sets of these were made. Two of these rectangles were sewn east and west side of the large central square. The smaller squares were attached each end of the other two rectangles, which were then sewn north and south of the block.

As with most of the blocks that contain small triangles, there is a necessity to watch those points and keep those seams to exactly 6mm. I was very concsious of how much room there was for error in this one but took it extra slow. Well, for the duration of Little Miss Ooobop’s flute lesson, actually!

Block Facts:

Name: Sawtooth Star block
History: This block gets it’s name from the triangles that are reminiscent of a saw’s cutting edge. It has appeared on very early quilts in the US, dating back to 1860.
Level: Slightly more advanced as accuracy is vital to create the points of the star
No. of pieces:17

Progress report:

Block 1: The Double Four Patch
Block 2: The Whirlwind
Block 3: The Sailboat
Block 4: The Shoo-fly
Block 5: The Trafalgar
Block 6: The Windmill
Block 7: The Chequer Square
Block 8: The Diamond Square
Block 9: The Cactus Pot
Block 10: The Sawtooth Star

The Cactus Pot block

quilt block cactus pot

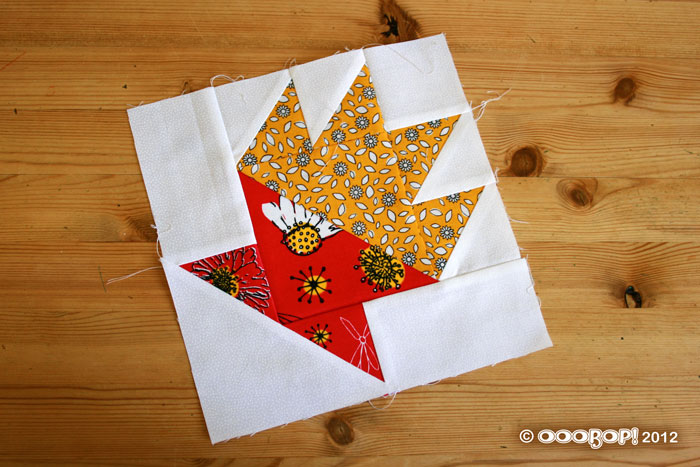
So here is block 9, The Cactus Pot. Apparently very popular in the 1930’s but, despite it’s Art Deco appearance, it actually dates back to the quilts of the 1800s. If the colour balance is altered it becomes more ‘Basket’ or ‘Cake Stand’!

I really like the fabric choice on this one. And with its white background, to be bordered by white, this little cactus is sure to be a pretty thorn among the ‘roses’!

I didn’t have too much trouble putting it together. I just took my time and repeatedly thanked my quarter inch foot! The small triangles were pieced together first, forming squares. Two sets of these were joined to make 2 rectangles. The first of these rectangles was sewn to the diagonal of the large yellow print triangle. A small white square was sewn to the second of the ‘rectangles’ to make a longer rectangle and this was then joined to the other diagonal of the triangle (and the edge of the first made rectangle)

Next up, the large red print triangle was joined to the yellow large yellow print triangle edge. Then the two small red print triangles were sewn to the short edge of the white rectangles. These were then joined to the sides of the block to create a ‘base’ to the pot. The last piece to be added was the large white triangle, across the bottom of the ‘base’.

Lots of pressing in between, and lots of satisfaction when this one was complete!

Block Facts:

Name: Cactus Pot block
History: The block was first published under this name in America, in the Oklaholma Farmer Stockman magazine in 1930. Also known as the Flower Pot.
Level: Some experience necessary for accurate piecing
No. of pieces:16

Progress report:

Block 1: The Double Four Patch
Block 2: The Whirlwind
Block 3: The Sailboat
Block 4: The Shoo-fly
Block 5: The Trafalgar
Block 6: The Windmill
Block 7: The Chequer Square
Block 8: The Diamond Square
Block 9: The Cactus Pot

A proper pencil skirt

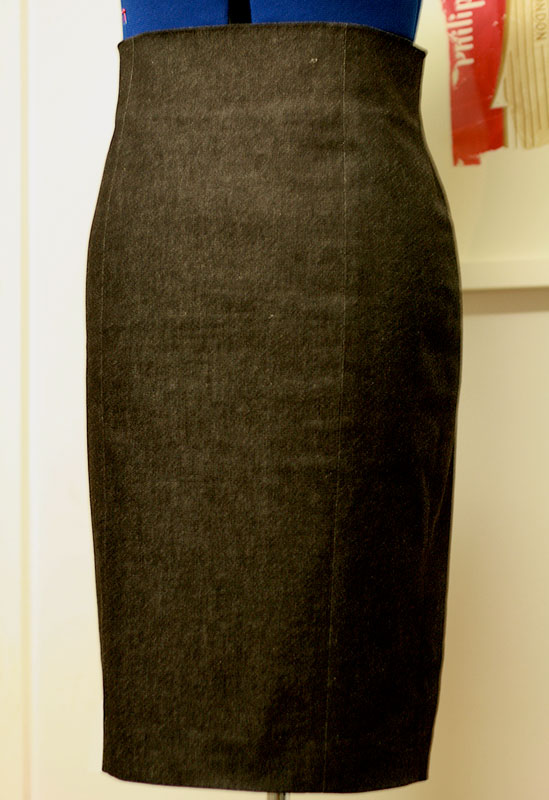
pencil skirt

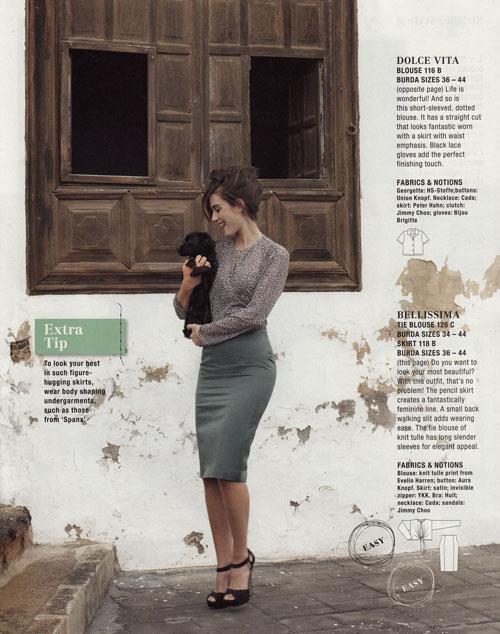
I do believe I have sewn a garment in the same month as the current Burdastyle! Not sure that has happened before. But I was very excited about April’s edition and I knew I would make this skirt.

burda_april_2012_puppy

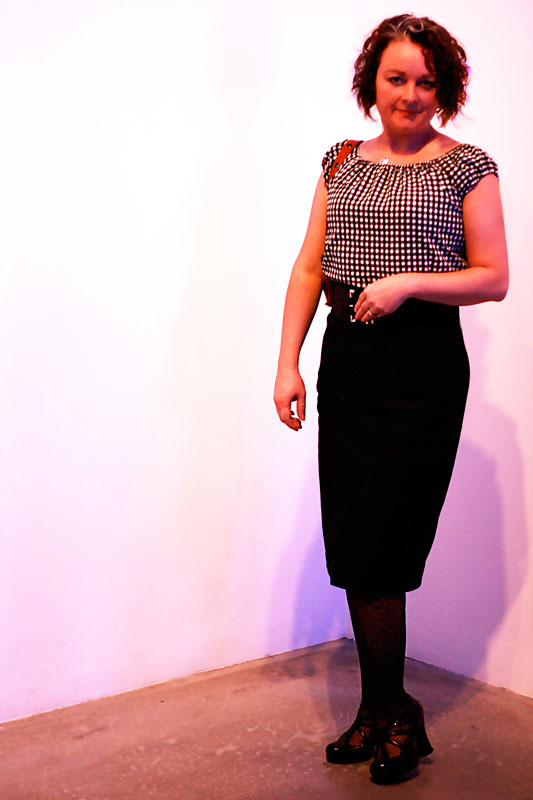
I love classic, timeless styles. And the pencil skirt is no exception. Worn anywear, anytime, dressed up or down, it makes getting dressed for work or an evening out, a mindless operation! I also love that it can be modern or vintage, whatever you team it with.

Satin was the suggestion for this particular version but there was another one with a gabardine recommendation. Satin is a bit too posh for work and everyday so I set off to get some gabardine. I bought some but wasn’t filled with the usual glee once I’d parted with my cash. Praps it will soften a bit in the wash, I thought! But just as I was on my way out of the shop my eyes continued searching – as they always do – and I spotted some black stretch denim. That’s the stuff, I thought. And I was right. Comfy, casual but smart and sturdy enough to hold me in, in all the right places!

pencil skirt

This is possibly the shapeliest pencil skirt pattern I have come across. Largely due to the panels and princess seams I would assume. It is really high waisted and a lack of waistband allows for a shapely top at the waist, or near under-bust!

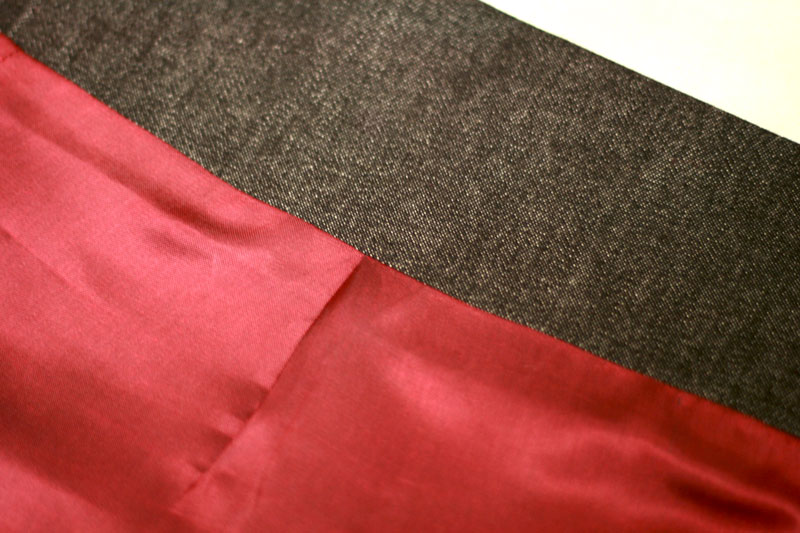
The instructions didn’t relay details of a lining and I have learned hard lessons from not including one so I dug out some deep red poly lining, cut the same pieces as the skirt, minus the facing and allowed a pleat in the front.

lining pleat

I felt quite pleased with myself for remembering this trick but alas it wasn’t enough ease to have just the one in the front. I should have really allowed for another two, one at the top of each back panel. It really is a very snug fit!

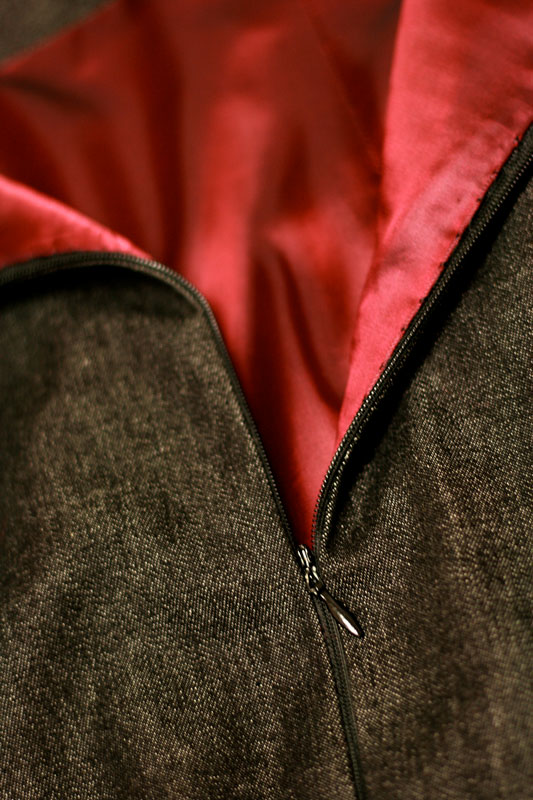
The invisible zip went in without any probs. It lines up and everything!

invisible zip

I will definitely return to this pattern at some point and would love to make a posh version and include the couture techniques suggested on the Burda Style website, namely adding boning, underlining etc.

But I seriously must not veer off the project list any more than I already have! I have much more interesting projects to fry, not least of all my jacket! I can report that it is, at last, taking shape, all be it in the initial stages, but it has a body, nonetheless, and some welt pockets with flaps and a collar ready and waiting its turn….. honest! 😉

ooobop! gypsy top #2

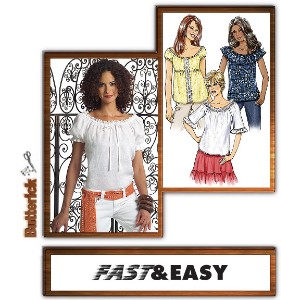
gypsy top frontThere is something quite comforting about visiting an old pattern. I made my first gypsy top almost a year ago and not only have I had great use out of it, it made a great addition to Dorothy’s ensemble too! Once again I used Butterick B4685, Fast and Easy… and indeed it was.

butterick b4685 sewing pattern

I used view D this time but omitted the front lace panel. I did originally include the underbust elastic but when I tried it on, tucked in a skirt, which is mostly how I intend to wear it, I looked a little (more) like the Michelin Man! So out came the elastic, quicker than when it went in!

I used a remnant of cotton gingham that I picked up from Oxfam, and used every last bit of it! So very satisfying especially as I’ve since found that 100% cotton gingham isn’t that easy to get hold of. Well not in a choice of colours. Despite my local plethora of fabric shops, they all stock poly cotton gingham, for the demand of school dresses, apparently. It looks just as pretty for sure but pure cotton feels so much nicer against my skin.

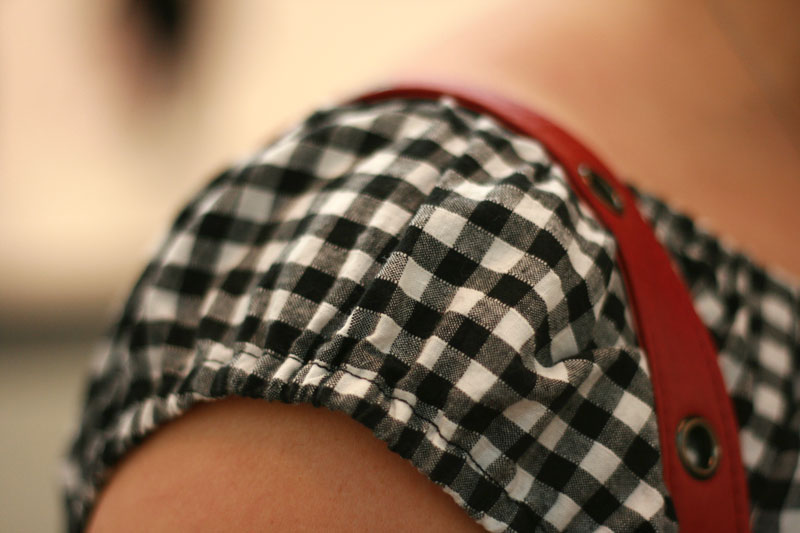
I prefer the sleeves and the simplicity of this style. Its less fussy and so quick to make up. I am going to make a few more, lined up for summer, and my eldest daughter has put an order in for one too.

gypsy top sleeve detail

It also made sense to enter this into Made by Rae’s Spring Top Sewalong 2012, just as I did last time round. Its not nearly up to the standards of most of the beautiful tops over there but I’m liking the annual inspiration of creating a new tops for Spring all the same! You can see this and all the other entries over at Flickr. My entry has been successful so I will keep you posted when it is time to vote! 😉

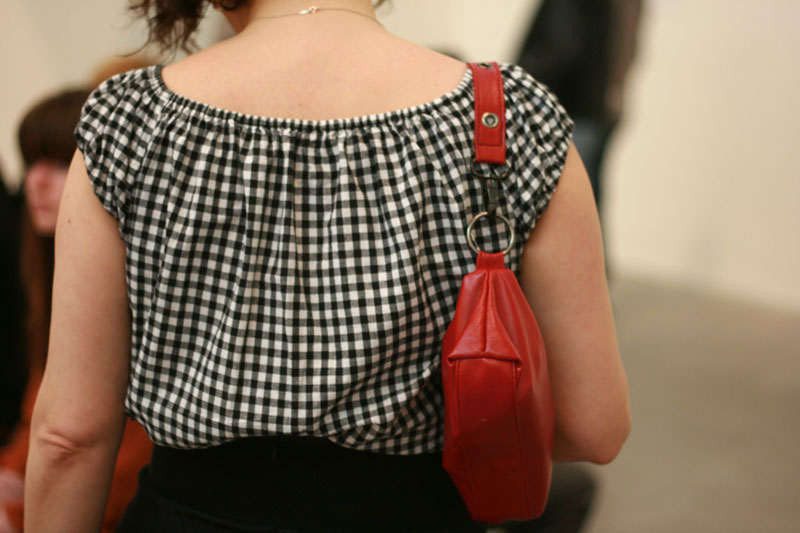
gypsy top back view

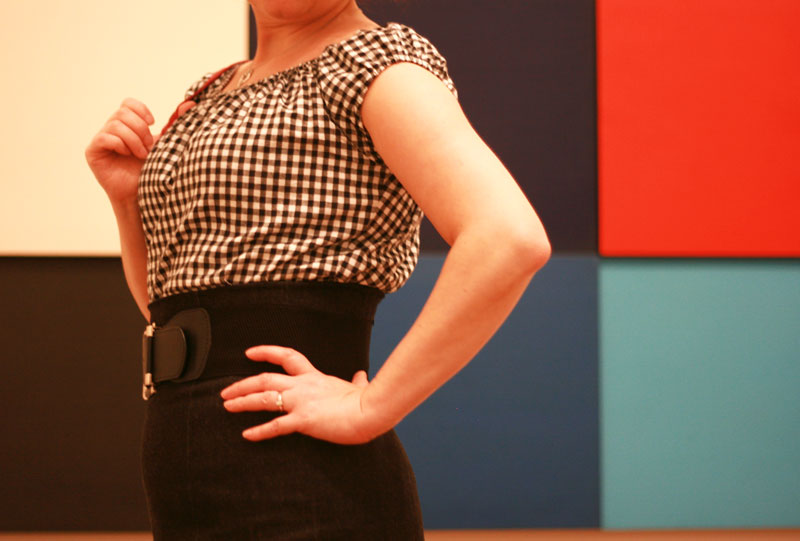
I wore it out to a trip to the Tate Modern yesterday with Mr and Little Miss Ooobop! and I have to say it is perfect gallery wear. It’s always soooo hot and stuffy in the galleries. The artwork made for a choice back drop too!

gypsy top side view

Hope you are all having a wonderful Easter break 🙂

The Diamond Square block

Diamond square quilt block

The Diamond Square block is number 8. That makes me a tenth of the way there… woohoo!! I wasn’t joking when I said this was going to take me over a year to make! The ‘pile’ (if you can call it that) of completed blocks is slowly growing. and issue 11 of the Art of Quilting has supplied the first batch of sashing (the white fabric that will join them altogether). I have yet to complete blocks 9 and 10 before I begin that task, when I shall then present them as one – a far more interesting post I’m sure!

I am happy to report that this particular block was a breeze. It is based on 2 sets of triangles around a central square. The central square allows for the use of bigger print and with the contrasting outer levels gives a great illusion of a square in a square in a square. All points matched up this time and I particularly like how it worked on the reverse!

diamond square quilt block reverse

Block Facts:

Name: Diamond Square block
History: This block design appears on quilts dating back to the 1870s. It is also known as ‘Pride of Holland’ or ‘Night and Day’
Level: beginner
No. of pieces: 9

Progress report:

Block 1: The Double Four Patch
Block 2: The Whirlwind
Block 3: The Sailboat
Block 4: The Shoo-fly
Block 5: The Trafalgar
Block 6: The Windmill
Block 7: The Chequer Square
Block 8: The Diamond Square