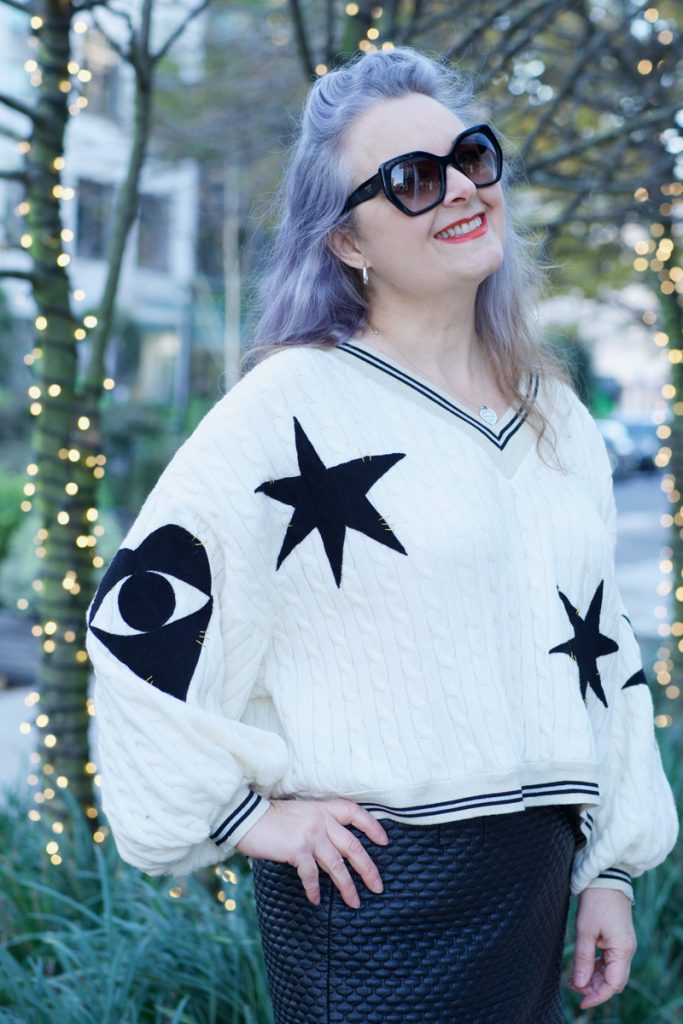
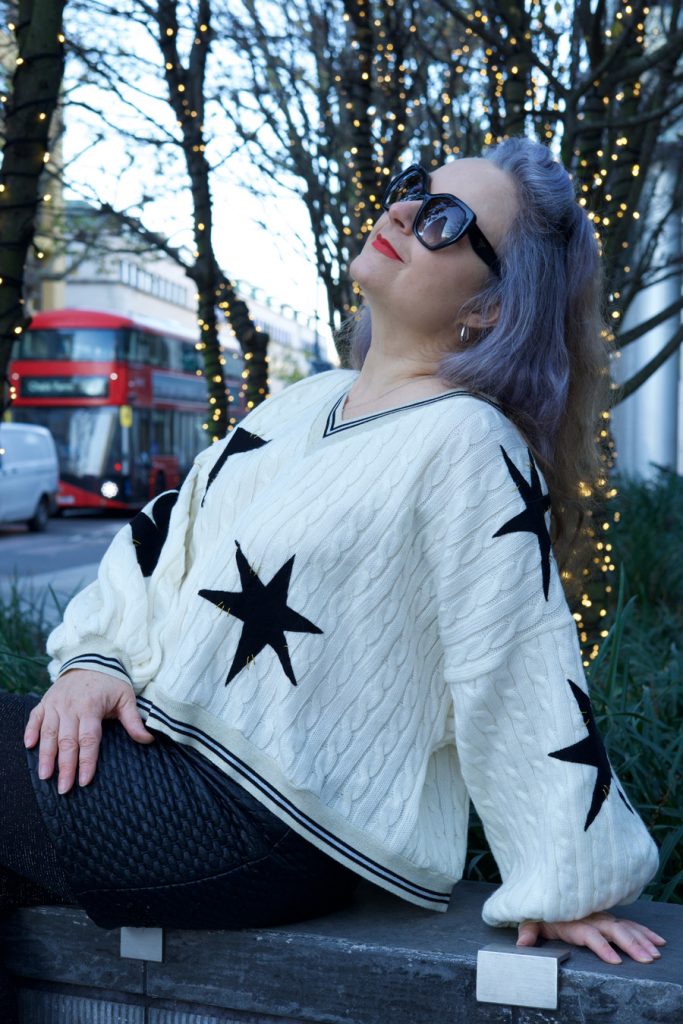
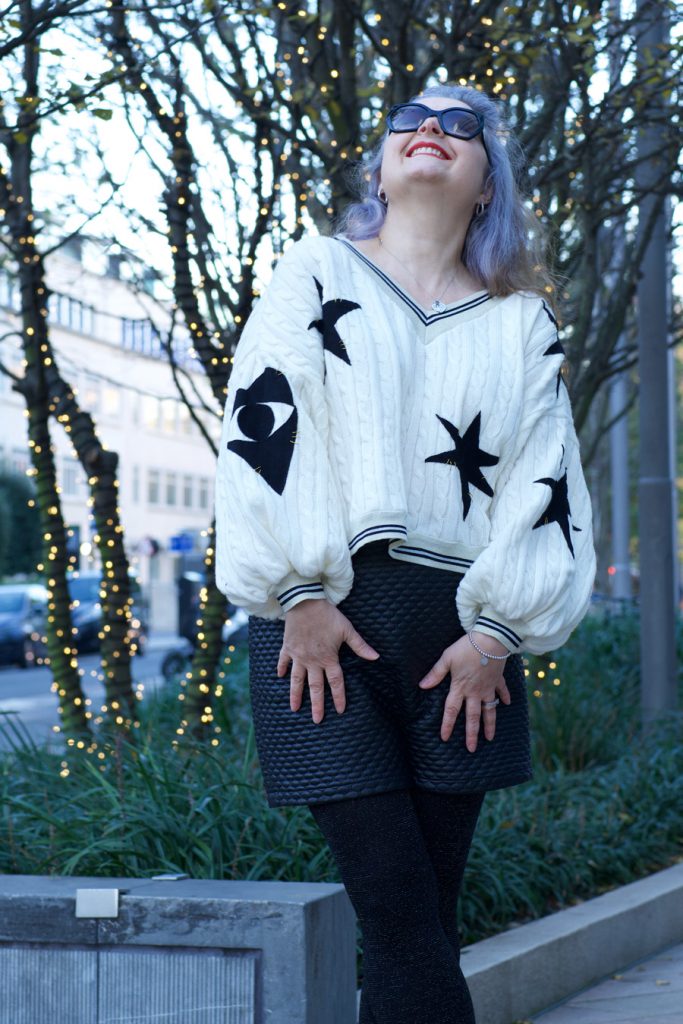
An ooobop original jumper for all reasons!

I like that there’s never a strict order of process. Often I pick a pattern and go looking for the right fabric. Sometimes the other way round. Driven by need or pure desire but in this case it got changed up a bit more.

Diane from @Dreamcutsew was kindly giving away some fabric on Instagram and I just couldn’t pass up her wonderful piece of cable knit jersey. I didn’t have a Scooby what I was going to do with it – I didn’t even know this kind of fabric existed till then!
I considered a cushion cover, a hat, some gloves – even some slippers! (I still have a small piece left so this could still be an option) But it sat for sometime, perched on the top of my own stash until I had a flash of inspiration. And then it came – in the shape of a hashtag challenge: #magamsewalong (Make a Garment a Month) hosted by @suestoney and @sewing_in_spain. This month the theme #naturalnovember was set by guest host @gigi_made_it, and that really got the ball rolling.
I loved how free-range the brief was;

☑️ Make something from a natural fibre
Now I’m pretty sure there wasn’t a speck of natural fibre in that cable knit but I did have a raggedy moth-eaten merino wool jumper which met its demise in an accidental hot wash. I’ve no idea why I kept it but I’m jolly glad I did because I decided to add some black detail. I generally stick to the safety of any colour palette that involves black!

☑️ Choose a make reflecting the weather and rhythms of the season where you live
The weather was definitely a factor in my need for a jumper. I don’t have nearly enough and I can never find any I like that I can actually afford!

☑️ Make something in a nature-inspired print
I figured stars are pretty nature-inspired, aren’t they? And an appliqué is an acceptable swap out for a print.

☑️ Use earth-friendly, sustainable materials in your make
So the main fabric was a leftover piece from another sewist, the appliquéd bits were upcycled from an old jumper. The gold thread was a few leftover strands from a previous project and the only additional notion was the cuffing/ribbing that I bought from Minerva.com
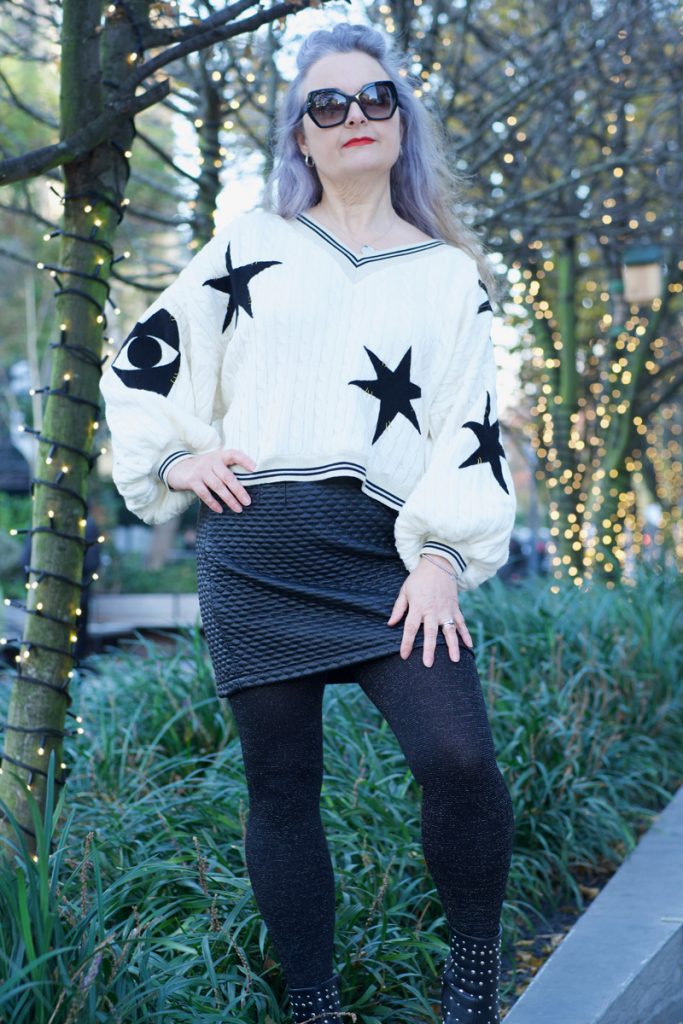
☑️ Make something that totally expresses your natural true self, unconstrained by cultural norms or trends
I’ve been so wanting to make something that does just that. It harks back to my 80s days where I was probably the most experimental with my clothing. Big batwings and balloon skirts the lot! I actually had puffball shorts too!

☑️ A make that occurs without (much) effort. As always, interpret creatively and be natural

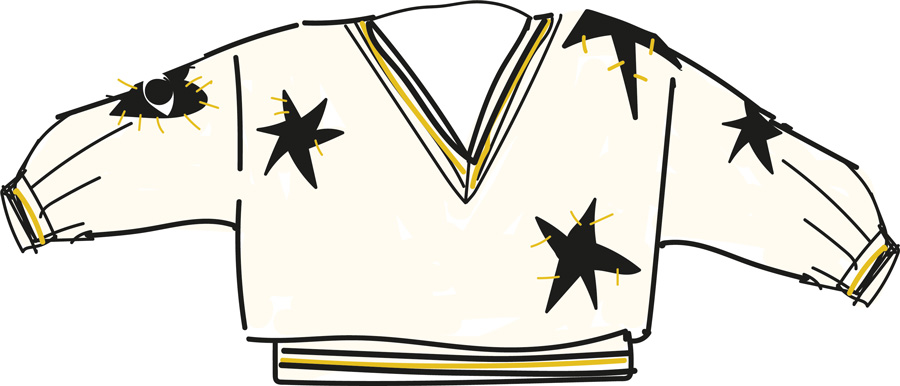
I freestyled the pattern. Based on a RTW jumper I already own and simplified further. No shaping for armholes and rectangles for sleeves gathered in at the cuff. That meant less waste too! I shaped the shoulders slightly and cut a V neck but the back piece is fundamentally a rectangle also.

The project began with a very rough sketch! Please do not judge my Adobe Illustrator skills on this sketch alone – I might never work again!
Once the main pieces were cut out, I began by stabilising the shoulder seams. Even though it was going to have a relaxed drop shoulder I still didn’t want it to stretch out. After sewing the front to the back along the shoulders I added the cuffing along the neckline. Incidentally I used a wide shallow zigzag stitch on my regular machine throughout and then overlocked the edges for a smaller neater finished edge.

To make the appliqué shapes I first fused some doublesided fusible stabilizer to the black jumper pieces (sans moth holes) and then cut the shapes. I ironed the pieces to the front of the jumper and to the sleeves while they were flat. I then handstitched all round with a tiny blanket stitch. I’m still not entirely sure how the points of the stars will hold up over time but we’ll see. The big gold stitches are purely for decoration and to complement the glittery gold stripe of the ribbing.
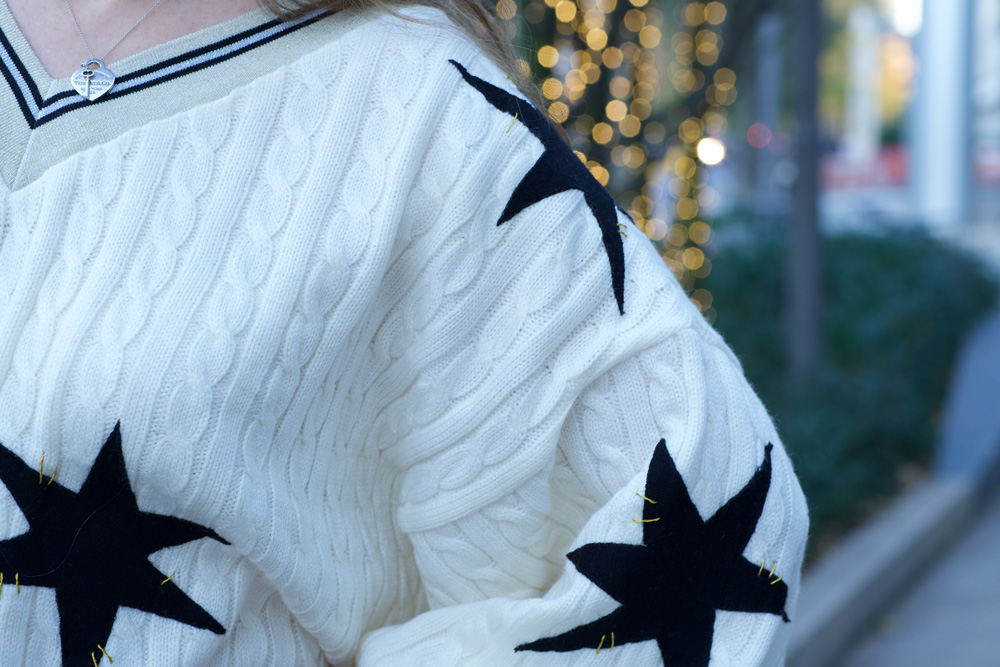
When all the pieces were in place, I closed up the underarm and side seams. I gathered the wrists of the sleeves by hand with reasonably big stitches and then stretched the cuffing to fit, sewing right sides together. I did worry that it might be a bit bulky but it doesn’t feel uncomfortable at all. Just extra warm… and that’s totally fine with me. I can’t stand the cold!
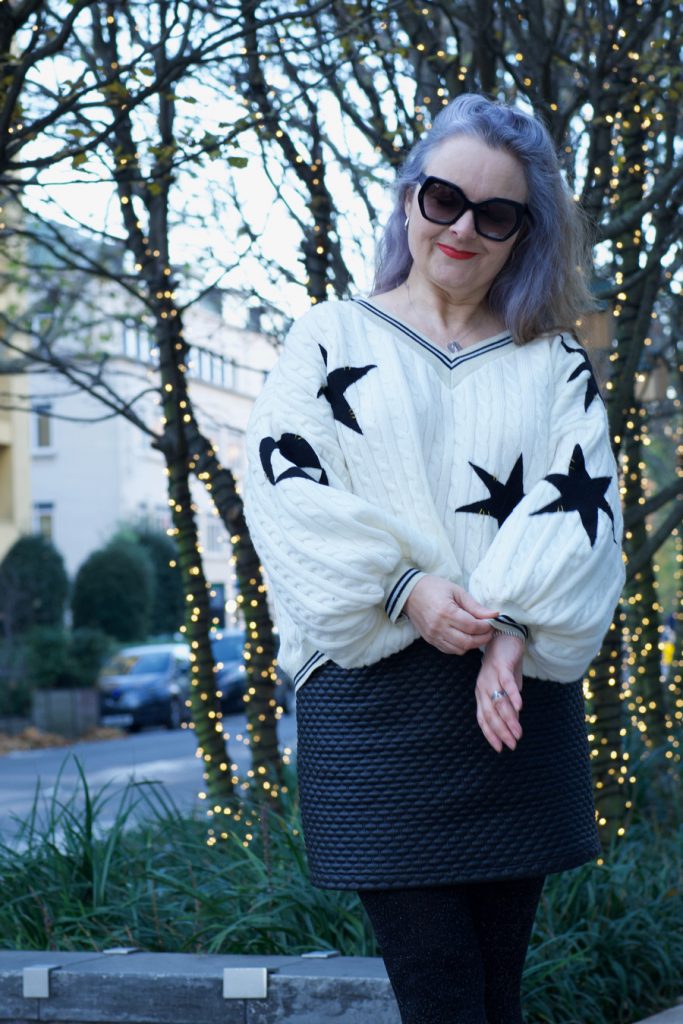
The final step was to add the ribbing to the hem. I really like the contrast of the stripe and the added glitter just makes it pop!

I really loved the whole process from hatching the idea to wearing the finished jumper! It feels so great to be wearing something that is totally unique and totally me. And all thanks to my Insta fam.

I’d like to say this is my new way of working. I’d so love to get even more creative and original about all that I make and I will, in time, but I’ve already got an indie pattern in mind for my next dress. One I’ve never tried before. Watch this space to find out more!
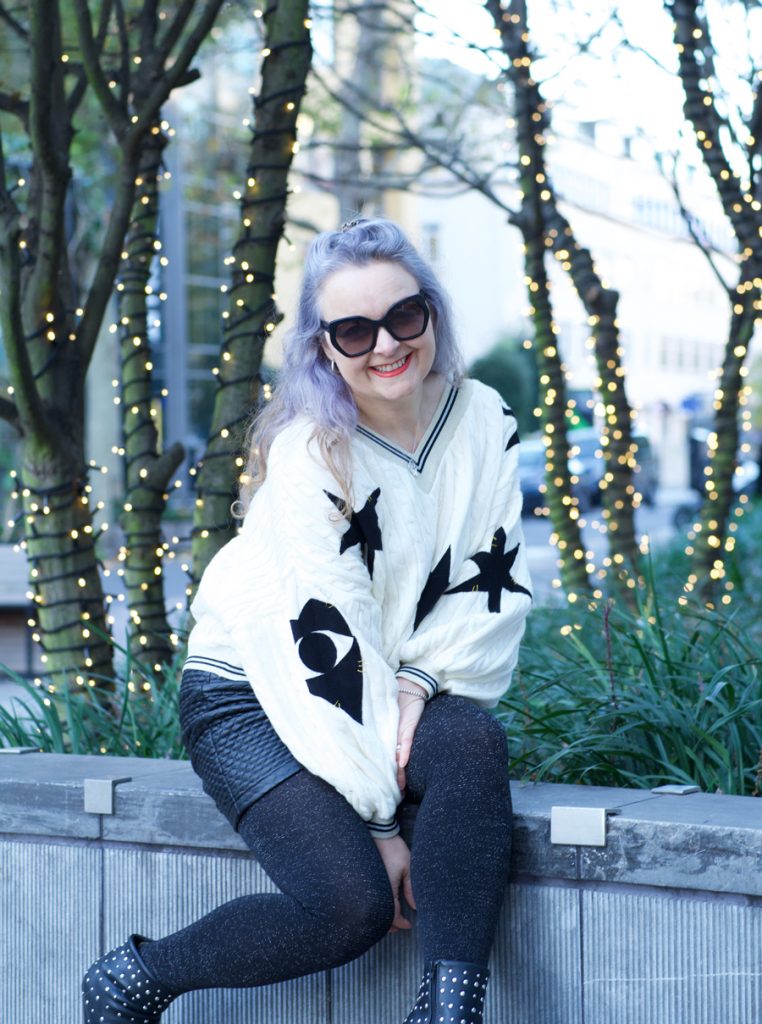
Dan of course is behind the lens of these super shots… we took a 5 minute walk up the road where he’d already planned to factor in some twinkly lights. He is so very good at this and I’m so grateful but also aware that he’s getting more photography gigs of late, so I better keep that leash tight!!

Happy weekend everyone!

Bring on the summer, I’m sundress ready!

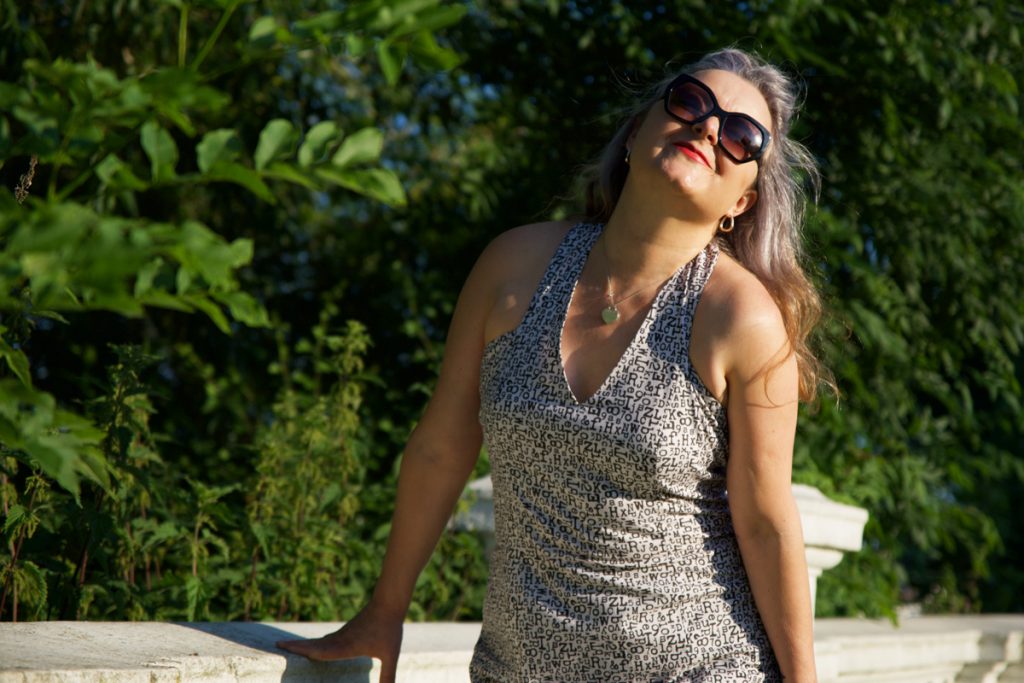
Janene is posing with her right hand on a low white wall with trees and bushes in the background. She is wearing her handmade sundress and sunglasses and smiling with head back

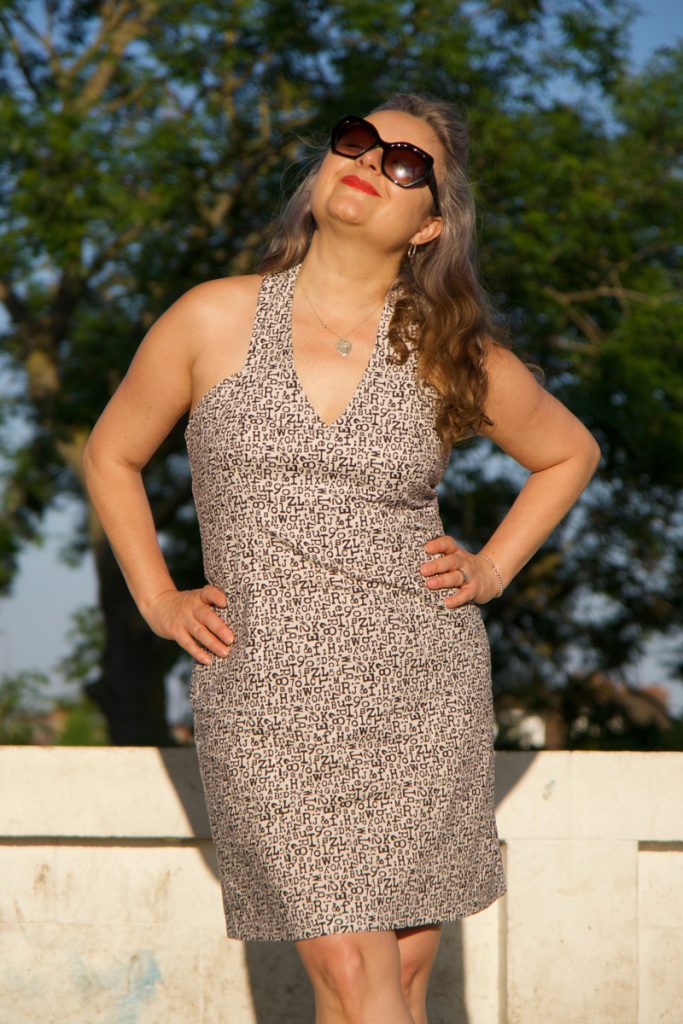
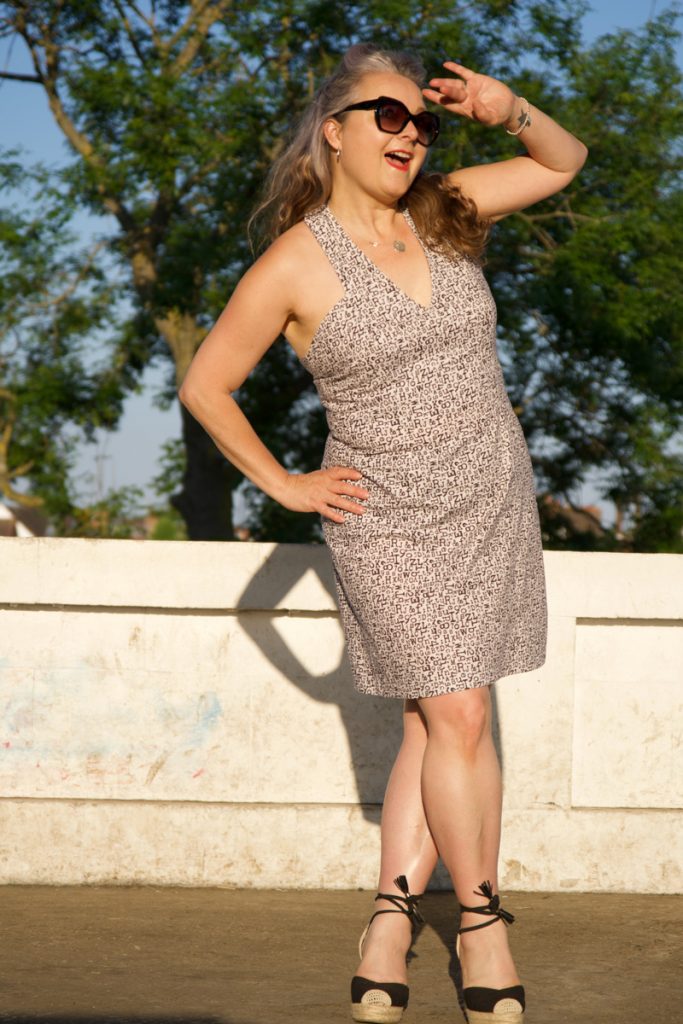
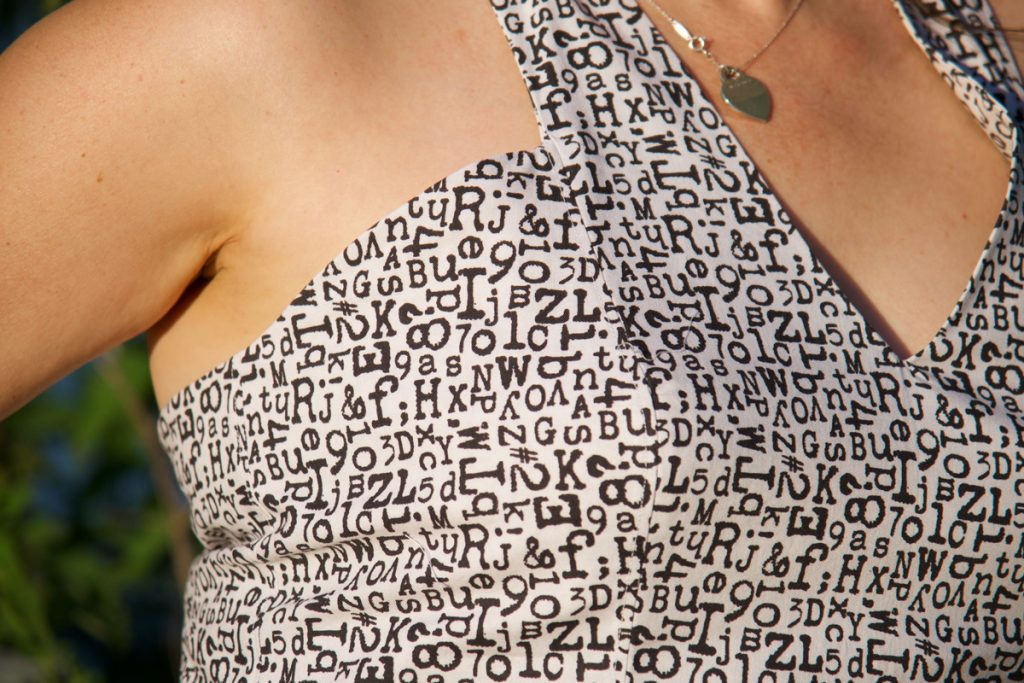
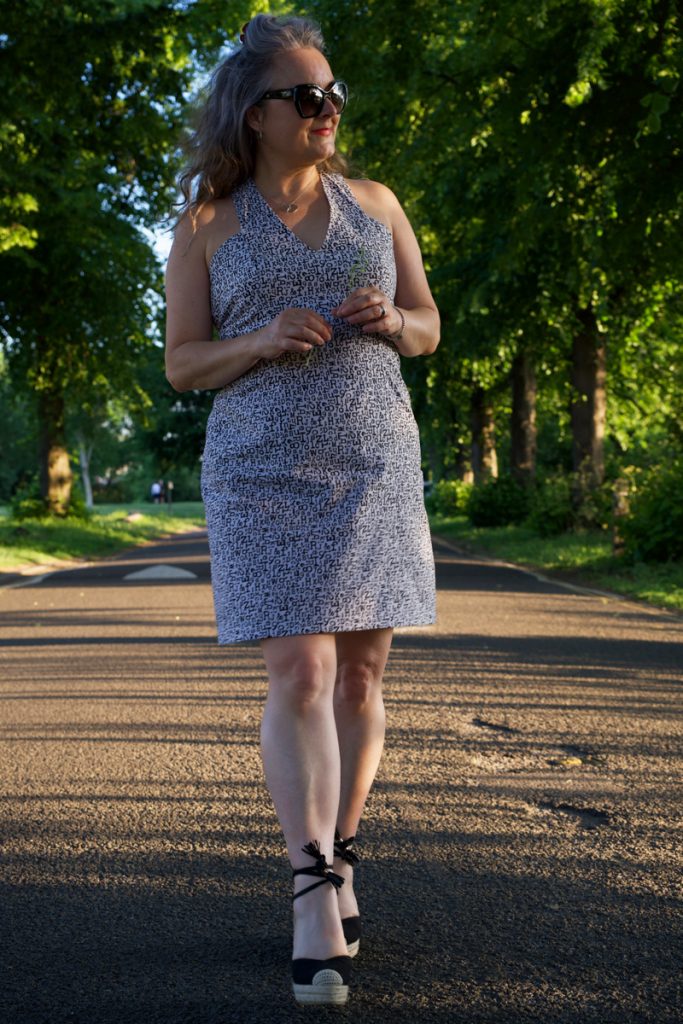
I had absolutely no plans whatsoever when I placed my order for this delightful Robert Kaufman cotton poplin fabric, which is usually a very bad mistake. Rash decisions with no end goal ultimately end up with more material languishing in stash mountain for a considerable amount of time. But I had to have it! I don’t generally like novelty prints but I think this can be classified more as graphic print or typographic print – very appropriate for a graphic designer anyways! And I absolutely love it!

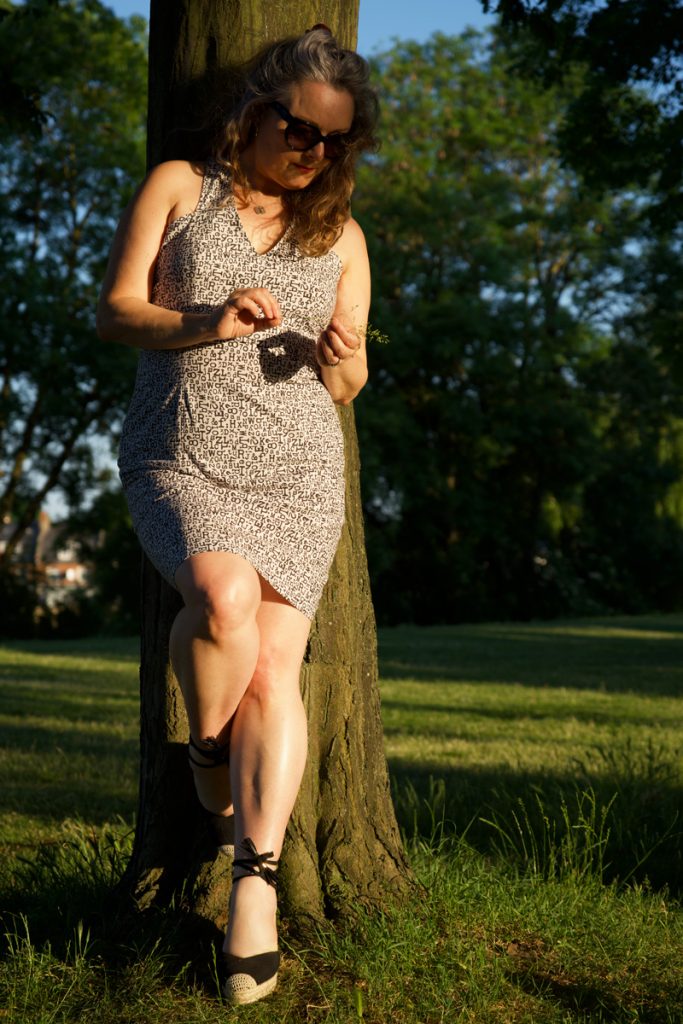
Janene is leaning against a tree holding a piece of grass, wearing her handmade sundress

When it arrived I was in awe of its texture. I don’t think I’ve ever worked with cotton poplin before – the cottons I’ve worked with have been much smoother and crease a whole heap more. You can see the weave of the threads on closer inspection of this one and it’s got a marvellous matt quality to it.

Janene is posing straight on with both hands on hips wearing her handmade sundress and sunglasses

It feels very similar to some vintage batik fabric I used last year for a sheath/shift dress and I love how that one feels against my skin. So after much deliberation, I decided upon something much the same – fitted for sure but with all this roasty toasty weather we’ve been blessed with, I also liked the idea of baring my back and cutting away the shoulders to air a bit more skin!

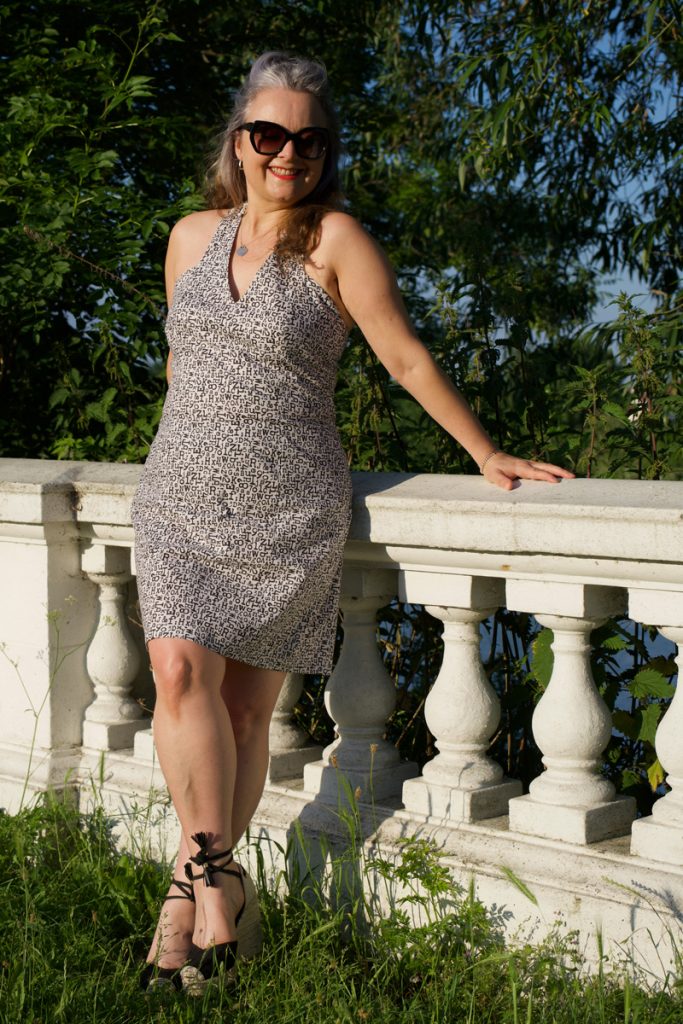
Janene is posing with her back to a low level wall alongside the river with trees and bushes in the background, wearing handmade dress and sunglasses and smiling

But I had to get my skates on. Not only did I have a Minerva review deadline, there was an Insta hashtag challenge I was determined to join in with, too.

So typically, I decided to make things just a tad more difficult for myself by designing, self-drafting and sewing my own fitted sundress!

Janene is posing in her handmade dress and sunglasses with one hand on hip and the other in a mock salute

I traced my existing sloper template to include princess seams and a V-neckline, increasing the underarm curve slightly above the bust across the side front where it meets the centre front piece seam and the ‘strap’ that is graduated to the shoulder and meets a back extension to form a buttoned halter-neck.

I created a facing for the whole of the top half to the waist. I did consider making it shorter but I may add a lining to the skirt section at some point.

To finish the seams, I trimmed and pressed the seam allowance to the side and topstitched alongside the joins to create a kind of faux flat felled seam finish.

Close up detail of the bodice section to show the faux flat felled seams

It’s not a bad fit for a first trial. I did do a mock up of a shortened version and its seemed to fit just right but its amazing what issues a little real life walk-around brings to the fore.

It transpires the back section collapses a little and could probably do with a bit more support. Maybe some interfacing would have given more structure or perhaps I need to add bones in the side and centre back seams? Or maybe I just live with it. What do you think? That said, I love how effortless it is to wear right now and I don’t particularly want to have to sit so upright in it all the time!

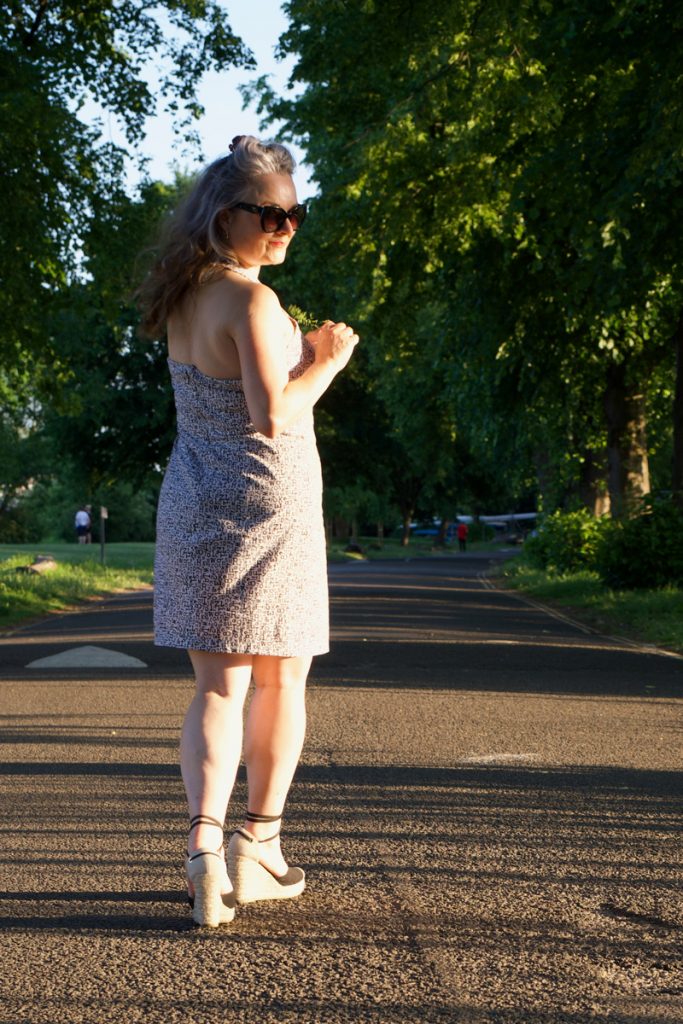
Back view of the dress that Janene is wearing to show that it is collapsing a little.

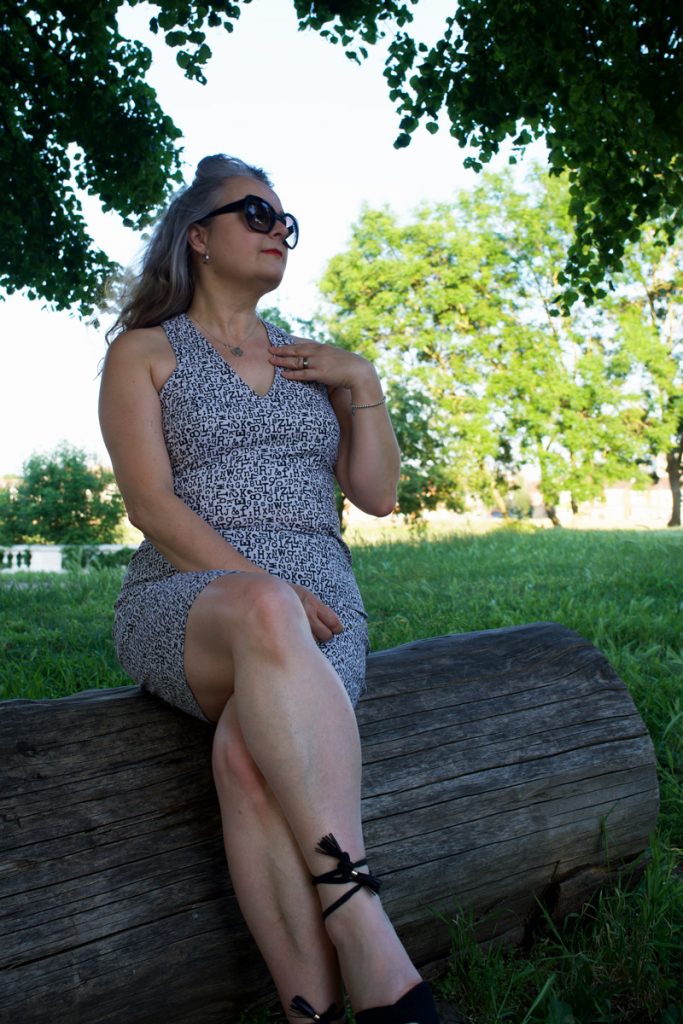
Needless to say, I’m not deterred. It’s so perfect to pair with espadrilles and I’m sure I’ll be donning trainers with it at some point, even flapping around in flip flops – DM’s too, probably. They’ll all go well with it, which proves its very much my kinda dress!

Janene is sitting on a log in the shade wearing her handmade dress, sunglasses and espadrilles. She is looking into the distance with her left hand on her shoulder and the other on her lap.

By the way, the fabric is called ‘Out of Print’ and if you like it as much as I do, here’s a link, but you’ll have to be quick. I don’t think theres many metres in stock.

Thank you so much to Minerva of course for gifting this lovely material as part of the Brand Ambassador programme. And also to the lovely ladies of Instagram (@sewing_in_spain, @Rocco.Sienna and @SewSarahSmith) who are hosting the #sewtogetherforsummer challenge which involves sewing a summer dress before 21st June. There are so many great entries already which have totally inspired and spurred my project along – do have a looksee! Sometimes deadlines are a good thing… Yay! I did it!!

Janene is walking towards the camera but looking to the side, holding a blade of grass. She is wearing her handmade sundress and sunglasses and espadrilles.

One more thank you to my Daniel for finding this ideal little suntrap along the river and for taking these fabulous photos.

http://vg9.14e.mywebsitetransfer.com/retro-butterick-57-halter-dress/
http://vg9.14e.mywebsitetransfer.com/speed-sewing-for-summer/

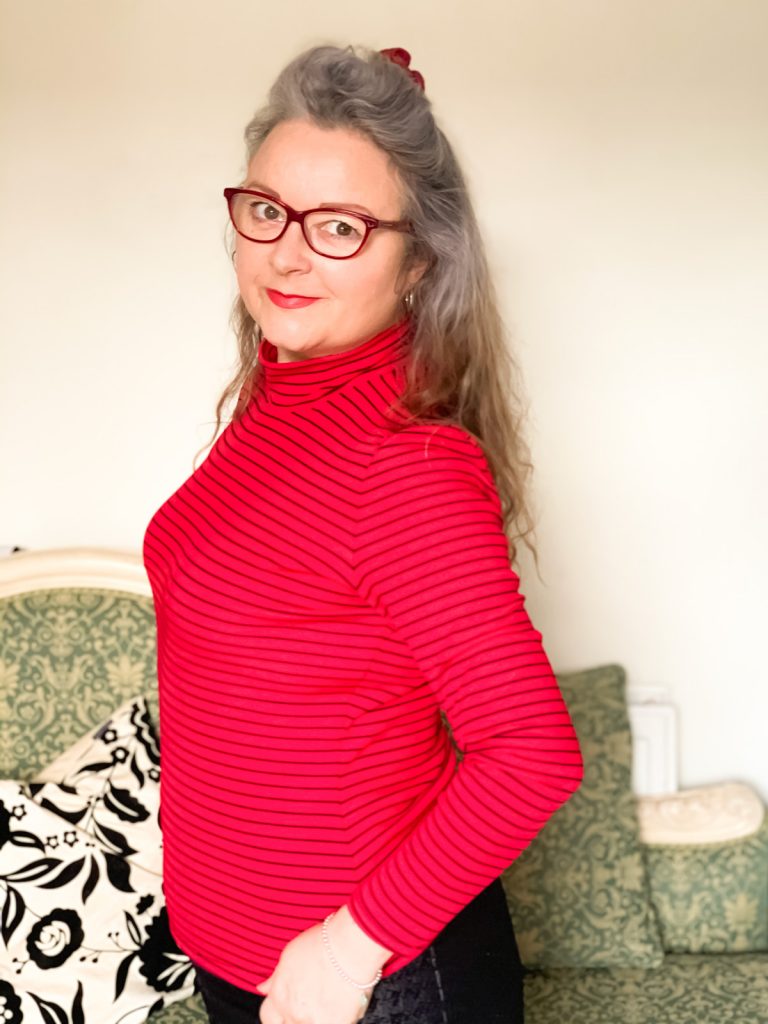
Another turtle neck top complete – in time for MemadeMay

May is one of my favourite months for many a reason. The weather is warming – I so can’t bear the cold – and I’m more likely to get out more for walks and to visit my favourite places and people after a long hibernation period. It’s also the month that the lovely So, Zo What Do you Know? hosts the #MemadeMay challenge. Now it’s fair to say that each year this flurry of instagram selfie shoots gets easier for me as my wardrobe becomes fuller. But Lockdown has narrowed my choices somewhat by what fits and I’m going to have to make some more clothes. Shame, eh?!

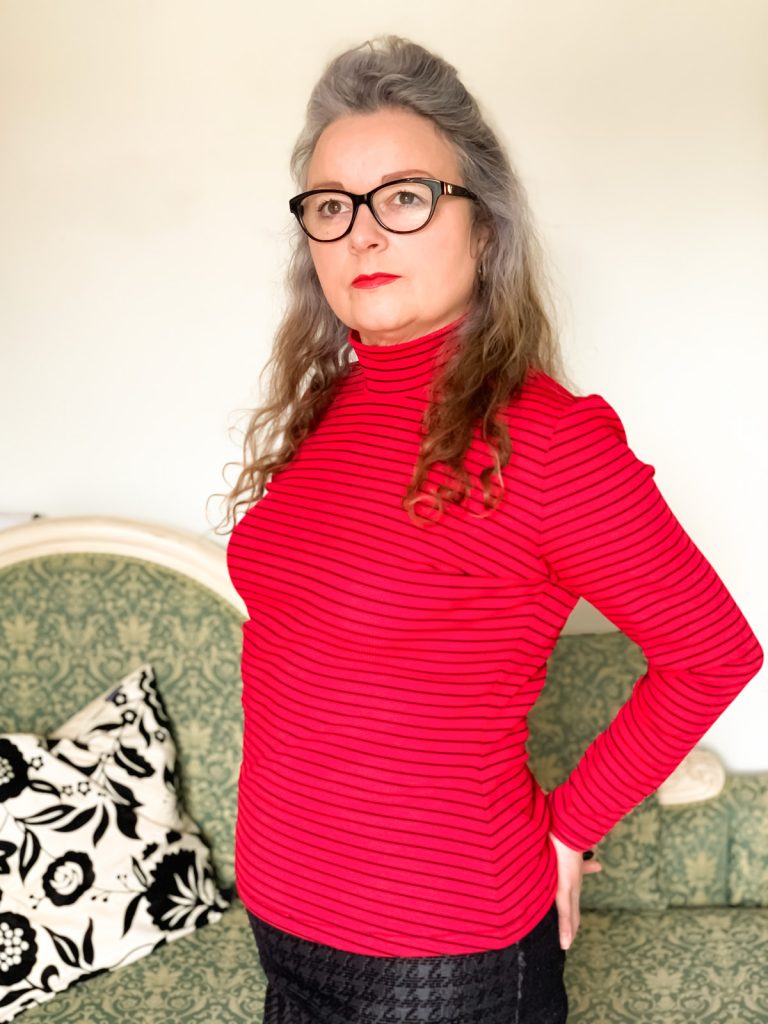
I’m kicking off with a new turtle-neck top, using the same self-drafted pattern as the black one I made not so long ago, which I might add might possible be my most worn thing ever, already!

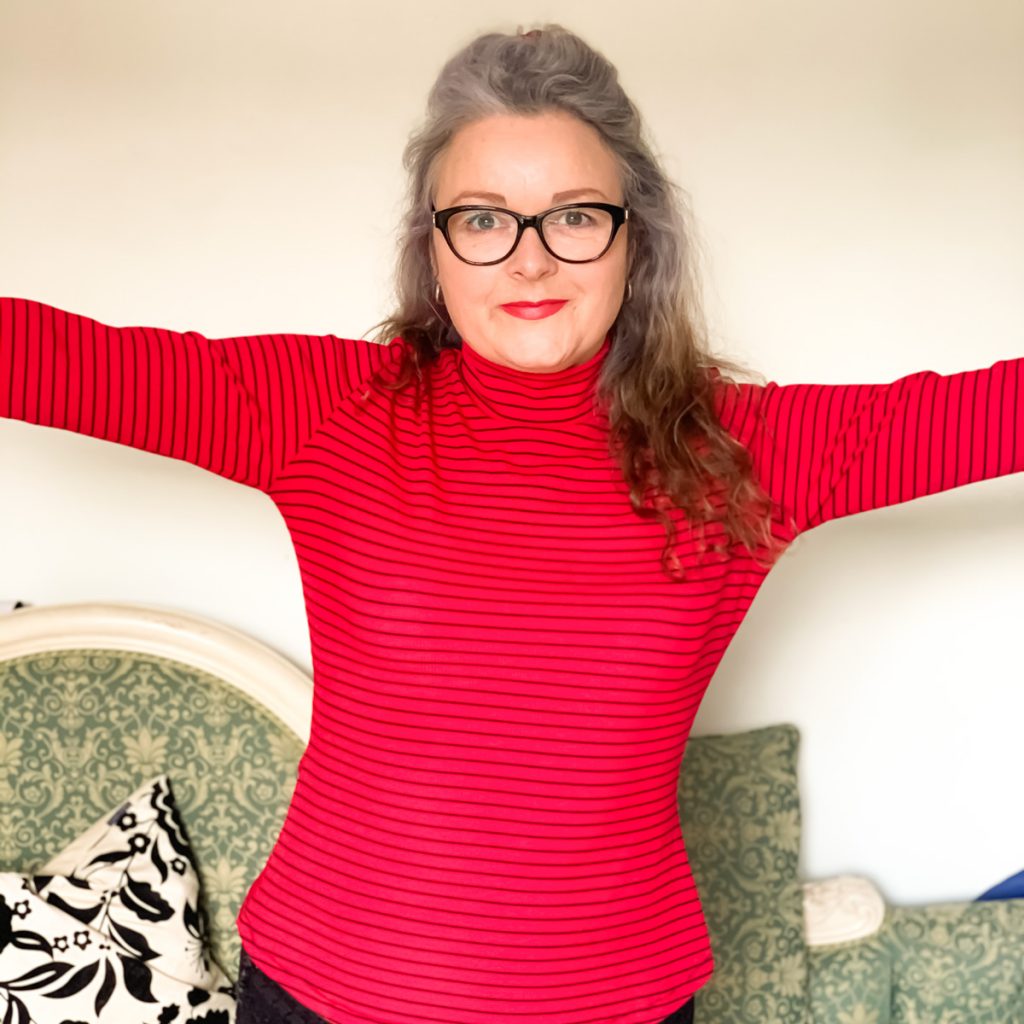
Nothing needed to change but I really wanted to see if I could elimate some little folds from the underarm, across the bust. I figured that underarm armhold point might be sitting a bit high, so I lowered it a quarter of an inch and adjusted the sleeve to match.

It does fit a bit more comfortably but didn’t reduce the wrinkles! Haha. Still a lesson learned though. I luckily only adjusted the paper pattern. The digital version remains. But I am going to flatten off the sleeve head. It does seem to force my shoulder end to sit a little too high and it does measure a couple of mm’s longer than the armhole and because its a stretch knit there is no need for ease, so it will probably help. I do like the power of being able to tweak patterns here and there. It gives me a little buzz of control!

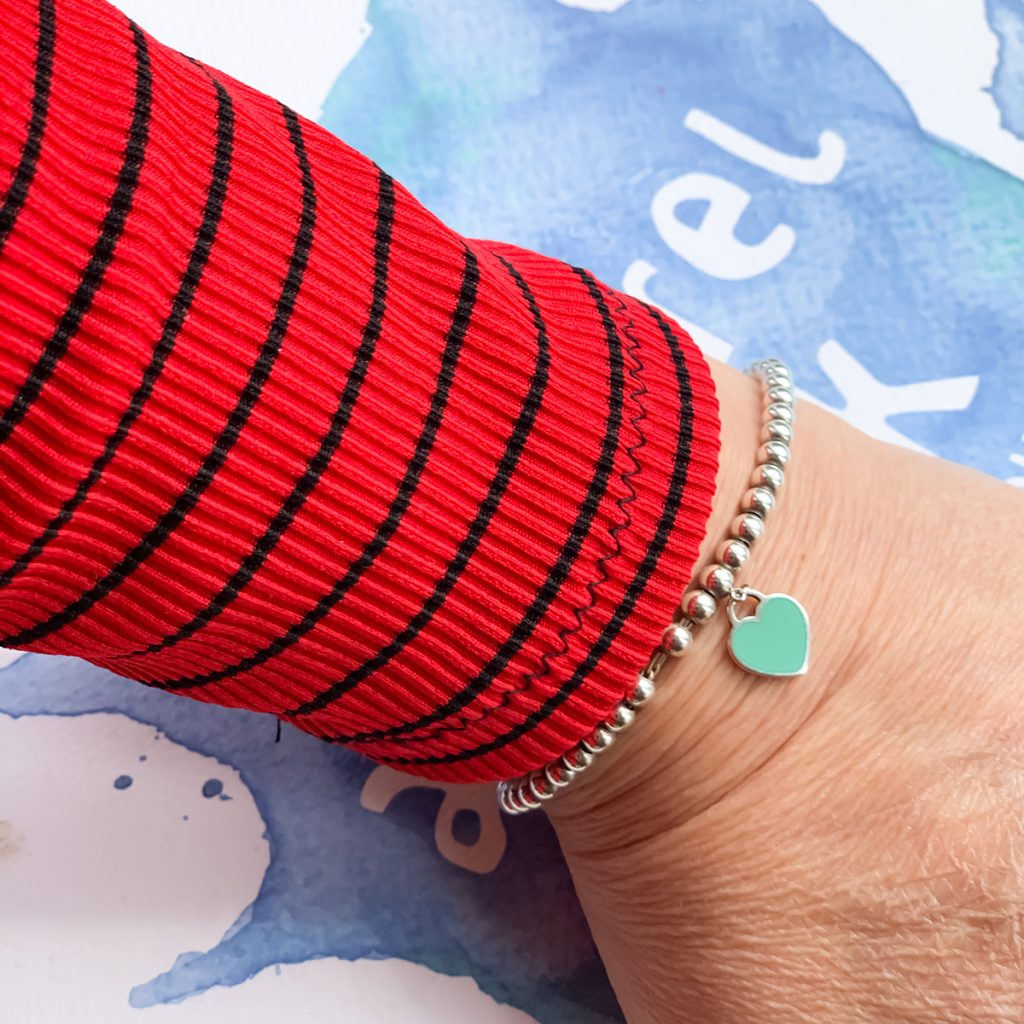
Once again the lazy in me couldn’t be arsed to set up another spool let alone the twin needle for the hems. So I zigzagged as usual. I kind of like the contrast of the zigs in between the black lines.

And I got the neck right this time! No silly amount of stretching. Just enough to fit. And its even more comfortable than the last.

The fabric is once again from Minerva.com. It’s a polyester rib knit in a lovely bright red colour with a narrow black stripe running round. I even made sure to match the stripes at the side. To be fair I wasn’t going to worry about it but the fabric behaved so well, it was harder not to!

This isn’t the end of stretchy tops. I definitely need them right now. And there is still room for improvement, and welcome opportunity for experimenting with different fabrics. Watch this space!

Retro Butterick 5880 in red leopard print

B5880 dress

Big thanks to Marie @stitchoddyssey and Kerry @kestrelmakes for their great insta challenge, #sewvintageseptember, without which this dress would still be in tissue form, in its little envelope, nestled with the other hopefuls! The challenge encouraged us to sew up our neglected vintage patterns, something I’ve been meaning to do for such a long time. Plus it presented so many inspiring posts as everyone uploaded their gorgeous creations. I’m late to the finishing post but I’m so jolly glad I got there!

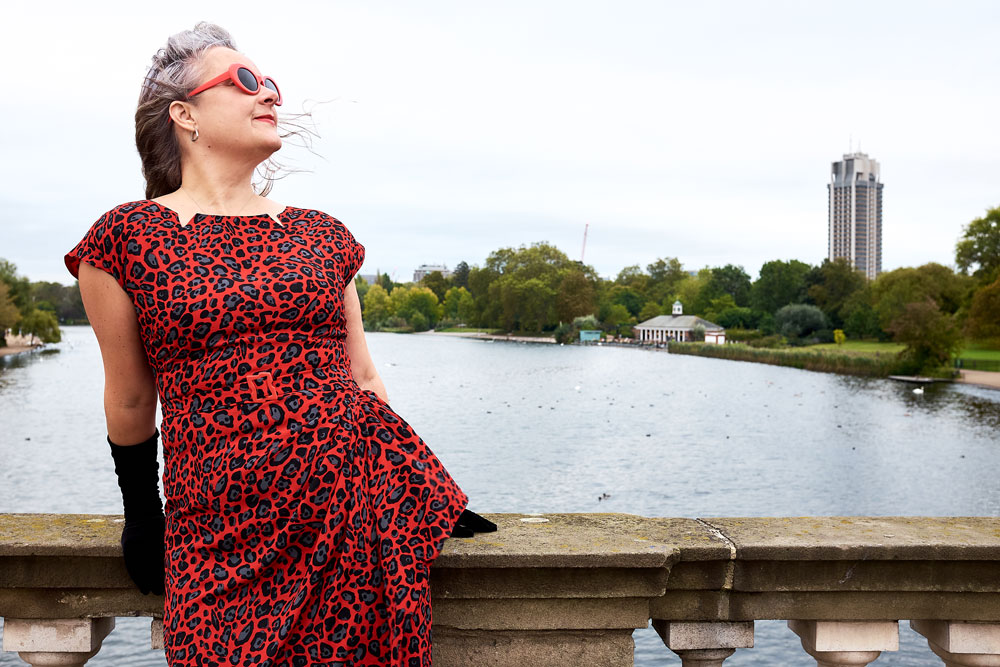
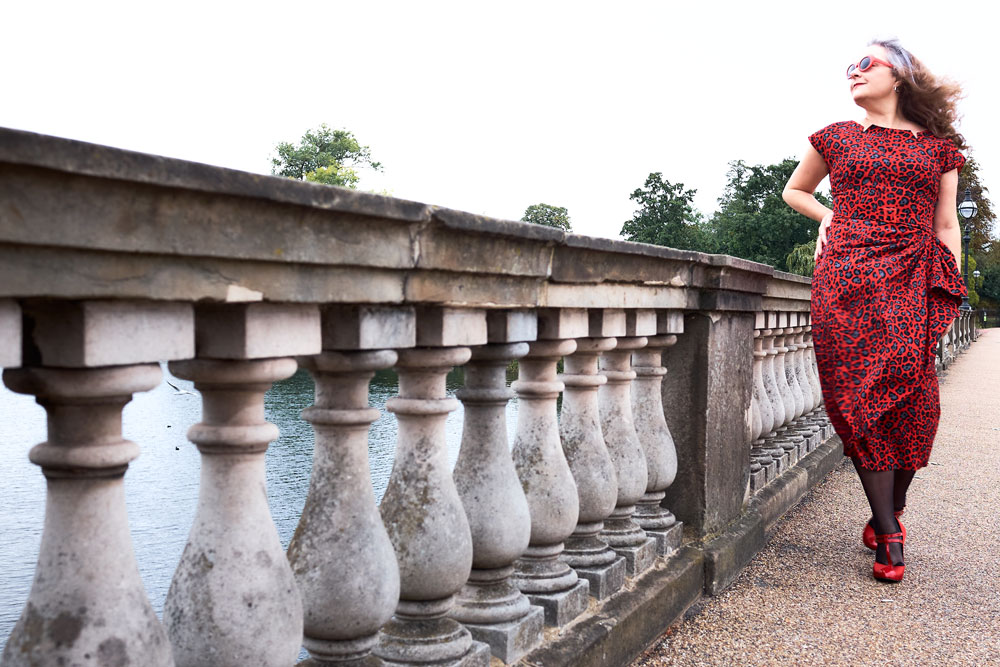
B5880 on the Serpentine bridge

I used to sew so many more vintage dresses than I do of late. When I first began sewing I inherited (read stole) a few from my mum’s collection – just basic skirts and tops. And then my love for them grew so much that years later I found myself bidding silly money for 40s and 50s patterns online. I loved the cover art, the pre-cut pieces, the prompts to hand finish and the unfailing elegance of the times.  I learned how to style the finished garment without conforming to an entire vintage look (totally ignoring the wails of the purists!) and made them my own. I’ve included links to some of my faves at the end of this post.

B5880 retro Butterick dress

So what happened? Why don’t I sew vintage so much any more? Well basically, I discovered indie patterns. And later learned to draft patterns myself. And those vintage pattern boxes have since remained closed owing to the rip-off number of hours in a day! That said, I have left a couple of patterns, loose on the top of the pattern box tower, just in case I get a miracle few hours spare to schedule them in!

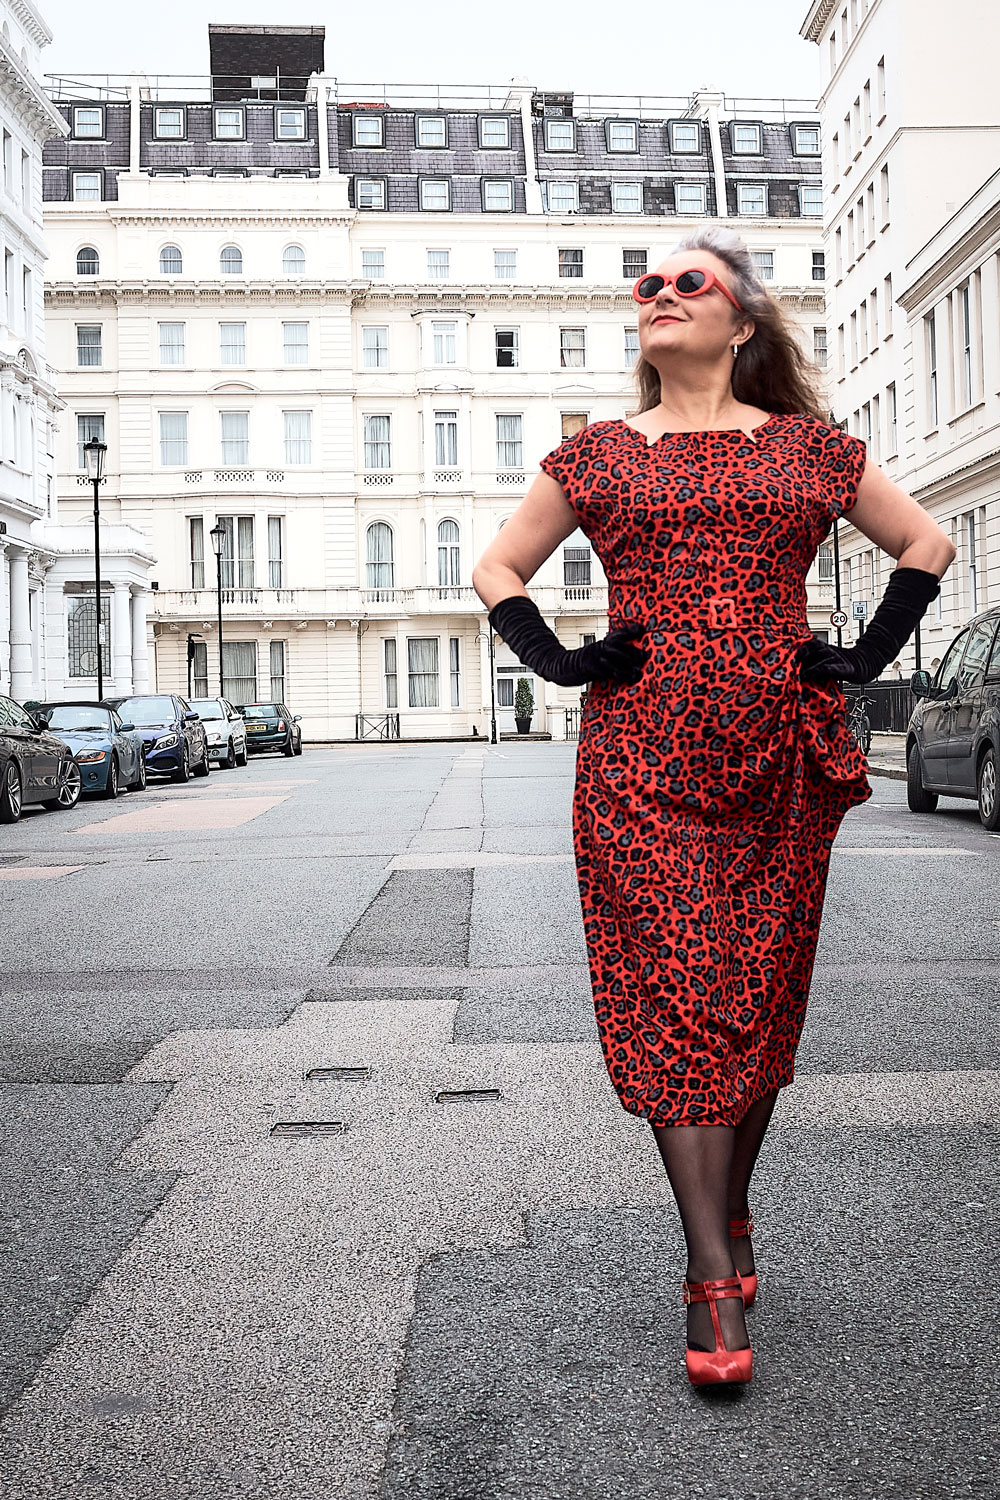
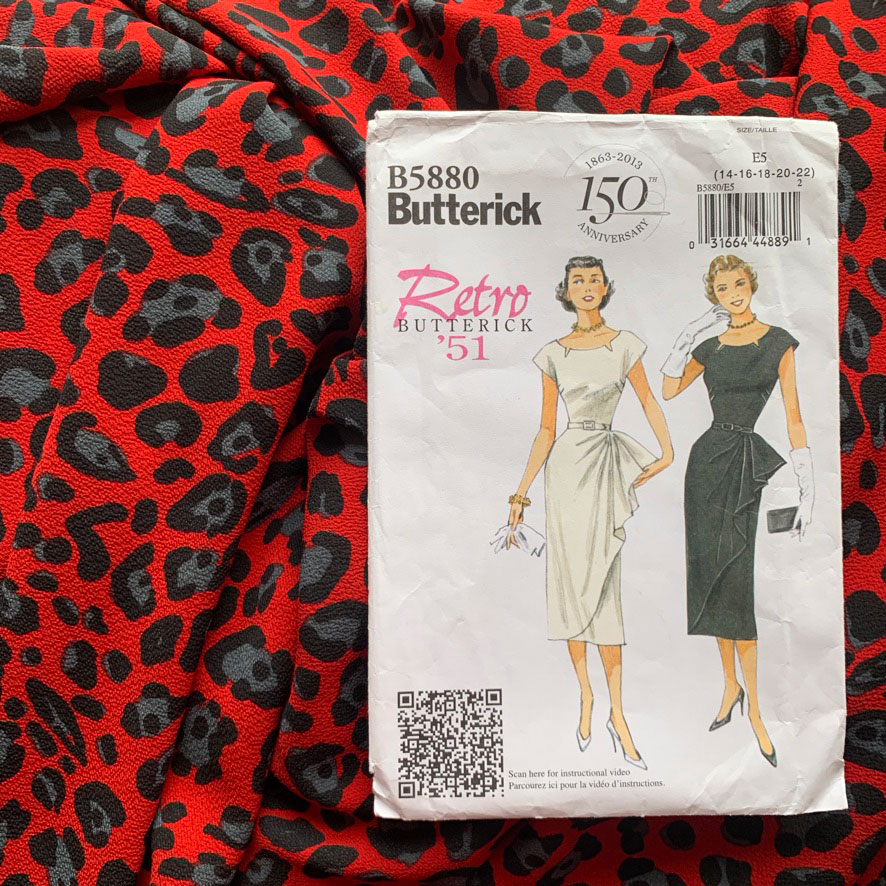
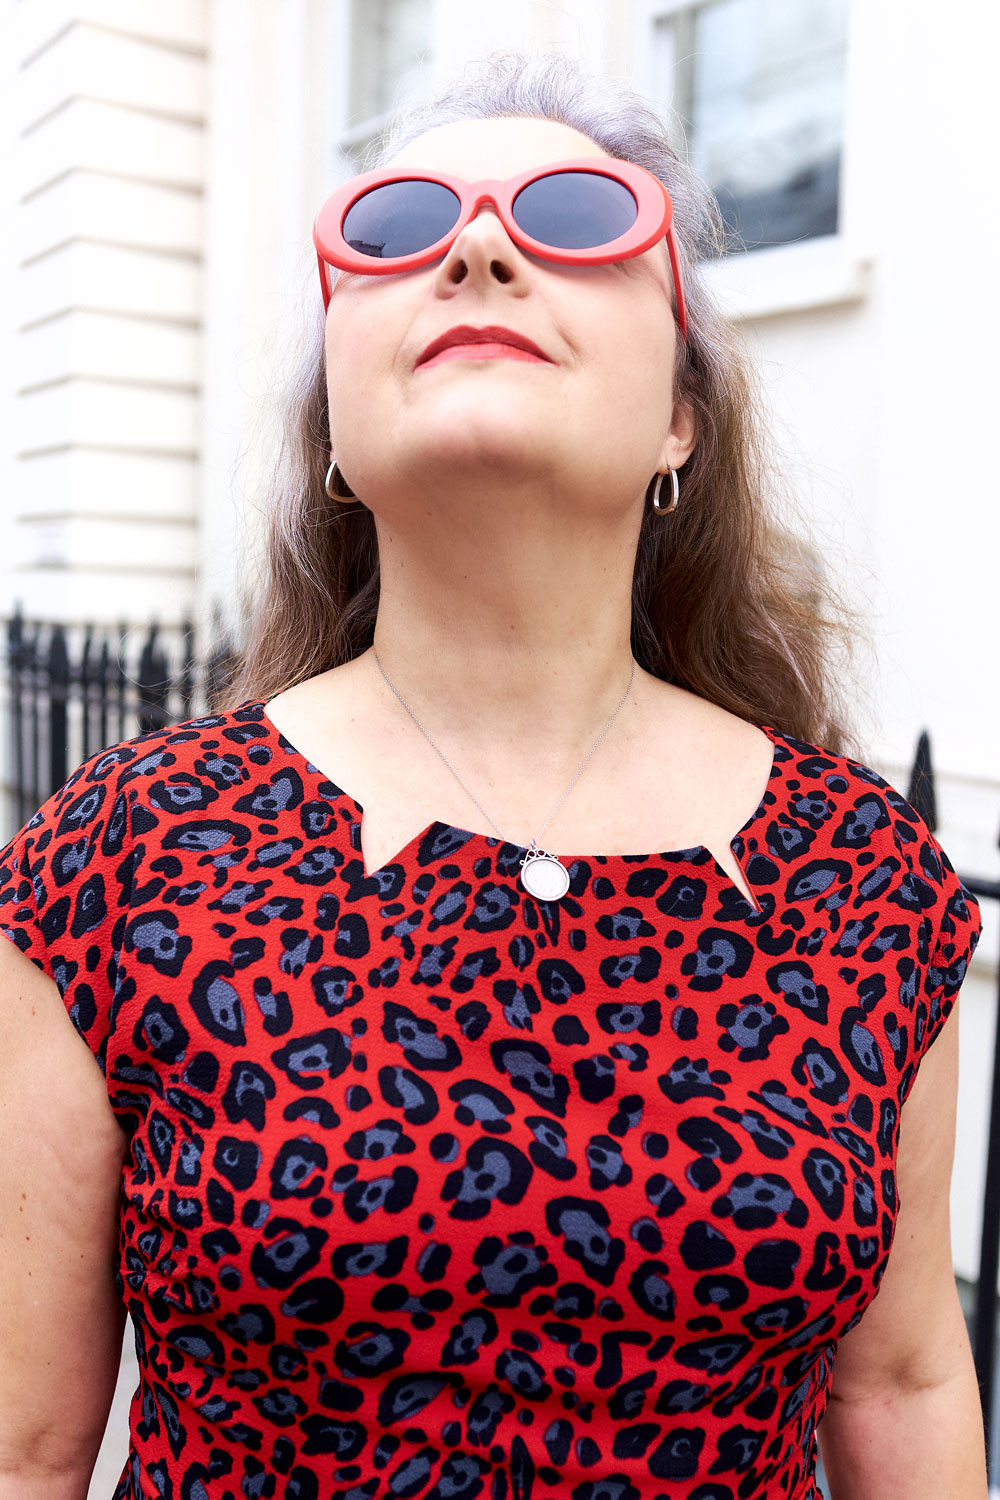
The pattern I used for this dress is Butterick 5880. A retro reproduction from 1951. I love the sarong-style side drape and the neckline with its little fang-like indents!

Retro Butterick 5880 pattern envelope

It screamed leopard-print at me from the off. But I can never find the perfect scale print in a perfect colour way, let alone the actual perfect fabric weight.

I asked in pretty much all the stores along the Goldhawk Road with not an ounce of success. A block colour probs would have worked fine and that was my next plan and was just deciding on red or black (of course) until I spotted this red, black and grey print in Classic Textiles. It was definitely an Hallellujah moment!

B5880 dress modelled on the Serpentine bridge

So my vision of Rockabilly chic was restored and off I skipped with some cheaper poly for the toile – I always try to mock up in as close a fabric as poss to get best fit – and some anti-static fabric from the little shop next to A-One (never can remember it’s name but the owner is always so friendly and kind). I paid £6.50 a metre for the lining. Pretty much the same as the main fabric because I didn’t want cling or spiky static stuff going on. It ironed like a dream and feels so silky to the touch – red of course!

I only mocked up the bodice. Knowing exactly what the issue was going to be – pooling at the back! The back piece is cut on the fold so to get round this I traced and cut the piece in two, adding seam allowance and taking 2 inches of ease out but cutting and slashing on a line drawn from a third of the way up from the bottom of the armhole, across to the centre back.

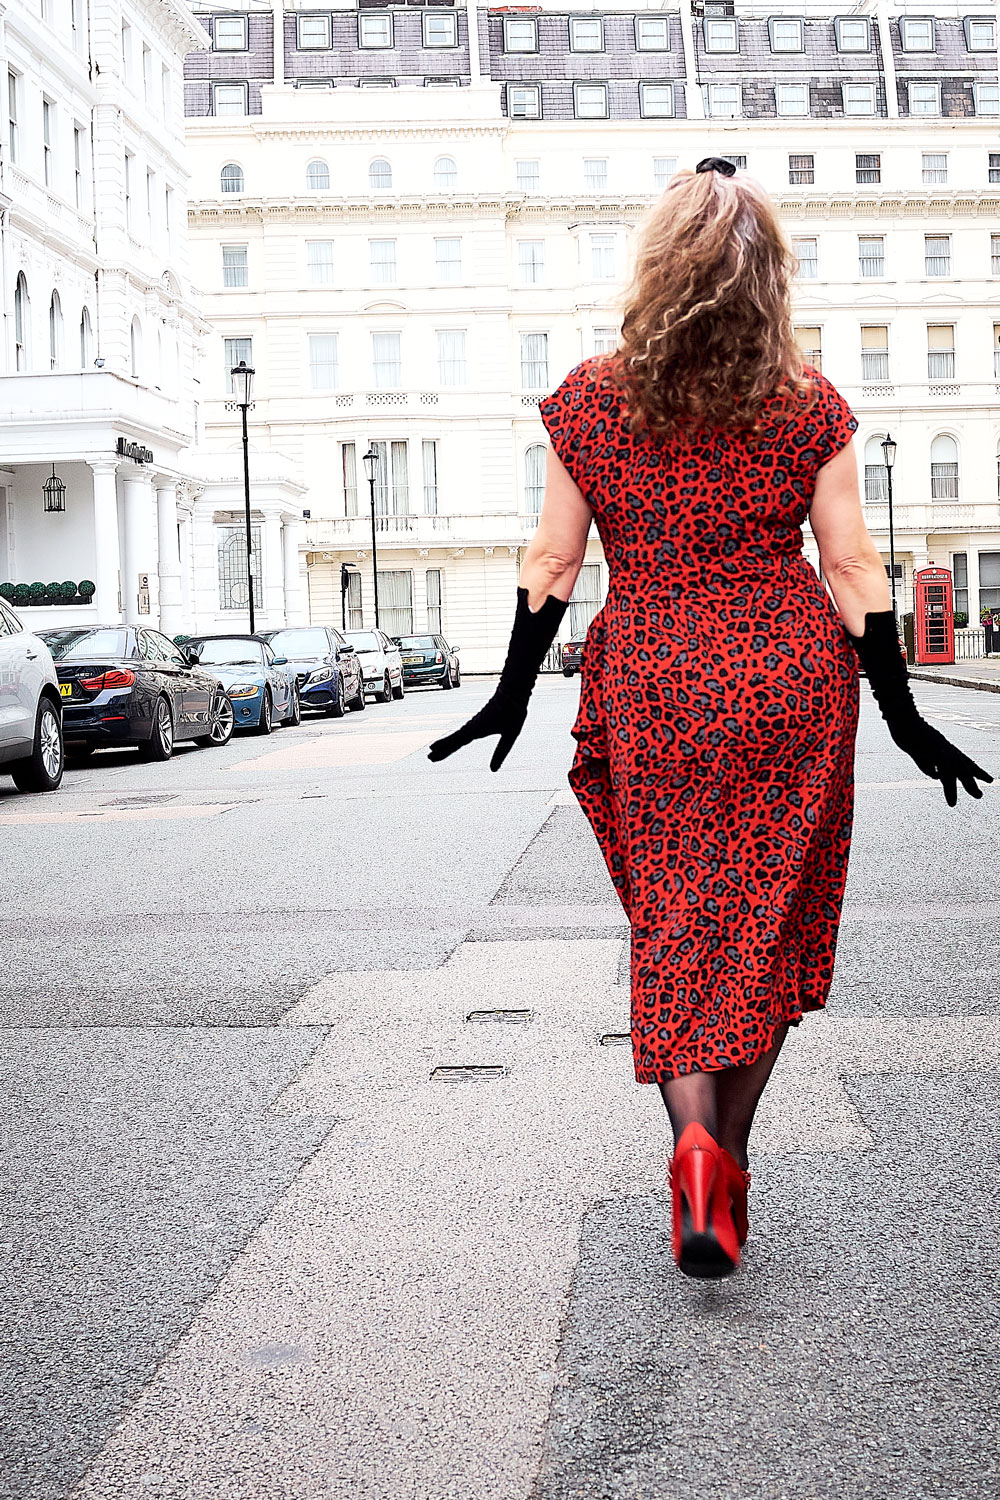
B5880 back view

I sewed out a dart on the mock up to check it worked before cutting out my main pieces.

And here is where the fun started. That wrap piece is huge and because I wanted to keep the entire length of the skirt (I know right… where has Janene gone!) I had no chance of cutting out on my tiny kitchen table. I remember thinking laminate flooring would be a great idea in the living room so I could cut larger pieces. And it is mostly. But wiggling crepe and shiny scissors meant I was crawling around on the floor for aeons! Getting up and straightening up afterwards was an insight into being a hundred years old!

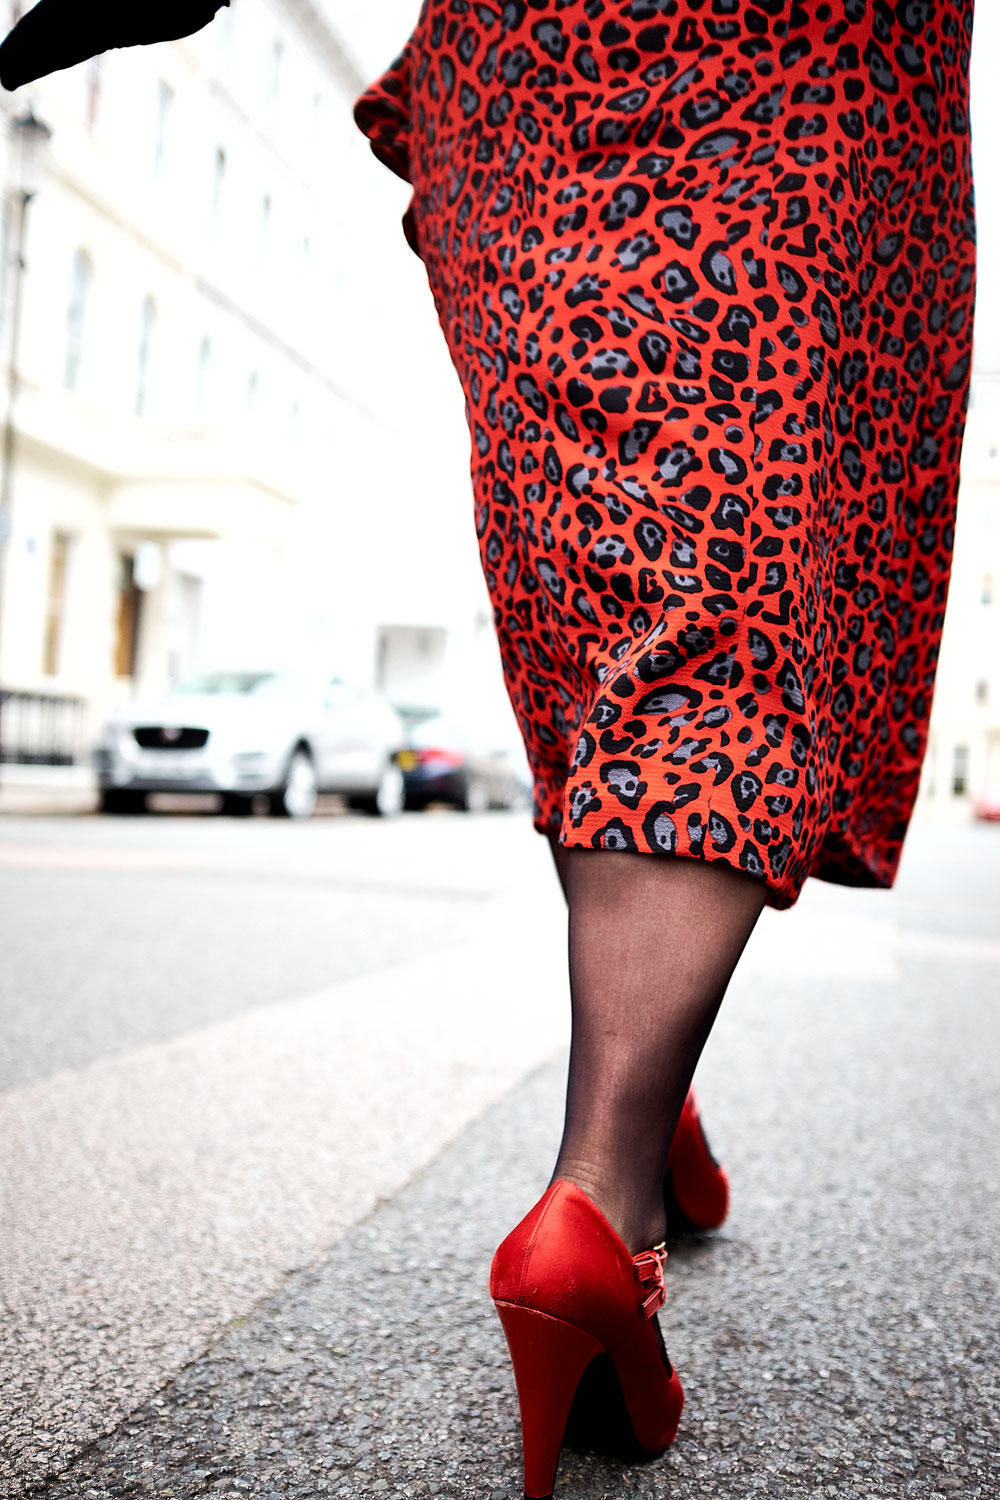
Back view of skirt and heels

And just as I’d finished I had to cut the lining, too. All the moaning and groaning that day – you’d never have guessed it was my favourite thing to do!

The bodice came together pretty swiftly. I’m always a bit scared to clip so close to the point of a ‘V’. And you can see a smidge of the lining as a result. But I’d rather that, knowing its stronger as there will be some stress on those points at times. But kudos to the Vilene G710 Light Woven Iron On Fusible Interfacing I got from Minerva Crafts. It was such good quality and it was definitely key for providing just enough structure so that neckline doesn’t roll out.

B5880 retro butterick dress neckline

I pinked the seam edges and the lining edges. Mostly so there would be no additional bulk on pressing. But also because it’s fun!

The main skirt pieces are dead simple to assemble too though I did overlock those seams. The bodice seams are enclosed and it felt safe to pink but when this dress ultimately gets tossed around with a wash load of other stuff, I worried the skirt seams would be more vulnerable and susceptible to fraying. And I didn’t want that after all the effort invested.

Now let’s talk wrap! All I can say is that I’m jolly grateful for that QR code bottom left of the pattern cover, that links to a very good tutorial by Professor Pincushion. I read the instructions included with the pattern about 50 times over and still couldn’t work it out. But the video was instrumental in working out those pleats.

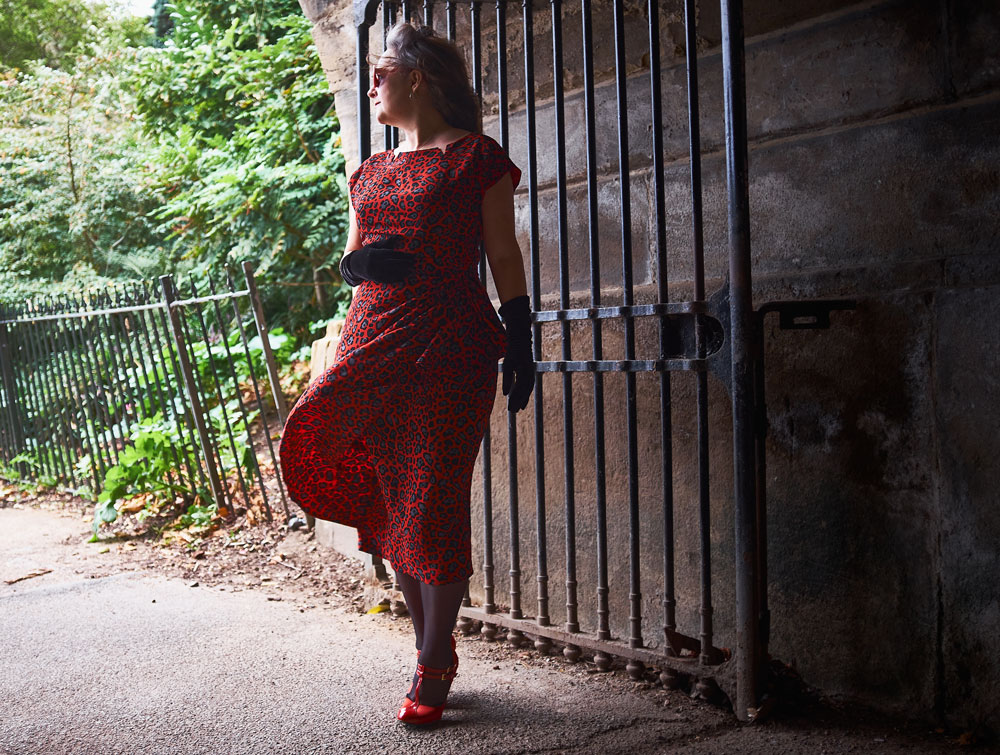
B5880 retro butterick dress shot in a tunnel

I had assumed the wrap was a singular piece. And it would probably work just as well assuming ones fabric is double sided. But I like how much neater it’s finished by being faced. It adds a fair bit of weight though, and there’s quite a bit of stress where that pleated section joins the waist seam so will have to keep an eye on that. The full lining adds even more weight to this dress but its not a bad thing. It slides on with ease, helps the dress to hang better, prevents any show through and feels so special to wear.

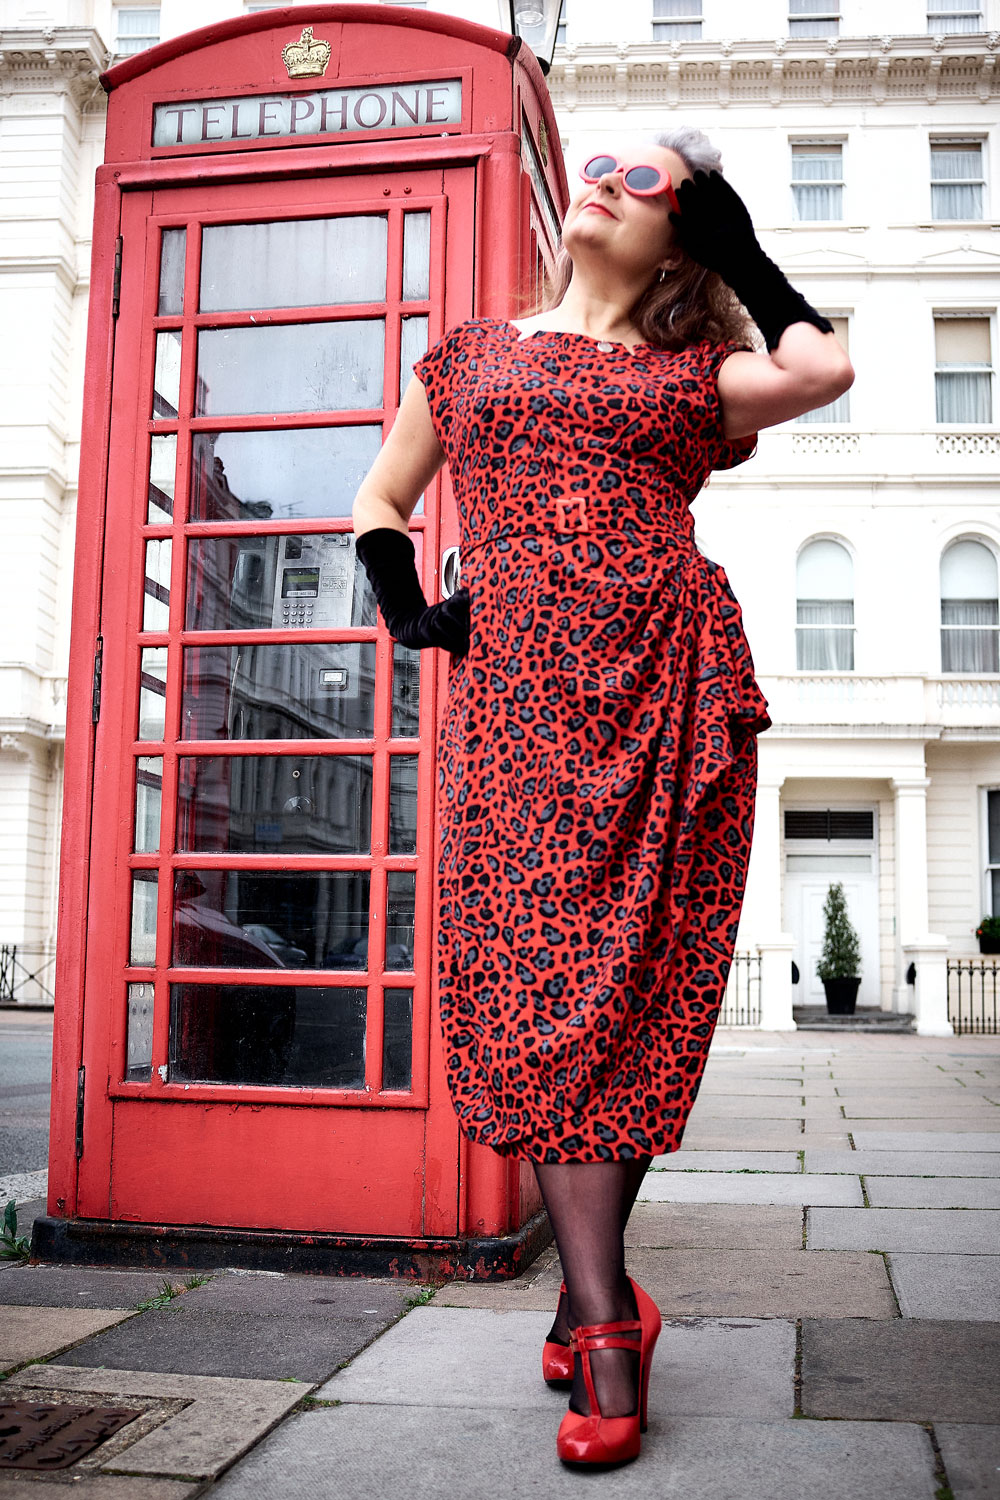
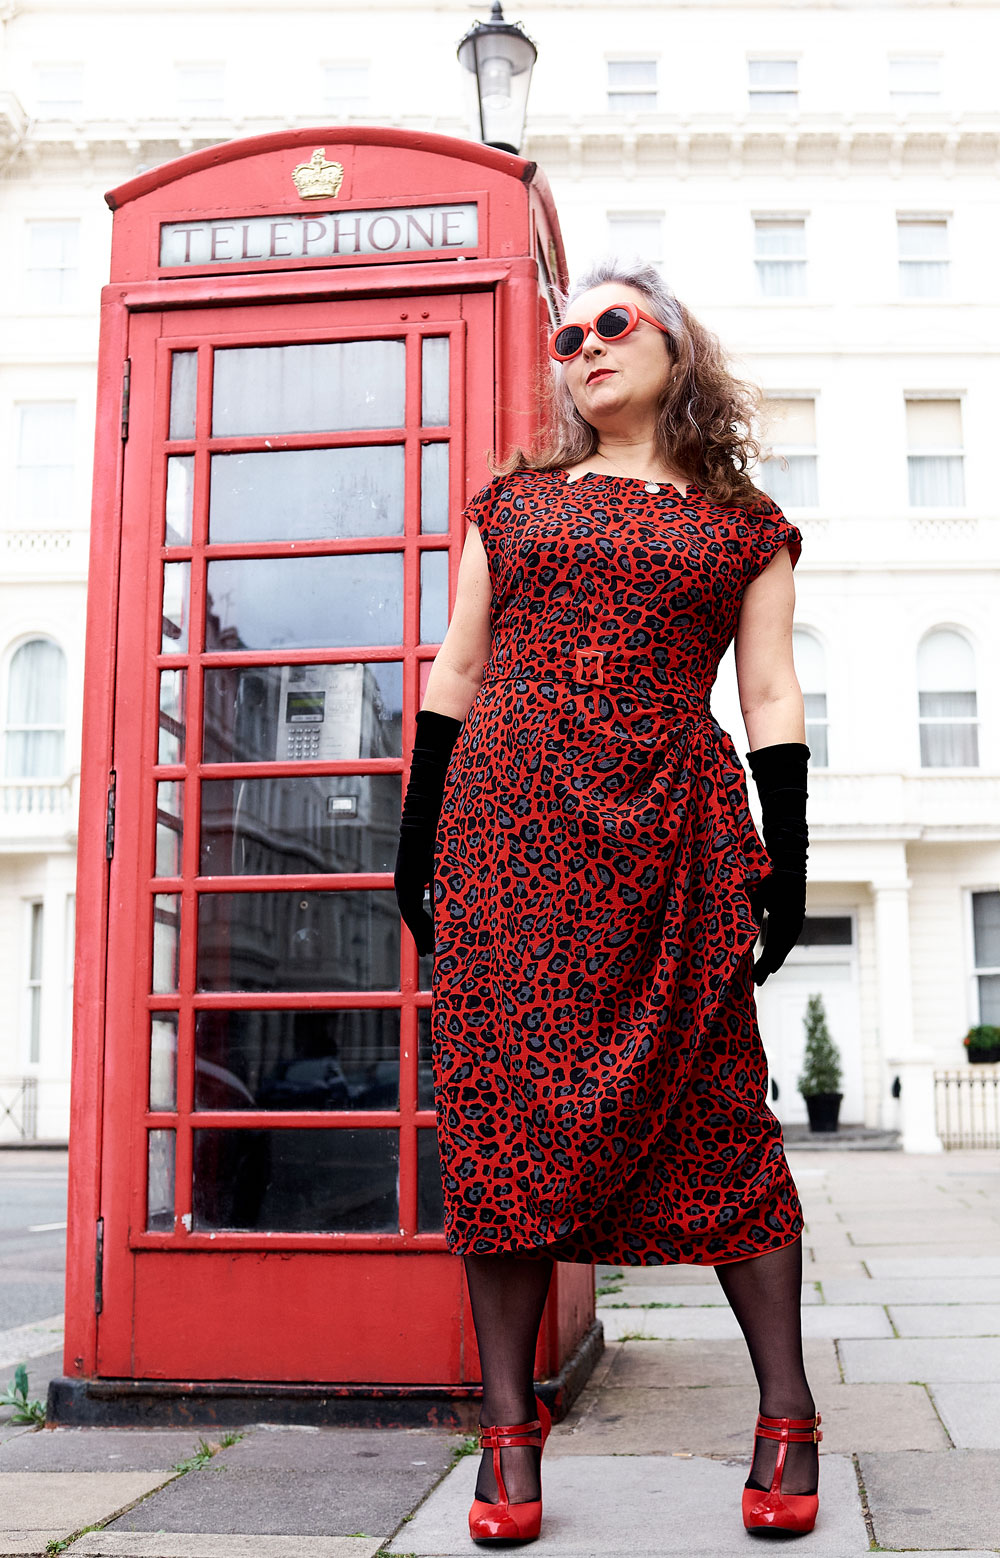
B5880 dress and London telephone box

Following the marathon hand finishing session (shoulder seams of lining, joining bodice lining at waist, hemming, French tacks) I almost forgot about the belt! That was pretty simple to whip up though. It’s basically an interfaced tube, sewn, trimmed and turned. Though the turning was not fun at all! Once pressed, the flat end is folded over the central bar of the buckle and hand stitched down. Luckily I had a small collection of vintage buckles to choose from – the asymmetric red one was a clear winner.

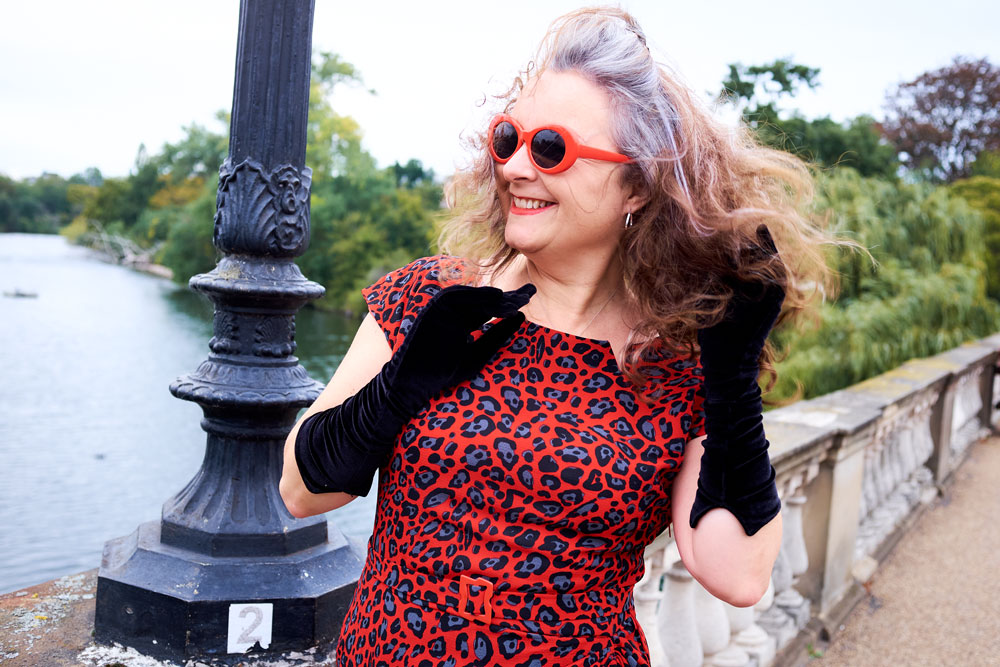
Although this is clearly a 50s dress design, it could so easily pass as 80s and be dressed down with Doc Martens and a denim jacket but for the purposes of our shoot on Sunday, I felt the need for glam – heels, care of Shelter Charity shop, Long velvet gloves from British Heart Foundation charity shop and Sunglasses, a lucky find in Cancer Research charity shop. Stockings bought from What Katie Did.

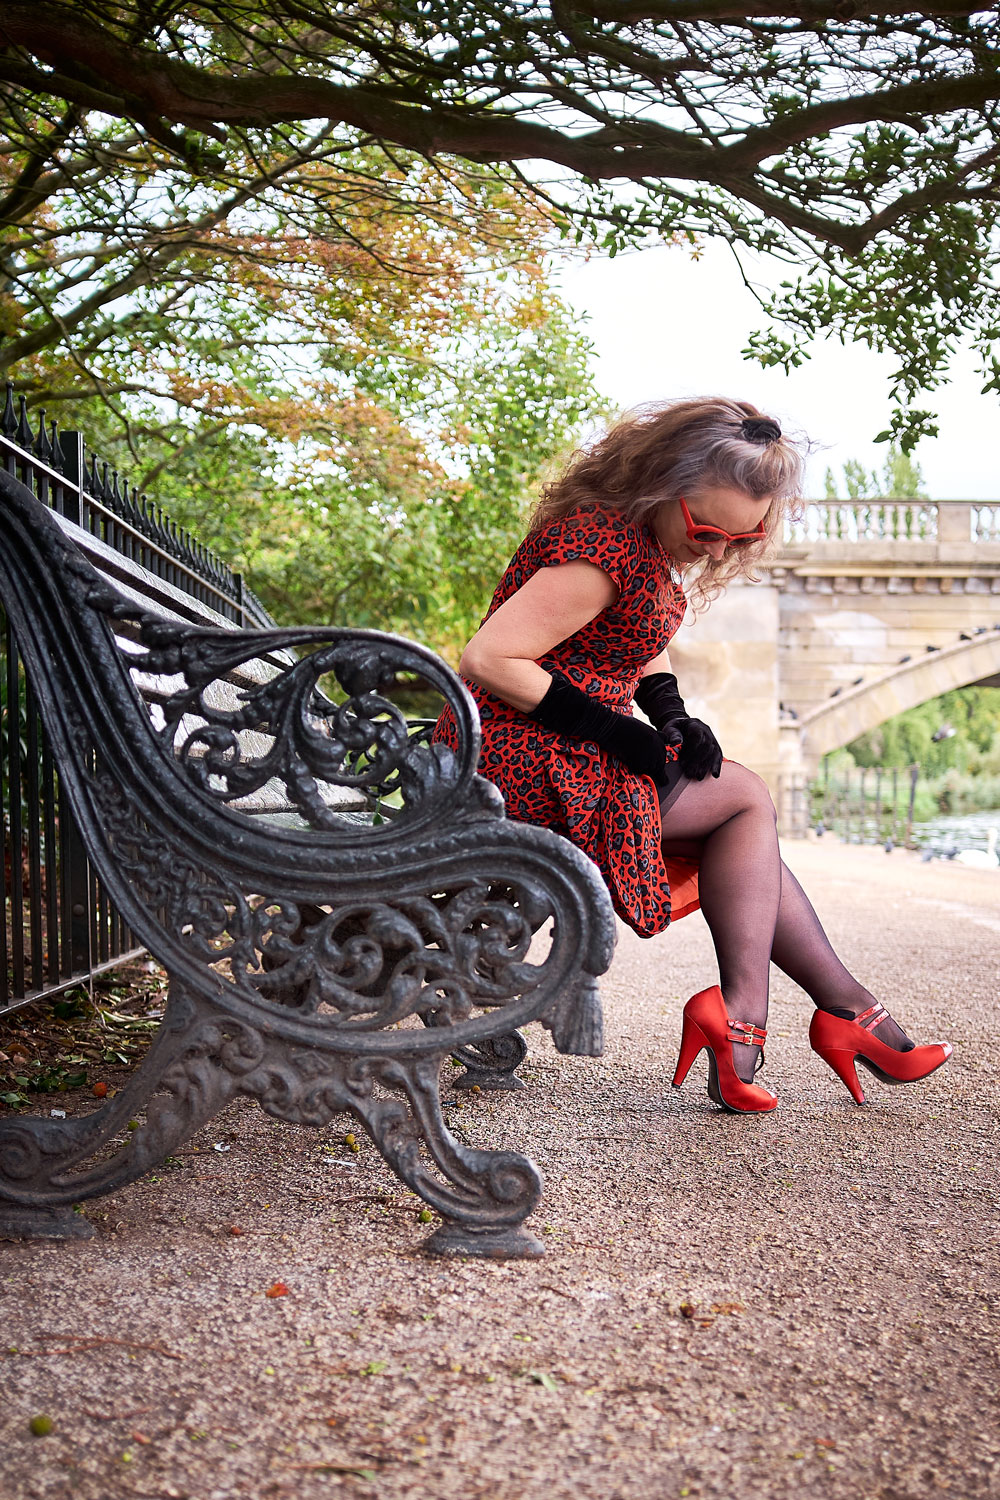
Adjusting stockings on a bench by the Serpentine, London

And yes, actual stockings! I’m so out of practice and really nervous of them pinging loose and ending up round my ankles. But they felt so good to wear with a dress of an ‘appropriate’ length and added to the feel good factor.

The weather wasn’t the least bit inspiring at the weekend but Dan was so keen to shoot with his new camera insisting that there’s no such thing as bad weather as far as photography is concerned. He’s mostly right of course, especially looking back at these photos, and I’m so pleased his eagerness helped me to meet the challenge deadline, but I might argue that wind is the exception to his rule!

 Windy day and wild hair

Some of my other favourite vintage makes:

Photography by Daniel Selway

Burda bell sleeve dress

burda bell sleeve dress

Happy new year my lovelies! I do hope you’ve all had a fabulous time and that January 2018 hasn’t arrived with too much shock to the system.

Such a weird time of year this first week of Jan. My lead up to Christmas – probably much like everyone else’s – was a flurry of work and panic shopping, drinking and feasting to excess like crazy bear people and without so much of a sniff of sewing time, and then… it’s all back to normal. Or as normal as it gets. And now I’m left in a constant state of thinking I’ve forgotten to do something, or that I’m meant to be somewhere. And it’s really hard to to rein in the graze and remember to go for the tap and not the wine bottle. Sound familiar?!


I awarded myself some sewing time between Christmas and New Year and the balance is still good so far, following week one in the work-house so I’ve signed up to Rochelle’s #2018makenine on Instagram – an easy enough challenge whereby we are encouraged to declare nine things we’d love to make throughout the year. And last night I managed to strike one of my intended projects off the list. Well two, actually, if the one I made for New Years eve counts!

ooobop 2018makenine

This dress a very gentle casual-style ease back into the sewing game kind of project: Burda Style Issue 12/2016 Bell-sleeve dress. It’s been a long while since I made anything Burda and I forgot all about wanting to make this dress till I had a had a sort out of my magazine collection. I’ve been collecting them since December 2010. I’m sure it would be easier to search up what I wanted on the site and download the pdf pattern but I quite like that I always have the pattern already and don’t mind tracing it off too much. Especially when there’s not too many pieces involved.

Burda bell sleeve dress in magazine

Really not very much to report on construction: A couple of bust darts and a neckline facing with a bit of understitching being the only faffs. And then my usual alterations. A sway back adjustment for one. So I just located the waistline and effectively took a horizontal dart 5cms from the back seam tapering to nothing at the side seam. It’s amazing how much of a difference this makes.

burdastyle bell sleeve dress by ooobop

I used a stretch jersey as recommended but was confused by the need for a zip. So I tacked the back pieces together to check the fit before I went and sunk those tiny stretch stitches into the fabric.

It was a good bit of hindsight and proved that I didn’t need a zip at all so I hi-fived myself and stitched it down.

The only other adjustment I made was to nip it in at the waistline a bit by marking in an inch and tapering back out to the side seams. Not too much of an issue as I was going to overlock a small seam allowance afterwards.

The fabric is a very soft, substantial jersey knit with a bit of glitter action so I can still carry a bit of a party round with me even though the season is done and dusted.

burda bell sleeve dress full length

The funnel sleeves are what sold me. They add a bit of fun and create a great silhouette to what is otherwise a very simple V-neck dress. The flounce is added to the sleeve before sewing up the under arm seam and insetting.  And not for the first time, I am so impressed with the perfect amount of ease Burda gets right on the sleeve cap every single time. Not a pucker in sight!

Well this dress has definitely filled a gap in the wardrobe: It’s perfect for work, 80 deniers and boots; worked great with a pair of Doc Martens (and a warm coat) for a river walk today and I’m sure a pair of heels and some twinkly earrings will transform it from a day to night-out dress. All bases covered!

It really does feel so good to be back behind the machine. I was so busy with work leading up to Christmas that there was no time for sewing and I missed it so much. I’m hoping to cut into the next one on my list soon and keep up a bit of wardrobe re-stocking while I can.


Sewing Dots for RNIB

Tilly and the Buttons Fifi pyjamas

I get so resentful when I don’t get any sewing time. And I don’t sport a good grumpy look either. So with back-to-back work deadlines this month, I needed to find a little sewing project that I could tap into in between marathon stints in front of the screen to retain balance and sanity… for everyone concerned!

#sewdots was brought to my attention on Instagram. Instigated by the brilliant Rosie of DIY Couture and writer of No Patterns Needed. She also works for the RNIB – Royal National Institute for the Blind – where she learned about their campaign that runs every October called Wear Dots Raise Lots. It highlights the impact of Braille and raises money for their services. It encourages the wearing of dots to raise awareness, encouraging people to hold dotty parties, or coordinate with colleagues and pick a ‘wear dots’ day for the office.

So Rosie has upped the ante to encourage the sewing of dots too!

The idea was to use fabric from stash and donate what you would have spent via the JustGiving page she has set up. Simples!

This was all shaping up nicely. I had two pieces of coordinating red and white polkadot fabric. And I had a Tilly and the Buttons Fifi pyjama pattern on my to do list. A pattern that needs little space to cut out and can certainly be achieved in manageable chunks of sewing time.

The Shorts took 40 mins, including cutting out time. And including unpicking my first elastic attachment!
The camisole happened a week later… over 3 days: The cutting and stay stitching in one shift, the main body sections sewn together in another, and the binding made and sewn on before work one morning. I sewed on the bow and attached the back straps just now!
But I’m sure if you had dedicated and uninterrupted sewing time, you could easily rustle this set up in a couple of hours.

handmade polkadot bias binding
Handmade polkadot bias binding

This is such a neat and gratifying garment to make. all the seams are ‘Frenched’ and it’s as neat inside as it is out. It really doesn’t need much fabric and if you are lucky enough to have coordinating scraps, the design possibilities are endless.

French seams
Lovely neat French seams!

And to boot, I have a lovely set of PJs at last! It appears I’ve made them for everyone in the household except me. I know they are slightly out of season but I really don’t care. I’m going to make more.

Theres still days left this month if you’d like to participate. There’s some great prizes up for grabs too!

Doesn’t have to be a garment of course. Could be a much smaller project still,  like a sleep mask or a headband or a scarf!

I can totally assure you that sewing and giving is a great self-indulgent, feel-good combo too. Good work Rosie!


#Blazerof2016 and tips for tracing Burda patterns

So this week, I finally chose what pattern to use for #Blazeof2016. I’ve decided to make it extra difficult for myself by going for the minimal instructions of the Burda Style magazine pattern from February 2016 issue, and I’ve just got as far as tracing the pieces. It took most of Saturday afternoon but that’s ok because I had an empty house save Phryne Fisher and Jack Robinson to keep me company!

Burda blazer pattern trace


The tracing took longer than usual not just because of all the pieces but because I was aware of how easy it would be to miss a notch or a mark of instruction. So I was like a detective myself, scanning the spaghetti lines with eagle eyes! I want this jacket to work so I need to make sure every detail is attended to. It didn’t help that the red lines on the pattern sheet I was following clashed with the red pattern pieces of the featured ladies blouse. This could wind up a very interesting hybrid ‘blouzer’, but let’s hope not!

For anyone who’s daunted by the tracing of Burda patterns – and let’s face it, that’s most of us – the following might be of help:

Top tips for tracing Burda patterns

  • Work on a large clean flat area
  • Use pattern weights or similar to hold your papers in place as you trace
  • Refer to the Pattern Overview to ensure you capture every notch, seam number, slit mark and grainline arrow
  • Tick off each piece in the list as you go

Burda pattern overview
Pattern Overview and Cutting Out list

  • Label all of your pieces with Model No., size and piece description / number
  • Remember seam allowances are not included so write that clearly on your pattern pieces too OR add them to your pieces and mark that they are included*
  • Photocopy the image to file with your pattern envelope if storing separately

*I will be making size adjustments to the pattern so I have left the seam allowance off. It’s way easier to play around with minus SA. And then I will either add it at the end or mark it directly onto the fabric when the pattern is pinned on.

Incidentally, the fabric we’ve decided on is a gorgeous traditional boating stripe from Yorkshire Fabrics. 100% wool, made in England which raises a little smile every time I see that selvedge! Doesn’t come cheap so I’ve wrapped it up like a precious swaddled baby and put it away for safe keeping until the calico version is made good. No chances being taken here!

boating stripe fabric

I really am in the slow lane here but there is a distinct advantage to this. Have you seen how MaleDevonSewing is steaming ahead with his amazing tailoring skills? For anyone else who is pootling along like me, he has posted some cool construction photos and instructions. Most of which I’ve never heard of. All of which I will be employing!

Di Kendall has shared the progress of the lovely striped blazer on her blog and it’s great to see lots more activity from other participants of #Blazerof2016 on Twitter too. Keep posting your progress… I need all the help I can get!! 😉

#Blazer of 2016: Potential Patterns

blazer of 2016

Thank you so much to everyone for your lovely words of support for #Blazerof2016 and especially to those who have signed up. And for anyone who’s teetering on the edge of joining in there’s still bags of time!

Typically my working-week has been busier than expected and there’s been no room for sewing but I did manage a little recce of potential sewing patterns that I’d like to share with you. Don’t hold your breath though. It won’t take long!

This little scout round the web – and to be fair, it was a little scout – has had some surprising results. When MaleDevonSewing suggested that menswear only represented 6% of sewing patterns, he wasn’t exaggerating!

Searching through the contemporary and classics of the Big 4‘s, this is all I came up with:


Burda 6813
Source: Jaycotts


Burda 6872
Source: Jaycotts


Burda 7194 Mans jacket
Source: Jaycotts


Burda 7046 Mans blazer
Source: Jaycotts


Burda 6993 mans jacket
Source: Jaycotts

Kwik Sew 3485
Source: Jaycotts


Vogue 8719 mans jacket
Source: John Lewis


Vogue 8988 jacket
Source: John Lewis

Of course there are only so many variations a man’s jacket might display, for example: the pockets, the lapel shape, the vent, if any, button cuffs or not, lined or not etc. No Westwood meeting McQueen with crazy shoulder shapes and asymmetric cross body lapels but that’s ok. We’ll make it interesting in our own way, right?!

So Burda gets the prize not just for the most patterns found but also for their jacket patterns featured in this month’s Burda Style magazine. What were the chances of that?


Patterns found in Burdastyle 2/2016


How are you getting on with your pattern searching? Have you found any designs by independent sewing pattern companies or have you gone vintage? There certainly seems to be more of those floating around. However, Mr O has a broader chest than most of those 50’s men it seems, hence my Big4 search. But to be fair, to find anything larger than a 44 chest in a modern day pattern is pretty rare too, it seems. Unfairly represented in more ways than one, then!

I think I’ll be going with the pattern on the left hand page of Burda Style magazine. I’m a bit nervous of the minimal instructions but I’ll be calling Jamie to the rescue if I get stuck! So calico at the ready I hope to be tracing and toiling sometime soon.