Another turtle neck top complete – in time for MemadeMay

May is one of my favourite months for many a reason. The weather is warming – I so can’t bear the cold – and I’m more likely to get out more for walks and to visit my favourite places and people after a long hibernation period. It’s also the month that the lovely So, Zo What Do you Know? hosts the #MemadeMay challenge. Now it’s fair to say that each year this flurry of instagram selfie shoots gets easier for me as my wardrobe becomes fuller. But Lockdown has narrowed my choices somewhat by what fits and I’m going to have to make some more clothes. Shame, eh?!

I’m kicking off with a new turtle-neck top, using the same self-drafted pattern as the black one I made not so long ago, which I might add might possible be my most worn thing ever, already!

Nothing needed to change but I really wanted to see if I could elimate some little folds from the underarm, across the bust. I figured that underarm armhold point might be sitting a bit high, so I lowered it a quarter of an inch and adjusted the sleeve to match.

It does fit a bit more comfortably but didn’t reduce the wrinkles! Haha. Still a lesson learned though. I luckily only adjusted the paper pattern. The digital version remains. But I am going to flatten off the sleeve head. It does seem to force my shoulder end to sit a little too high and it does measure a couple of mm’s longer than the armhole and because its a stretch knit there is no need for ease, so it will probably help. I do like the power of being able to tweak patterns here and there. It gives me a little buzz of control!

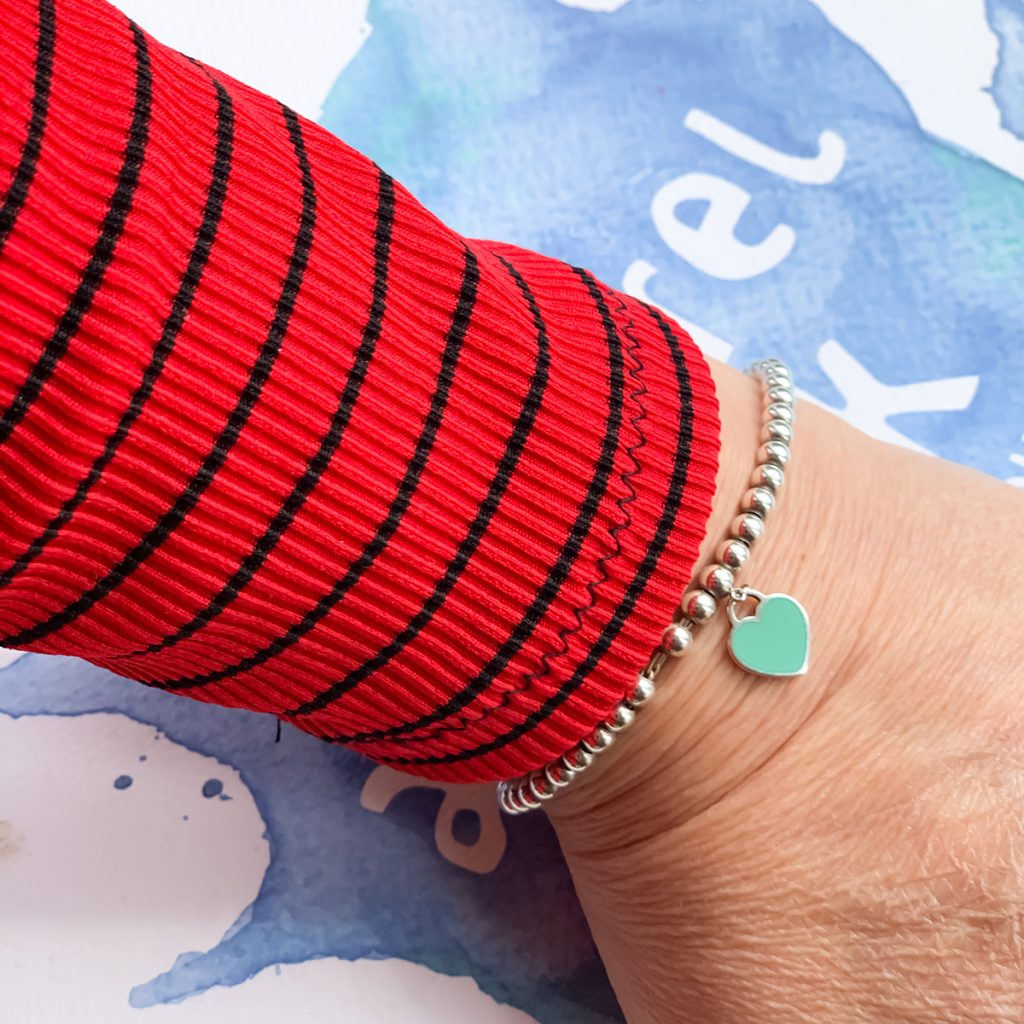
Once again the lazy in me couldn’t be arsed to set up another spool let alone the twin needle for the hems. So I zigzagged as usual. I kind of like the contrast of the zigs in between the black lines.

And I got the neck right this time! No silly amount of stretching. Just enough to fit. And its even more comfortable than the last.

The fabric is once again from Minerva.com. It’s a polyester rib knit in a lovely bright red colour with a narrow black stripe running round. I even made sure to match the stripes at the side. To be fair I wasn’t going to worry about it but the fabric behaved so well, it was harder not to!

This isn’t the end of stretchy tops. I definitely need them right now. And there is still room for improvement, and welcome opportunity for experimenting with different fabrics. Watch this space!

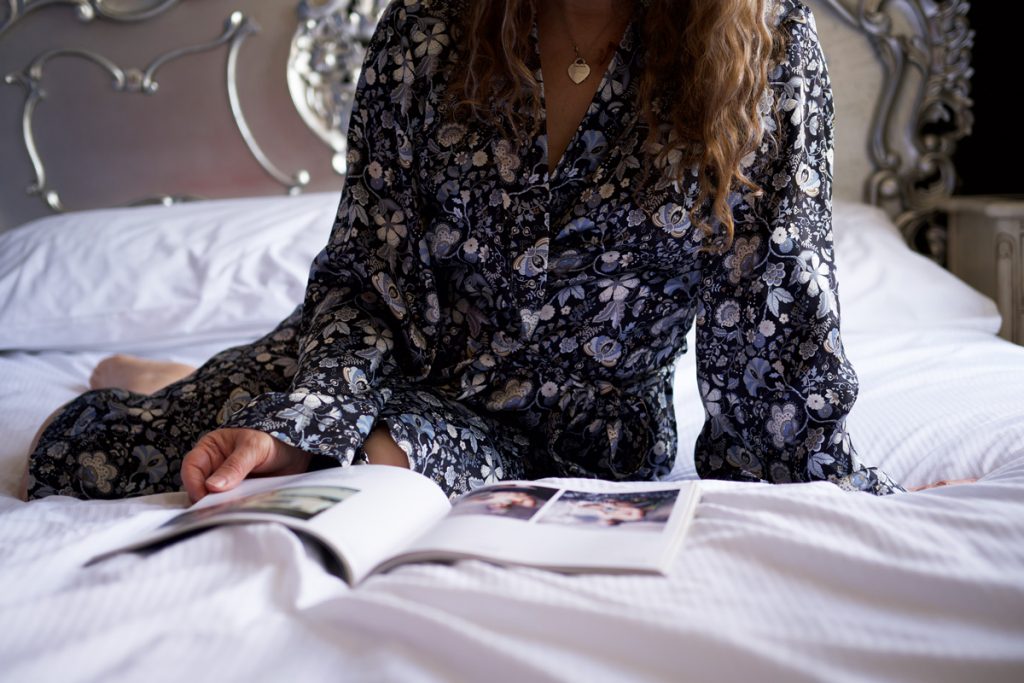
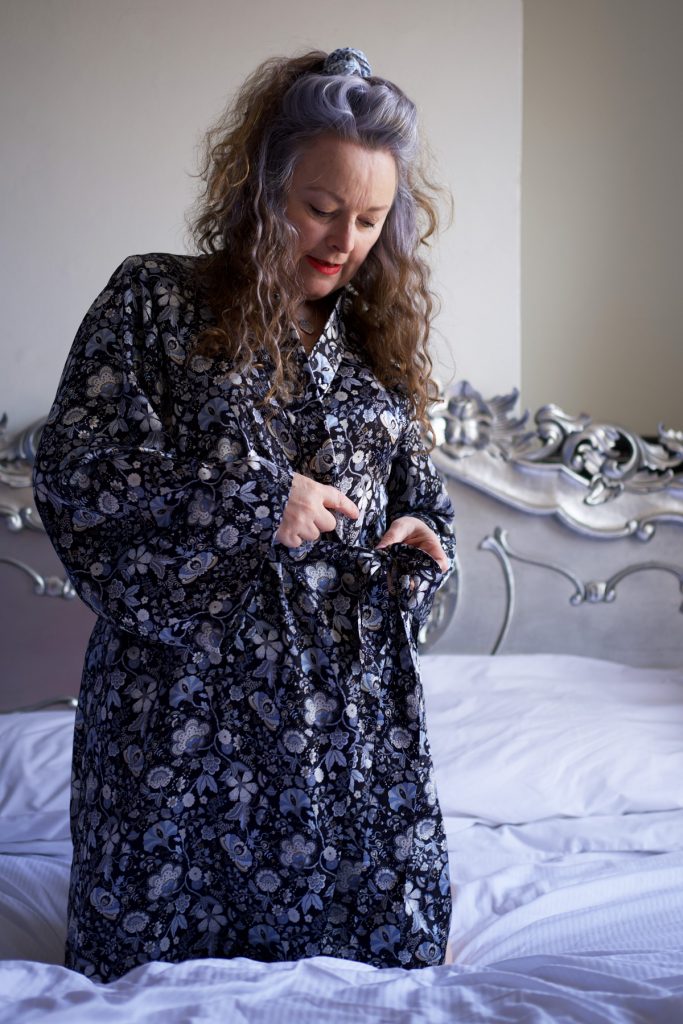
Vogue robe in a luxurious Liberty silk – my wfh wardrobe is looking better already!

I generally don’t have a go-to order for dressmaking. My thought processes vary according to mood, need and weather. Sometimes choosing pattern first and then pairing an appropriate fabric, sometimes the other way round, especially if I’m fabric shopping in real shops and then an idea will spring to mind while I’m stroking and bouncing and draping and holding all the materials aloft. The latter is a dangerous game though, and hasn’t helped stash mountain at all!

But when Minerva approached me with some Liberty silk offerings I was quick to choose which fabric but wasn’t so quick to pair a pattern. What a gift! But wow… what a blooming responsibility! What pattern would best showcase this heavenly fabric?

I needed a project with damage limitations. It had already arrived at a super work-busy point in time and there was only room for assignment within small allocated time-slots throughout the weeks.

Mood and need and weather came to the fore. I was so tired of shuffling round the house in my tatty old dressing gown. Sometimes I don’t even bother getting out of it to work – there’s actually no need when I’m working from home and nobody is going to see me. But a silk robe would have me sitting more upright, feeling so much better about myself, plus it’s getting warmer so I really don’t need to be enveloped in velour anymore. I had a need to swan around in silk! And a robe would be simple, right?!

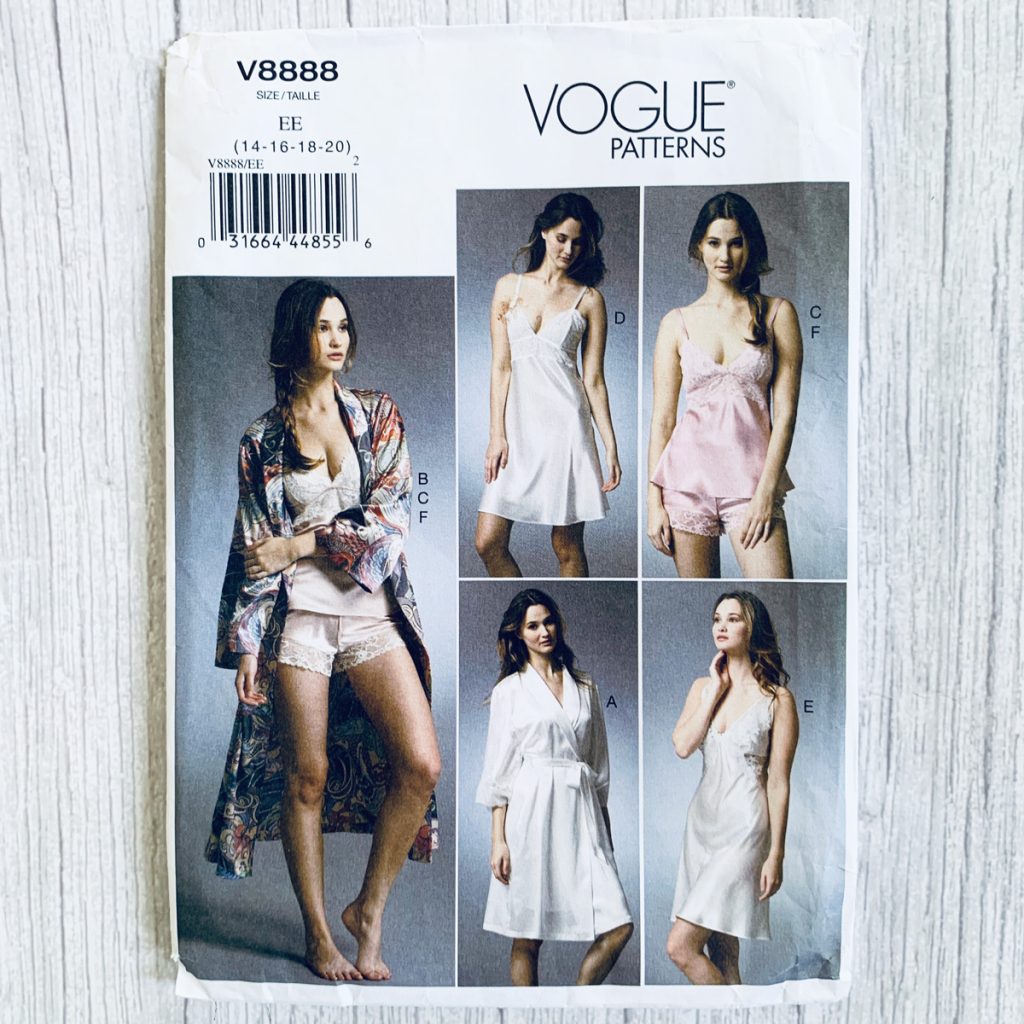
In an ideal world I’d have drafted the pattern myself. I’m getting quite fond of the maths. But with time not on my side that wasn’t going to be a great option because it would need toiling, too. So a quick scout on the web presented me with V8888. A delightful selection of nightwear to accompany a very stylish robe. I ordered it from Minerva.

I also ordered a very large cutting mat and a new blade for my Fiskars rotary cutter. I’ve worked with silk satin only once before and it was a slippery beast. My scissors slid around the dining room table and I was cursing at every snip. But weighted down and cut slowly and carefully with said cutter, this time I had no problems at all. I was amazed at how little it frayed, especially with all the extra handling involved. Most of the seams except for the armholes are sewn with a French seam. And because I only had one shot of this, I checked and double-checked and triple-checked each side and pairing of seams before sewing. It was totally worth it of course because the inside is so neat and the robe so much stronger as a result.

I chose the longer sleeves for the shorter version of the robe. Because I like that look and it’s way more classy. The shorter sleeves involved a band of lace at the hem and that would have been far too fussy for the design of this fabric. I wanted to keep it as simple as possible.

But I had not anticipated all the rouleau loops. Haha. There was me, thinking simple robe tied at the waist with a belt. The belt was actually such a joy to make and press. So satisfying. But the loops I left for another day. And another day. Until I didn’t really have many days left to submit the finished article!

So I cracked on. And fell at the first hurdle. My smallest loop turner was too fat. The smallest drinking straw I had in the kitchen drawer (for the drinking straw/kebab stick trick) was too fat as well. So I remembered a trick my mum taught me, by tying the long threads left at the end of the seam to the end of a bodkin, or large-eye needle, and pulling through, eye of needle first. So satisfying that I was weirdly excited to do the rest and even made a little graphic tutorial for my sister in law!

There are two inside ties – one front left and the other inside right side seam. There are two belt loops inset on each side seam and there is a thread loop at the right front opening. I’m thinking of doing a tutorial for that too as it was quite fun to do.

I am so grateful to Minerva for the opportunity to sew with this fabric because it has definitely delivered some more valuable experience as well as a super luxurious wfh outfit! I must admit I was terrified of cutting into it at first but once I got going, any fear was allayed, largely due to the quality of those threads. It’s so stable, on grain and not at all like the silk I previously sewed that was fragile enough to catch on the rough skin of my hands! Liberty silk is most definitely worth its price point.

And just to note, it does make me sit straighter, it feels amazing to wear and it has got me out of doing the washing up!

Daniel is of course the man behind the lens and this was such a fun shoot. The look on my daughter’s face was priceless when she poked her head around the bedroom door to see what we were up to. Even more so when Dan said ‘Its not what it looks like’!! Haha. We are so doing our best at being embarrassing parents!

Please note: I am an Ambassador for Minerva and the fabric was given to me free of charge in exchange for a review. I purchased the pattern and all notions required. To see the original article and more of my Minerva Makes. Please visit my Minerva profile.

Self drafted Turtleneck knit top

black rib knit top worn with plaid shorts

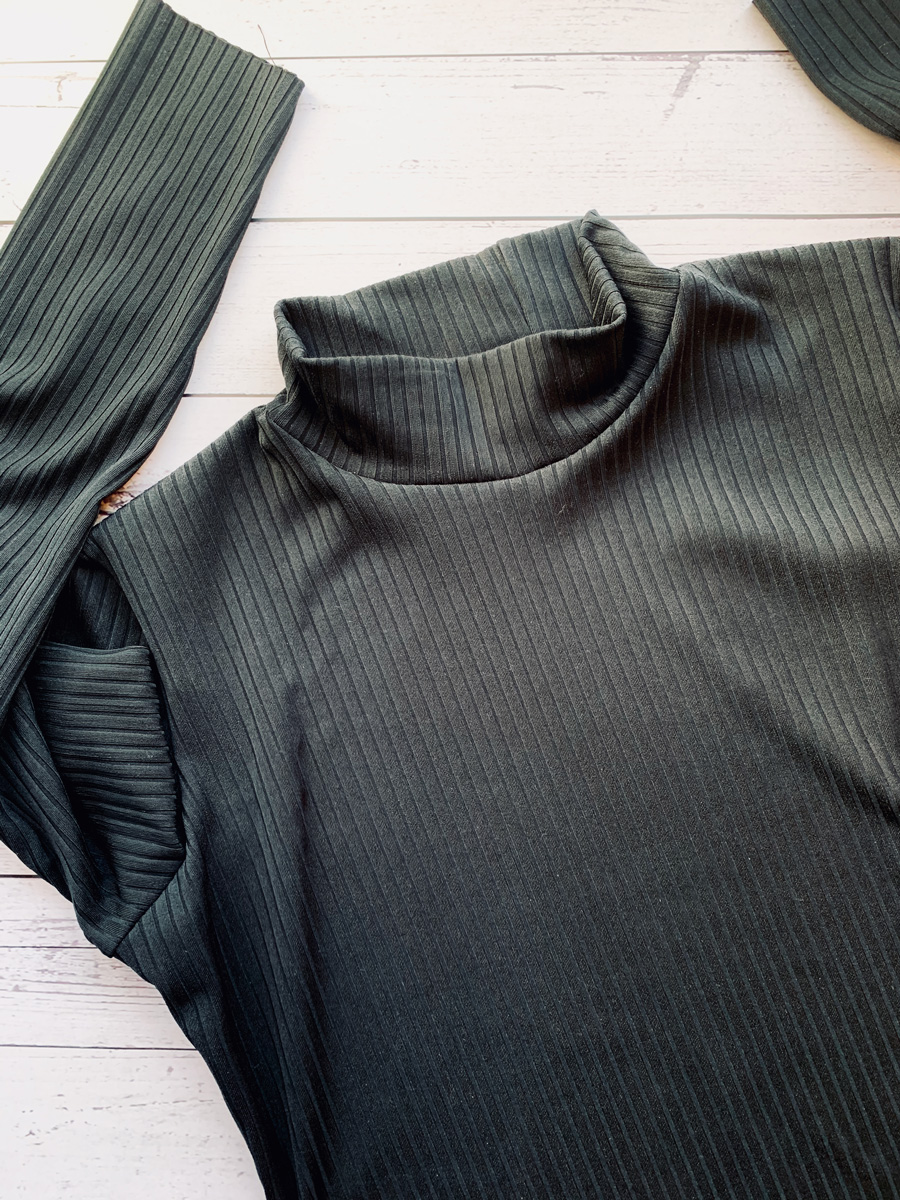
The last thing I made was this turtleneck rib knit top. Most probably up there with some of the most boring things I’ve made, but actually a top that ticks a lot of boxes.

I self drafted it for one and learned something new in the process. I’ve self drafted a fair few patterns for woven fabric to date, like this Liberty Lawn summer dress, a few shift dresses like this batik one, and more recently my handkerchief hem dress  to name a few. But I’ve never thought to self draft a knit pattern. Why would I? Its akin to reinventing the wheel as there’s so many great basic knit patterns out there. But I do love a challenge. And also have another agenda in the shape of some very special stretch fabric that is still waiting to be made into a well fitting dress so if I master a moulage in knit then I’ll be one step closer to designing a knit dress, right?

Black ribbed knit top flatlay

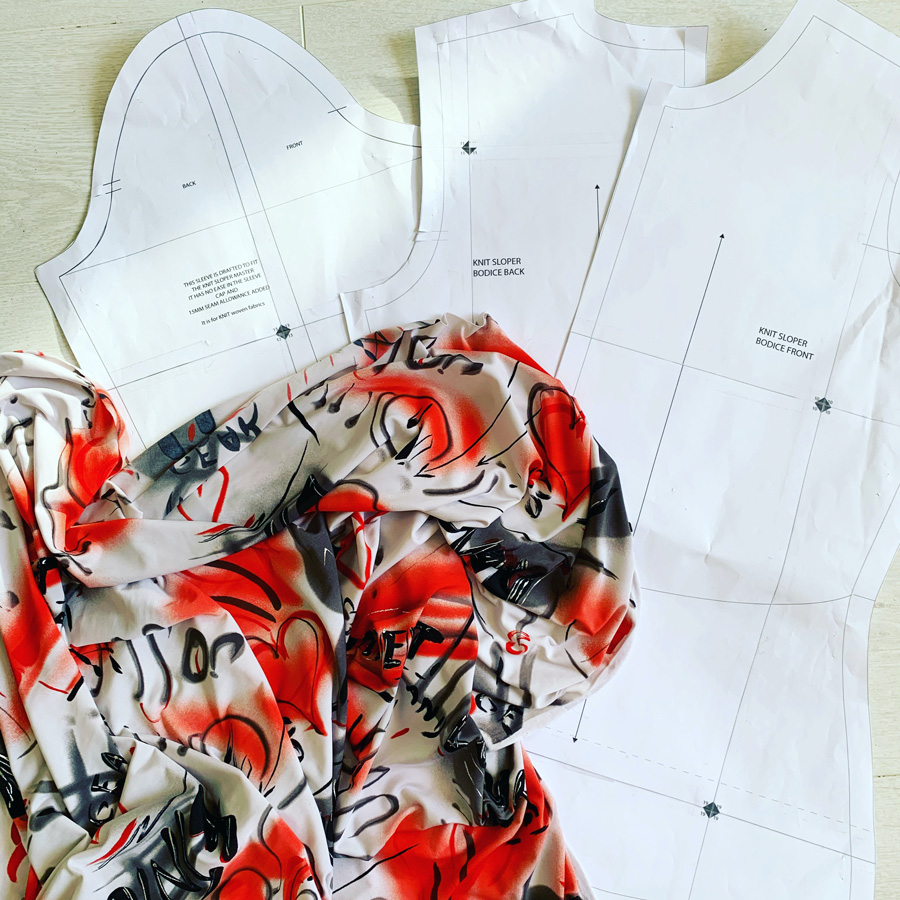
The process was actually very simple. In a nutshell removing the darts and any ease to create a close fitting shell that stretches around the curves of the body. I used my self-drafted woven moulage as a starting point and made the adjustments from there. I found a great lesson on Craftsy, by Suzy Furer and also referred to my favourite sewing book: Patternmaking for Fashion Design by Joseph Armstrong.

knit sloper pattern pieces

I tested it first on some nasty nylon fabric. To be fair I don’t know what the fibre content is but I’m certain there’s not an ounce of natural anything in it! Looks kinda cool with its graffiti design though. But I messed up royally on the turtle neck itself. Such a stoopid mistake. I made it 10% smaller than the neck opening which was fine. Sewed it in a circle to check it would go over my head which was fine too. Then stretched it as I sewed in place, much as I would sew a binding on a scooped neckline. Realising I had excess (as a result of over stretching) I cut off about an inch and a half, maybe even 2 inches more to make it fit. And that was where I went so wrong. I can just about get it over my head but its akin to being slowly strangled if I’m wearing it for more than half an hour!

toile of knit top in a synthetic graffiti print fabric

Everything else was just fine, though. Just made a massive note to self to not mess with the collar piece!

I especially loved that it was all sewn on the overlocker save for the hemming, so was super quick to whip up. One very important thing gleaned from sewing knit tops before is to stabilise the shoulder seam to stop it stretching out. I used some Prym iron on stay tape (aff. link) for the first time and it was so easy to apply in a straight line. Its been subject to a few 40 degree washes since and it’s still totally intact. Definitely no going back to sew-in tape now.

So then I made the black one with ribbed knit I bought in the Minerva sale for a snip! And I love it. Its so versatile – goes with all my skirts and shorts and also is a great under-layer for some of my self-drafted dresses, on a chillier days. Topped with a cardi for an extra layer its a definite win win win!

It’s just so classic, with a nod to retro too and has already had soooo much wear that it will probably wind up being the most sustainable item of clothing in my wardrobe for that reason alone.

I’d love a couple more of these. A leopard print one for sure and perhaps a red one … predictable much! But first I have to make something a bit more exciting. And I’ll tell you all about that real soon.

In the meantime, here’s to boring practical clothes that go with absolutely everything and for a quick sew fix too!

Are you sewing much over lock down? I’m struggling to get as much sew time due to work pressures – everything is taking so much longer so I feel like I’ve lost so many hours in my day. But all things considered, it could certainly be much worse!

Wishing you all well in any case.

Janene x

Tilly Agnes top with hacked sleeves

Tilly and the Buttons Agnes sleeve hack

I feel like I haven’t posted anything in yonks though I did publish a write up about my By Hand London Rumana Coat over at Minerva. That’s the deal, see. They send me choice fabric, I whip something up and give them an exclusive write-up in exchange. If you haven’t seen it on my instagram grid @ooobop, do hop over to here at my Minerva profile to have a looksee!

The coat was such a lovely project to work on but if you’ve worked on one before, and if you don’t get much time to sew, you’ll know just how long it takes in short bursts. As soon as I finished it I promised myself that my next project would be a quicker one. A Tilly and the Buttons Agnes top – Just the ticket for a swift sew on a spare Saturday morning.

Tilly Agnes top in crushed black velvet

For clarity I cut it out the night before, but seriously, this top was ready to wear by lunchtime.

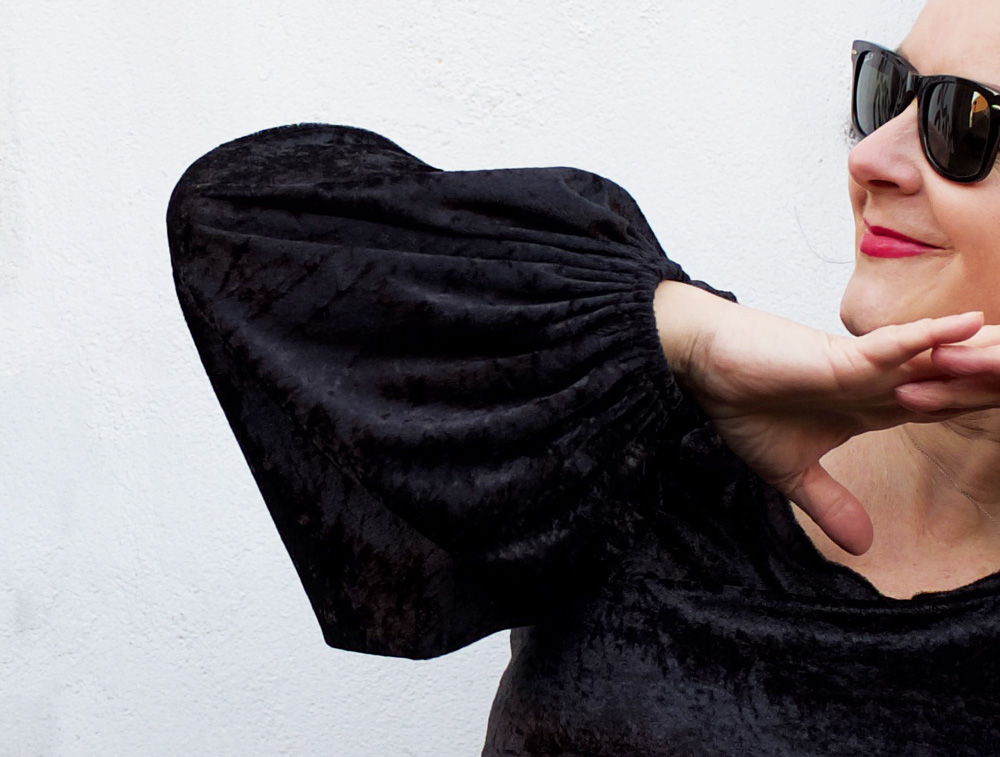
It helped that I’ve made three others before: One in a navy/ivory striped cotton jersey, a plain black cotton jersey one and a navy/red/ivory striped one in a gorgeous French Terry. Each time I opted for the ruched neckline and those gorgeous puffy sleeves but this time I thought I’d change things up a bit with a bishop sleeve.

To do this, I took the regular full length template and slashed from the hem of the sleeve to the arc of the sleeve cap. I spread the pieces, traced the result and repeated the process again with the new piece to create the flare.

I was tempted to go larger still but was worried the fabric would be too bulky gathered in at the wrist.

Tilly Agnes sleeve hack detail

The fabric is a gorgeous stretch crushed velvet from Fabrics Galore. I bought it eons ago when we were allowed to go actual fabric shopping. It was definitely earmarked for an Agnes and I’m so pleased to have stuck to plan for a change! My only concern was the extent of stretch compared to the jerseys I’d used before.

I measured the bodice pattern pieces and physically stretched the fabric to guesstimate the result and I’m glad to report that it fits. Albeit very snuggly! There would be no hope if there were any remaining mince pies to be had!

Though it has to be said,  I do like the contrast of the close fitting body against the draping sleeves. Luckily!

To sew this top you begin by stabilising the shoulder seams with some tape or ribbon or suchlike. I skipped this stage with one that I made with disastrous results – the shoulder stretched out like Billy-O! So I made sure to obey that instruction this time.

And then on to that neckband. Oh boy was I in for a ‘treat’ this time.  The object is to stretch the doubled over loop of fabric as you stitch it around the neckline. Well, the crushed velvet, as soft and lovely as it is, definitely wasn’t designed for such treatment. And it curled up like a goodun on the raw edge I wanted to sew. It became a nail-biting 8-stage process of pressing, pinning, unpinning, pressing, basting, pressing, sewing and eventually overlocking which thankfully sliced off the curl and the bulk thus making the topstitching way easier. I decided against the ruching at the neckline to avoid tempting fate!

Tilly Agnes top detail of neckline

From this point on it was seriously plain sailing. The sleeves are set in flat. No ease necessary on the cap. The side seams and underarm seams are sewn in one go. I used the overlocker for this – so satisfying! I hemmed the bottom up with a Zigzag stitch, mostly because I’m too lazy to set up another spool and swap out the needle for a twin one! In. Any case the stitches were going to sink in to the velvet so it didn’t really matter.

And finally I cut some Prym 7mm standard elastic (Aff link) just a bit wider than my wrist and wide enough to go over my knuckles plus bit extra for the overlap. (Its all very calculated round here!) I threaded the elastic through a gap in the sleeve hem that I sewed up and zig zagged the overlapped ends before sewing up the gap.

And then my hacked-sleeve Tilly Agnes was ready to go!

Tilly Agnes sleeve hack

I love that she’ll be a staple in place of any boring long sleeve Tee and can be dressed up or down owing to the slightly more luxurious fabric. Just got to remember to pull those sleeves up if I’ve got soup for tea!

And I’m so glad this was as successful as was envisaged because I have just taken delivery of a new length of equally gorgeous stretch velvet from Minerva in leopard print which I can’t wait to make!

Thanks to Daniel for my impromptu photoshoot. We went for a walk trying to avoid people and ended up down the back of the bus garage… such glamour!

Tilly Agnes top with sleeve hack

And thanks to you my lovely reader,  for taking the time to read my ramblings and for your continuing and valued support. Hope you are also managing to find joy in the small things to keep you happy in these weird times.

More soon
Janene x

The Wizard in My Shed: Costume for Simon Farnaby

Simon Farnaby wearing bespoke Merdyn costume

And now for my next magic trick . . . !

I’ve worked as a graphic designer – advertising, marketing and publishing – for more than 30 years now and its fair to say that some of my most fun jobs have been sewing ones, such as this apron for Ellie Simmonds and Laura Ellen Anderson’s Amelia Fang outfit.

Last week was a busy one and typical that I should get an Emailed request for another costume with precious no time to spare.

Poised to turn it down, I looked to Dan in despair that I was about to say no to such a lovely job and he said, “Say yes. And we’ll make it happen!”

We? I thought. And how?!

But his face was doing that convincing thing. I’ve seen it before and he’s always been annoyingly right. So I replied to that Email with a yes and a gulp!

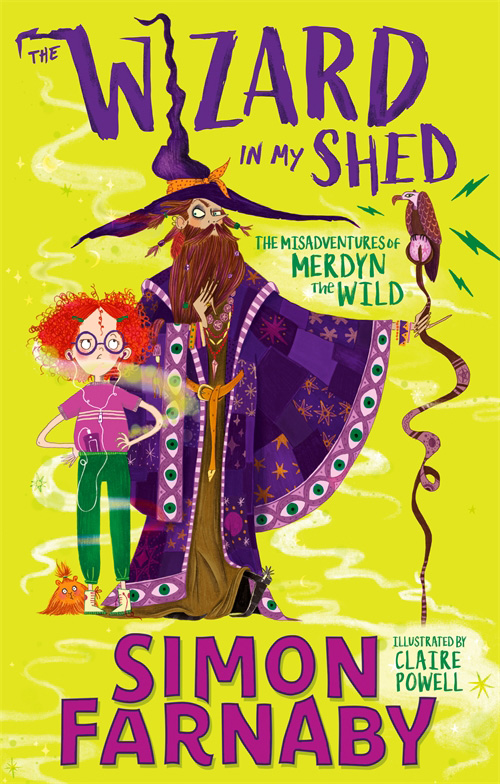
The original brief was for a hat and a cape of sorts fit for Merdyn, the main character from The Wizard in My Shed, the debut children’s book by Simon Farnaby. And it was needed tout de suite so that Simon could be filmed wearing it for a Blue Peter appearance the following week. Eek!

The Wizard in my Shed book cover

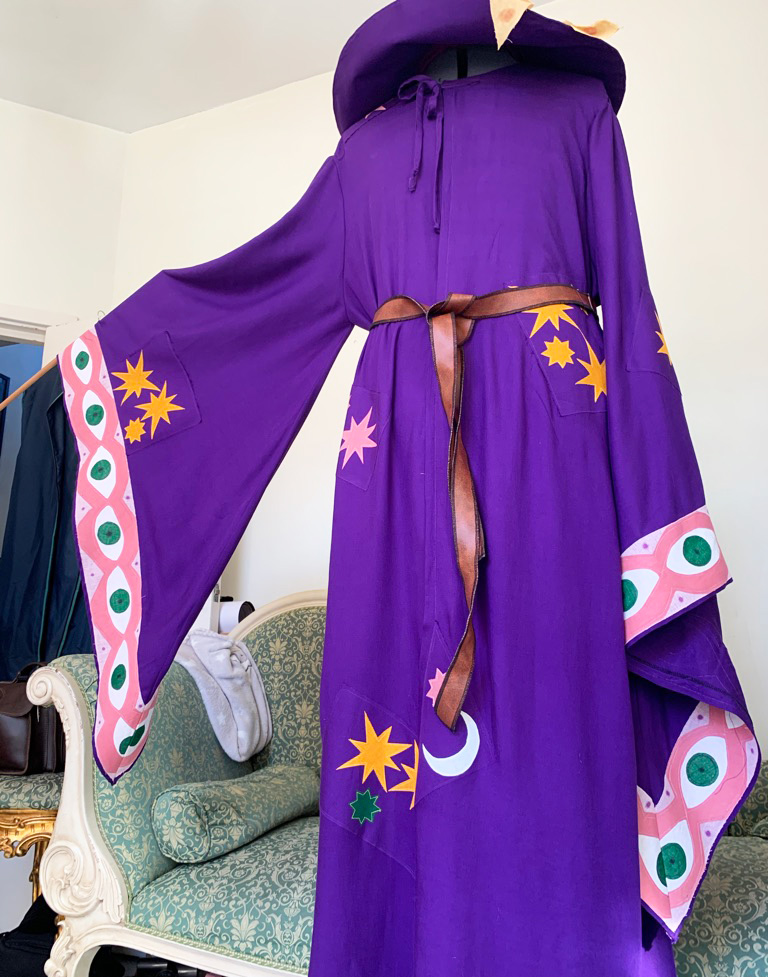
We don’t do things by half-measures at House of Ooobop – Simon was going to get a proper Wizards robe! So… no time to panic, I set about sourcing some purple fabric and Dan took charge of the details.

Have you ever wondered just how many purples there are in the world? I haven’t until now, that is. mostly because it’s my most unfavourite colour and generally only gets called upon reluctantly when I’ve run out of colour choices for a series of book cover designs!

But seriously, I walked the whole circle of Goldhawk Road fabric stores before I found not just the right shade of purple but also the right fabric itself – I needed 7.5metres of something drapey with a touch of structure. Something vaguely natural in fibre to account for studio lighting and prevent slow-roast simulation… oh and nothing too shiny or fancy-dress-like.

It took a while but patience persisted and I ticked all the boxes with a what I believe was a viscose twill and in the meantime, Dan came up trumps with some lovely muslin pieces in muted colours for the embellishments. All very carefully considered.

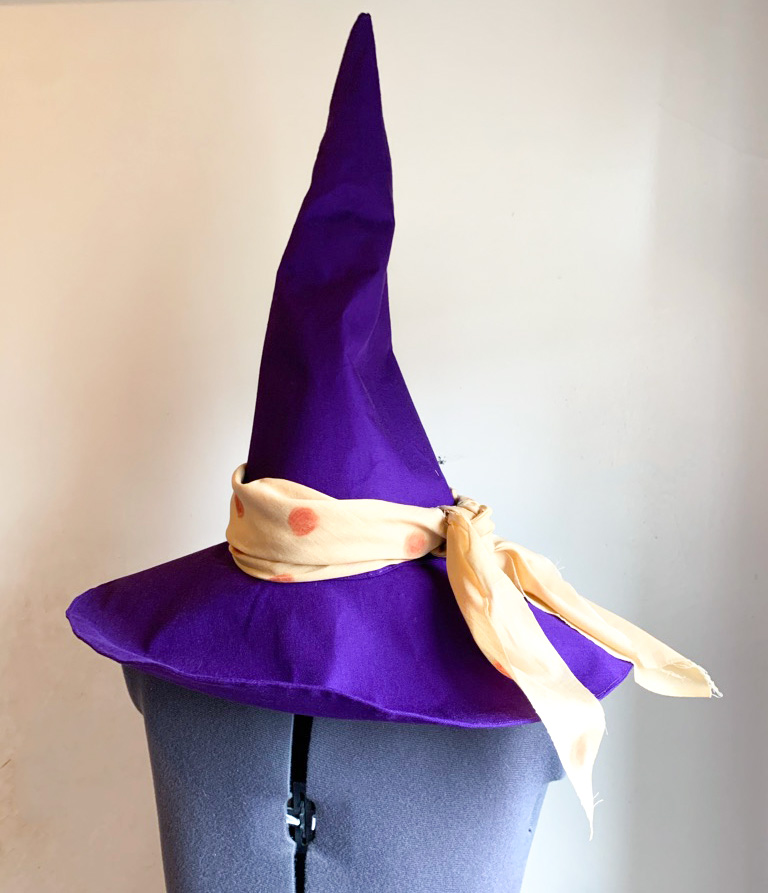
I started with the hat. Very simple pattern pieces but a very stiff fusible interfacing was key here. It created an authentic crumple in all the right places once I turned the main pointy section the right way out. It was quite tough sewing to the covered brim but once that seam was clipped and trimmed it sat beautifully. And I added a cotton muslin lining so it wouldn’t be so sweaty to wear under the lights.

Merdyns hat

Dan, meanwhile hand-coloured the spots on the scarf that was to be tied round the hat. Total dedication to the cause. He used the fabric sublimation crayons I bought from Wear Your Art at The Stitch Festival earlier this year and they worked a treat. Believe it or not, red dots on a yellow fabric is as hard to find as the right colour purple!

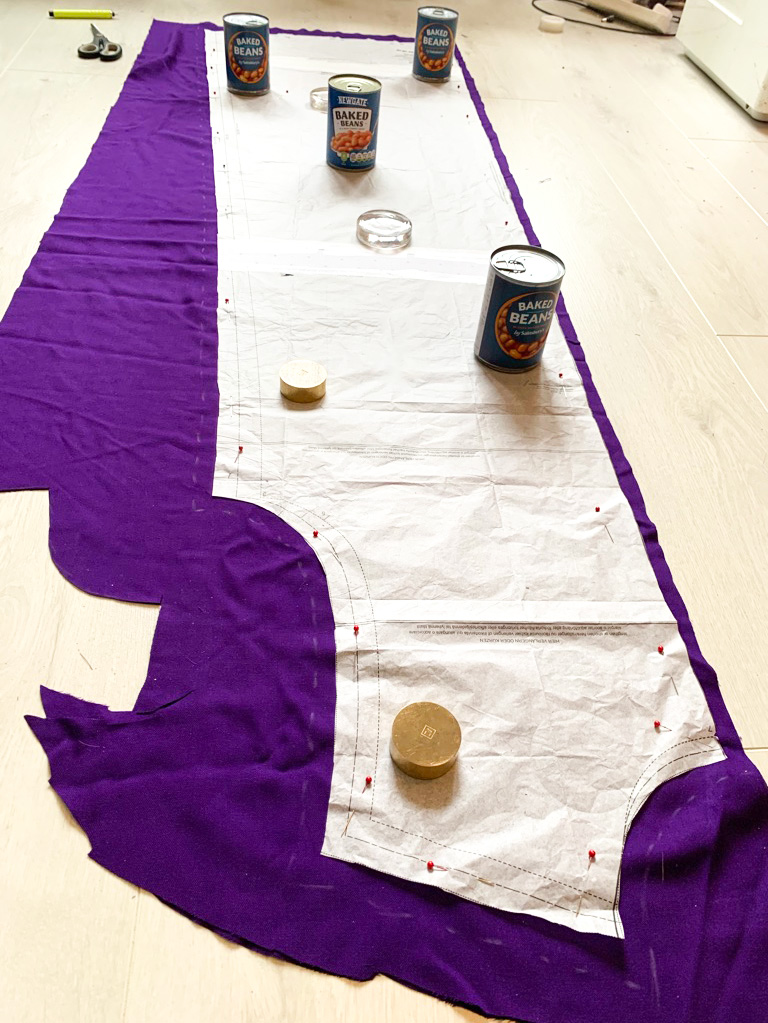
I can’t lie, I was dreading the next stage – cutting out the super long pieces of the robe – as I don’t have a table anywhere near long enough and it transpires my living room floor was only long enough to cut a single piece at a time. Boy was that a test of my knees! Also fingers crossed the whole time that the measurements had been taken and sent correctly. So much apprehension when you don’t get to take them yourself.

And do note the sophistication of pattern weights here.

robe pattern pieces pinned

Whilst I was finishing up on yards of seams, Dan was fusing the sleeve detail sections and the patches of stars. Two heads and two pairs of hands were definitely key to getting this done – just when I thought I couldn’t love him more!

The Wizard In My Shed Costume

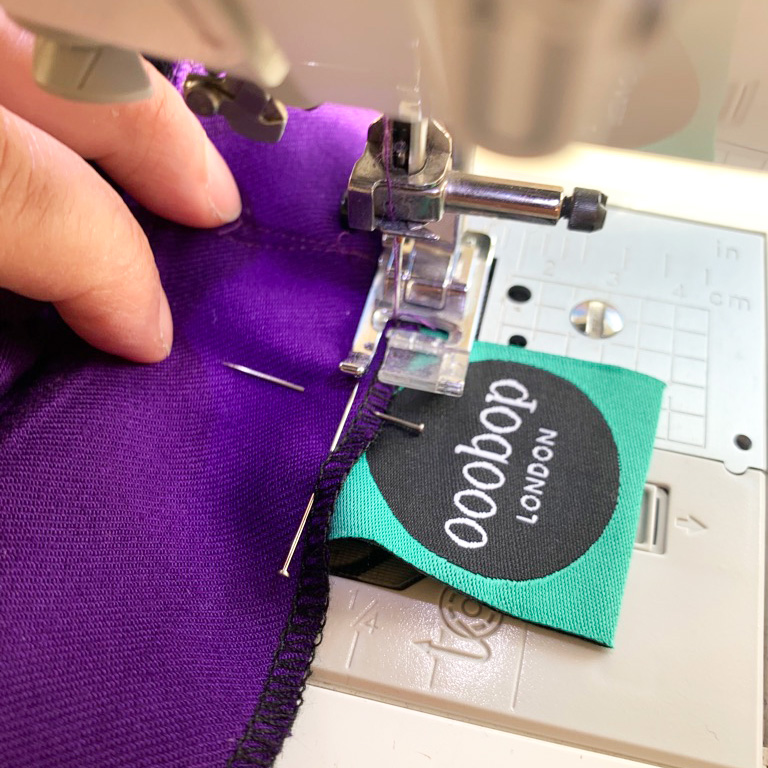
Wee hours of Wednesday morning came and we were trimming threads adding ties and sewing in the labels. I only ever add an ooobop label when I’m happy with my work.

ooobop label being sewn into the garment

Only thing left to do was to package our prized project ready for the courier. Something else that had to be considered. A regular dress cover was no where near long enough so Dan’s quick thinking brought some super long dust sheets to the table which I whipped up into a custom covering… of course!

I was a little bit sad, waving it goodbye especially after we cleared up the devastation. It was like nothing had happened.

We weren’t allowed to post pictures until after its appearance on Blue Peter. But boy was it worth the wait, Simon Farnaby in it and a Blue Peter badge on it. How cool is that?! So grateful for Dan’s faith in me and the trust of Lucy and Emily at Hachette Children’s Group for putting this amazing project our way.

Simon and Lindsey on set

I’m not being careful what I wish for any more. I totally want more of the same!

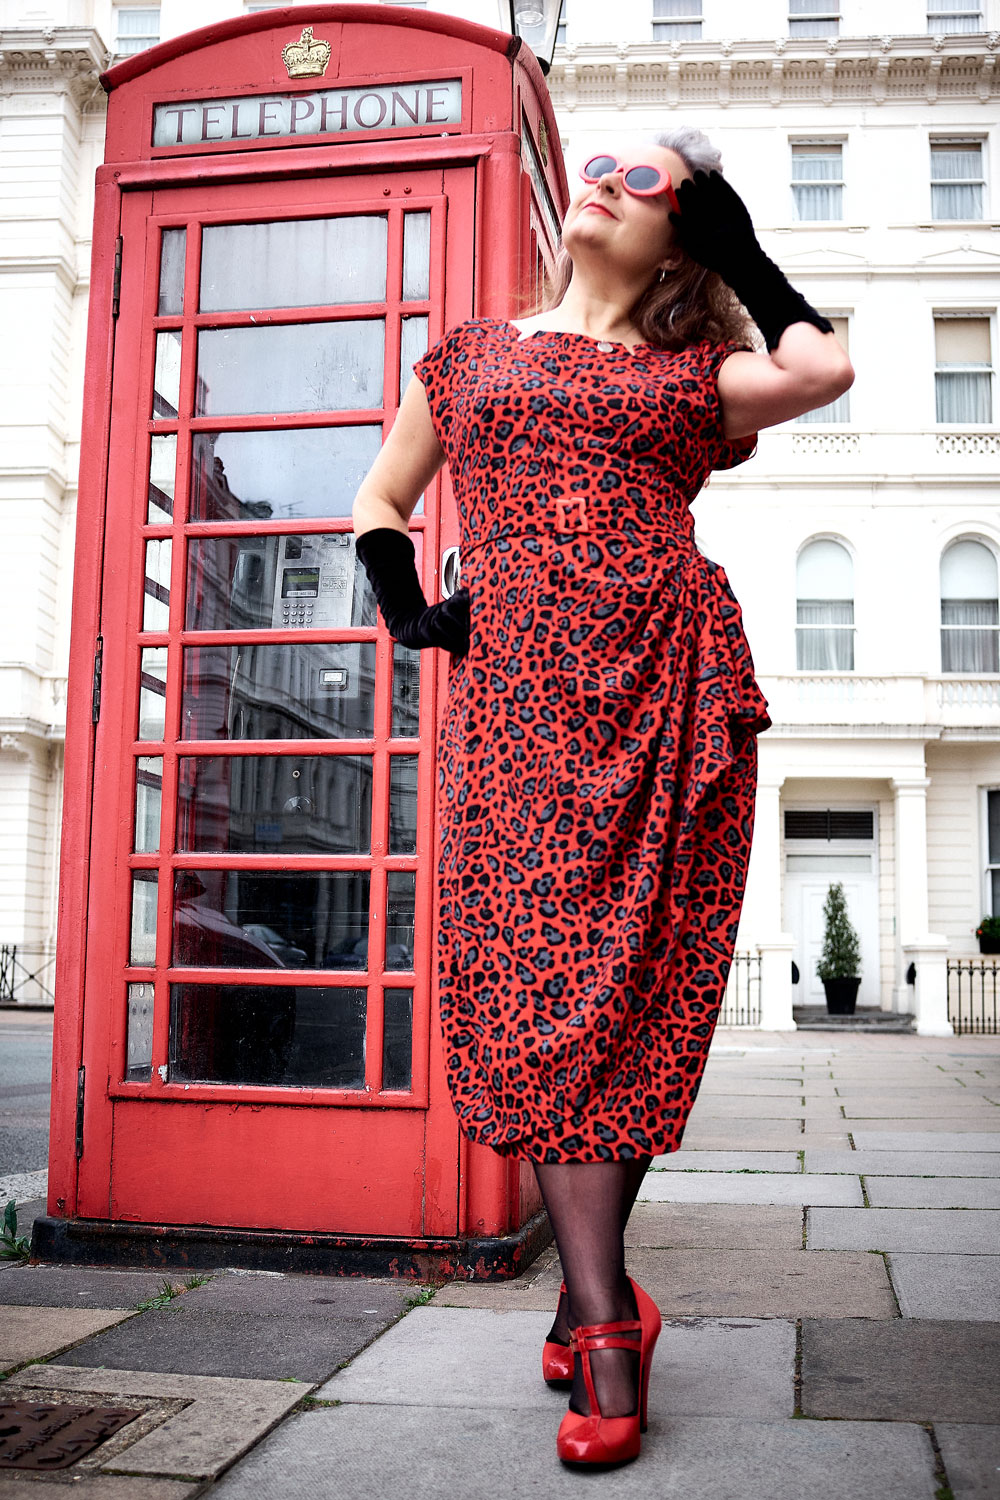
Retro Butterick 5880 in red leopard print

B5880 dress

Big thanks to Marie @stitchoddyssey and Kerry @kestrelmakes for their great insta challenge, #sewvintageseptember, without which this dress would still be in tissue form, in its little envelope, nestled with the other hopefuls! The challenge encouraged us to sew up our neglected vintage patterns, something I’ve been meaning to do for such a long time. Plus it presented so many inspiring posts as everyone uploaded their gorgeous creations. I’m late to the finishing post but I’m so jolly glad I got there!
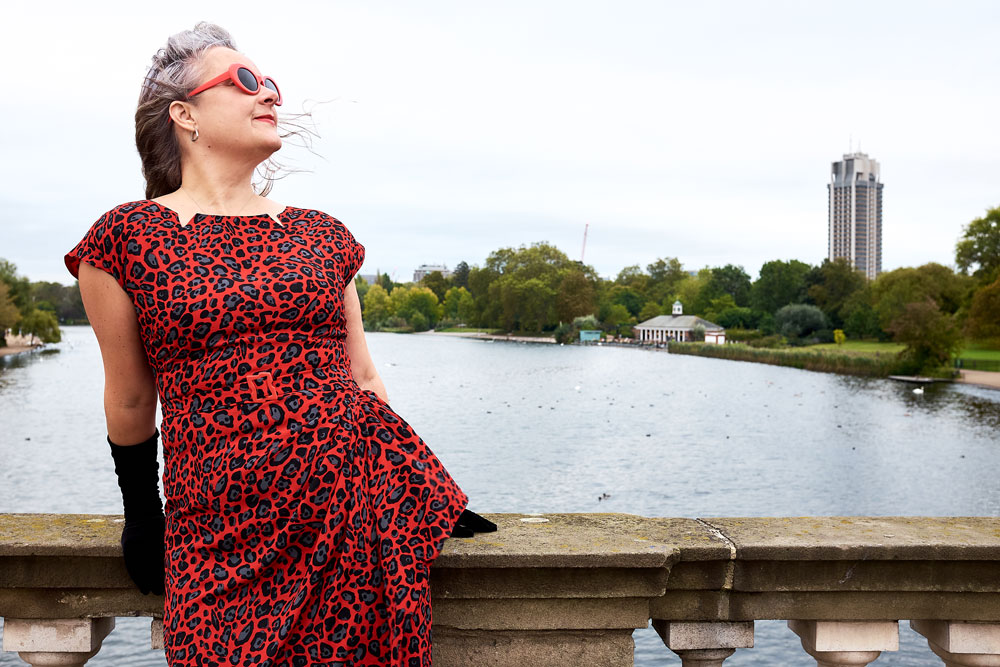
B5880 on the Serpentine bridge

I used to sew so many more vintage dresses than I do of late. When I first began sewing I inherited (read stole) a few from my mum’s collection – just basic skirts and tops. And then my love for them grew so much that years later I found myself bidding silly money for 40s and 50s patterns online. I loved the cover art, the pre-cut pieces, the prompts to hand finish and the unfailing elegance of the times.  I learned how to style the finished garment without conforming to an entire vintage look (totally ignoring the wails of the purists!) and made them my own. I’ve included links to some of my faves at the end of this post.
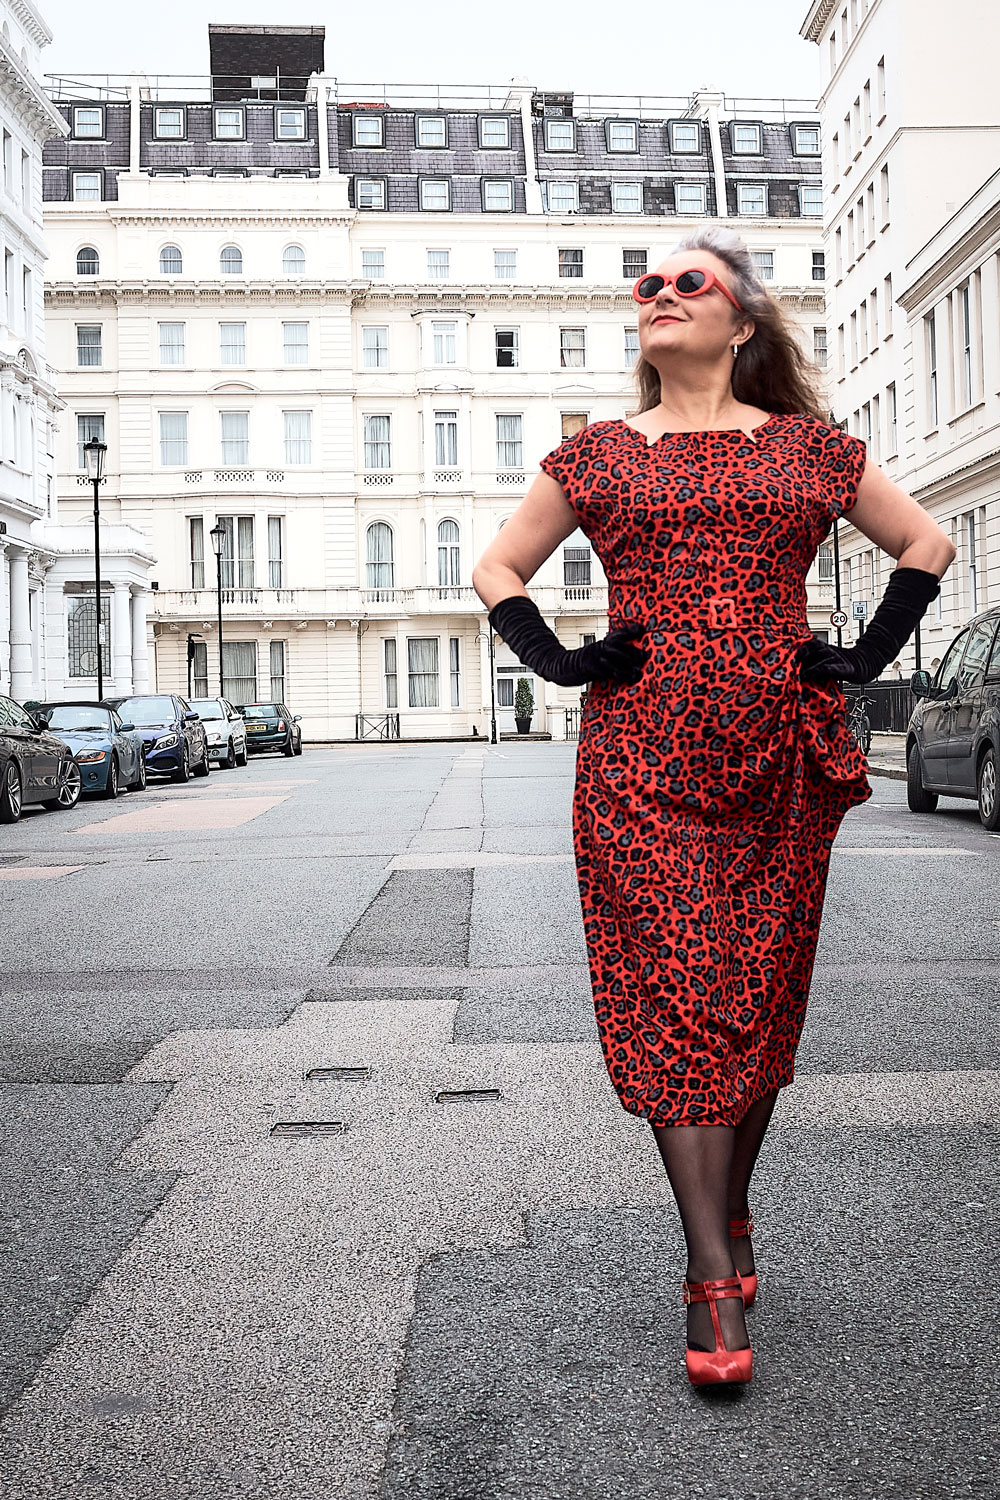
B5880 retro Butterick dress

So what happened? Why don’t I sew vintage so much any more? Well basically, I discovered indie patterns. And later learned to draft patterns myself. And those vintage pattern boxes have since remained closed owing to the rip-off number of hours in a day! That said, I have left a couple of patterns, loose on the top of the pattern box tower, just in case I get a miracle few hours spare to schedule them in!

The pattern I used for this dress is Butterick 5880. A retro reproduction from 1951. I love the sarong-style side drape and the neckline with its little fang-like indents!
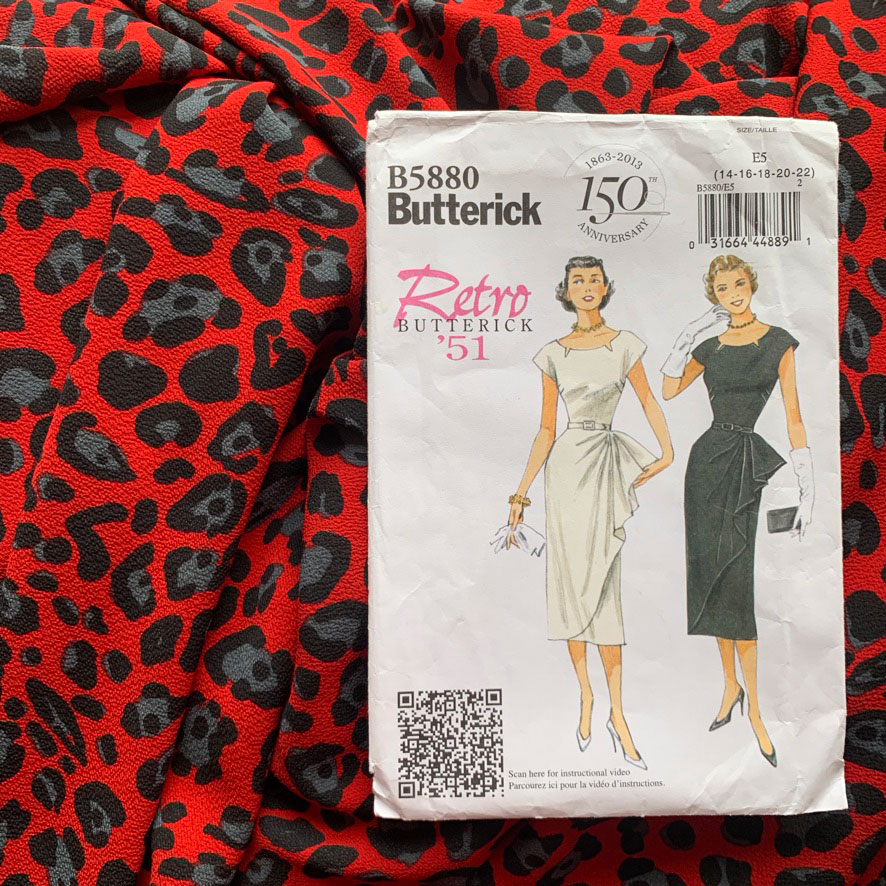
Retro Butterick 5880 pattern envelope

It screamed leopard-print at me from the off. But I can never find the perfect scale print in a perfect colour way, let alone the actual perfect fabric weight.

I asked in pretty much all the stores along the Goldhawk Road with not an ounce of success. A block colour probs would have worked fine and that was my next plan and was just deciding on red or black (of course) until I spotted this red, black and grey print in Classic Textiles. It was definitely an Hallellujah moment!
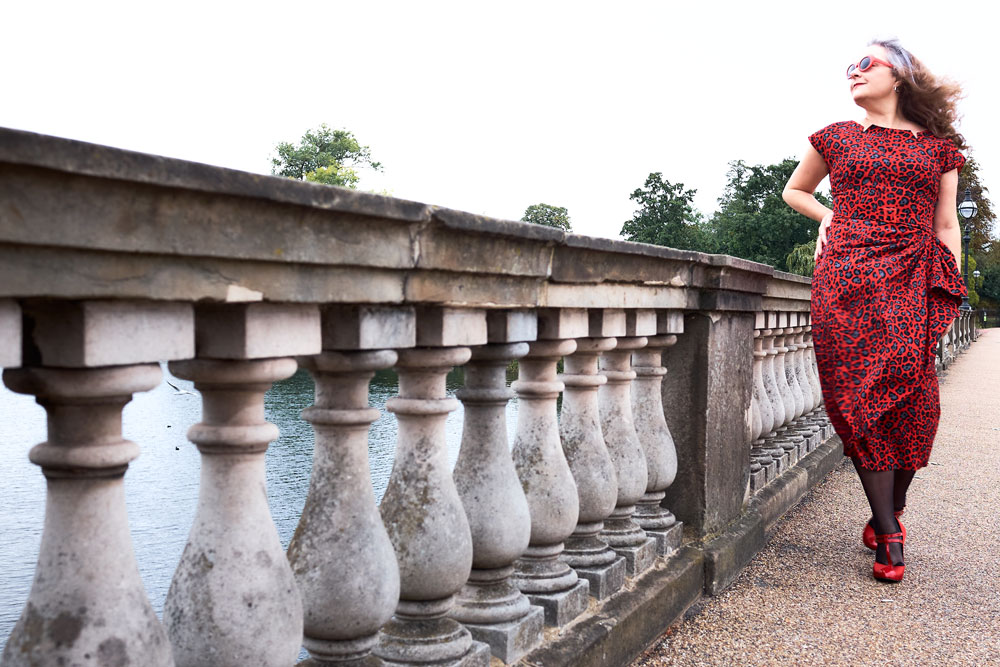
B5880 dress modelled on the Serpentine bridge

So my vision of Rockabilly chic was restored and off I skipped with some cheaper poly for the toile – I always try to mock up in as close a fabric as poss to get best fit – and some anti-static fabric from the little shop next to A-One (never can remember it’s name but the owner is always so friendly and kind). I paid £6.50 a metre for the lining. Pretty much the same as the main fabric because I didn’t want cling or spiky static stuff going on. It ironed like a dream and feels so silky to the touch – red of course!

I only mocked up the bodice. Knowing exactly what the issue was going to be – pooling at the back! The back piece is cut on the fold so to get round this I traced and cut the piece in two, adding seam allowance and taking 2 inches of ease out but cutting and slashing on a line drawn from a third of the way up from the bottom of the armhole, across to the centre back.
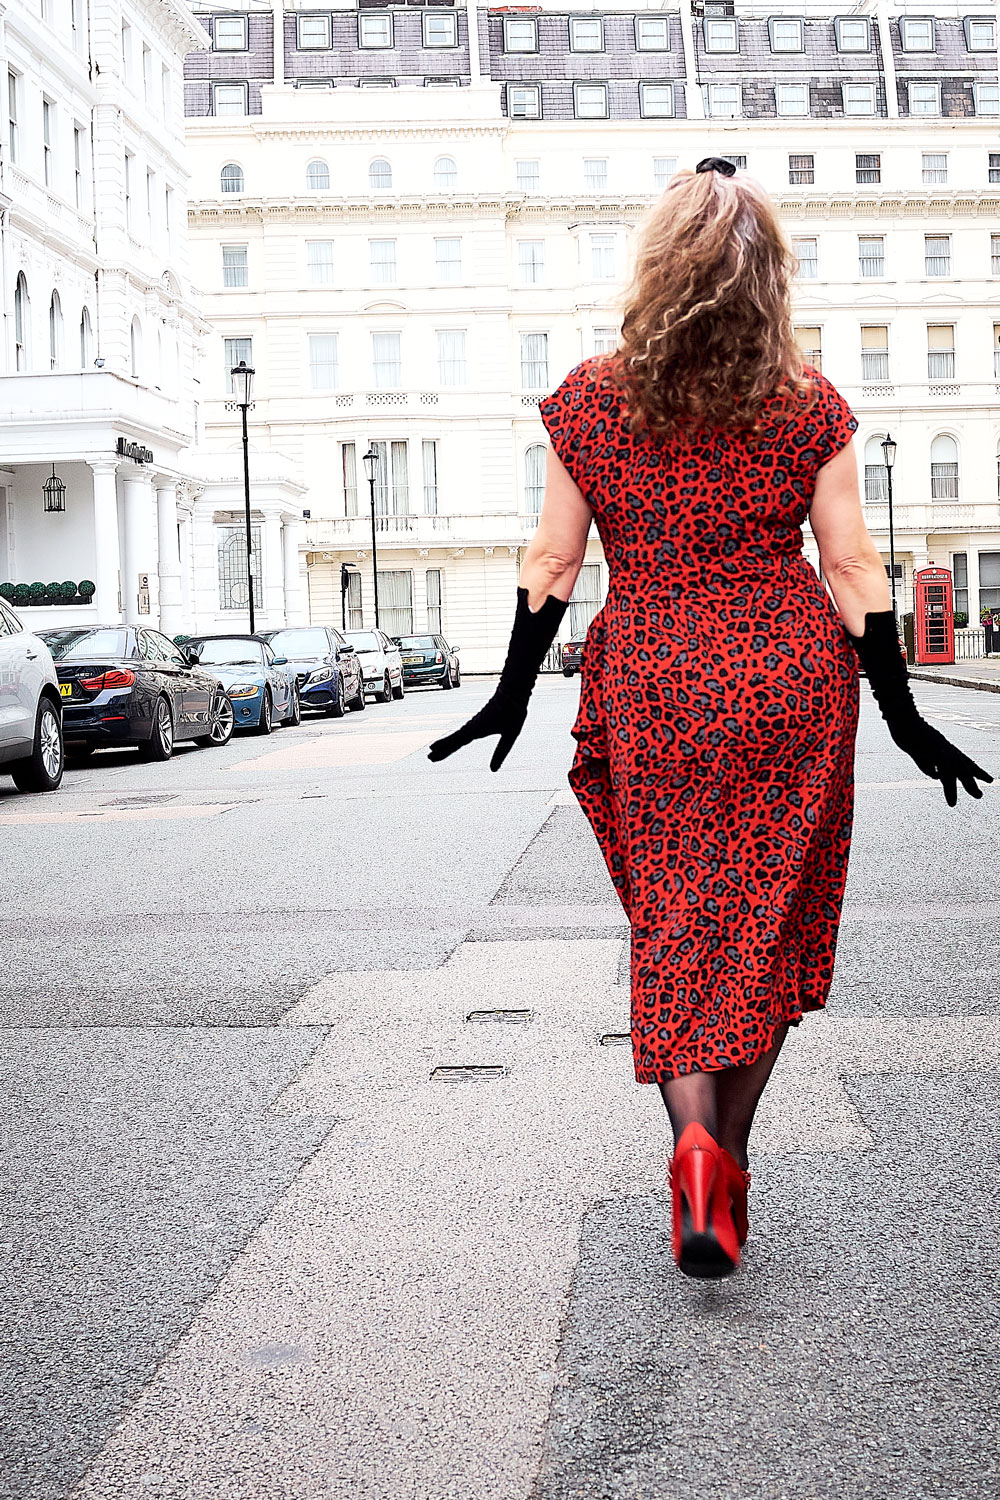
B5880 back view

I sewed out a dart on the mock up to check it worked before cutting out my main pieces.

And here is where the fun started. That wrap piece is huge and because I wanted to keep the entire length of the skirt (I know right… where has Janene gone!) I had no chance of cutting out on my tiny kitchen table. I remember thinking laminate flooring would be a great idea in the living room so I could cut larger pieces. And it is mostly. But wiggling crepe and shiny scissors meant I was crawling around on the floor for aeons! Getting up and straightening up afterwards was an insight into being a hundred years old!
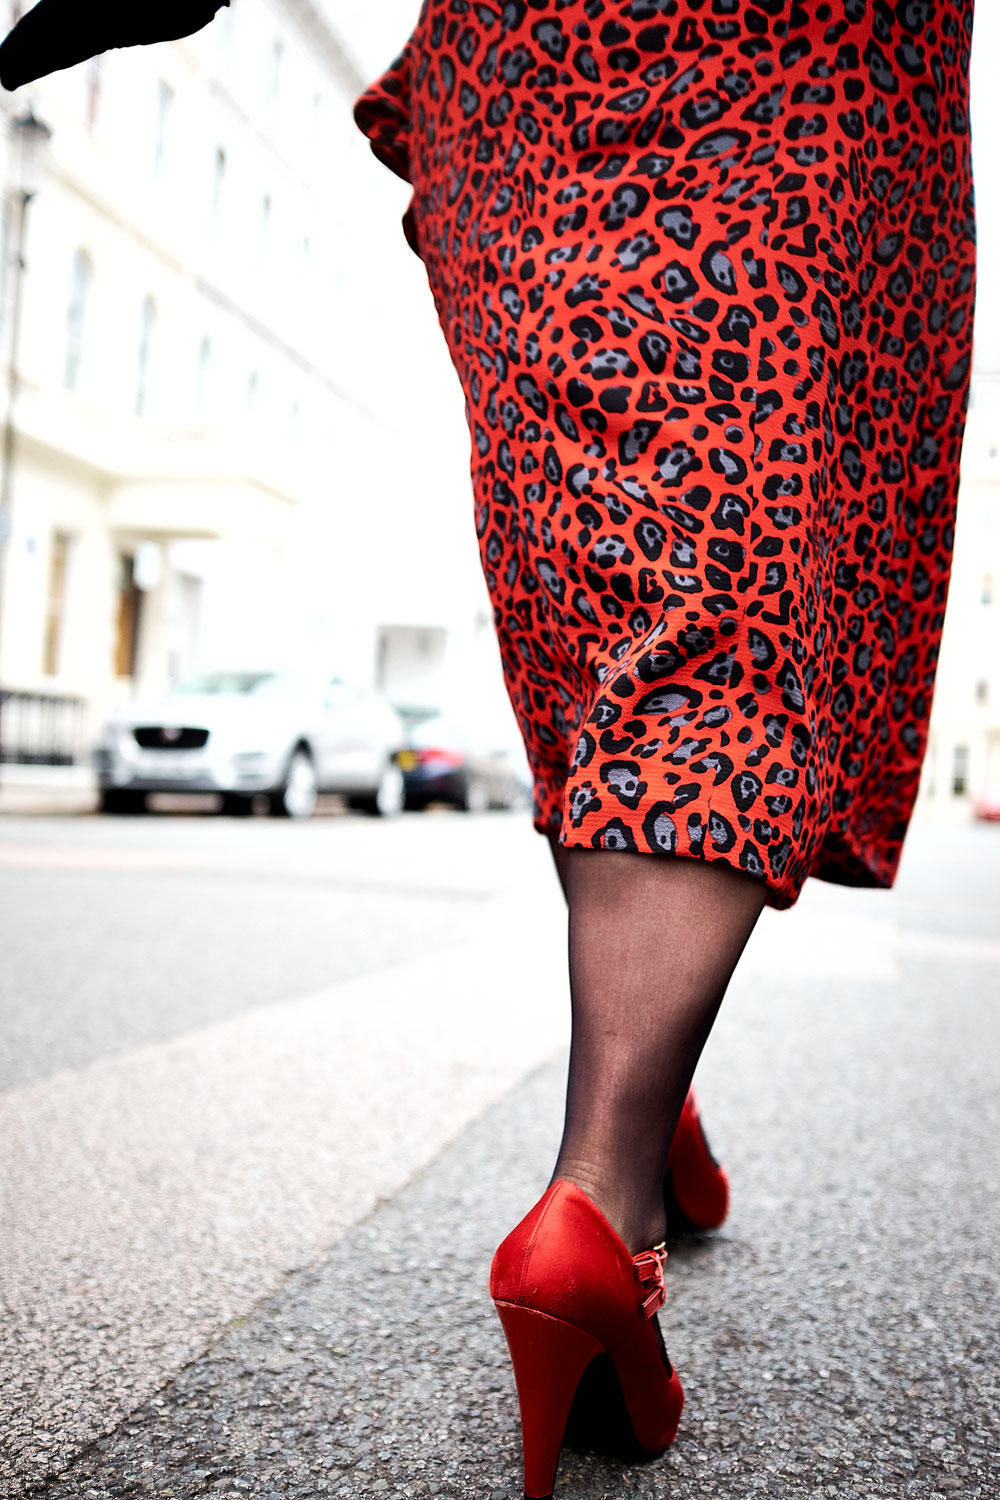
Back view of skirt and heels

And just as I’d finished I had to cut the lining, too. All the moaning and groaning that day – you’d never have guessed it was my favourite thing to do!

The bodice came together pretty swiftly. I’m always a bit scared to clip so close to the point of a ‘V’. And you can see a smidge of the lining as a result. But I’d rather that, knowing its stronger as there will be some stress on those points at times. But kudos to the Vilene G710 Light Woven Iron On Fusible Interfacing I got from Minerva Crafts. It was such good quality and it was definitely key for providing just enough structure so that neckline doesn’t roll out.
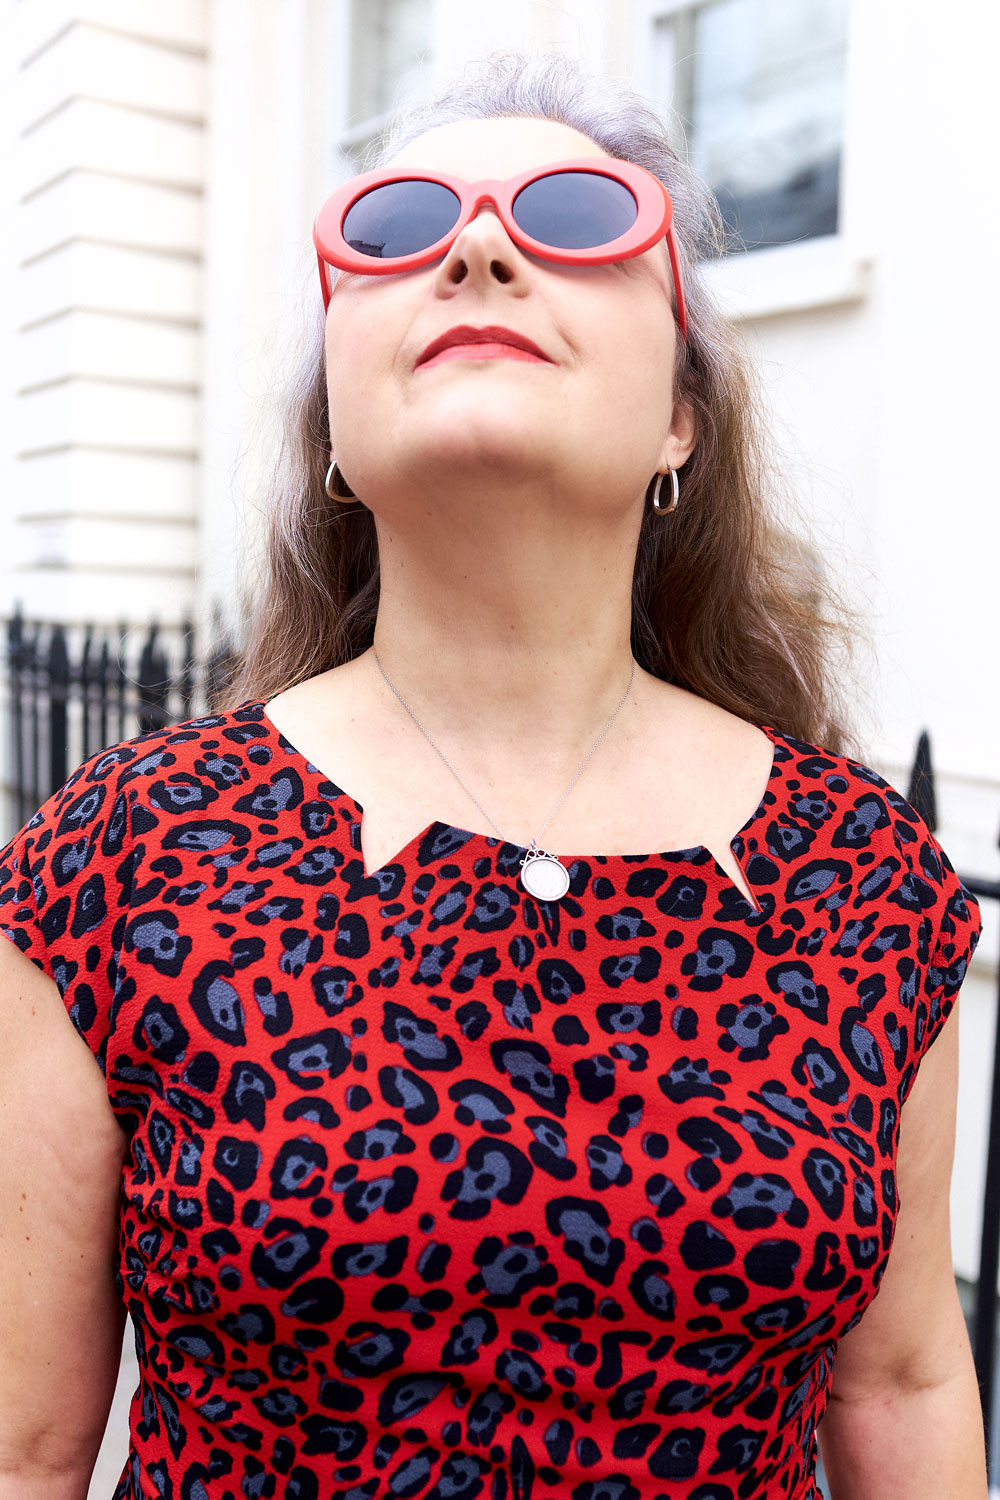
B5880 retro butterick dress neckline

I pinked the seam edges and the lining edges. Mostly so there would be no additional bulk on pressing. But also because it’s fun!

The main skirt pieces are dead simple to assemble too though I did overlock those seams. The bodice seams are enclosed and it felt safe to pink but when this dress ultimately gets tossed around with a wash load of other stuff, I worried the skirt seams would be more vulnerable and susceptible to fraying. And I didn’t want that after all the effort invested.

Now let’s talk wrap! All I can say is that I’m jolly grateful for that QR code bottom left of the pattern cover, that links to a very good tutorial by Professor Pincushion. I read the instructions included with the pattern about 50 times over and still couldn’t work it out. But the video was instrumental in working out those pleats.
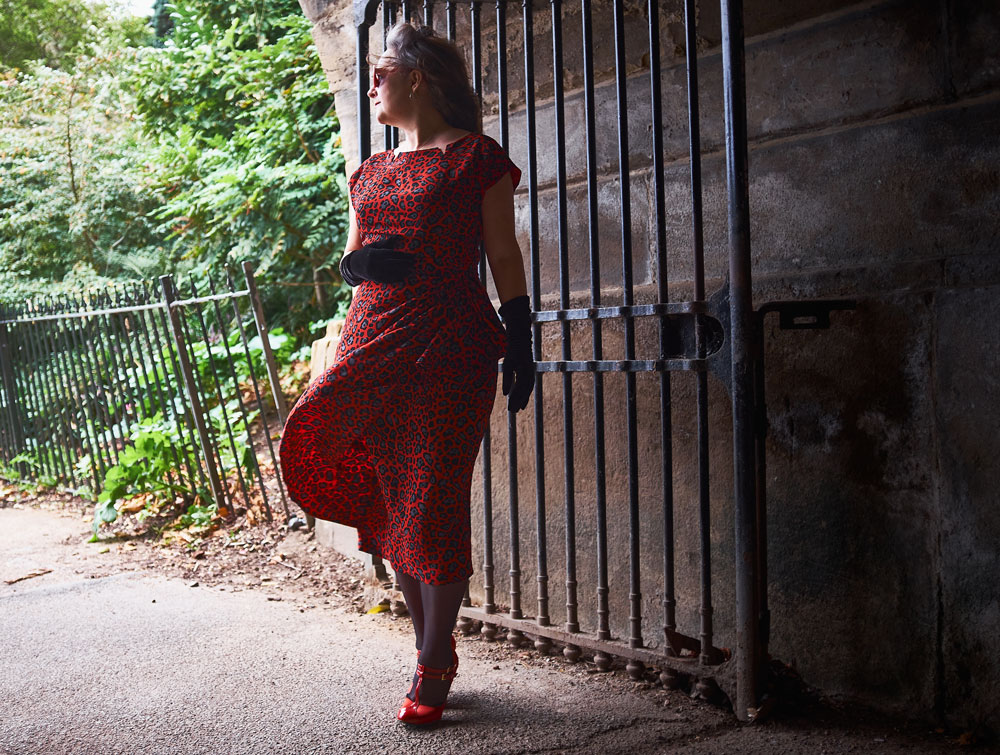
B5880 retro butterick dress shot in a tunnel

I had assumed the wrap was a singular piece. And it would probably work just as well assuming ones fabric is double sided. But I like how much neater it’s finished by being faced. It adds a fair bit of weight though, and there’s quite a bit of stress where that pleated section joins the waist seam so will have to keep an eye on that. The full lining adds even more weight to this dress but its not a bad thing. It slides on with ease, helps the dress to hang better, prevents any show through and feels so special to wear.
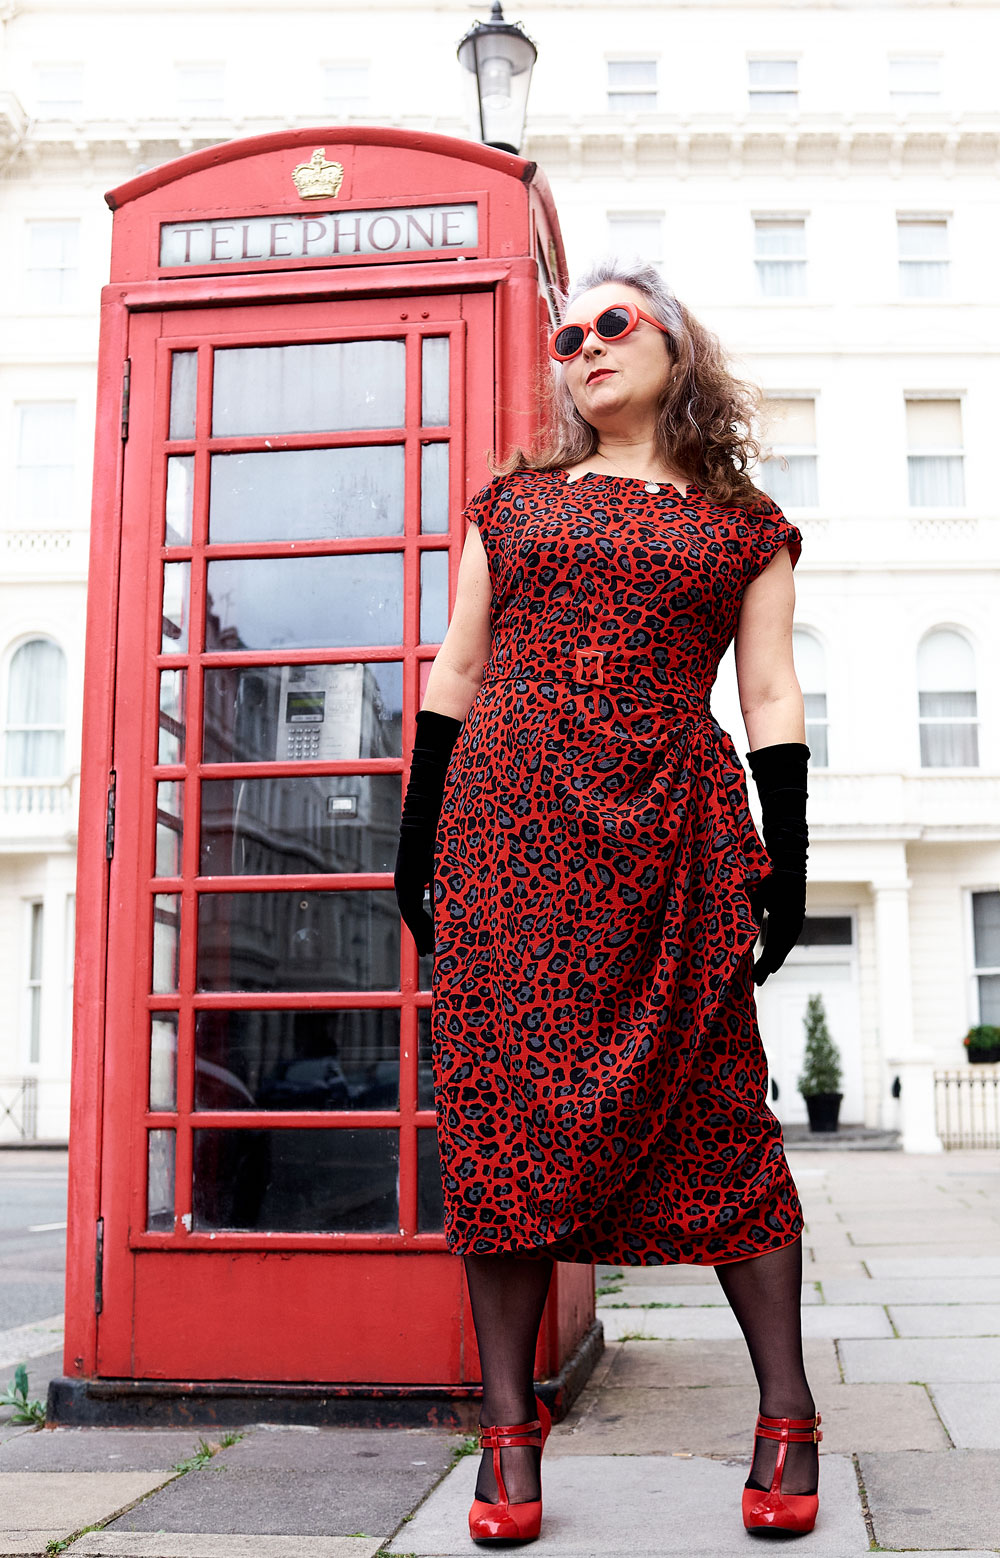
B5880 dress and London telephone box

Following the marathon hand finishing session (shoulder seams of lining, joining bodice lining at waist, hemming, French tacks) I almost forgot about the belt! That was pretty simple to whip up though. It’s basically an interfaced tube, sewn, trimmed and turned. Though the turning was not fun at all! Once pressed, the flat end is folded over the central bar of the buckle and hand stitched down. Luckily I had a small collection of vintage buckles to choose from – the asymmetric red one was a clear winner.

Although this is clearly a 50s dress design, it could so easily pass as 80s and be dressed down with Doc Martens and a denim jacket but for the purposes of our shoot on Sunday, I felt the need for glam – heels, care of Shelter Charity shop, Long velvet gloves from British Heart Foundation charity shop and Sunglasses, a lucky find in Cancer Research charity shop. Stockings bought from What Katie Did.
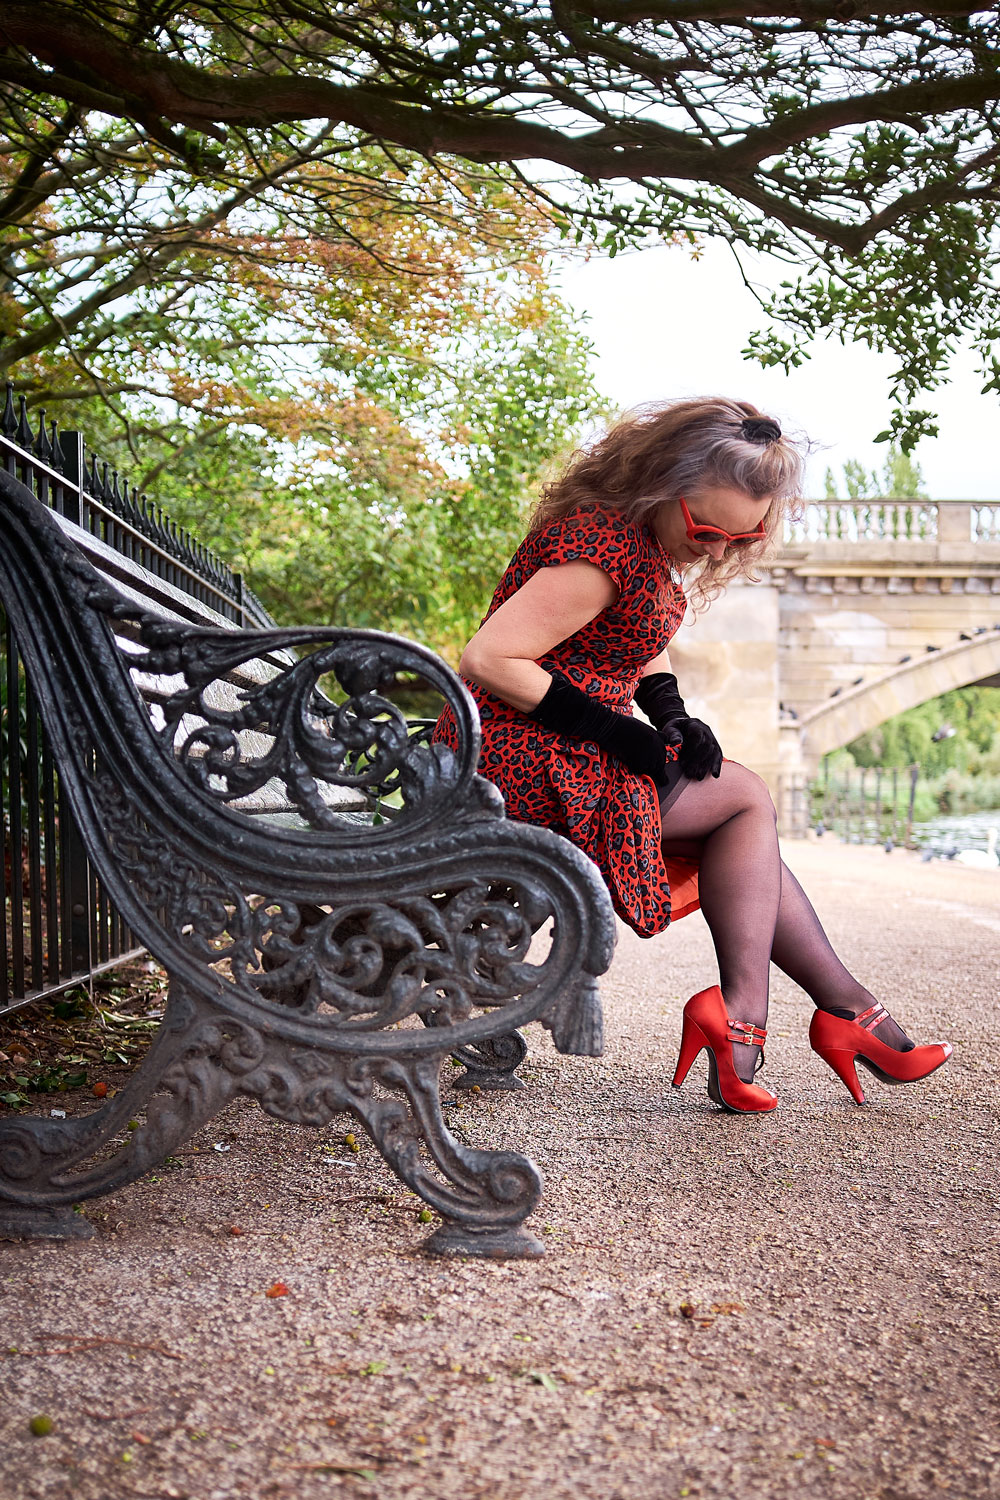
Adjusting stockings on a bench by the Serpentine, London

And yes, actual stockings! I’m so out of practice and really nervous of them pinging loose and ending up round my ankles. But they felt so good to wear with a dress of an ‘appropriate’ length and added to the feel good factor.

The weather wasn’t the least bit inspiring at the weekend but Dan was so keen to shoot with his new camera insisting that there’s no such thing as bad weather as far as photography is concerned. He’s mostly right of course, especially looking back at these photos, and I’m so pleased his eagerness helped me to meet the challenge deadline, but I might argue that wind is the exception to his rule!

 Windy day and wild hair

Some of my other favourite vintage makes:

Photography by Daniel Selway

Testing the Tamzin dress

BHL tamzin dress by ooobop

It’s been a while since I’ve taken on any pattern testing. I’ve been trying to claw back time so I can focus on a whole host of things that I want to work on and develop and I managed to resist the urge until By Hand London contacted me to test the tremendous Tamzin dress. How could I possibly refuse?

It’s so floaty, so folksy yet so cool and classy all at the same time.

And if you hadn’t noticed already there’s some beautiful bonus details which bring the added charm.

A square neckline is always a favourite of mine. I love the clean lines and that it shows just enough skin to keep it classy. The external front and back neckline facing is such a neat finish. I’m sure it helped that I used quite a lightweight fabric to get that topstitching nice and consistent but the proof will be in the pudding when I get my hands on some lovely linen for the next version. I just can’t resist the urge to embellish that facing much like Elisalex did.

BHL Tamzin dress made by ooobop

Incidentally the fabric I used for this was won over a year ago, in the #brightsewing challenge hosted by @thepinkcoatclub and @theunfinishedseamstress. (I had entered my Yellow shiny appliquéd number!) Part of my prize was a voucher which went towards this amazing Atelier Brunette diamond viscose fabric from SisterMintaka. It is such a beautifully soft and draping fabric that I was almost too scared to use it. I wanted it to be for something special and, well now you see it!

I didn’t quite have enough for the full length of skirt – its quite hungry on the yardage due to those pin tucks and the sleeves pieces are huuuge! – but to be fair, I had already decided on a shorter version so there wasn’t any heartache involved. Except I sewed the pin tucks too small!

And let’s just take a moment to ogle at the pin tucks on the sleeves. Aren’t they simply divine?!

By Hand London Tamzin Dress sleeve detail

Before I read the instructions I had anticipated a right royal pain in the arse time of getting them even, especially with drifting draping fabric but there is a nifty technique included to make life so much easier and perfectly sized and spaced pint tucks to boot!

Now you may think I’m being lazy here but another selling point of this pattern is that there are no closures on this dress other than the delightful back ties. I don’t hate sewing zips as much as I used to but the joy in not having to sew one at all is immense!

BHL Tamzin dress handmade my ooobop

I chose the variation with the ties that start from the side front and wrap around the back. There is another version of the tie that starts from the back. But I wanted all that ribbon detail and for it to cinch me in at the waist.

I think you can probably tell already how happy I am with the result.

BHL Tamzin dress made by ooobop

The instructions were super clear, and it was a joy to sew. Not complicated at all but I must add that it’s not the quickest dress to whip up – those added details come at a price of a couple of hours more but it’s totally worth it.

Are you sold? Or have you made one already? I’d love to know what you think either way.

Handkerchief hem dress

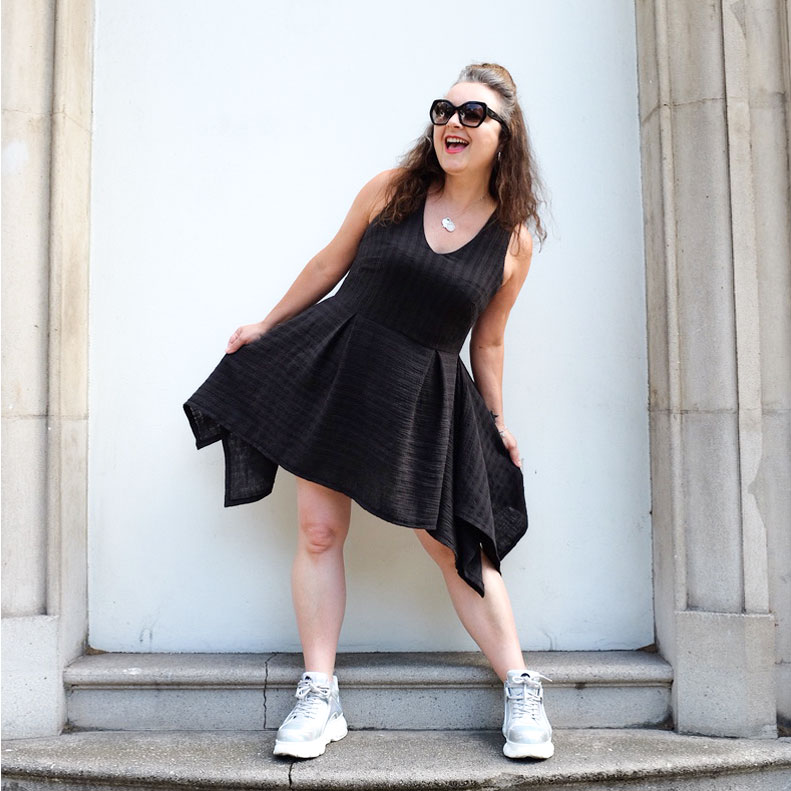
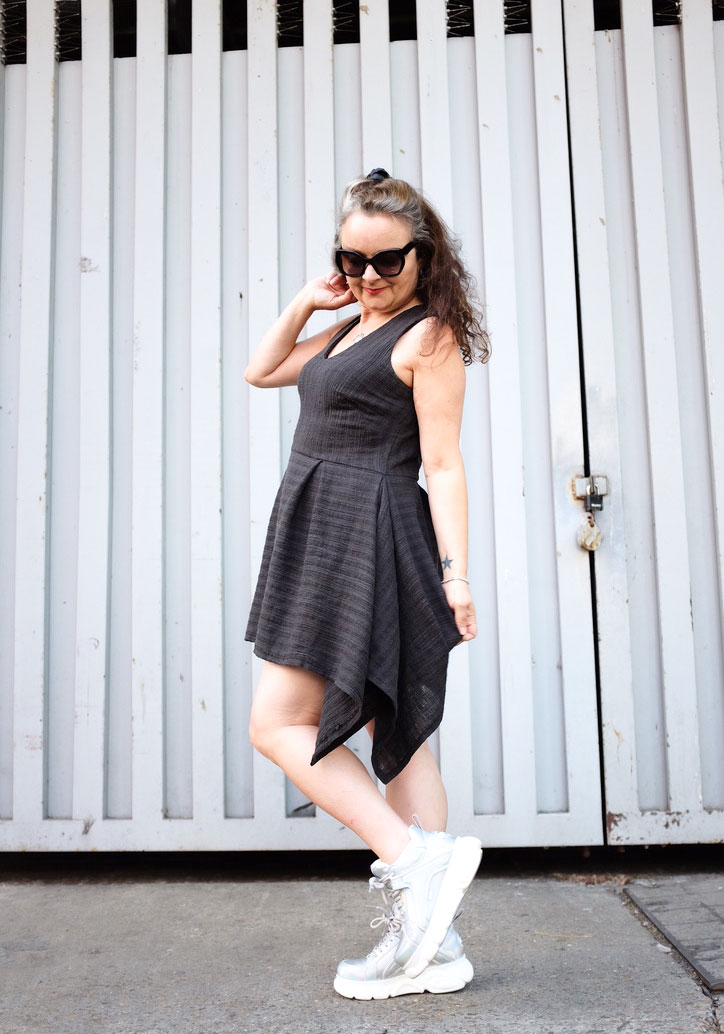
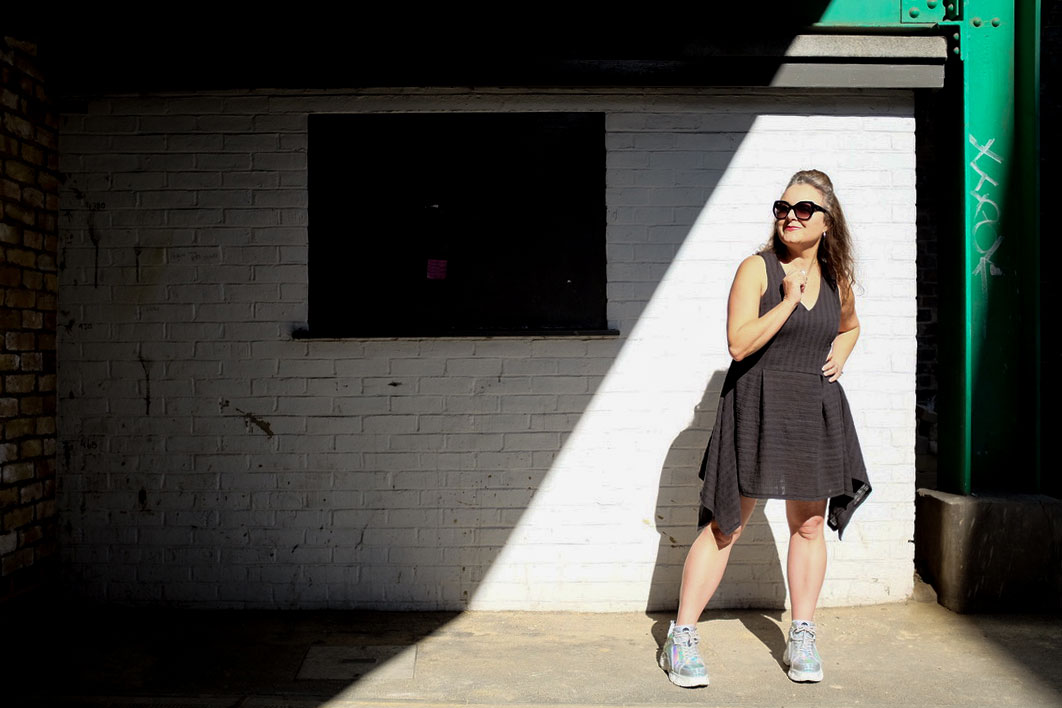
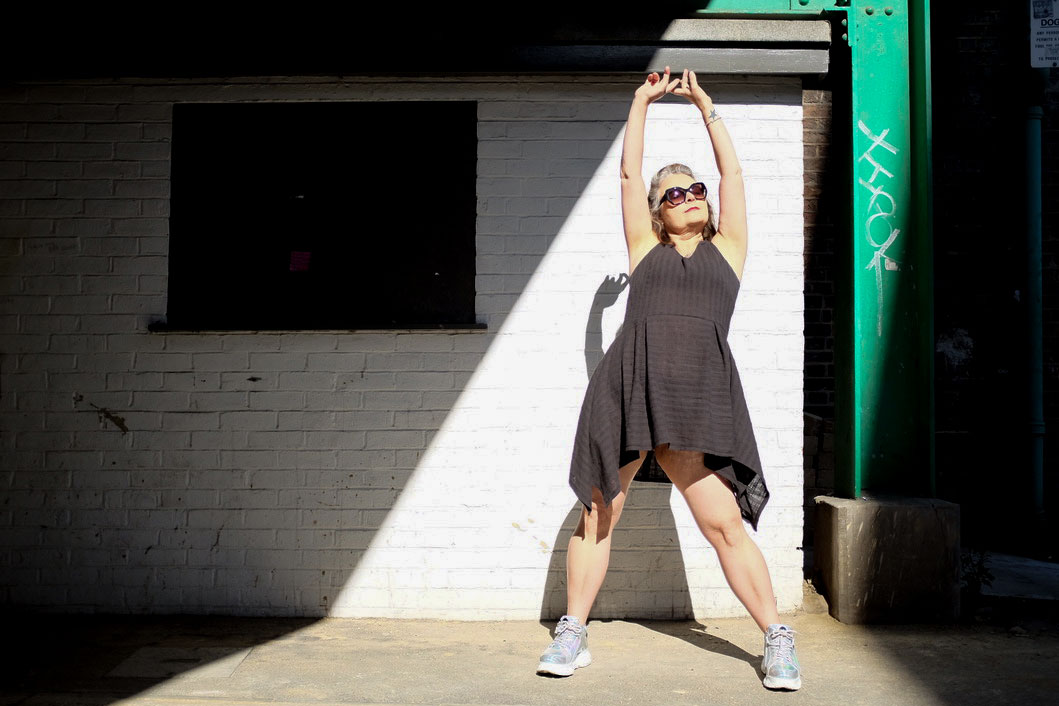
ooobop design hankerchief hem dress

Lockdown forced me to buy fabric online. Not my favourite thing to do but needs must when Covid pulls the rug!

I headed straight to Minerva – amazing selection; easy to navigate website and very competitive prices. I’m also a fan of the accompanying videos that showcase the fabric in action so you can get a fair impression of the weight and drape.

I was on a roll with the Shelby rompers, having made a starry one, a tropical one and an upcycled one in relatively quick succession, and my plan was to make a plain one that was a bit more casual and downplayed for those days when you want to be slightly less visible. Read: any excuse to go back to black!

I’m a sucker for black. But even moreso for a black fabric with a texture. And linen is a firm favourite. So I figured this crinkle cotton striped linen gauze would tick all the boxes. Black was sold out unsurprisingly, so I went for charcoal which actually champions those slubs with way more contrast.

But when it arrived I was a bit miffed. It wasn’t at all as I’d imagined. It was a bit scratchy, a bit wonky with it’s loose weave and worst of all, following a prewash it contracted to half the width! That lovely slubby texture totally worked against me, didn’t behave at all like regular linen and was almost elastic! – I was dead scared to make it into a romper. What if one leg ended up longer than the other, lol!

ooobop hankerchief hem dress
Channeling Blondie and Parallel Lines!

Despite the disappointment I rejoiced in the realisation that I’ve come far enough into my dressmaking journey to know when a fabric isn’t going to cut it. And the tantrums are few and far between now, because I’m quicker at finding solutions. Also the fabric completely softened after a prewash and I was more determined than ever to let this fabric do the talking.

So I went off piste. Not accidentally I’m sure because I’ve always got a catalogue of crazy designs in my head and sometimes they make it to a page in my Fashionary book so they’ve got a better chance of being realised. A summer linen dress incorporating a fitted sleeveless bodice, with a v-necklline and a handkerchief skirt would be it’s destiny.

ooobop hankerchief hem dress

I reached for my bodice sloper, added a v-neckline and narrowed the shoulders. I also swung the darts to fashion a double French dart for no good reason other than I’ve never done it before. And I really like the result!

The vertical stripes of this linen lend themselves perfectly to the bodice but I decided to switch the stripes horizontally for the skirt section because I much prefer how horizontal lines fall at the sides. There was precious little worry how it would all hang for cutting it on the cross because I was playing to it’s wonky nature in any case. And it turned out good. In fact more than good. I love it!!

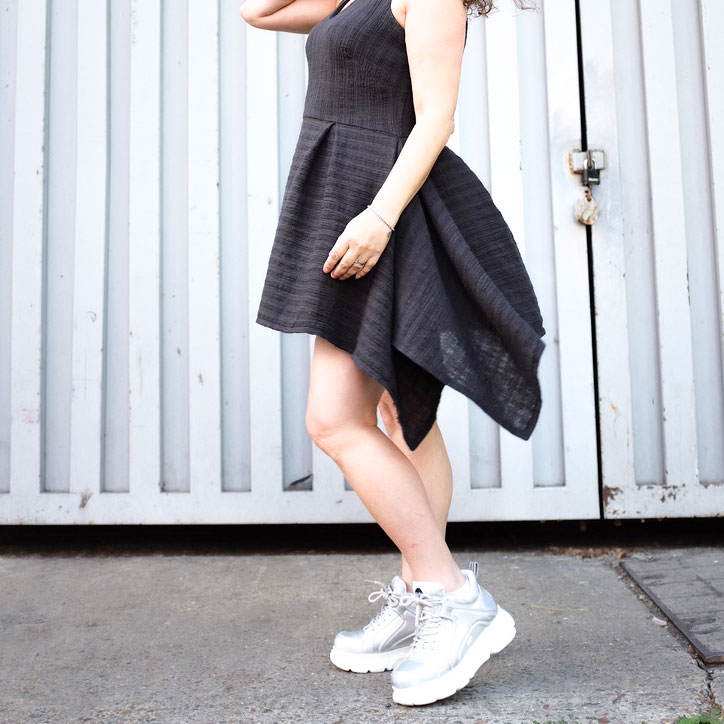
ooobop design hankerchief hem skirt detail

I have to cite a few influences here: Liz from this year’s GBSB for sticking to her alternative fashion style. I realised I was drifting away from mine and she’s unknowingly reeled me right back in! My bestie Laura Bird who loves an All Saints asymmetric number, always sporting an ‘interesting’ dress and Burda Style for first introducing me to a hanky hem!  I made my first maxi dress here and a second silver one here  and they are still my favourites though this is my first short dress with a handkerchief hem.

So how did I cut the skirt?

I decided on the length of the skirt (the depth) and factored in seam allowance and hem.

I made the width of the skirt to the following calculation:

Front piece (cut 1) = half waist measurement + (2x length of skirt) + 8inches for 2 box pleats + (2x hem allowance)

Back piece (cut 2) = quarter waist measurement + (1x length of skirt) + 4inches for 1 box pleat + seam allowance + hem allowance

I marked the centre of the front piece and 4 inches either side to tack the box pleats. I overlocked the bottom of the bodice piece and the top of the skirt pieces before pinning and sewing in place. I sewed up to the side seam on each piece and then sewed the seam allowance of the extra fabric along the top edge. After the centre back edges were overlocked, I inserted an invisible zip and enclosed the top part of the zip with the facing.

Finally I hemmed all four edges of the skirt and mitred the corners. And oh what a neat little finish that is!

ooobop hankerchief hem dress

I know it’s not the most groundbreaking dress. But I made it to my own order and an image in my head and it really feels good. The fabric feels good against my skin in this heat and I love how carefree it is.

I finished up sewing it yesterday morning in good time for Dan to have a practice with his new camera. (Clever, hey?!) And I’m delighted with the results. Thank you oh clever talented husband of mine!

ooobop hankerchief hem dress

Also…new shoes!!  Buffalo hologram numbers that literally turn rainbow in the sunshine. And yes I know I’m probably channelling 90s Spice Girl. And no… I’m not about to grow up anytime fast!

Vintage Laura Ashley Romper

Shelby Romper Suit by ooobop against a white wall

Last weekend was a Godsend. Seriously. As a sewist, who wouldn’t relish permission to sew your undivided heart out for two full days whilst tuned in to all manor of inspirational videos and chat from the best kind of community ever. I’m talking the #SewingWeekender hosted by The Foldline and English Girl at Home, obviously. The event that sparked so much joy and raised so much money for such great causes.

And hey, I made a new outfit in the process, too!

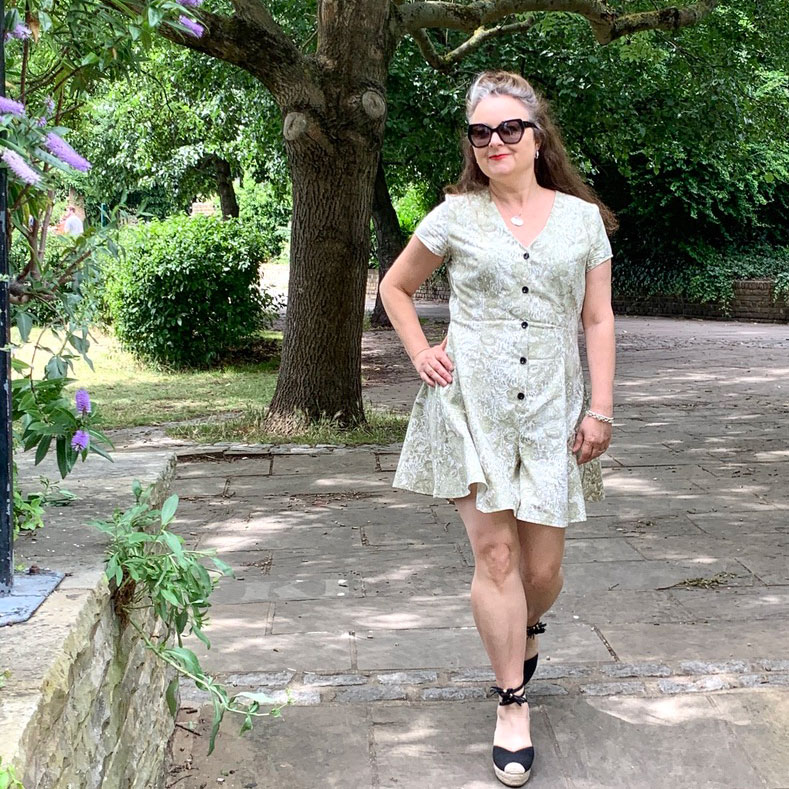
ooobop shelby romper against white wall

I’m not sure if I can ever stop making True Bias Shelby Rompers now. This is my third and still I’m not done!

This wasn’t the intended fabric though. I had factored in some crinkle cotton linen gauze, but following a prewash, it crinkled to half the size and became all elastic and everything. I set about ironing but got bored after the first 20cms and swapped it up for a really old pair of curtains instead. As you would!

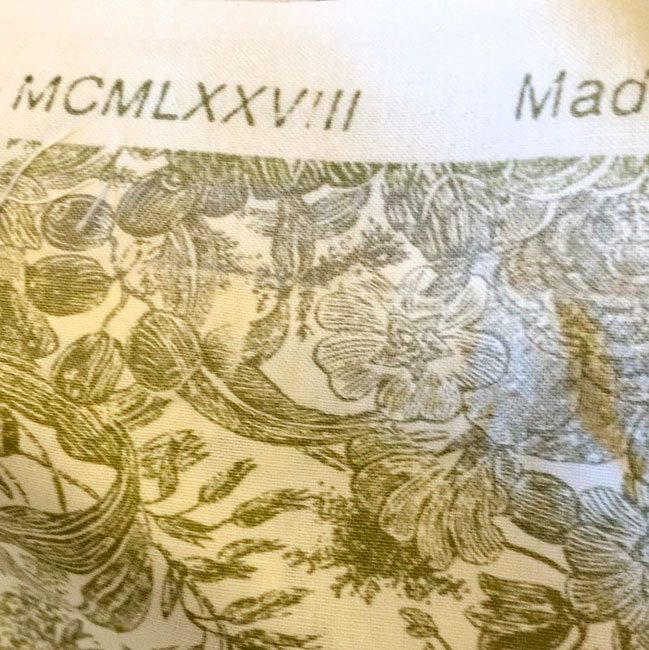
Ordinarily I have a reputation for exaggeration, but in this case I’m not joshing. I bought these Laura Ashley curtains in a charity shop many moons ago. Quite excited by the vintage factor. Had to look up those roman numerals though . . .

MCMLXXVIII

MCMLXXVIII = 1978 for the less Roman among us!

I bought them when I was dead broke. And still argued the West London inflated charity shop price! They served my previous two addresses as actual curtains and have sat wantingly in stash mountain for the last 10 years. So I think you might relate to my happiness at using them to make my third True Bias Shelby Romper suit.

ooobop shelby romper walking

I get it now. Using the same pattern over and over. If it ain’t broke and all that. Such an easy gig when it works straight out of the packet. I made my first ‘trial’ one in a very lightweight (quite see through) star-print viscose. And I love it still. The second, more improved version realised in a tropical print viscose and it’s so interesting to see the difference when it sews up in a fabric with a bit more structure. The silhouette is accentuated even more and feels good against the skin being 100% cotton and all. Feels even better knowing how many lives it’s lived and yet 42 years on its still many more years away from a landfill!

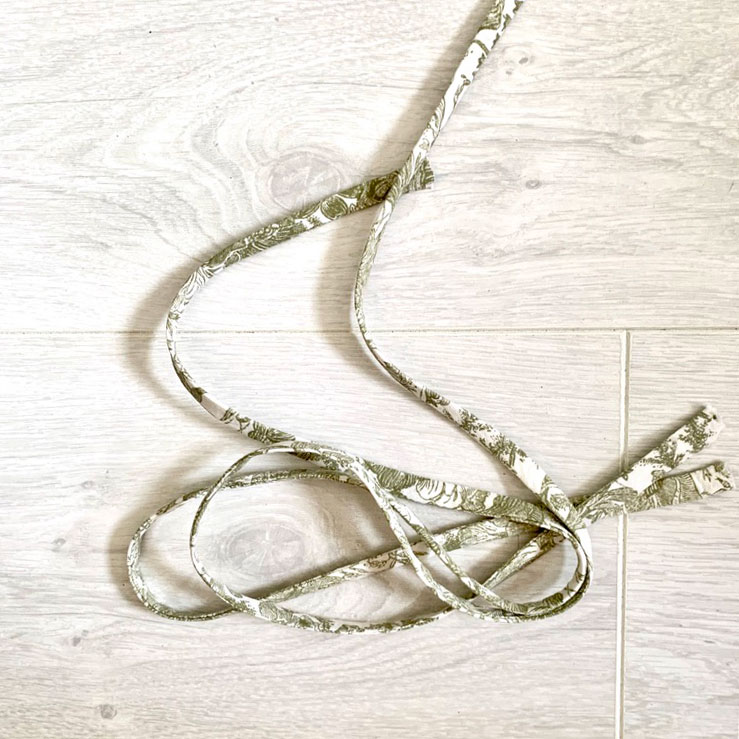
That said, there was a little issue with the tiny back straps. They didn’t turn as easily in curtain fabric. It’s a bit of a toughie compared to viscose. So following a wee tantrum, I re-cut the pieces on the bias – remembering a video tutorial I’d watched about cutting rouleau loops on the bias – and it bloody worked a treat. Thank goodness I had enough fabric left!

ooobop bias straps for shelby romper suit

This isn’t the end of this particular project. I’ve got plans. Mostly to mess things up! You know what I’m like with my colour palette – there’s not a scrap of black going on, save for the buttons. So I’m going to add some paint. Just a bit. And not quite sure where and what. But watch this space!

Thank you Daniel once again, for my lovely photos. Especially when the clouds dictated we should never have strayed further than the garden gate, let alone to the riverside. But I’m jolly glad we did.

ooobop shelby romper hammersmith riverside


Shift in the right direction!

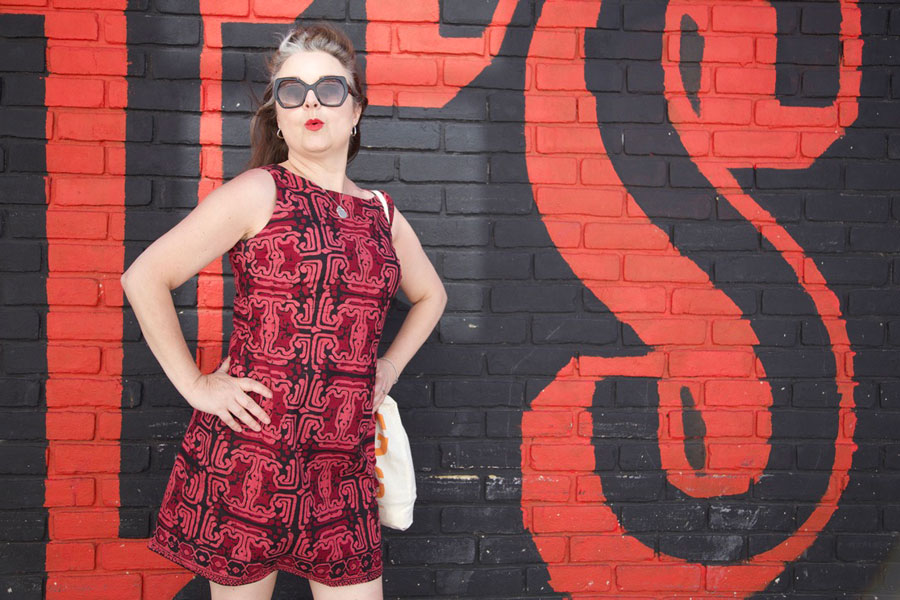
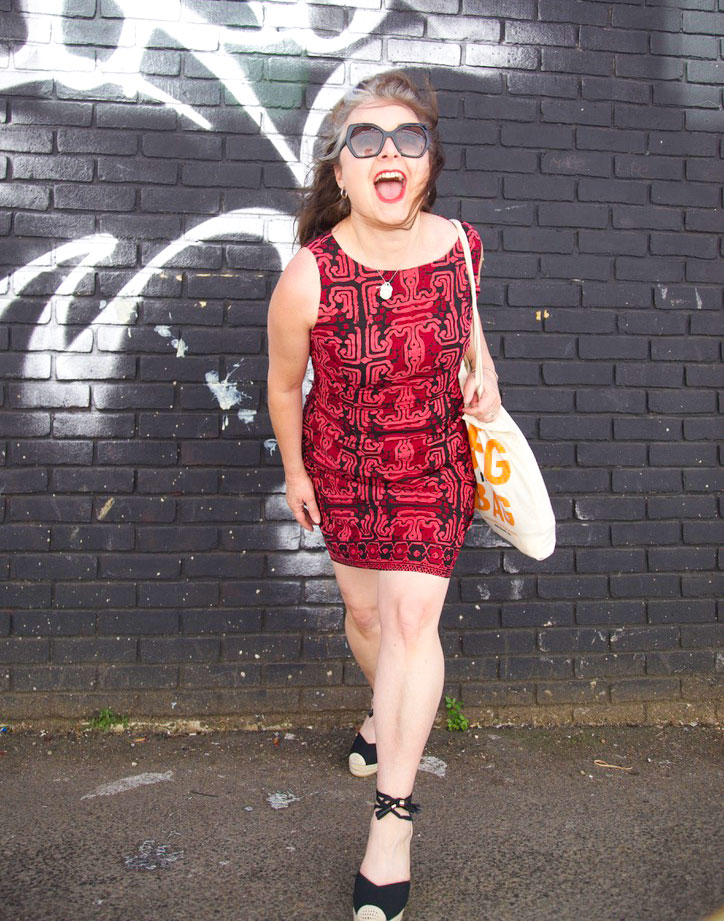
ooobop self-drafted shift dress

I’m so happy right now. Doesn’t take much – just a shed load of sunshine, some quality time with the fam and success at last with the fit of my shift dress.

In case you’ve missed any part of me whittling on about this process, my mission has been to achieve the best fit I can using my own dress pattern with minimal seam lines – ie a darted dress with both front and back pieces cut on the fold – so as not to disturb the print of a very boldly designed fabric that I have in mind to sew next!

self-drafted shift dress in a vintage batik fabric

The fabric I used here was the best test so far because it too required careful pattern placement. You can see the first version I made here and I just realised I didn’t even get round to blogging the second so here is an actual shot, instead!

Self-drafted dogtooth shift dress

I was gifted the gorgeous batik fabric a few years back, by a lovely friend who had inherited it from her parents. When she saw it featured in my instagram post she was so happy to see it again and so pleased that it was being put to good use. I kinda felt duty bound as I remember her telling me that her parents used to travel for to Thailand and Indonesia  quite a lot in the 60s and 70s for work and that they always returned with gorgeous authentic fabrics. Proper sentimental value and vintage, too!

ooobop self-drafted batik shift dress

This piece in particular is undoubtedly a hand-blocked batik. Though this is based purely on my own research and I could be wrong so please correct me if you think different.

It wasn’t very wide but I knew it would be perfect for the third trial of my shift dress, knowing I was very nearly there with the fit. I wouldn’t have risked it otherwise!

It’s such a fine quality cotton. Actually feels so natural against my skin, which is an odd thing to say but I have worn cotton before that doesn’t feel nearly as good. And it completely stood up to a stroll in 24° of Shepherds Bush sunshine today.

ooobop self-drafted batik shift dress

I was intrigued by the selvedge of this fabric. Why would it have just one edge of border decoration? I put out to the wonderful, ever obliging sewing community on Instagram and the very clever Meg from @cookinandcraftin suggested it was very likely to be used for a hemline and a centre front detail for a sarong when wrapped. I loved knowing this and was determined not to waste this detail so I set about cutting my pieces on the cross grain in order to make the best use of the design.

ooobop_self-drafted shift dress in batik

But I hit a snag and realised just in time that the cross grain had absolutely no give at all, and considering the style and fit, it could have been a disastrous move. So I cut on the long grain, as I have trialled twice before (if it ain’t broke and all that) and cut the border separately to seam along the hemline with a generous seam allowance which is overlocked and pressed down on the wrong side. It actually helps to add a bit of weight to the bottom of the dress too.

ooobop shift dress and shades

I made a few other tweaks to the pattern since version 2:

  1. I widened the shoulder straps by 1cm having struggled to pull the dress through the facing during construction, as per the ‘burrito-method’! The fabric I am going to use for the next one is much thicker and I don’t want to risk damaging it or pulling out any stitches in the process.
  2. There was still an element of pooling at the back (swayback issues as usual). And even though I added a quarter of an inch more at the hips since last time – with some improvement – it didn’t seem to solve the issue as much as I’d like.
  3. Then, just this morning, I saw that Cortney from @s.is.for.sew on Insta detailed how she lengthened her back darts to resolve a similar issue. So I moved the bottom point of the diamond dart down 2.25″ and continued the widest part down longer before tapering off. It worked a bloody treat!

ooobop self-drafted batik shift dress

ooobop batik shift dress

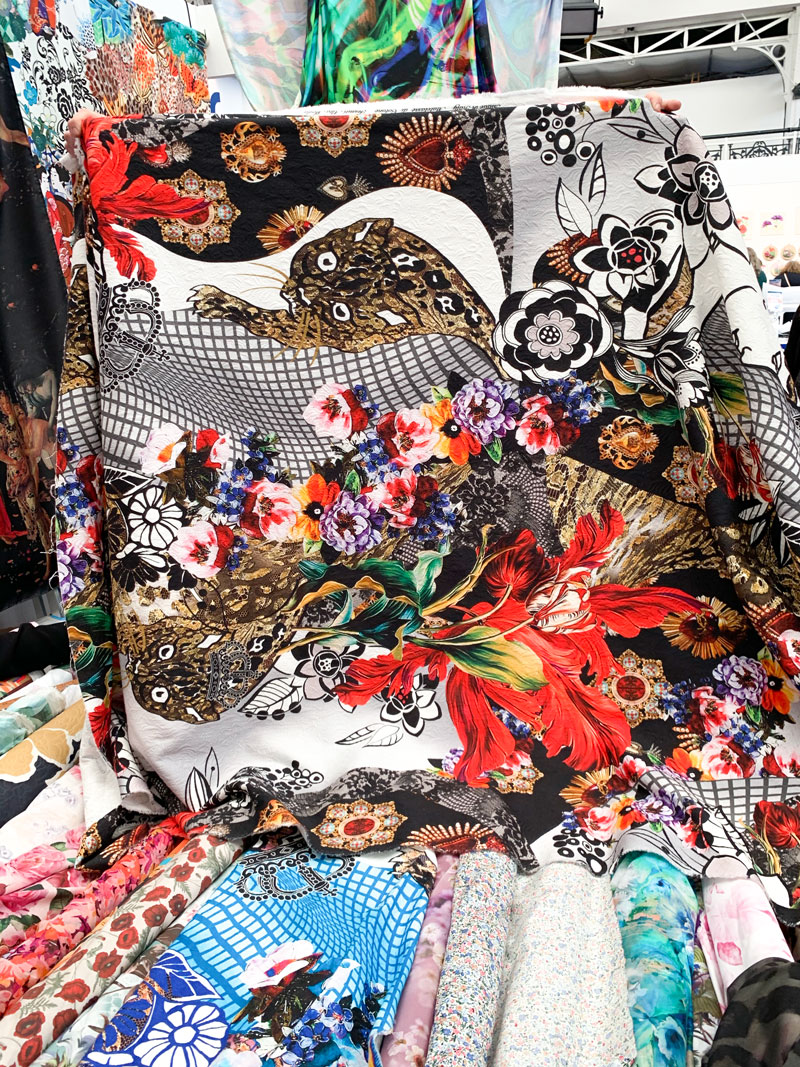
And so I do believe I’m ready to cut into that prize D&G fabric that I got from The Stitch Festival 2020 – only dilemma now being, how the hell do I choose my favourite placement of the design? I anticipate this being the longest part of the process!

Dolce and Gabbana fabric at M Rosenberg's stall
Dolce and Gabbana fabric at M Rosenberg’s stall

Thank you as always to Daniel for these amazing shots down the alley of the Laundry Yard in Shepherds Bush, London. For anyone who knows, you’ll know what a brave move this was!

Self-drafted Batik shift dress by ooobop