Shift in the right direction!

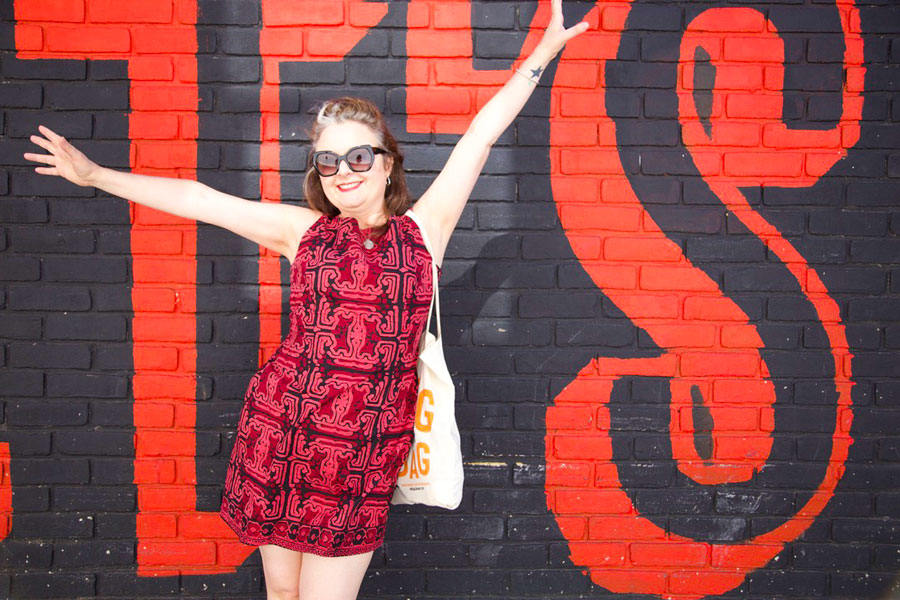
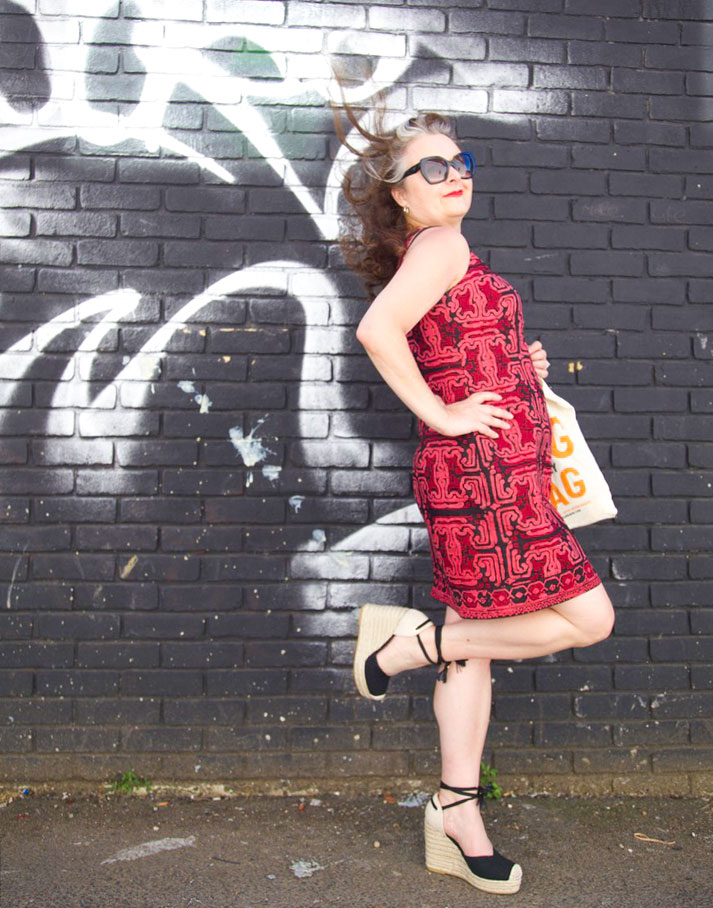
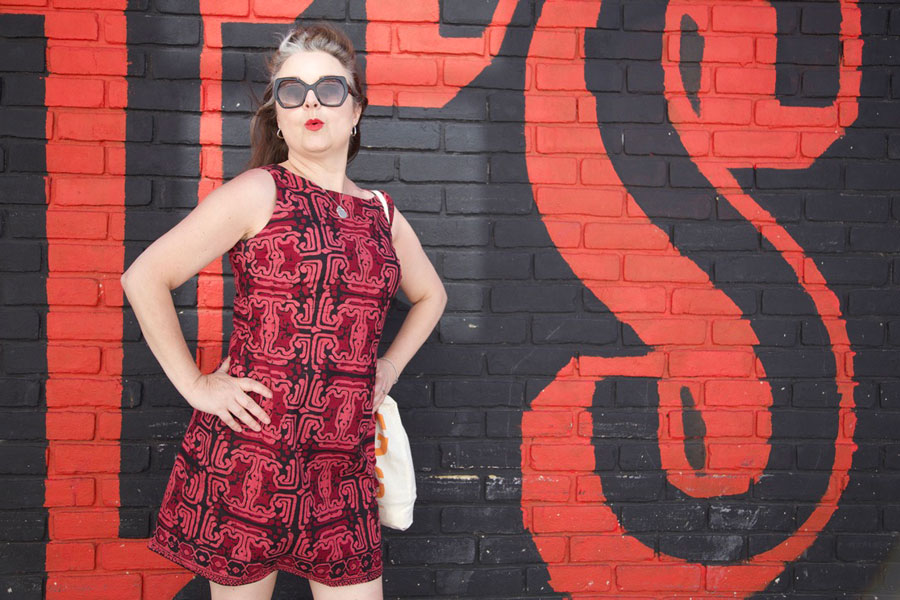
ooobop self-drafted shift dress

I’m so happy right now. Doesn’t take much – just a shed load of sunshine, some quality time with the fam and success at last with the fit of my shift dress.

In case you’ve missed any part of me whittling on about this process, my mission has been to achieve the best fit I can using my own dress pattern with minimal seam lines – ie a darted dress with both front and back pieces cut on the fold – so as not to disturb the print of a very boldly designed fabric that I have in mind to sew next!

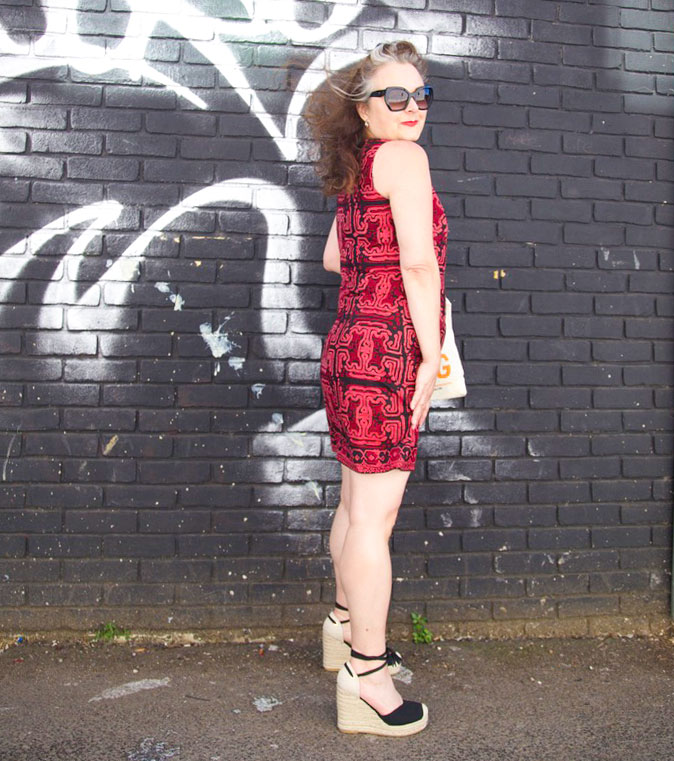
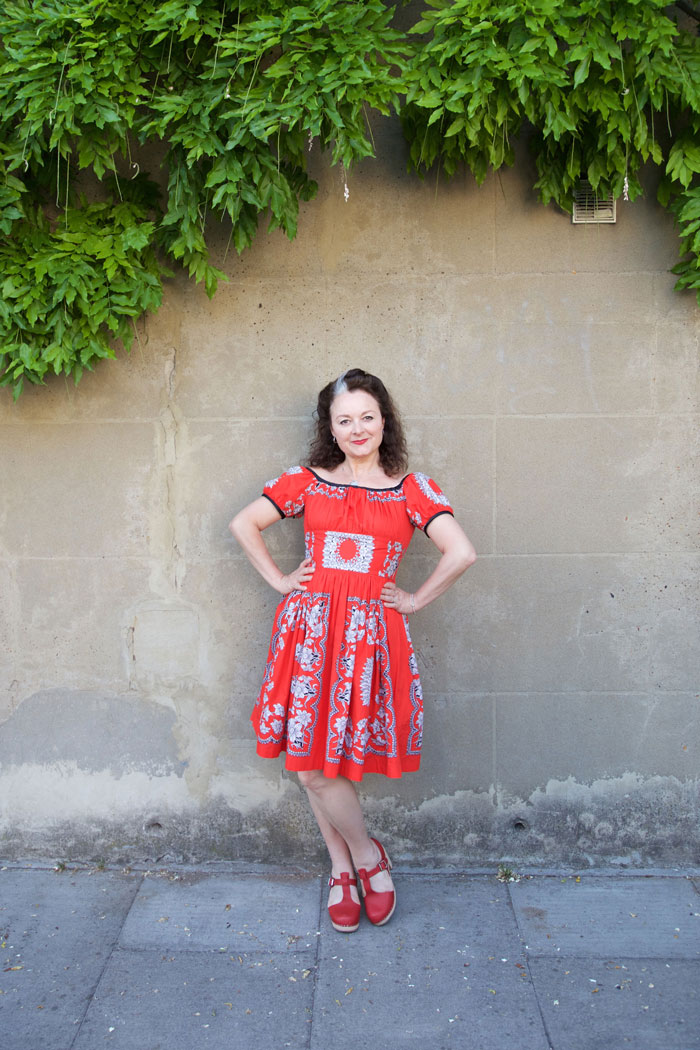
self-drafted shift dress in a vintage batik fabric

The fabric I used here was the best test so far because it too required careful pattern placement. You can see the first version I made here and I just realised I didn’t even get round to blogging the second so here is an actual shot, instead!

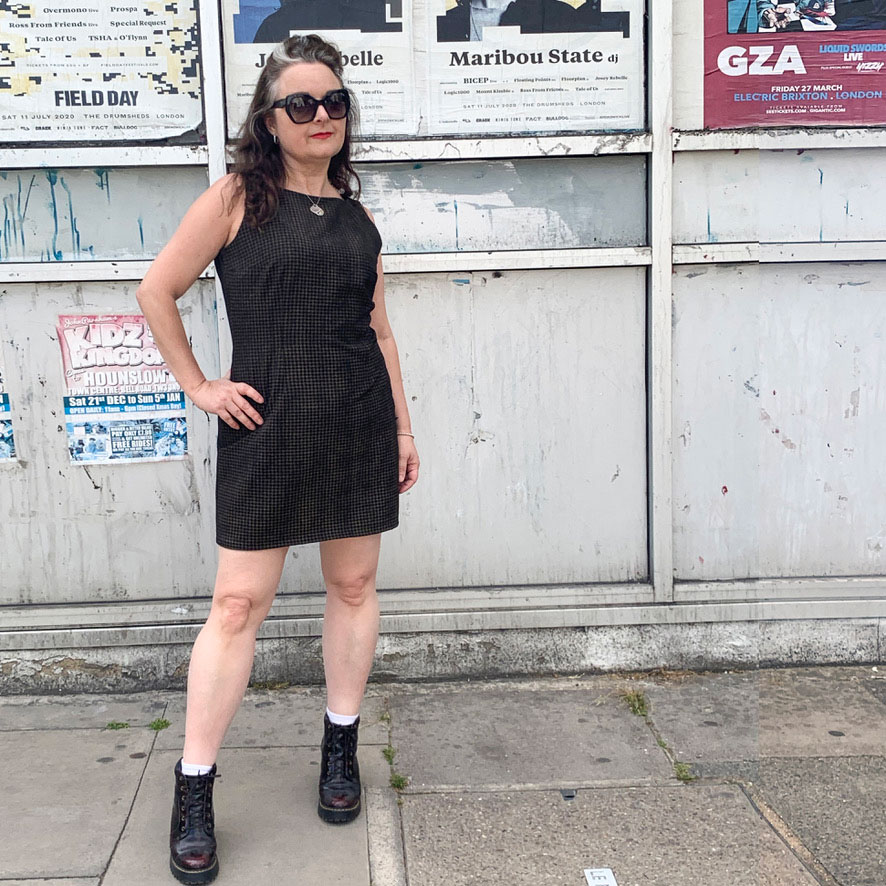
Self-drafted dogtooth shift dress

I was gifted the gorgeous batik fabric a few years back, by a lovely friend who had inherited it from her parents. When she saw it featured in my instagram post she was so happy to see it again and so pleased that it was being put to good use. I kinda felt duty bound as I remember her telling me that her parents used to travel for to Thailand and Indonesia  quite a lot in the 60s and 70s for work and that they always returned with gorgeous authentic fabrics. Proper sentimental value and vintage, too!

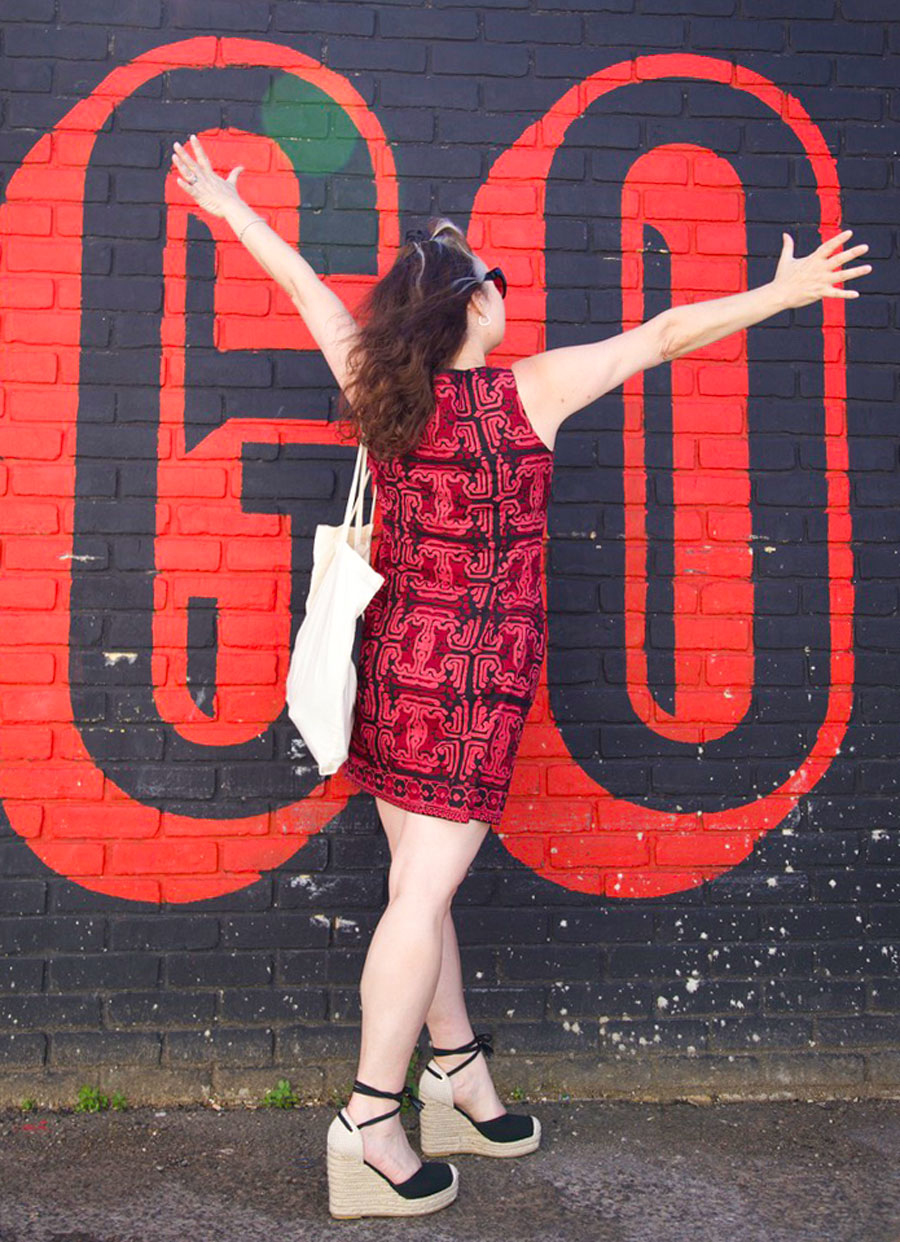
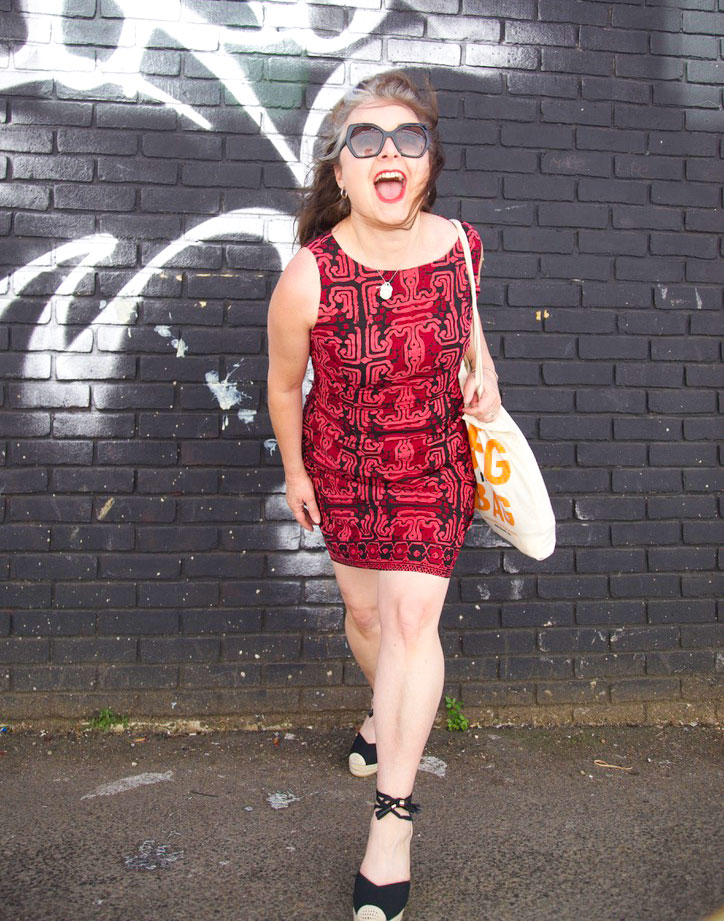
ooobop self-drafted batik shift dress

This piece in particular is undoubtedly a hand-blocked batik. Though this is based purely on my own research and I could be wrong so please correct me if you think different.

It wasn’t very wide but I knew it would be perfect for the third trial of my shift dress, knowing I was very nearly there with the fit. I wouldn’t have risked it otherwise!

It’s such a fine quality cotton. Actually feels so natural against my skin, which is an odd thing to say but I have worn cotton before that doesn’t feel nearly as good. And it completely stood up to a stroll in 24° of Shepherds Bush sunshine today.

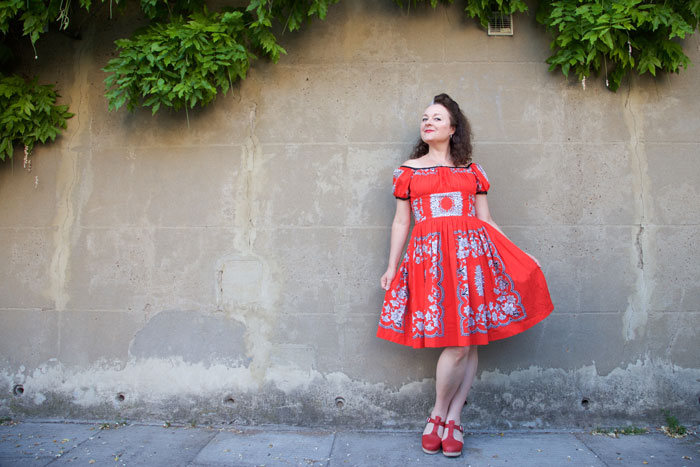
ooobop self-drafted batik shift dress

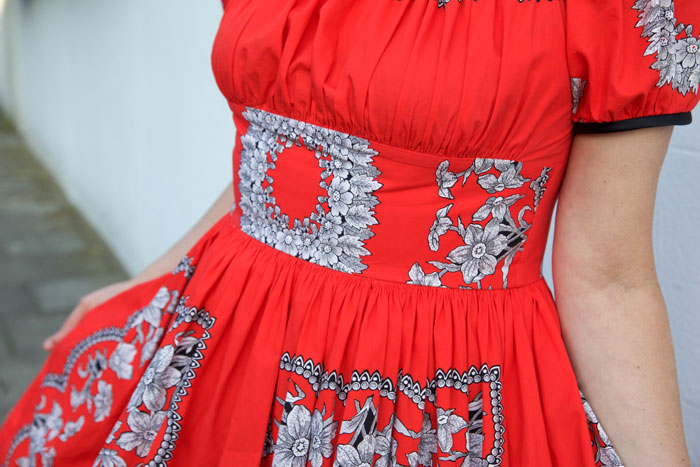
I was intrigued by the selvedge of this fabric. Why would it have just one edge of border decoration? I put out to the wonderful, ever obliging sewing community on Instagram and the very clever Meg from @cookinandcraftin suggested it was very likely to be used for a hemline and a centre front detail for a sarong when wrapped. I loved knowing this and was determined not to waste this detail so I set about cutting my pieces on the cross grain in order to make the best use of the design.

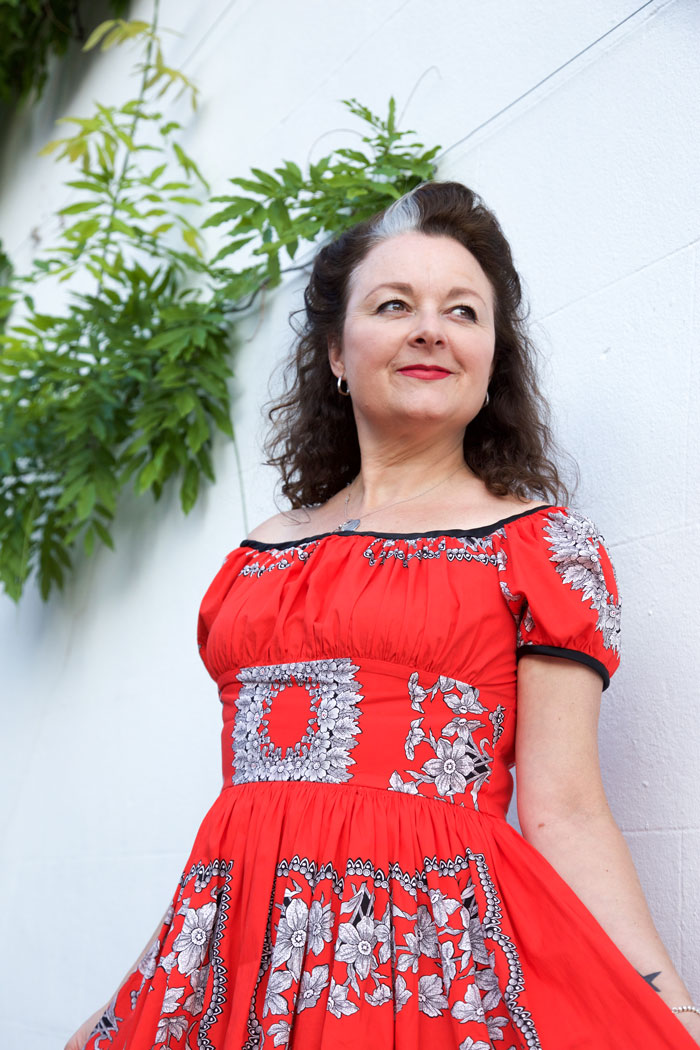
ooobop_self-drafted shift dress in batik

But I hit a snag and realised just in time that the cross grain had absolutely no give at all, and considering the style and fit, it could have been a disastrous move. So I cut on the long grain, as I have trialled twice before (if it ain’t broke and all that) and cut the border separately to seam along the hemline with a generous seam allowance which is overlocked and pressed down on the wrong side. It actually helps to add a bit of weight to the bottom of the dress too.

ooobop shift dress and shades

I made a few other tweaks to the pattern since version 2:

  1. I widened the shoulder straps by 1cm having struggled to pull the dress through the facing during construction, as per the ‘burrito-method’! The fabric I am going to use for the next one is much thicker and I don’t want to risk damaging it or pulling out any stitches in the process.
  2. There was still an element of pooling at the back (swayback issues as usual). And even though I added a quarter of an inch more at the hips since last time – with some improvement – it didn’t seem to solve the issue as much as I’d like.
  3. Then, just this morning, I saw that Cortney from @s.is.for.sew on Insta detailed how she lengthened her back darts to resolve a similar issue. So I moved the bottom point of the diamond dart down 2.25″ and continued the widest part down longer before tapering off. It worked a bloody treat!

ooobop self-drafted batik shift dress

ooobop batik shift dress

And so I do believe I’m ready to cut into that prize D&G fabric that I got from The Stitch Festival 2020 – only dilemma now being, how the hell do I choose my favourite placement of the design? I anticipate this being the longest part of the process!
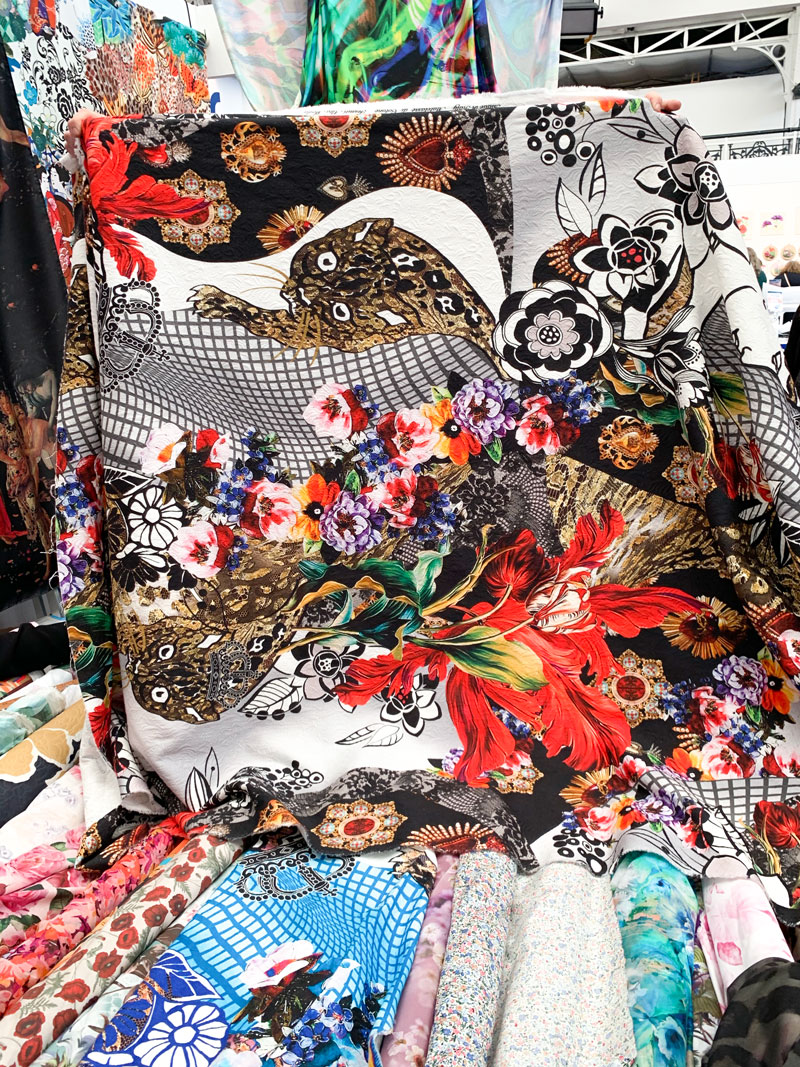
Dolce and Gabbana fabric at M Rosenberg's stall
Dolce and Gabbana fabric at M Rosenberg’s stall

Thank you as always to Daniel for these amazing shots down the alley of the Laundry Yard in Shepherds Bush, London. For anyone who knows, you’ll know what a brave move this was!

Self-drafted Batik shift dress by ooobop

Ooobop original 70s style dress

ooobop original 70s style dress

The thing I love most about sewing is the eternal learning curve. I will always be on a joyful journey of discovery because there is no chance I will ever learn it all in my lifetime but with every little milestone I reach I get a little buzz of excitement which propels me to the next level and this little dress is prime example of my progress.

It might not be the most ground-breaking, couture class garment you’ve ever seen but its mine, all mine – an ooobop original

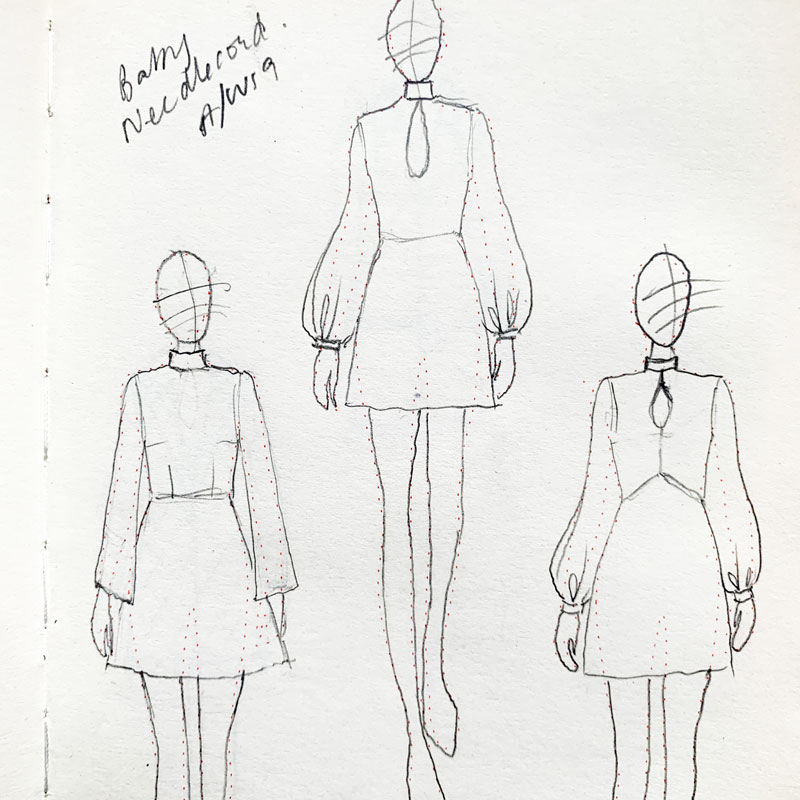
I dreamt it, I drew it, I drafted it, I sewed it.

sketches of the dress
Love drawing the possibilites in my Fashionary sketchbook

For sure, I’ve sewed and drafted for other people but never as successfully for myself. I’ve been bouncing between lessons on Craftsy’s Blueprint and instructions from various pattern-making books but it transpires the reason it took me longer to fit myself was my own dishonesty. Denial of my actual measurements. Reluctance to accept the differing pattern shapes to the examples given. Even cheating my measurements knowing it would look better if I nipped in certain stats. Desperate. IKR!

wearing ooobop original 70s style dress
Striking a pose in Notting Hill

And it just goes to show that you can’t cheat at maths. On the fourth attempt at a moulage (a close fitting blue print from which one adds ease to create a master sloper ) it bloody worked! I was so happy . Literally danced around the room in nowt but a pair of pants and the moulage for a good half hour. And then it dawned on me all the possibilities.

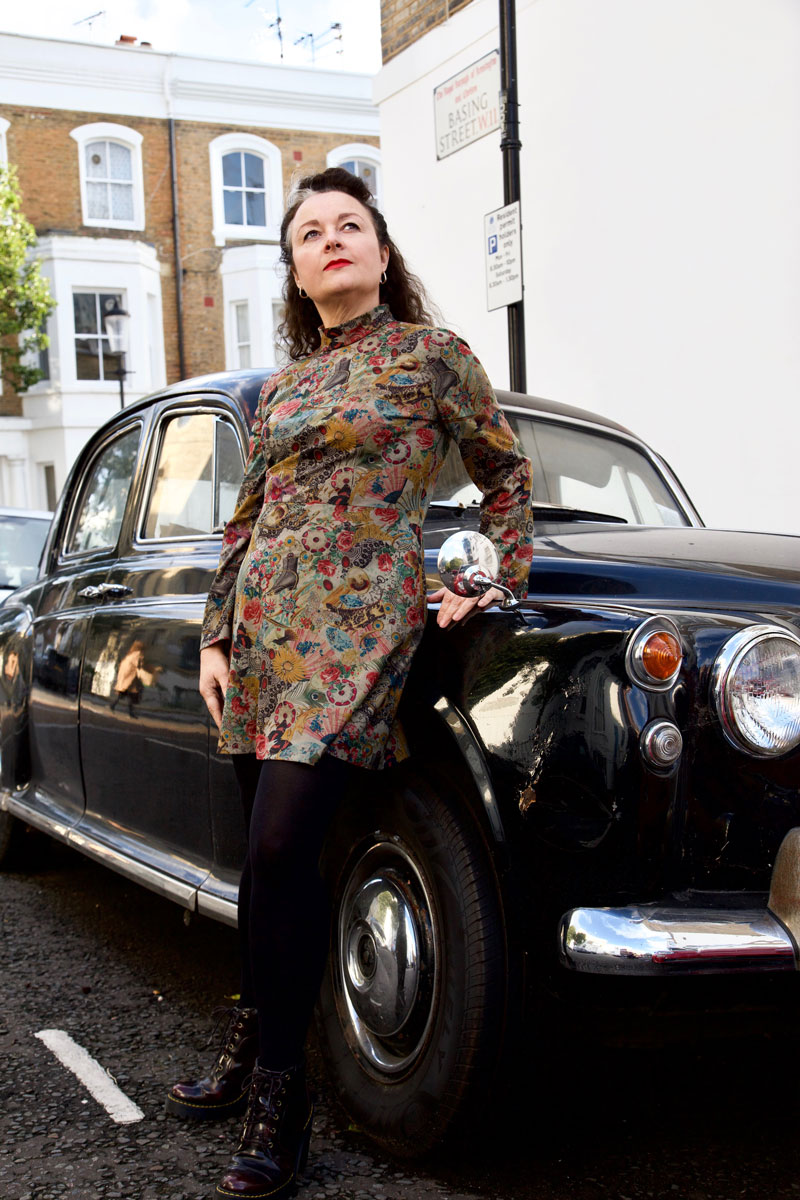
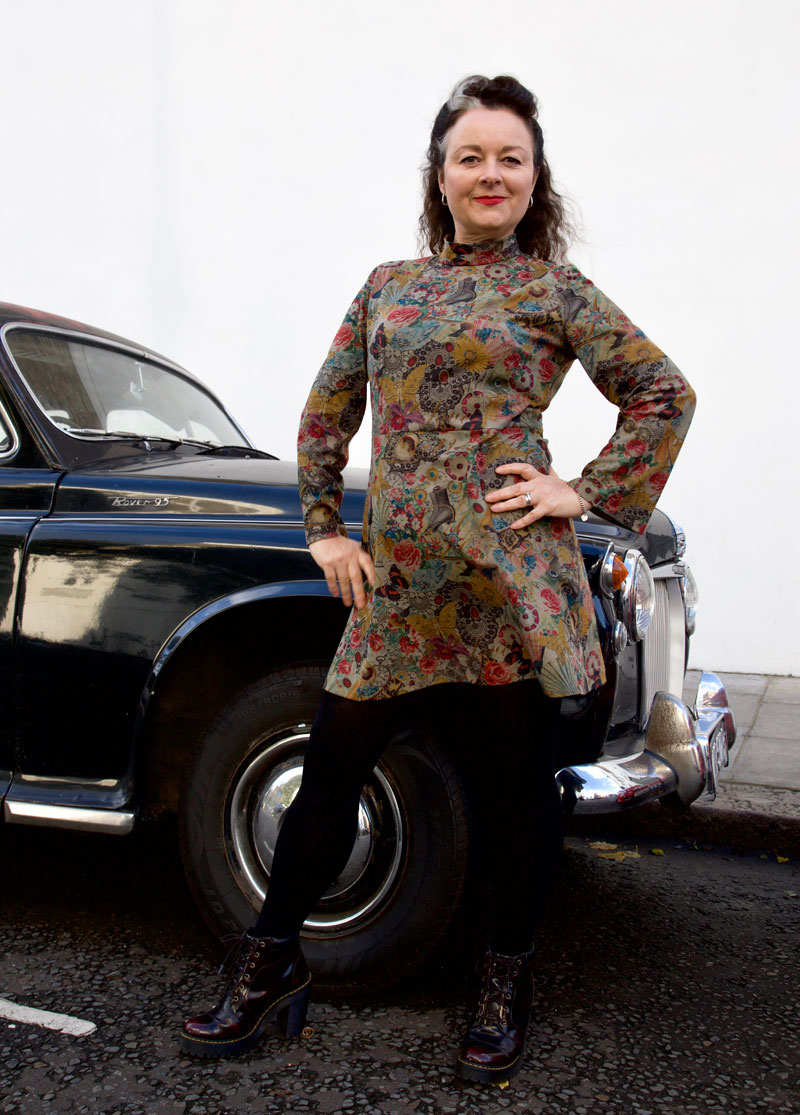
Classic pose with a classic car

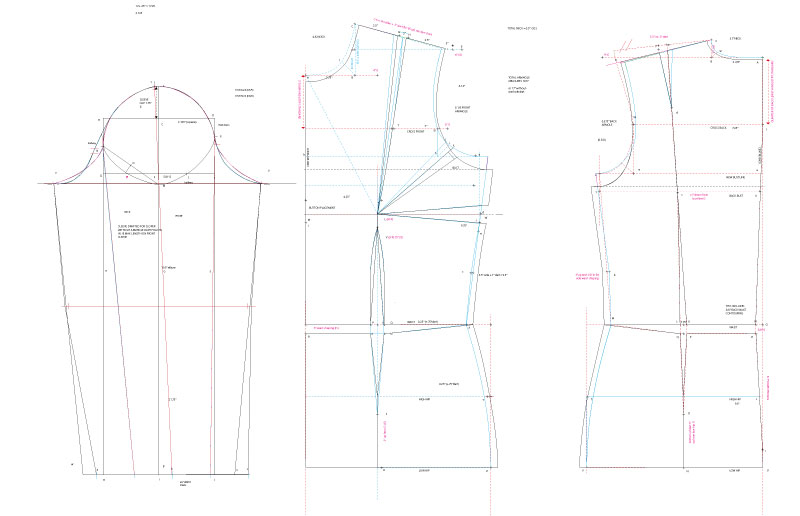
But first I had to add ease to create the sloper. Another milestone reached as I’m getting much quicker and more efficient at drafting in Adobe Illustrator. Luckily I use this programme for my job as a graphic designer and can justify the substantial Adobe Creative Suite subscription. But it makes it all the more satisfying that I am getting untold extra benefits from its use. My space is so limited at home and the prospect of getting out and putting away all the giant drafting materials is exhausting in itself, before I’ve even put pencil to paper. Drawing patterns using my laptop and being able to store them digitally thereafter is literally life changing, for me!

Sloper created using Adobe Illustrator

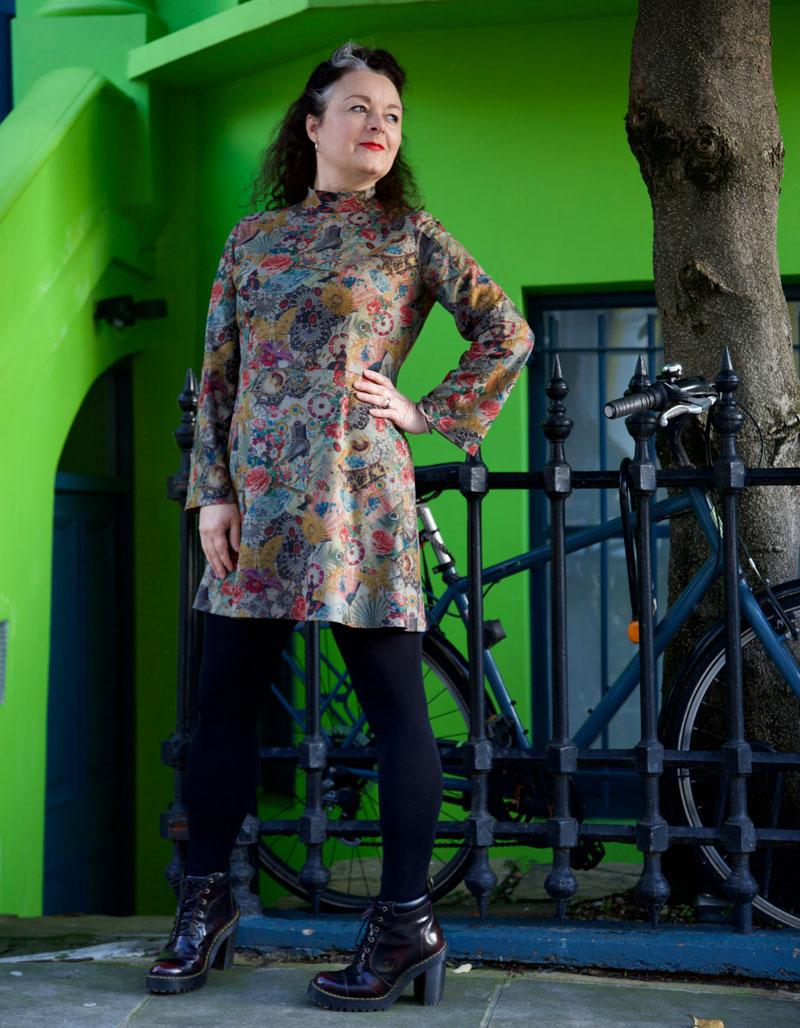
Once I’d drafted the sloper, the only other piece left to draft was the turtle-neck collar. That was a case of simply measuring the neckline and cutting a bias rectangle piece to that length and 6″ wide. It was sewn like a bias binding around the neckline. I left the back edges open to insert a zipper to the top of the neckline then folded the facing part of the collar to the inside and finished by hand.

Striking a different pose with the classic car. Loving the silhouette
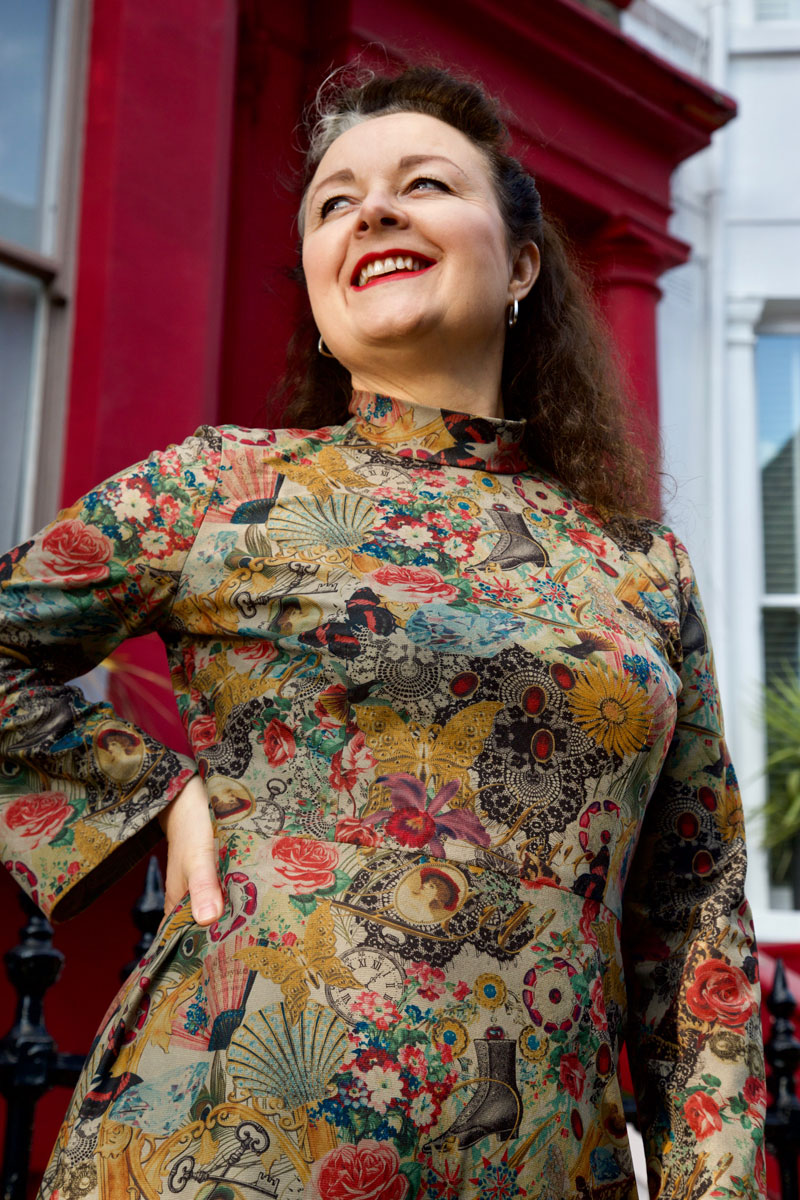
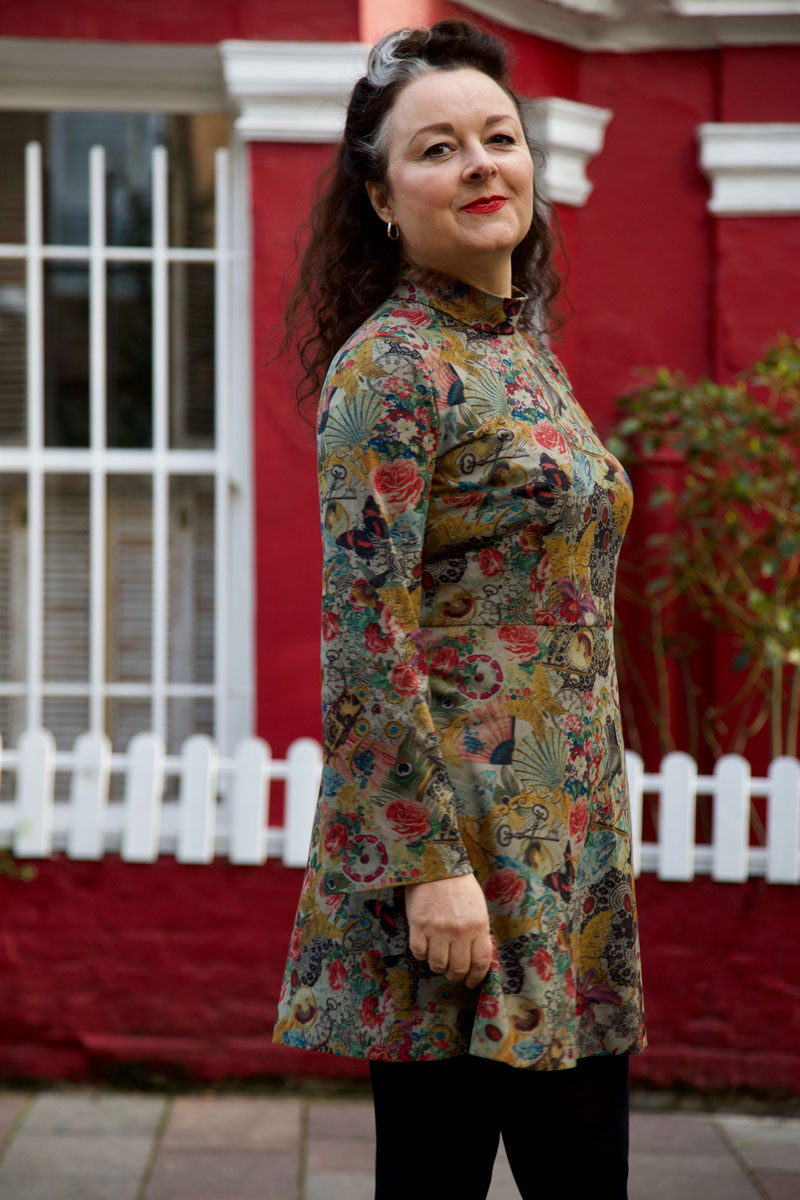
I do love the simple silhouette of this dress

I had originally planned an extravagant bishop-style sleeve but I didn’t think I’d have enough fabric for such indulgence, so I settled on a slightly flared sleeve instead – slashing and spreading my sleeve sloper from wrist to sleeve cap.

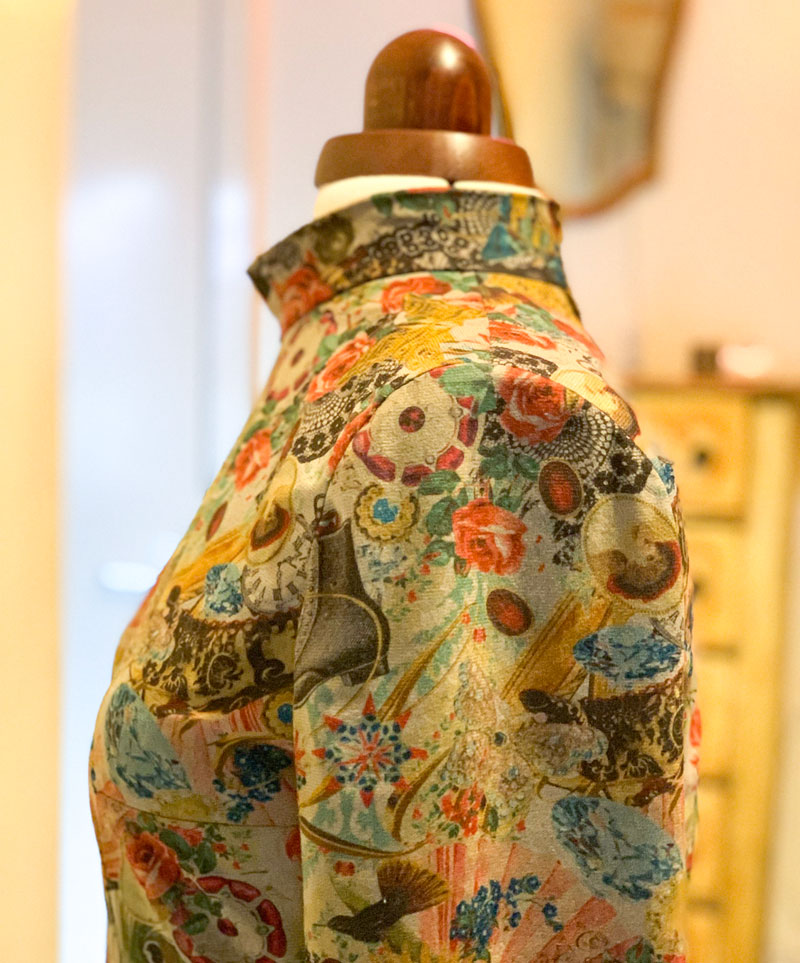
And while on the subject of fabric, let me tell you how I came by such a perfectly suited piece. Every now and then I venture out on a little sewing people meet-up. One of my favourites is  organised the London Stitchers Meet Up.  The last one I attended was held at The Blue Boat in Fulham and involved a fabric swap. Such a great idea to downsize that stash and to swap a piece or two that might not have plan attached, for something that triggers an instant course of action. Interestingly enough I had no plans on bringing any fabric back home. I’m trying to use what I have and not buy/acquire anything new but the stars instantaneously aligned when glanced over Giorgia’s shoulder to see it sat wantingly in the corner.  It was a beautifully soft baby needlecord (I think) with a vintage style montage print. I always maintain I’m more about texture than print but there are always exceptions to the rule. Thanks so much to Lauriane Loves Sewing for bringing it to the table. I do hope I’ve done it justice.

ooobop original 70s style dress

So why am I creating so much more work for myself when there are plenty nuff awesome patterns in the world? Each stage of sewing this dress confirmed what I good idea it was. The notches aligned perfectly. The bust darts hit where they were supposed to, the shoulders finished on my shoulder line. And I confess I stood and I stroked and I marvelled at how well they did, for quite some time.  No puckers, nuffink.

Marvelling at the inset of my sleeve caps

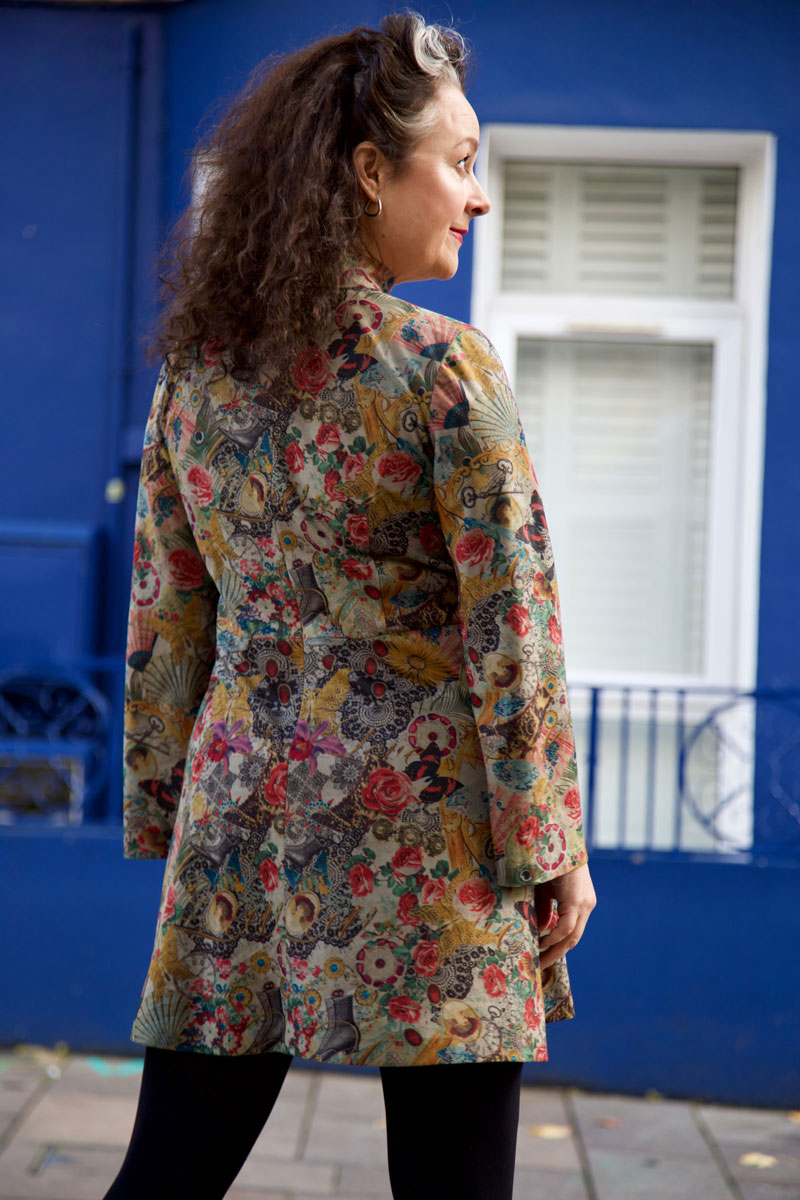
Add to that the waist sitting where it is meant to, no pooling in the small of my back and Bob is definitely my lobster! Gotta love it when an invisible zip becomes super evasive too!

Back view of dress with no pooling

Well I think that’s just enough of me blowing my own trumpet and time for me to big up the talents of my super lovely, supportive husband, Daniel. I’m always the first to run out of steam, just knowing there’ll be a hundred good shots even if I am pulling a stupid face in 50 percent of the contact sheet. But he always want’s just one more. And its always for good reason and I thank him from the bottom of my heart.

Lying on some steps in my 70s style dress
In response to ‘Just one More’!

And he’s available for booking. He loves an event. So good at capturing those  off the cuff, journalistic poses. So if you have an upcoming event and in need of a trusty photographer please do check out his portfolio here or contact him at danieljamesphotographic@gmail.com.

Thanks for swinging by. Your readership and comments mean the world to me and add so much to my journey. Wishing you all a gloriously productive weekend. xxx

Previous attempts at self-drafting:

DIY Dior-inspired tulle skirt

tulle skirt front

I’ve been inspired to make a tulle skirt for a very long time. I’ve made a few for others – my favourite was an orange one for ‘Amelia Fang’ – but still I wondered long and hard about what kind of tulle skirt would I make for me. And where on earth would I wear it tbh! A lot of what I make might be considered a #sewfrosting entry but I often wear party clothes as office attire so it would never go underworn. So long as I didn’t go for ‘sugar-plumb fairy’ all would be good.

tulle skirt back view

And then one day, whilst browsing the ‘glossies’ in my local hairdressers, I spotted that Dior tulle skirt. I gasped once at the skirt and twice at the price – a whopping great £3,100!

Now I don’t doubt the craftsmanship and experience deployed at House of Dior and I am totally au fait with the arduous task of gathering grief and the time it takes, but still that price point means I’ll just have to make my own. Lifelong story of life!

dior style tulle skirt

It would be unfair to say that Dior was the original designer inspiration. It was more Molly Goddard that initially sold me, with her transparent chiffon baby doll dresses worn over jeans with clompy boots. But still that image prompted the action.

dior style tulle skirt

I love the cheeky transparency of the tulle and the sideways looks it attracts from passing strangers. I do have modesty shorts underneath by the way –  I’m not brave enough to show the world my actual pants! But should the occasion arise for less cheek, I can always rustle up a simple petticoat of black lining.

It’s so much fun to wear. Currently loving it styled as shown with fitted jacket and high-heel Doc Martens but can also see it with a T-shirt and trainers, versus a corset and some sparkly shoes. In your face, repeat-wear shame… I’m even wearing this skirt to Sainsbos!
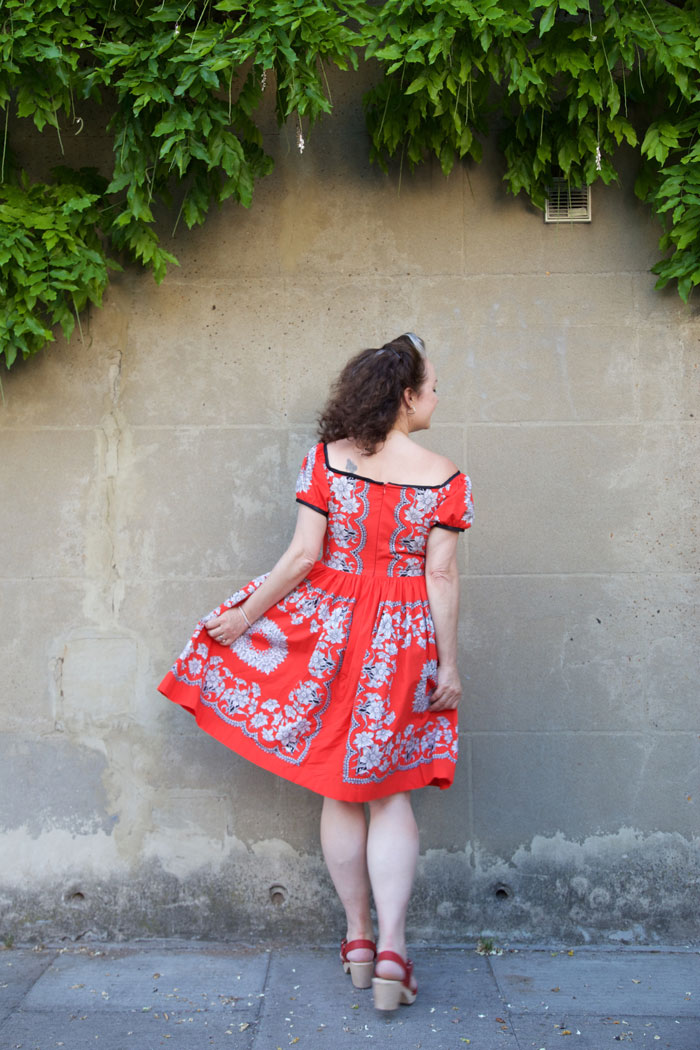
And it’s perfect for twirling in. Doesn’t take much to release my inner gypsy spirit. I could dance all day!

twirling in tulle skirt

ooobop tulle flamenco pose

I’ve been reining in my fabric buying for a wee while now but with a firm idea of what I was going to immediately make, I could justify a few metres of tulle. I just had to endure a few eye-rolls!

The construction at House of Ooobop was very basic: there are fundamentally two layers of two gathered tiers of tulle. The top layer is a soft pin-dot tulle. It has a bit of stretch cross-wise so I made sure to keep the ‘straight grain’ long! The under layer is a mid-weight tulle – not too stiff, not too soft – so it gives the necessary structure to the floppy tulle on top.

dancing in a tulle skirt

Once gathered, the top edges are attached to a satin waistband with button closure. And the beauty of tulle is that there is no need to hem – thank goodness. I was clean out of black thread at the end of this! But should anyone want a more detailed tutorial, please leave me a comment below and I’ll gladly do a follow up post.

ooobop tulle skirt with London bus

Mr O (aka Daniel James Photographic) took these amazing photos of course. His patience and dedication to the cause unruffled by my whinging about the cold (and the smell of horse poo!) … and that my feet hurt from all the walking we did.

wearing tulle skirt in Trafalgar Square

But the latter is largely due to wearing my new Christmas Docs from my lovely hubby, fresh out the box without wearing-in first. No pain no gain though!

Doctor Martens with tulle skirt

So I’m totally New Year’s Eve ready, and of course I am also appropriately ready for  the much awaited Christian Dior: Designer of Dreams exhibition at the V&A museum in February… which is really soon. And I’m so excited! Who’s coming?

ooobop tulle skirt front view

Thank you so much for reading this post, and for all your lovely words of encouragement over the years. I have been a little lapse in the writing dept of late but I’m not stopping blogging any time soon. I’ve got some lovely projects coming up in 2019 already and some I didn’t even get round to posting from this year. So keep tuned and all will be revealed!

Wishing you all an amazing New Year, fuelled with happiness and good health and all things sewing of course! xxx

Gypsy dress and panel placement


ooobop soladida gypsy dress front

I am flexing those self-sabotage skills again. I have had notice of my daughters wedding for almost a year and with only a month away, have I begun making my mother of the bride dress? Don’t be daft. But I did make another Sew La Di Da French Gypsy dress. And I must say, I’m not even a little bit sorry!

ooobop soladida gypsy dress front

I totally blame that upstairs bit at Misan Fabrics, in the Goldhawk Road, where they have the most desirable remnants on sale, way cheaper than the fabrics they have downstairs. There was this 3.5m bolt of bright red panel fabric that was signalling from the top shelf. I didn’t have a clue what I’d do with it at that point. Cutting it up for headscarves was an option. But not a very exciting or fulfilling one. Maybe posh napkins or a gathered skirt? Seriously, I’m so uninspired sometimes. I spread it out on the table and looked to the assistant for a suggestion. A shrug of the shoulders translated that she wasn’t the least bit interested and was I going to buy it or not? The reason I was stalling was that the label said £10. I didn’t imagine for one minute that meant for the whole lot. So when the penny dropped, so did the idea that I could indeed make a gathered skirt but with a French Gypsy dress bodice attached to the top of it… for a tenner!


It’s great to revisit a recently-made sewing pattern: It’s already been traced; the fit is established – though I had to keep in mind that the fabric I used last time had a bit of stretch – plus having rehearsed it already, it’s a more confident sew and the process is therefore quicker.

ooobop soladida gypsy dress bodice

There was an issue of placement though. There were not going to be any happy accidents here, oh no! The skirt was dead easy to work out. I just used the width of the fabric for front and back and then halved the back for the seam allowance and zip. But I did think to make sure the panels aligned from the same point at the top/bottom… just before I cut, lol

The midriff – which I must have told you a hundred times before, is my favourite section of a dress – deserved a small floral border that came from the centre of the larger panel. I like how it kind of looks like a giant buckle from a distance. The little floral bits at the side were a bonus.

ooobop_soladida gypsy dress midriff

That same little patterned square worked for the sleeves just as well.

ooobop soladida gypsy dress sleeve

Back bodice pieces always give the most placement jip when there’s a zip to factor in. So annoying. Even more annoying when I’d already cut the back skirt pieces apart and could have made life easier for myself if I’d have thought it out properly and allowed for a side closure instead. But then I had a little brainwave and made sure that the placement didn’t need any matching up. I just needed to make sure the design was the same distance away from the zip on either side. Which it is. Kind of!

ooobop soladida gypsy dress back

The only section I’m not crazy about is the front gathered bust section. There wasn’t enough plain red and I didn’t want to repeat too much the ‘lacy’ edging of the panel section. I can live with it though!

I still had enough duchesse satin left over from the last time to make the black binding which is lucky because I love how it outlines the dress at the top.

My new dress had it’s first outing today and proved to be very picnic-worthy and received lots of lovely comments. It also attracted some attention on our little shoot in the neighbourhood earlier this evening. One passing stranger couldn’t resist joining in and worked it so well it would be rude not to include him. Thinking of you, Karen (didyoumakethat). I didn’t even have to tell him what it was for!

ooobop soladida gypsy dress guest

Thanks as always to the lovely Mr O for these lovely photos. x


Born to be a gypsy girl

gypsy girl top and skirt

I gave up Flamenco dancing when I was 7 months pregnant with son. My teacher told me that if there was an ounce of gypsy blood in me I would continue dancing right up until the baby was born. Clearly my o-neg wasn’t cutting it. Lord knows how any amount of footwork is achieved when one is the size of a whale!

Anyhoos, just 4 years of practice and 17 years later there is still undeniable evidence of gypsy in me. Even if I’m not a real one. The dancing, the music, the earrings, the roses . . . the dresses. I think I’m just going to have to grab that bull by the horns and start over again.

gypsy girl dancing

But before I drift back to when I had time on my hands, lets talk about this outfit. It’s not a dress. It’s a top and a skirt. Separates, like!

I literally snatched the fabric out of the hands of the shopkeeper when he showed me some precuts on the counter. Just how hard is it to find border print these days? I knew it was going to be a skirt already but I had enough to make a top and my lightbulb moment was realising I had the perfect pattern in Butterick B4685. I’ve made it a few times before and blogged one of them here. Another version even served to complete Dorothy’s World Book Day costume! But this is the first time I’ve included the flounce on version C. And this fabric was perfect for the job.

Butterick 4685 top

I do have an issue with the fabric though. Mostly I find the shop keepers in the Goldhawk Road honest about the content. At least where they are informed themselves. And some even do an on the spot burn test for me if I ask. But this one (who shall remain nameless) confidently told me it was linen lawn. I had no reason to disagree. After all I’ve never purchased linen lawn before. But it sounded good and most importantly, implied of natural fibre. It is lovely and soft and lightweight. Perfect for keeping gathering bulk to a min. But I got that suspicious sweet smelling odour that hit my nose when I ironed it and felt compelled to do a burn test myself.

gypsy skirt and top back view

Surprise, surprise. Not an ounce of natural fibre to write home about. Well maybe one fibre in a million. It did crumble a bit betwixt forefinger and thumb so not 100 per cent plastic. Gah!! I hate the dishonesty. I probably would have still bought it with a bit of a haggle attached. But why glam it up when its so easily sussed?

I’m not too cross because I’m very happy with the outcome. I’m just cross with the bull****!

gypsy girl in the orchard

So the skirt is just a self-drafted gathered rectangle on a waistband with an invisible zip in the side. Unlined and therefore so quick to run up. Though I did hand-sew the hem because it pleases me!

gypsy skirt and top

Dan took these photos in and around the grounds of Fulham Palace, London. Such a beautiful and understated palace which is openly used as a museum and wedding venue and picnic grounds! The gardens are so immaculately kept. And the perfume from the wisteria was gorgeous!

gypsy style with wisteria

gypsy girl by outhouse

And as has become the norm, we had some more interest from the local residents. Clearly cleaning up from the picnics!

squirrel with a sandwich

And once again outposing me on the log shot! I’m sure Mr O does this on purpose. It had bugs and cobwebs and everything on it. Eeeewwww! Can I just say out loud. I hate sitting on logs!!

gypsy girl on a log

I love this outfit, not only because it brings out my inner gypsy, not even just because I made it  (well that as well!) but because its a style that never goes away. I’m as happy wearing this kind of dress now as I was in the 90s and the 80s and I’m pretty sure there’s photographic evidence of me wearing a dress very similar in the 70s! Or maybe I’m just plain old fashioned. Who knows. Who cares. I’ll make more anyway!!

A visit to Contrado

The weekend before last I had the absolute pleasure of joining Kate and Rachel from the Foldline along with some other lovely sewing bloggers –Marie, Jane, Katie, Elena and Charlotte – to visit Contrado – a very exciting, UK-based printing company with so much to offer.

choosing fabric at Contrado

The Day began cozied up in a room with tea, sticky buns and more lovely fabric samples than one could possibly shake a stick at. Already sold! We’d each come armed with a design in mind and we were going to print our very own fabric. It was almost too exciting to bear.

Looking at fabrics

Chris and the gang gave us an introduction from whence they came to where they are today and I was effortlessly sucked into his mesmerising world of print-on-demand on pretty much anything with a turnaround of just a couple of days, in most instances.

We uploaded our ’tiles’ and chose our fabric. I’m making that bit sound easy but when you’ve got a choice of over 75, so generously care of Contrado, it was such a tough decision. We watched the scheduling process as it happened on the big screen. Upload to print. Just like magic.

Next stop was to see them emerge from the printer. What? Already? I seriously wasn’t expecting to take mine home the same day.

fabric emerging

A little trot past the photo studio and around the trampoline (I didn’t ask that question) and into the print room where all the magic was happening. I was amazed at the silence of the operation. Smooth-running synchronised inkjets dancing back and forth in a clean and cool room. And not smelly at all!

The transferred fabrics were coming out and as I turned the corner, there was mine, printing onto actual cotton satin fabric in front of my very own eyes. The natural fabrics get printed onto directly whereas the designs for synthetics are transferred.

While this was happening, we were shown some of the great garments available for customisation. A dressing gown, espadrilles, a baseball cap, some lucky pants, swimwear, kimonos, all printed and handmade right there on the premises, to order.

printed dressing gown

It really is incredible. But seeing how speedy the seamsters were upstairs it was completely plausible. We oooed and arrred at the machines a lot. I can still hear the Randomly Happy squeals of delight. And just check out this bad boy!

contrado sewing machine

And it’s not just about garments. Though clearly that’s what we were all most interested in. It’s about product too: Hairbrushes, X-Box controllers, clocks, deckchairs, foam cubes, roller-blinds, shower curtains, phone cases, trays, biscuit tins… it would have been easier to ask what they don’t print on!

The next room was where the fabrics were heat-sealed (for durability) and packed. Though most of us chose not to have ours packed and instead, just folded for immediate cradling. You can just imagine the squeals in that room!

And so here are the fruits of my humble tile! Plans for a 50s wiggle dress of sorts have promptly entered the queue!

contrado_fabric_1

We all had such a brilliant and inspiring day. I left not only with an armful of amazing fabric but a head full of design plans for more. I love that this is a UK-based and family-run company. And I’m completely smitten with the strength of passion that passes through the team. It matters that communication is good when you are working at creating something so unique and precious. And so to meet such an approachable team in person was not only reassuring but it was truly an absolutely honour.

sewing bloggers

With much thanks to Rachel and Kate and the Contrado team.


BHL Sabrina dress v3

sabrina front view by fountain

This is my third Sabrina dress. And the best-fitting one yet. The first one was the result of a pattern test for By Hand London and the second, more recent version, was made so I didn’t keep wearing the first one all the time! It was also meant to address some of the fitting issues. But if you read that post, you’d see that I only created more!

But this one is certainly close to the mark with regards a perfect fit.

Most dress patterns come up too big across the back bodice for me. It’s not something I’ve ever properly addressed before I made a Sabrina, mostly because I didn’t know how. But it was as simple as taking a horizontal dart from the centre back and tapering to the armscye.

Sabrina dress back view

If I’m honest, it’s still a little snug across the hips. Probably because this fabric is less forgiving. It’s a sturdy brocade-like viscose. It has shiny woven ‘characters’ on a matt background which works great in the sunshine. The shop assistant guessed it was a polyester, which at £8 a metre stumped us both a little, so he took a sample outside to do a burn test. And it turned out there was more than just a little natural fibre in there!

viscose brocade close up

I also hemmed little bit shorter than the other two.  The skirt section flares out perfectly, especially in this fabric. Perfect for a bit of flirty, flarey fun!

sabrina silhouettes

bhl sabrina battersea

The weather was gorgeous on Wednesday as it is today, and promises to be on the weekend too! So Mr O suggested Battersea Park for our shots. I wasn’t too sold on walking from The Kings Road in Chelsea in high heels but he is mostly and annoyingly right with the no pain, no gain philosophy!

sabrina dress

I remember saying, not so long ago, that I couldn’t bear to make the same thing more than once, given all the amazing options out there. But I’m happy to make as many as it takes if it means I get the perfect fit, and the perfect fabric of course. I still have plans for more of these using some more challenging fabrics but those plans are on hold for a little while, as I focus on what I’m meant to be doing: Dan’s blazer and my Big Vintage Sewalong dress for example… ooops!

The By Hand London Sabrina dress pattern comes in two variations. This one and a lovely strappy button-front one…mmmm… no stop it, Janene. Focus!!


#Blazerof2016 and tips for tracing Burda patterns

So this week, I finally chose what pattern to use for #Blazeof2016. I’ve decided to make it extra difficult for myself by going for the minimal instructions of the Burda Style magazine pattern from February 2016 issue, and I’ve just got as far as tracing the pieces. It took most of Saturday afternoon but that’s ok because I had an empty house save Phryne Fisher and Jack Robinson to keep me company!

Burda blazer pattern trace


The tracing took longer than usual not just because of all the pieces but because I was aware of how easy it would be to miss a notch or a mark of instruction. So I was like a detective myself, scanning the spaghetti lines with eagle eyes! I want this jacket to work so I need to make sure every detail is attended to. It didn’t help that the red lines on the pattern sheet I was following clashed with the red pattern pieces of the featured ladies blouse. This could wind up a very interesting hybrid ‘blouzer’, but let’s hope not!

For anyone who’s daunted by the tracing of Burda patterns – and let’s face it, that’s most of us – the following might be of help:

Top tips for tracing Burda patterns

  • Work on a large clean flat area
  • Use pattern weights or similar to hold your papers in place as you trace
  • Refer to the Pattern Overview to ensure you capture every notch, seam number, slit mark and grainline arrow
  • Tick off each piece in the list as you go
Burda pattern overview
Pattern Overview and Cutting Out list
  • Label all of your pieces with Model No., size and piece description / number
  • Remember seam allowances are not included so write that clearly on your pattern pieces too OR add them to your pieces and mark that they are included*
  • Photocopy the image to file with your pattern envelope if storing separately

*I will be making size adjustments to the pattern so I have left the seam allowance off. It’s way easier to play around with minus SA. And then I will either add it at the end or mark it directly onto the fabric when the pattern is pinned on.

Incidentally, the fabric we’ve decided on is a gorgeous traditional boating stripe from Yorkshire Fabrics. 100% wool, made in England which raises a little smile every time I see that selvedge! Doesn’t come cheap so I’ve wrapped it up like a precious swaddled baby and put it away for safe keeping until the calico version is made good. No chances being taken here!

boating stripe fabric

I really am in the slow lane here but there is a distinct advantage to this. Have you seen how MaleDevonSewing is steaming ahead with his amazing tailoring skills? For anyone else who is pootling along like me, he has posted some cool construction photos and instructions. Most of which I’ve never heard of. All of which I will be employing!

Di Kendall has shared the progress of the lovely striped blazer on her blog and it’s great to see lots more activity from other participants of #Blazerof2016 on Twitter too. Keep posting your progress… I need all the help I can get!! 😉

Burda cap-sleeve top and a bit of a whinge-up!

burda style cap sleeve top

Once in a while a sewing project is sent to try us. This particular little smart-arse of a sewing project first lured me from the glossy pages of Burda Style around this time 3 years ago. It presented a cool, stylish-looking basic that could rock any skirt, shorts or pair of strides. Edgy with its contrasting shiny sleeve caps, close-fitting for sleekness of style and a raised neckline for a fierce, designer don’t mess with me touch. I should have got that message first time round really!

My self-imposed rule not to impart cash for cheaply made RTW clothes has been obeyed for a good few years now. And I’d say it’s largely been very easy and fun and rewarding. But to summon up the motivation to make what is fundamentally a basic black staple is much harder than making a pretty dress. That’s way more fun.

I cannot even begin to recount the hours spent on this tiny little top. It was definitely a test of patience. Largely because I didn’t do a muslin so no surprises really.

I decided to stick to the suggested fabric which was crepe satin – luckily there was little needed because this fabric didn’t come cheap either. Read on if you can really bear to listen to my gripes!

burda style 2012 cap sleeve top

First gripe: crepe satin. I will think twice before sewing those stupid shiny sides together in a hurry. They move! But having said that, lucky the shiny sides were inside because they also catch on just about anything that is vaguely rough. Like hands, unfiled nails, pins etc etc. It also frays. And so every seam, every edge had to be overlocked. Do not even attempt this top, in this fabric if you don’t have sufficient means to finish every single edge. And OMG, static alert! I tried this top on at least 10 times to check fit and shape of sleeve etc and the electricity ran at least 240v from root to tip of hair. This firmly remains one of it’s unforgiving factors!

The bust darts are way too low for me. I know, I know, I didn’t toile!

There are two zips involved in this top, or else you’d never get it on. One from the neck edge down the top of the left sleeve. And another under the left arm and down to the hem. Fine in principle, definitely not fine if you want two matching shaped sleeves! I bought a couple of quality invisible zippers from Dalston Mill. I remember thinking at the time that I should perhaps invest in more quality notions. I usually get them from Shepherds Bush market for a snip of the price. But it wasn’t such a good call ater all. Sadly the teeth were metal and so the zips less flexible coupled with the instructions to end the zipper a couple of inches from the hem, I ended up with one sleeve fit for a Gary Glitter tribute and another as a deflated floppy thing. Zipper aside, at that point I realised the sleeves were far too roomy in any case. They seemed to fit snugly on the model which is confusing given my substantial arm girth. So I removed said sleeve zipper and shaved a bit off each of the top sleeve seams to ‘smallen’ the sleeve cap.

Removing the zipper was a mare. Black on black, mostly with a crap lightbulb overhead and from hostile fabric that was just goading me to be snagged.

I put a new cheapo lightweight zipper in but made it run from top to bottom this time. Better but still not brilliant. Plus it took 2 goes to insert. Don’t ask! In hindsight I should have sewed another just to the seam allowance on the wrong side of the opposite sleeve to match the shape better. I may still do this.

The sleeve hems are hand sewn. Catching 1 of those damned threads at a time so it doesn’t make a mess of the right side. And the underarm seams are finished with a self made bias strip, hand sewn to the inside also. Slowly, slowly, catchy monkey!

So then there was the neck facing. Could well have been me but I’m totally blaming those Burda-style translations. I have such a problem with visualising even the simplest written instructions. Give me pictures every time. So after the umpteenth read, I gave up trying to understand and went ahead governed by my own hunches! They were rubbish hunches and I ended up sewing the bottom bit of the facing to the shoulder/top sleeve seam. What is wrong with me? I was all twisted and distorted and I was convinced the facing was the wrong shape!

A right proper meltdown ensued. Foot on the pedal-bin pedal, lid raised, dangled over the sprout peelings and prosecco foils, the whole thing was about to meet its demise!

Saved by a flash of possibility. I spared the wretched thing and spread it inside out on the ironing board to instantly see the issue: The lower end of the facing was meant to be sewn around the armhole… of course!!

cap sleeve top back view

More unpicking. More hand sewing. It worked. Kind of. But even though I’d used a stretch interfacing (My own recommendation, not Burda’s) it doesn’t behave the same as the outer and there is still an element of ‘pull’.

Although the sleeves are too big, the body is a touch too small. I clearly overestimated the stretch in this fabric and underestimated the difference in a petite sizing, which this pattern was. I might possibly get away with it in a dark room with a jacket on!


The hours involved to create something that is at best a black top, have completely taken me by surprise. I seriously could have whipped up a whole dress in as much time!

If I did it again, I’d go up a size and definitely redraft the sleeves.

I’m glad I didn’t give in though and I’m glad I found a way to solve the main issues. I hate being defeated at anything. I don’t often work with fine fabrics and clearly this is something I need more practice in next year. But for now I’m rifling though some good old fashioned vintage dress patterns where suiting and furnishing fabrics are my favourite friends. Onwards and upwards!

Happy New Years Eve, my wonderful readers. Wishing you all a healthy, productive and successful 2016.
With lots of love thrown in for good measure

Janene xxx

Curtain call for the Martini!

capital chic martini front

Sadly this is my first and very likely my last post of December. But I’m not going to duff myself up because… it’s Chriiiiiissssstmaaaaasssss!

Just one more day of work to go. I repeat, just one more day day of work. Excited? Me? Yes siree. But also determined to hold that wonderful thought and not to get stressed out that I’ve not yet scratched the surface of my shopping list nor yet contemplated what is to appear on the Christmas dinner table!

But let’s get priorities in order. Let’s blog this latest outfit of mine. This two-piece garment of brilliance that’s been so patiently waiting in my inbox! It’s the Martini pattern by the very cool and talented Sally of Capital Chic. I’ve been a fan of her amazing Charity Shop Chic refashions for like aaaages so when she asked if I’d be interested in trying out one of her new patterns I was flattered beyond belief. It just took me a hundred years to get round to finding the absolute perfect fabric to do it justice!

So just how delighted do you think I was to find this amazing set of vintage bark cloth curtains with ‘Martini’ written all over them!!

vintage bark cloth curtains

They were peeking out behind a rail of really naff shiny peachy curtains in Snoopers Paradise, Brighton. I’d almost given up hope of finding any vintage fabric at all. And as I gave one last despairing glance backwards, there they were, glowing, calling me. I literally ran back like a crazy woman, in case anyone else spotted them before me and whipped them out like my life depended on them. Nostalgia screamed from every thread. I’m pretty damned sure we had these curtains in our living room when I was a kid!

Here’s a little intro to Snoopers Paradise if you haven’t had the pleasure…

I think I might possibly be a professional snooper!

And oh the beautiful irony that this pair of the coolest curtains were to be refashioned into a Capital Chic outfit designed by the queen of charity shop chic, herself!

And so they became my Martini. Why oh why isn’t bark cloth made any more? It sews like a dream, it doesn’t crease, it presses beautifully, it has body and holds its shape, and washes like a dream. I think I am actually in love with this fabric. The colour too, actually. I knew I loved it, lairy as it was, but I’ve had at least three random people comment on how ‘very me’ this lime green is. And there’s me thinking I’m all red and black!!

This is probably my most impressive invisible zip insertion to date. Once again, Thank you for all the advice on my invisible foot purchase. How ever did I manage without it?! The zip totally sinks into the centre seam of the back skirt. And the top has a separating zip. I so love that there’s always something new to learn about sewing. This is the first time I’ve ever had to shop for one of these, let alone sew one on a garment!

capital chic martini close up back

The construction of this two-piece is very simple if you pay attention to every word of the carefully presented instructions. I say this only because I’m definitely one for skipping an instruction or two and thinking I know better. But Sally knows her onions and her technique for sewing an all in one lined bodice is genius, as is her explanation on how to line a vent in the back of a skirt.

The waist is high on the skirt as you can see and is supported by bones sewn to the darts and the seams in the lining (which makes for six). But if I had to add one thing to those instructions, it would be to file those bones more roundy at the top, because boy do they dig in if you don’t sit up straight or lean over without hoiking up your skirt!

Also, The top worked out surprisingly short. Totally my fault for not toilling and so I defo need to add an inch or two next time. I’m no spring chicken and I’m not sure that the world needs to be exposed to any amount of my midriff so I sewed an inch of ‘modesty lace’ to the hem. That said I’m still horrified by the amount of skin that still shows. I’m hoping that this is because the lens was low!

capital chic martini front

I love the cutaway armholes in the top. Even if they do highlight the squidgy bits of my arms. But I will go a size up next time to lessen the squeeze. The beauty of this two-piece design is that you can have a totally separate size top to bottom. Which is what I am. You could also add a contrasting colour top to bottom as Thumbelnina did. and if you were really clever you’d make two or three sets that you could mix and match!

Watch out crazy curtains…. I’m on a mission and I’m coming after ya, big time!

capital chic martini back